Thermaltake CL-W344-PL00SW-A
Thermaltake Pacific Core P6 DP-D5 Plus Distro-Plate with Pump Combo
User Manual
Model: CL-W344-PL00SW-A | Brand: Thermaltake
1. Product Overview
The Thermaltake Pacific Core P6 DP-D5 Plus Distro-Plate with Pump Combo is a specialized liquid cooling reservoir solution designed for the Thermaltake Core P6 Chassis. It integrates a high-performance D5 pump and features customizable RGB lighting controlled via TT RGB PLUS 2.0 Software and its accompanying app.
This unit is engineered for durability and pressure resistance, capable of sustaining pump output up to 50 PSI. Its design ensures efficient liquid circulation within custom PC cooling loops.
Key Features:
- Customized liquid cooling reservoir solution for Thermaltake Core P6 chassis.
- 16.8 million RGB colors with TT RGB Plus enabled, compatible with ASUS, GIGABYTE, MSI, and ASROCK RGB software.
- Pre-installed D5 pump for reliable performance.
- Multiple inlet and outlet ports providing flexible water loop installation options.
- Constructed from high-quality 30mm thick PMMA for durability.

Figure 1: Front view of the Thermaltake Pacific Core P6 DP-D5 Plus Distro-Plate with Pump Combo.
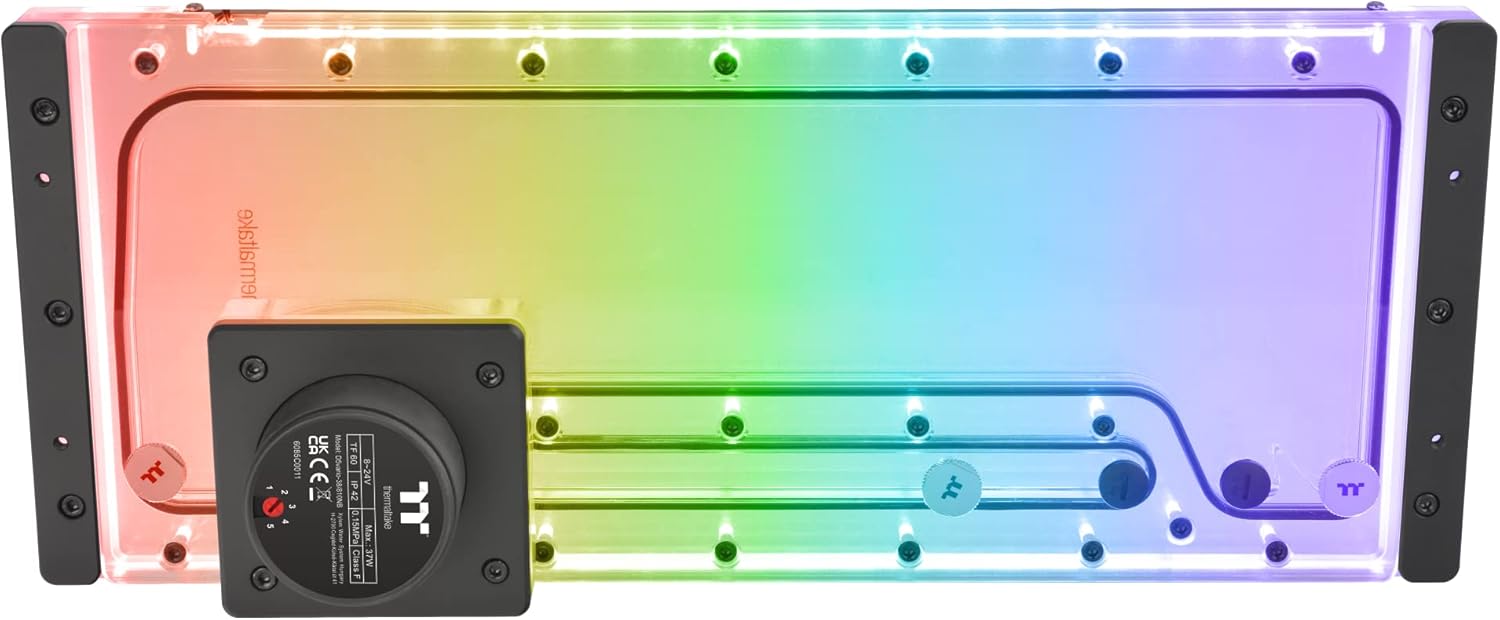
Figure 2: The Distro-Plate illuminated with customizable RGB lighting.
2. Setup and Installation
This section provides general guidelines for installing the Pacific Core P6 DP-D5 Plus Distro-Plate. For detailed chassis-specific instructions, refer to your Thermaltake Core P6 Chassis manual.
2.1 Unpacking and Inspection
Carefully remove all components from the packaging. Inspect for any signs of damage during transit. Ensure all listed parts are present.
- Pacific Core P6 DP-D5 Plus Distro-Plate with pre-installed D5 pump
- Mounting brackets (2x)
- Mounting screws (4x)
- Power connector cable (4-Pin)
- USB 2.0 connector cable (9-Pin)
- G 1/4" stoppers (5x)
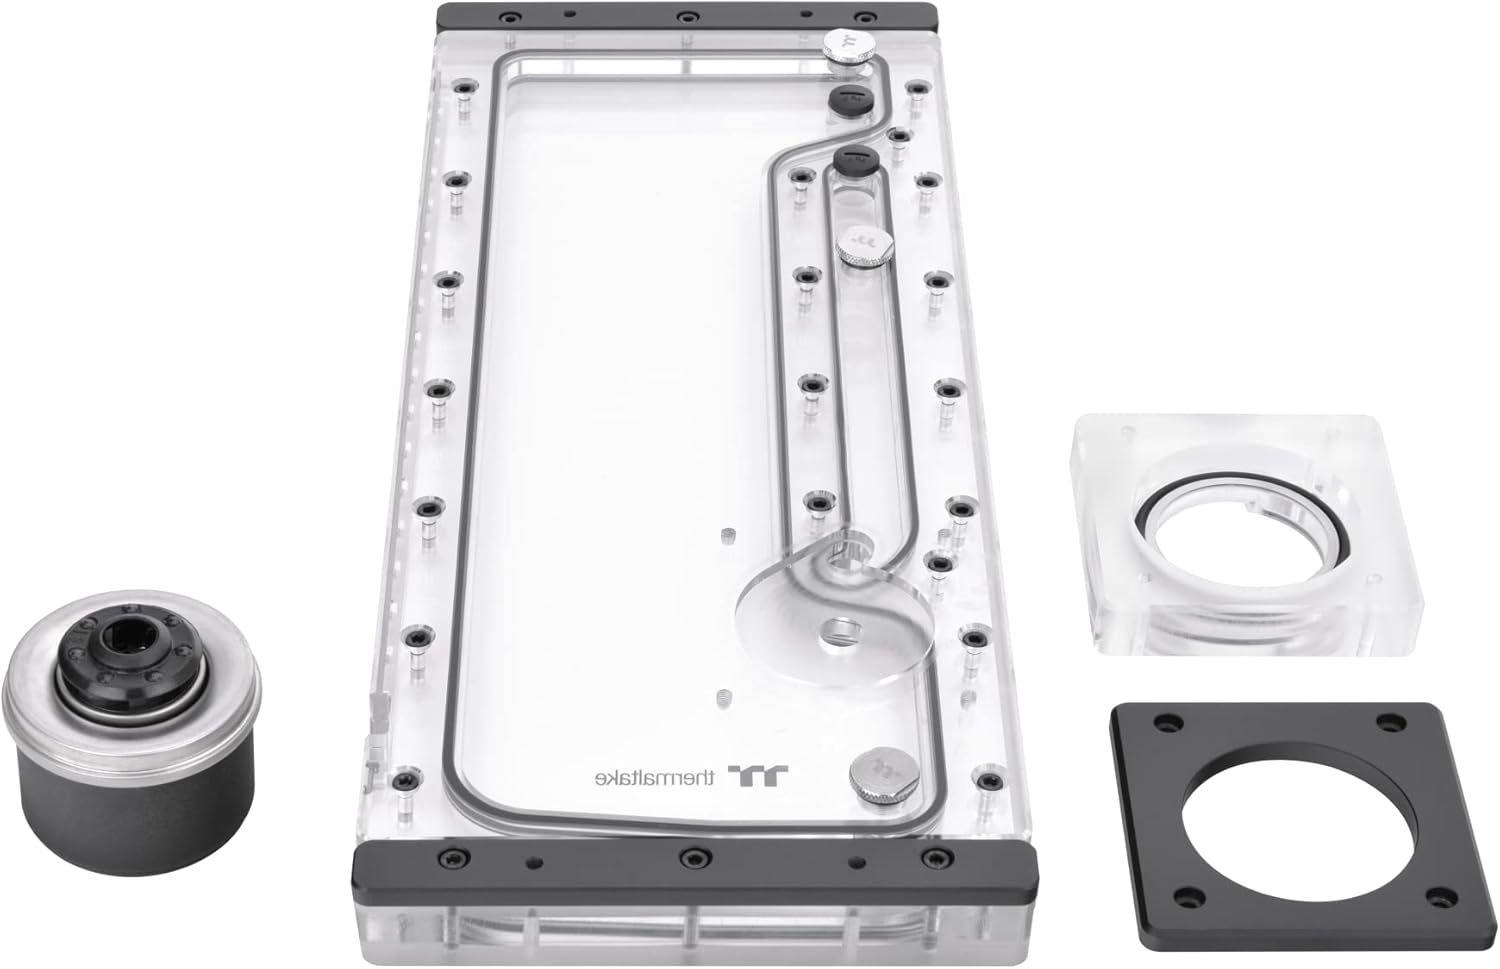
Figure 3: Main components including the distro plate, pump housing, and mounting plate.

Figure 4: Included accessories: mounting brackets, screws, and various connection cables.
2.2 Mounting the Distro-Plate
- Identify the designated mounting points within your Thermaltake Core P6 chassis. The distro-plate is specifically designed to fit this chassis.
- Align the mounting brackets with the distro-plate and secure them using the provided screws.
- Position the assembled distro-plate within the chassis and secure it firmly using the appropriate mounting hardware for your Core P6 case.
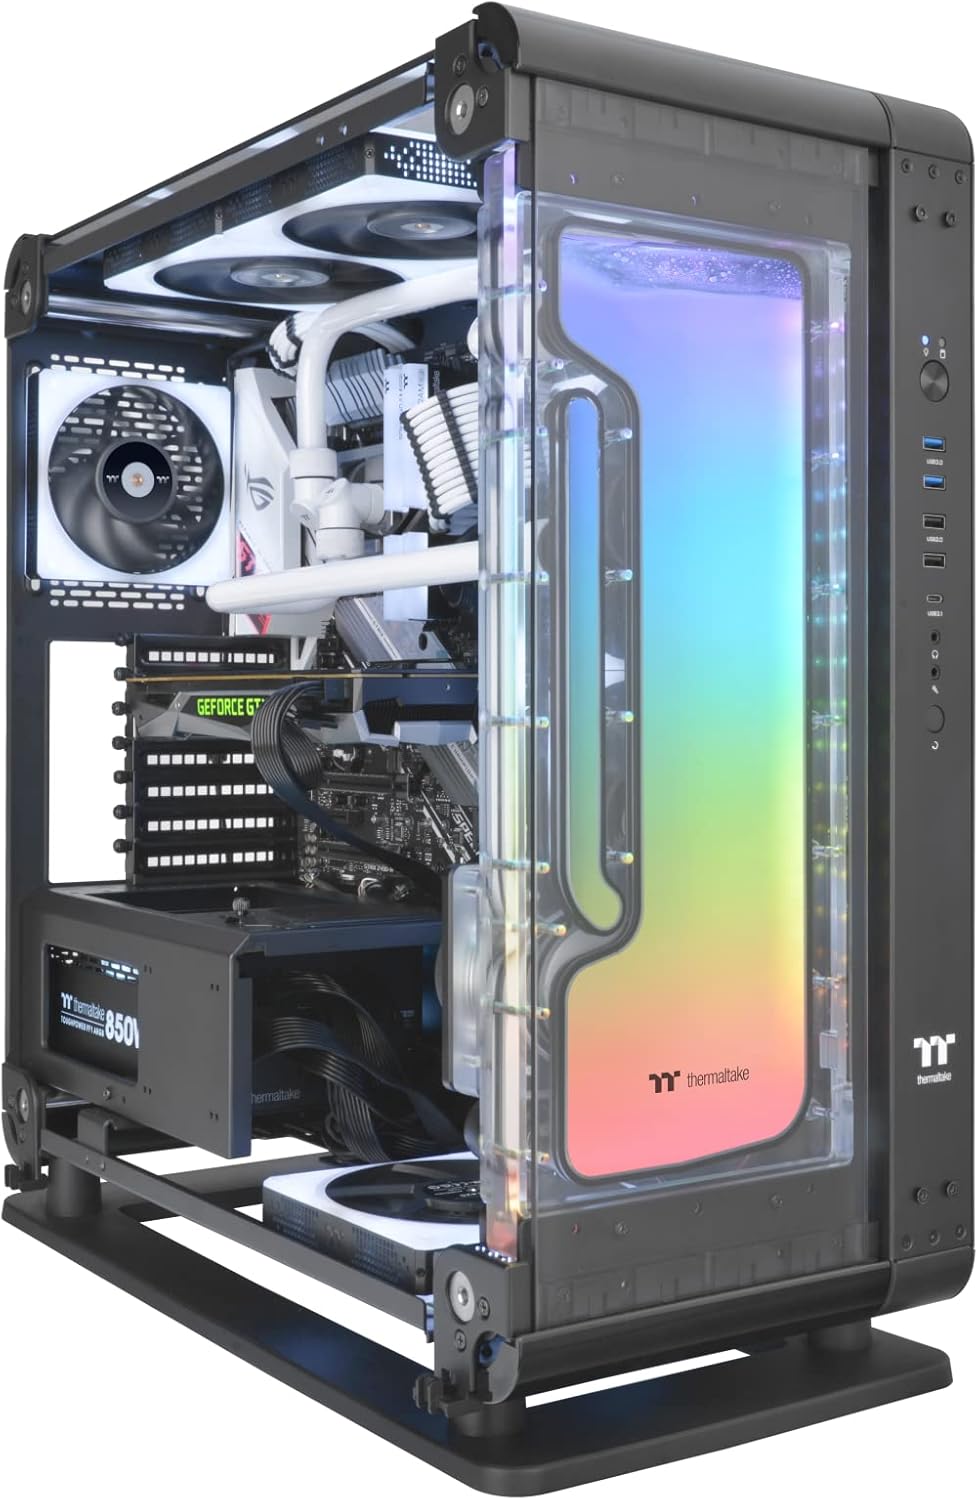
Figure 5: The Distro-Plate integrated into a Thermaltake Core P6 chassis, showcasing its fit and aesthetic.
2.3 Connecting Power and Data
- Connect the 4-Pin power connector from the distro-plate to an available 4-Pin power header on your power supply unit (PSU).
- Connect the 9-Pin USB 2.0 connector cable from the distro-plate to an available USB 2.0 header on your motherboard. This connection is essential for RGB lighting control via software.
2.4 Liquid Loop Integration
The distro-plate features multiple G 1/4" inlet and outlet ports for flexible water loop routing. Plan your loop carefully, connecting your CPU block, GPU block, radiators, and other components to the appropriate ports. Use the provided G 1/4" stoppers to seal any unused ports.
Before filling the loop, perform a leak test with air pressure or distilled water to ensure all connections are secure and leak-free.
3. Operating Instructions
3.1 Initial Fill and Bleeding
After installation and leak testing, fill your liquid cooling loop with a high-quality coolant. Power on your system briefly to allow the pump to circulate the coolant. Repeat this process, topping off the reservoir as needed, until all air bubbles are purged from the system. This process may take several hours or even a day for complete air removal.
3.2 TT RGB PLUS 2.0 Software Control
The P6 DP-D5 Plus's RGB lighting and pump speed are controlled by the patented TT RGB PLUS 2.0 Software and its mobile app. Download and install the latest version of the software from the official Thermaltake website.
- Lighting Control: Use the software to customize the 18 LEDs, choosing from a wide range of colors, effects, and synchronization options.
- Pump Speed Adjustment: The D5 pump offers multiple speed settings (P1-P5). Adjust the pump speed via the software to balance cooling performance and noise levels according to your preference.
- System Compatibility: The software is compatible with Windows 10 and Windows 11 operating systems.
4. Maintenance
Regular maintenance ensures the longevity and optimal performance of your liquid cooling system.
- Coolant Replacement: It is recommended to replace the coolant every 6-12 months, or as specified by your coolant manufacturer, to prevent buildup and maintain cooling efficiency.
- System Flush: When replacing coolant, consider flushing the entire loop with distilled water or a dedicated cleaning solution to remove any accumulated debris or residue.
- Visual Inspection: Periodically inspect the distro-plate and tubing for any signs of leaks, discoloration, or algae growth. Address any issues promptly.
- Dust Removal: Ensure the area around the pump and distro-plate is free from dust buildup, which can affect component temperatures.
5. Troubleshooting
5.1 Pump Not Operating
- Check Power Connection: Ensure the 4-Pin power connector is securely plugged into the PSU.
- Check PSU: Verify that your power supply unit is functioning correctly and providing adequate power.
- Software Check: Confirm that the pump speed is not set to 0 or a very low setting in the TT RGB PLUS 2.0 software.
5.2 RGB Lighting Not Functioning
- Check USB Connection: Ensure the 9-Pin USB 2.0 cable is securely connected to both the distro-plate and the motherboard header.
- Software Installation: Verify that the TT RGB PLUS 2.0 software is correctly installed and up to date.
- Software Settings: Check the lighting settings within the software to ensure RGB effects are enabled and configured.
- Motherboard Compatibility: If using motherboard sync, ensure your motherboard's RGB software is compatible and properly configured with TT RGB PLUS.
5.3 Leaks Detected
- Tighten Fittings: Carefully inspect all G 1/4" fittings and connections. Gently tighten any loose fittings. Do not overtighten.
- O-Ring Inspection: Check the condition of O-rings on fittings and the distro-plate. Replace any damaged or worn O-rings.
- Component Damage: If a leak persists, inspect the distro-plate and other components for cracks or manufacturing defects. Contact support if damage is found.
6. Specifications
| Attribute | Value |
|---|---|
| Part Number (P/N) | CL-W344-PL00SW-A |
| Dimensions (L x W x H) | 458 mm x 170 mm x 85 mm (18.03" x 6.69" x 3.35") |
| Material | Polymethyl Methacrylate (PMMA) |
| Capacity | 350 ml |
| Maximum Head | 15 feet (4.5m) |
| Maximum Flow Rate | 1135 L/h |
| Maximum Pressure | 50 PSI |
| Input Voltage | 12 V / 5 V |
| Power Input | 37 W / 3.5 W |
| Connector | 4 Pin (Power), USB 2.0 (9 Pin) (Data/RGB) |
| Pump Speed Settings | P1: 1,800 RPM, P2: 2,550 RPM, P3: 3,300 RPM, P4: 4,050 RPM, P5: 4,800 RPM |
| Screw Thread | G 1/4" |
| System Compatibility | Windows 10 / 11 |
| Noise Level | 1 dB |
| Item Weight | 2.2 pounds |
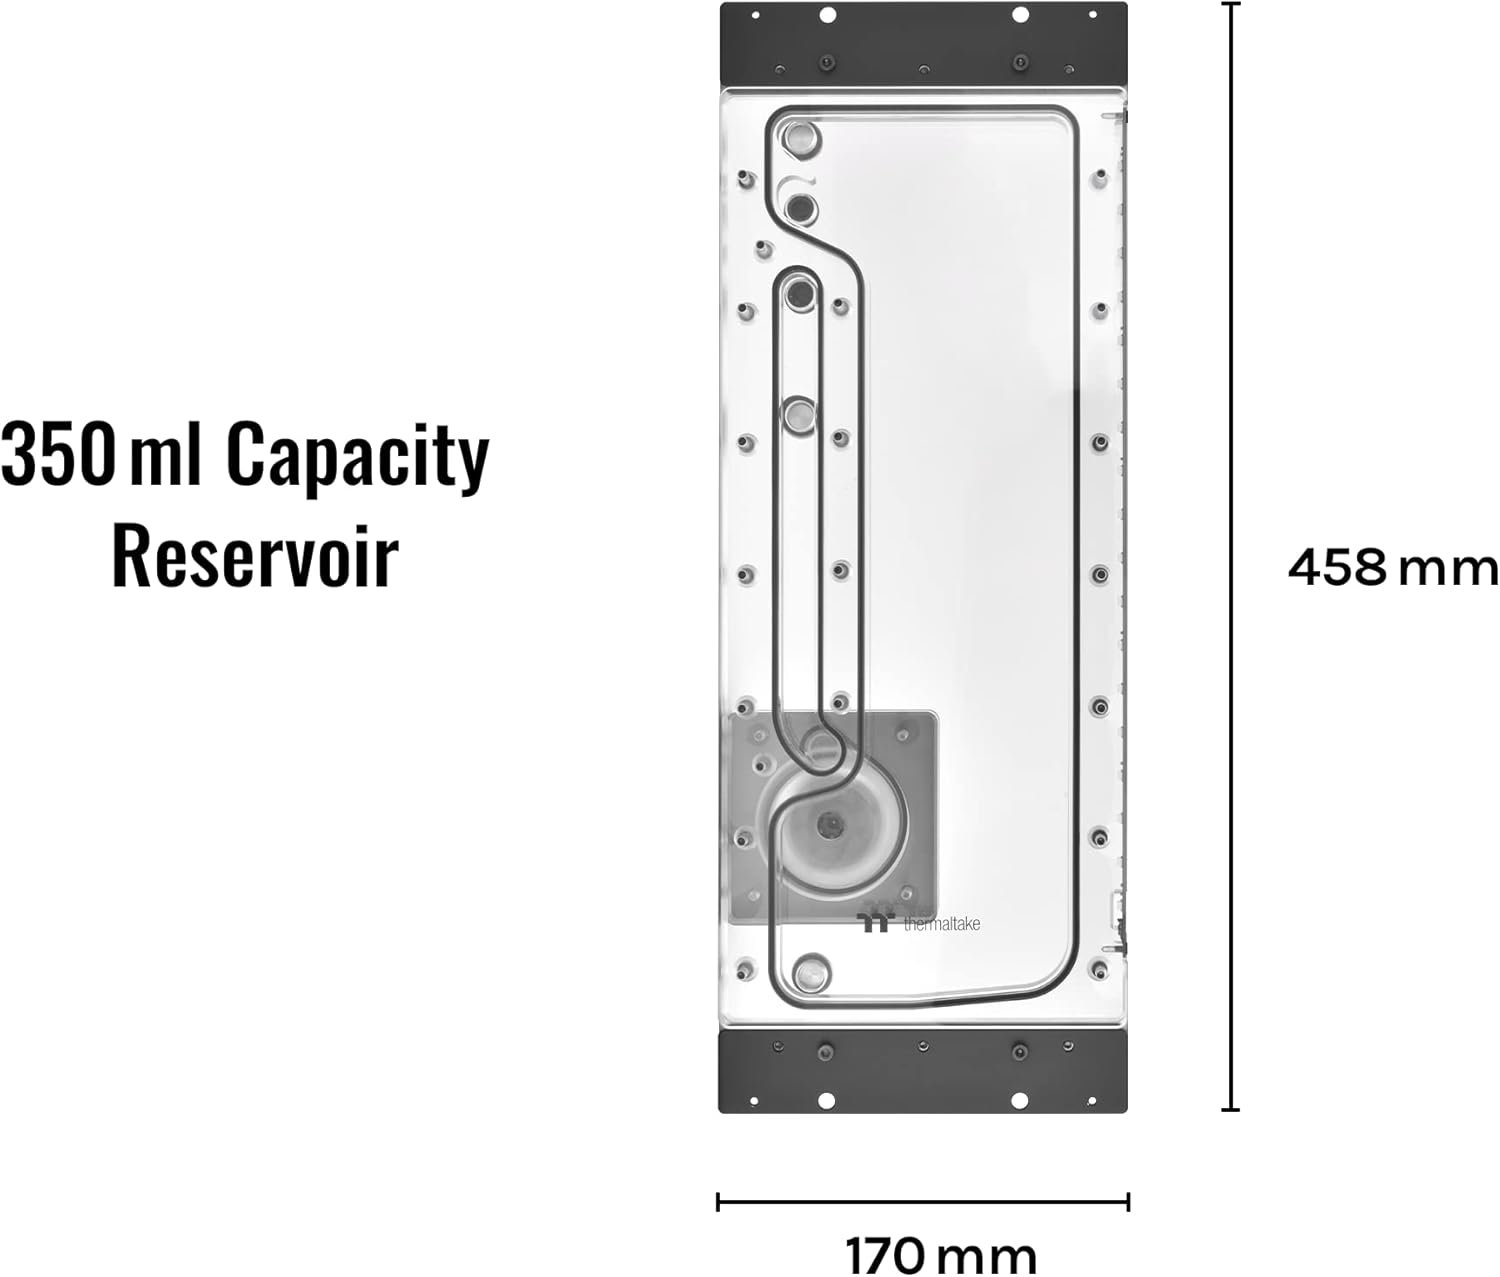
Figure 6: Top-down view illustrating the 350ml capacity and overall dimensions (458mm x 170mm).
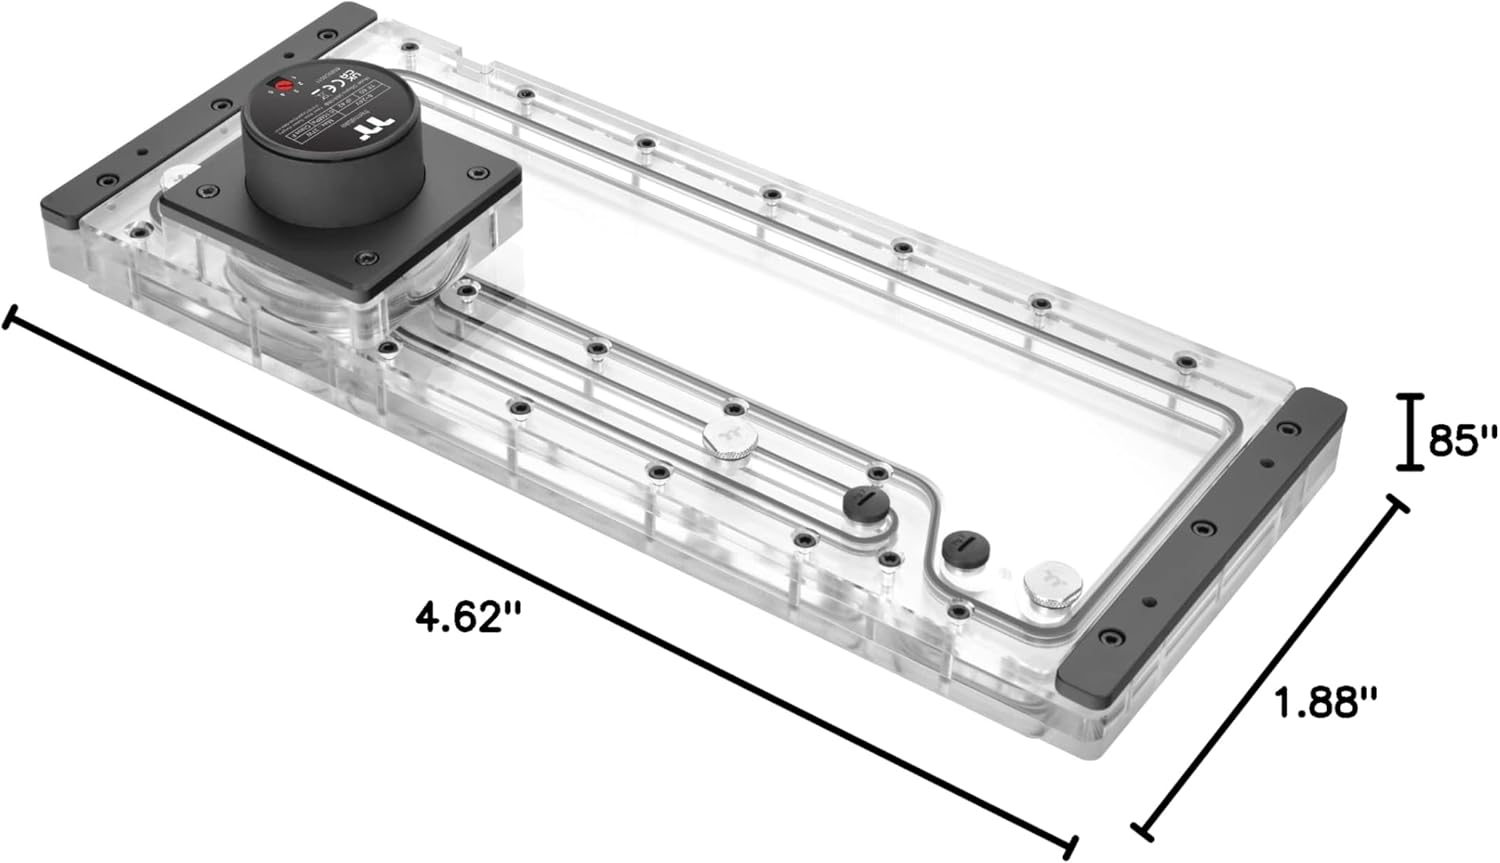
Figure 7: Angled view showing specific dimensions of the distro plate's body (4.62" x 1.88" x 0.85" thickness).
7. Warranty and Support
Thermaltake products are manufactured to high quality standards. For warranty information, please refer to the warranty card included with your product or visit the official Thermaltake website.
For technical support, troubleshooting assistance, or to download the latest software and drivers, please visit the Thermaltake support page:
When contacting support, please have your product model number (CL-W344-PL00SW-A) and purchase information readily available.