1. Introduction
Thank you for choosing the VIHELM DT-322 Digital Thermo-Hygrometer. This device is designed to provide accurate measurements of indoor temperature and humidity, along with time and comfort level indications. Please read this manual carefully before use to ensure proper operation and to maximize the lifespan of your device.
2. Product Overview
The VIHELM DT-322 is a compact and easy-to-read digital thermo-hygrometer, suitable for various indoor environments such as homes, offices, and warehouses. It features a large LCD display showing time, temperature, and humidity simultaneously.
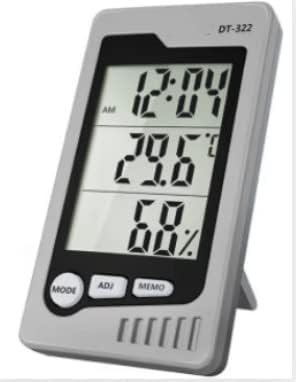
Front view of the VIHELM DT-322 Digital Thermo-Hygrometer, displaying time, temperature, and humidity readings.

Back view of the VIHELM DT-322, showing the battery compartment and control buttons.
2.1 Components
- LCD Display: Shows time, temperature, humidity, and comfort level.
- MODE Button: Used to switch display modes and enter setting mode.
- ADJ Button: Used to adjust values during setting mode.
- MEMO Button: Displays maximum/minimum temperature and humidity records.
- °C/°F Button (Rear): Toggles between Celsius and Fahrenheit temperature units.
- RESET Button (Rear): Resets the device to factory settings.
- Battery Compartment: Located on the back for battery installation.
- Kickstand: For desktop placement.
3. Features
- Environment Comfort Display: Indicates COMFORT, WET, or DRY conditions.
- Simultaneous Time, Temperature, and Humidity display.
- Switchable Temperature Units: Celsius (°C) or Fahrenheit (°F).
- Highest/Lowest Temperature and Humidity memory function.
- Calendar display with daily alarm functions.
- 12/24 hour clock format.
4. Specifications
| Parameter | Value |
|---|---|
| Temperature Range | 0°C to 50°C (32°F to 120°F) |
| Temperature Accuracy | ±1.0°C (±1.8°F) |
| Temperature Resolution | 0.1°C (0.1°F) |
| Humidity Range | 10% RH to 90% RH |
| Humidity Accuracy | ±5% (for 40%RH-80%RH), ±8% (for other ranges) |
| Dimensions (HxWxD) | 108mm x 60mm x 15mm |
| Weight | 74g (without battery) |
| Power Source | 1 x AAA 1.5V Battery |
| Item Model Number | DT-128M |
| Included Components | DT-322 Unit x1 |
5. Setup
5.1 Battery Installation
- Locate the battery compartment cover on the back of the device.
- Slide the cover downwards to open.
- Insert one (1) AAA 1.5V battery, ensuring correct polarity (+/-).
- Replace the battery compartment cover by sliding it upwards until it clicks into place.
Note: The device will power on automatically once the battery is installed. If the display is dim or blank, replace the battery.
5.2 Placement
For accurate readings, place the thermo-hygrometer in a location away from direct sunlight, heat sources (e.g., radiators, appliances), and strong drafts (e.g., open windows, air conditioning vents). The integrated kickstand allows for convenient desktop placement.
6. Operating Instructions
6.1 Basic Display
Upon power-on, the LCD will display the current time, temperature, and humidity. The comfort level indicator (COMFORT, WET, DRY) will also be shown.
6.2 Switching Temperature Units (°C/°F)
To switch between Celsius (°C) and Fahrenheit (°F), press the °C/°F button located on the back of the device.
6.3 Setting Time and Alarm
- Press the MODE button once to display the current time.
- Press and hold the MODE button for approximately 3 seconds until the hour digit starts flashing.
- Use the ADJ button to adjust the hour.
- Press MODE again to move to the minute setting, then use ADJ to adjust minutes.
- Continue pressing MODE to cycle through 12/24 hour format, year, month, and day settings, adjusting each with the ADJ button.
- After setting the date, pressing MODE will allow you to set the alarm time (if applicable). Use ADJ to set the alarm hour and minute.
- Press MODE one last time to exit setting mode.
6.4 Viewing MAX/MIN Records
Press the MEMO button to cycle through the following displays:
- Current temperature and humidity.
- Maximum (MAX) recorded temperature and humidity since the last reset.
- Minimum (MIN) recorded temperature and humidity since the last reset.
To clear the MAX/MIN records, press and hold the MEMO button while MAX or MIN values are displayed.
7. Maintenance
7.1 Cleaning
Wipe the device with a soft, dry cloth. Do not use abrasive cleaners, solvents, or immerse the device in water.
7.2 Battery Replacement
When the display becomes dim or shows a low battery indicator, replace the AAA battery as described in the 'Battery Installation' section. Remove the battery if the device will not be used for an extended period to prevent leakage.
7.3 Storage
Store the device in a cool, dry place, away from extreme temperatures and humidity.
8. Troubleshooting
- No Display / Dim Display: Check battery polarity. Replace with a fresh AAA battery.
- Inaccurate Readings: Ensure the device is placed away from direct sunlight, heat sources, and drafts. Allow 15-30 minutes for readings to stabilize after initial setup or relocation.
- Buttons Not Responding: Try removing and reinserting the battery. If issues persist, press the RESET button on the back of the device using a thin object (e.g., paperclip). Note that resetting will clear all settings and recorded data.
9. Warranty and Support
For warranty information or technical support, please refer to the product packaging or contact your retailer/seller directly. Keep your purchase receipt as proof of purchase.