1. Introduction
This manual provides essential instructions for the proper use and maintenance of your Generic L-09-G Remote Control. This remote is designed as a replacement or secondary controller for various Android TV Box models. It features an ergonomic design and comes with a protective silicone cover.
Compatibility: This remote control is compatible with a wide range of Android TV Box models, including but not limited to: MXQ, MXQ Pro, MX10, T95M, T95N, T95Q, T95, T95X, T95Z PLUS, mx9, H96, H96 pro+, H96max, HK1 MAX, HK1BOX, HK1 RBOX, x96mini, X96, X98Q, X96MAX, X92, X96 X4, X88PRO10, X88 PRO 20, TX3MINI, TX6S, TANIXX4, H40, H50, 6K.
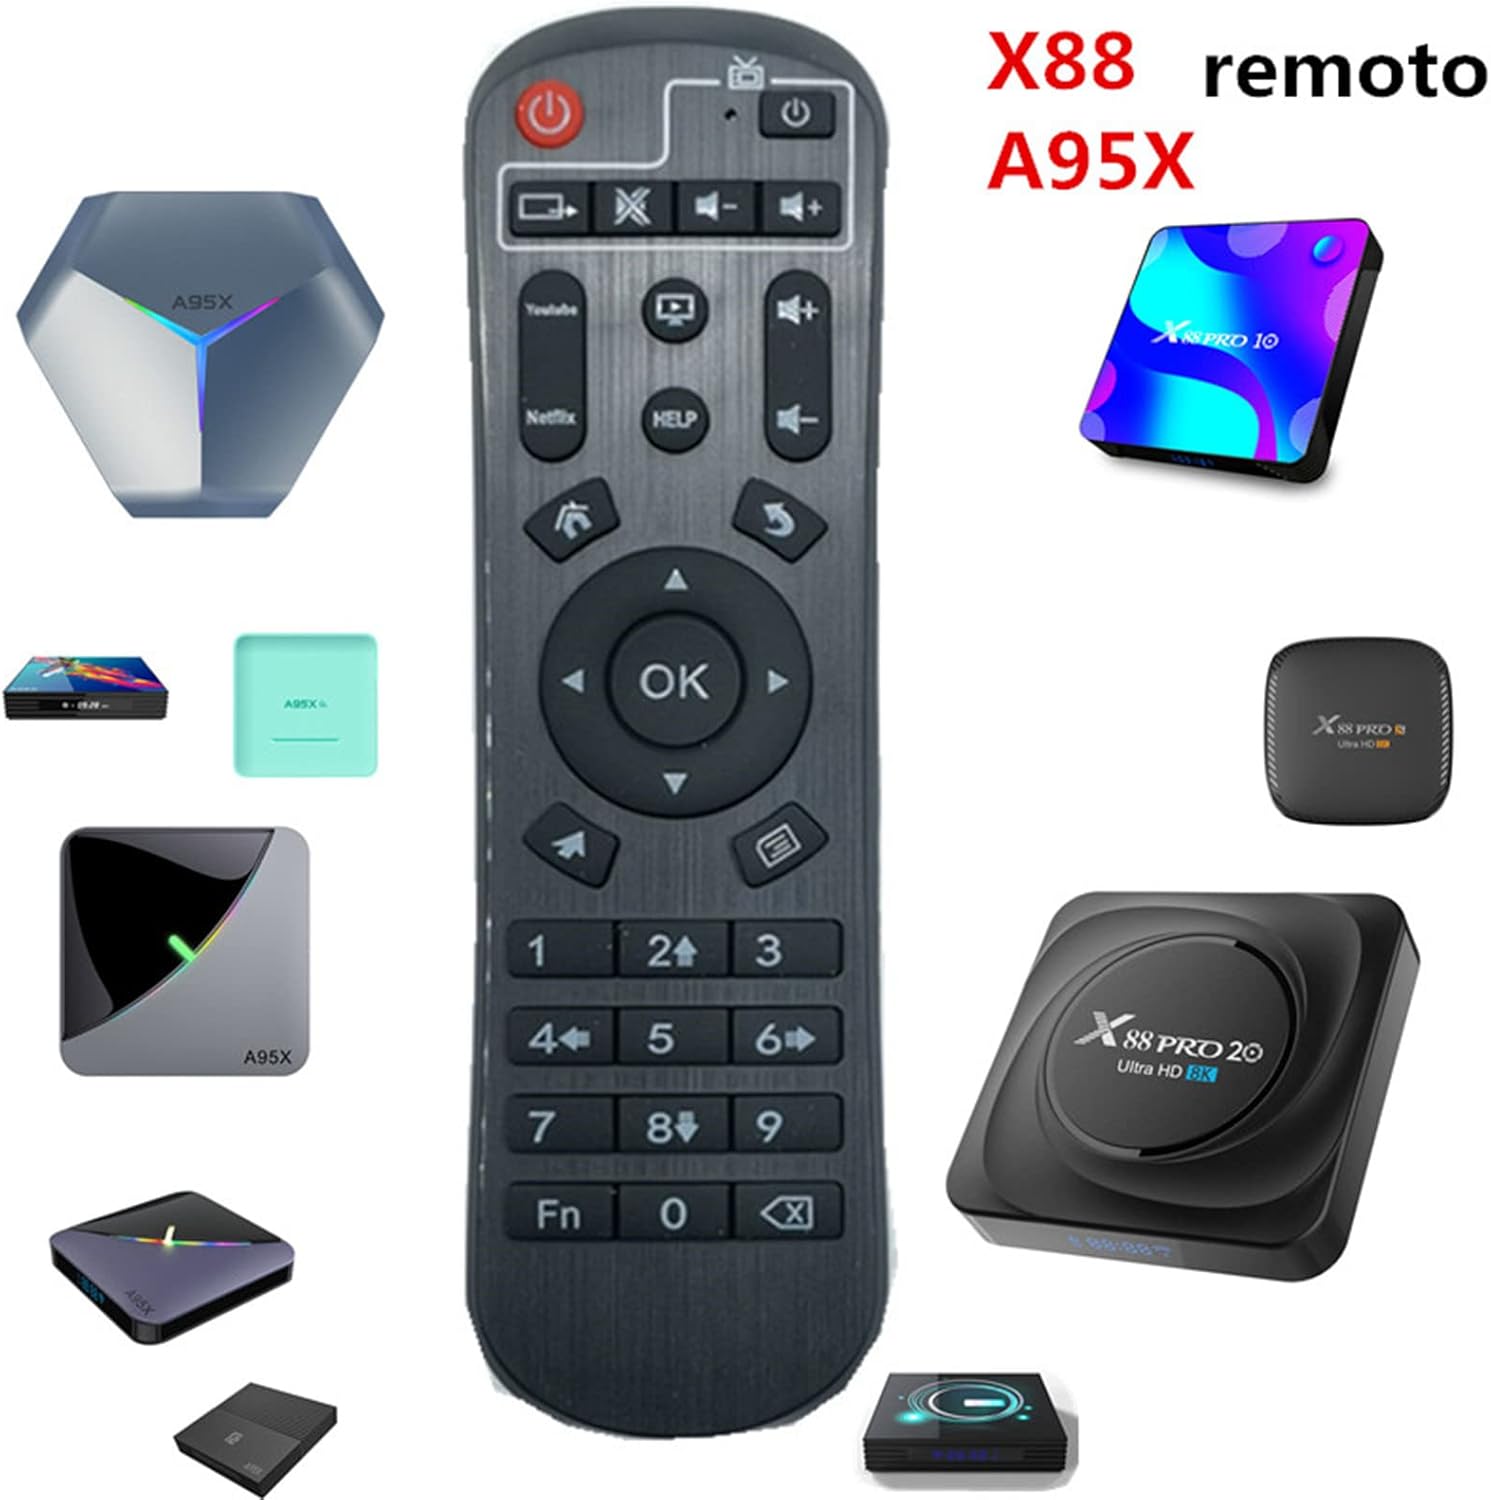
Figure 1: Generic L-09-G Remote Control shown with compatible Android TV Box models.
2. Package Contents
Verify that all items are present in your package:
- 1 x Generic L-09-G TV Box Remote Control
- 1 x Silicone Protective Sleeve
- Note: Batteries are not included.

Figure 2: Remote control and its included silicone protective sleeve.
3. Setup
3.1 Battery Installation
The remote control requires two AAA batteries (not included). To install:
- Locate the battery compartment on the back of the remote control.
- Slide open the battery compartment cover.
- Insert two AAA batteries, ensuring correct polarity (+ and -).
- Close the battery compartment cover securely.
3.2 Initial Use and Programming (Study Function)
This remote control is designed to work with compatible Android TV Boxes without programming. However, it features a "Study Function" to learn commands from another remote control, typically for TV power or volume functions.

Figure 3: Detailed steps for using the remote's Study Function.
To use the Study Function:
- Press the Blue Powerkey (often labeled "SET" or a similar blue button) for 5 seconds until the LED indicator stays on. This indicates the remote is in learning mode.
- Press a study button (a button designated for learning, often indicated by a blue LED) on the new remote. The LED indicator will blink, signifying it is ready to receive signals.
- Place your original remote control and the new remote control together, facing each other, within 3-5mm distance.
- Press the target key on your original remote control that you wish the new remote to learn.
- After the LED indicator on the new remote blinks 3 times and then stays on, you can choose another study key to program, or proceed to the next step.
- If the learning process fails (LED blinks 5 times), repeat steps 1-5.
- When you have finished programming all desired keys, press any key outside the TV zone (e.g., a navigation button) to exit the study status. The LED indicator will turn off.
4. Operating Instructions
The remote control provides standard functions for navigating and controlling your Android TV Box. Key buttons include:

Figure 4: Layout of the Generic L-09-G Remote Control buttons.
- Power Button: Turns the Android TV Box on or off.
- Navigation Pad (Up, Down, Left, Right, OK): Used for menu navigation and selection.
- Volume Up/Down: Adjusts the volume.
- Mute: Mutes or unmutes audio.
- Back/Return: Returns to the previous screen or menu.
- Home: Returns to the main home screen of the Android TV Box.
- Menu/Options: Accesses context-sensitive menus or options.
- Number Pad (0-9): For direct input or channel selection.
- App Shortcuts (e.g., YouTube, Netflix): Direct access to popular applications.
Ensure the remote control is pointed towards the Android TV Box for optimal signal transmission.
5. Maintenance
- Cleaning: Use a soft, dry cloth to clean the remote control. Do not use liquid cleaners or abrasive materials.
- Silicone Cover: The included silicone cover helps protect the remote from dust, spills, and minor impacts. It can be removed and cleaned with mild soap and water if necessary. Ensure it is completely dry before reattaching.
- Battery Replacement: Replace batteries when the remote's performance degrades or if the LED indicator does not light up. Always replace both batteries at the same time with new ones of the same type.
- Storage: Store the remote control in a cool, dry place away from direct sunlight and extreme temperatures.
6. Troubleshooting
| Problem | Possible Cause | Solution |
|---|---|---|
| Remote control not responding. |
|
|
| Specific buttons not working after programming. | Learning function failed or was interrupted. | Repeat the "Study Function" steps for the affected buttons (refer to Section 3.2). |
| Remote control feels sluggish or unresponsive. | Low battery power. | Replace batteries. |
7. Specifications
| Feature | Detail |
|---|---|
| Model Number | L-09-G |
| Brand | Generic |
| Connectivity Technology | Infrared (IR) |
| Compatible Devices | Android TV Boxes (various models listed in Introduction) |
| Power Source | 2 x AAA Batteries (not included) |
| Item Weight | 2.04 ounces (approx. 57.8 grams) |
| Package Dimensions | 7.52 x 2.28 x 0.94 inches (approx. 19.1 x 5.8 x 2.4 cm) |
| Special Feature | Ergonomic design, Learning Function |
8. Warranty and Support
This product is covered by a standard manufacturer's warranty against defects in materials and workmanship. Please refer to your retailer's return policy or contact the seller for specific warranty details and support inquiries.
For further assistance, please contact the seller through the platform where the purchase was made.


