1. Introduction
This manual provides detailed instructions for the proper setup, operation, and maintenance of your FEELWORLD 4K173-9HSD-CO 17.3-inch Broadcast Monitor. Please read this manual thoroughly before using the product to ensure optimal performance and to prevent damage.
The FEELWORLD 4K173-9HSD-CO is a professional 17.3-inch broadcast monitor designed for various video production environments, offering a 1920x1080 Full HD resolution display, multiple input/output options, and advanced monitoring features.
2. Package Contents
Verify that all items listed below are included in your package. If any items are missing or damaged, please contact your dealer immediately.
- 1× FEELWORLD 4K173-9HSD-CO 17.3-inch Broadcast Monitor (in Suitcase)
- 1× Mini HDMI Cable
- 1× V Battery Plate
- 1× 3A DC Power Adapter
- 1× Tally Kit
- 1× Sunshade
- 1× Operation Manual

Image 2.1: All components included in the FEELWORLD 4K173-9HSD-CO package.
3. Product Features
3.1 Sharp and Clear Image Quality
The monitor features a 17.3-inch Full HD (1920x1080) resolution display with a 600:1 contrast ratio and 400cd/m² brightness, ensuring a sharp and clear image for accurate monitoring and focus.

Image 3.1: The monitor's display quality with key specifications.
3.2 Advanced Monitoring Tools
Equipped with professional monitoring functions such as DSLR Scale, Peaking Filter, Image Freeze, Check Field, Image Flip, Center Marker, Screen Marker, and Color Temperature adjustment, this monitor assists in accurate exposure and focus during shooting.
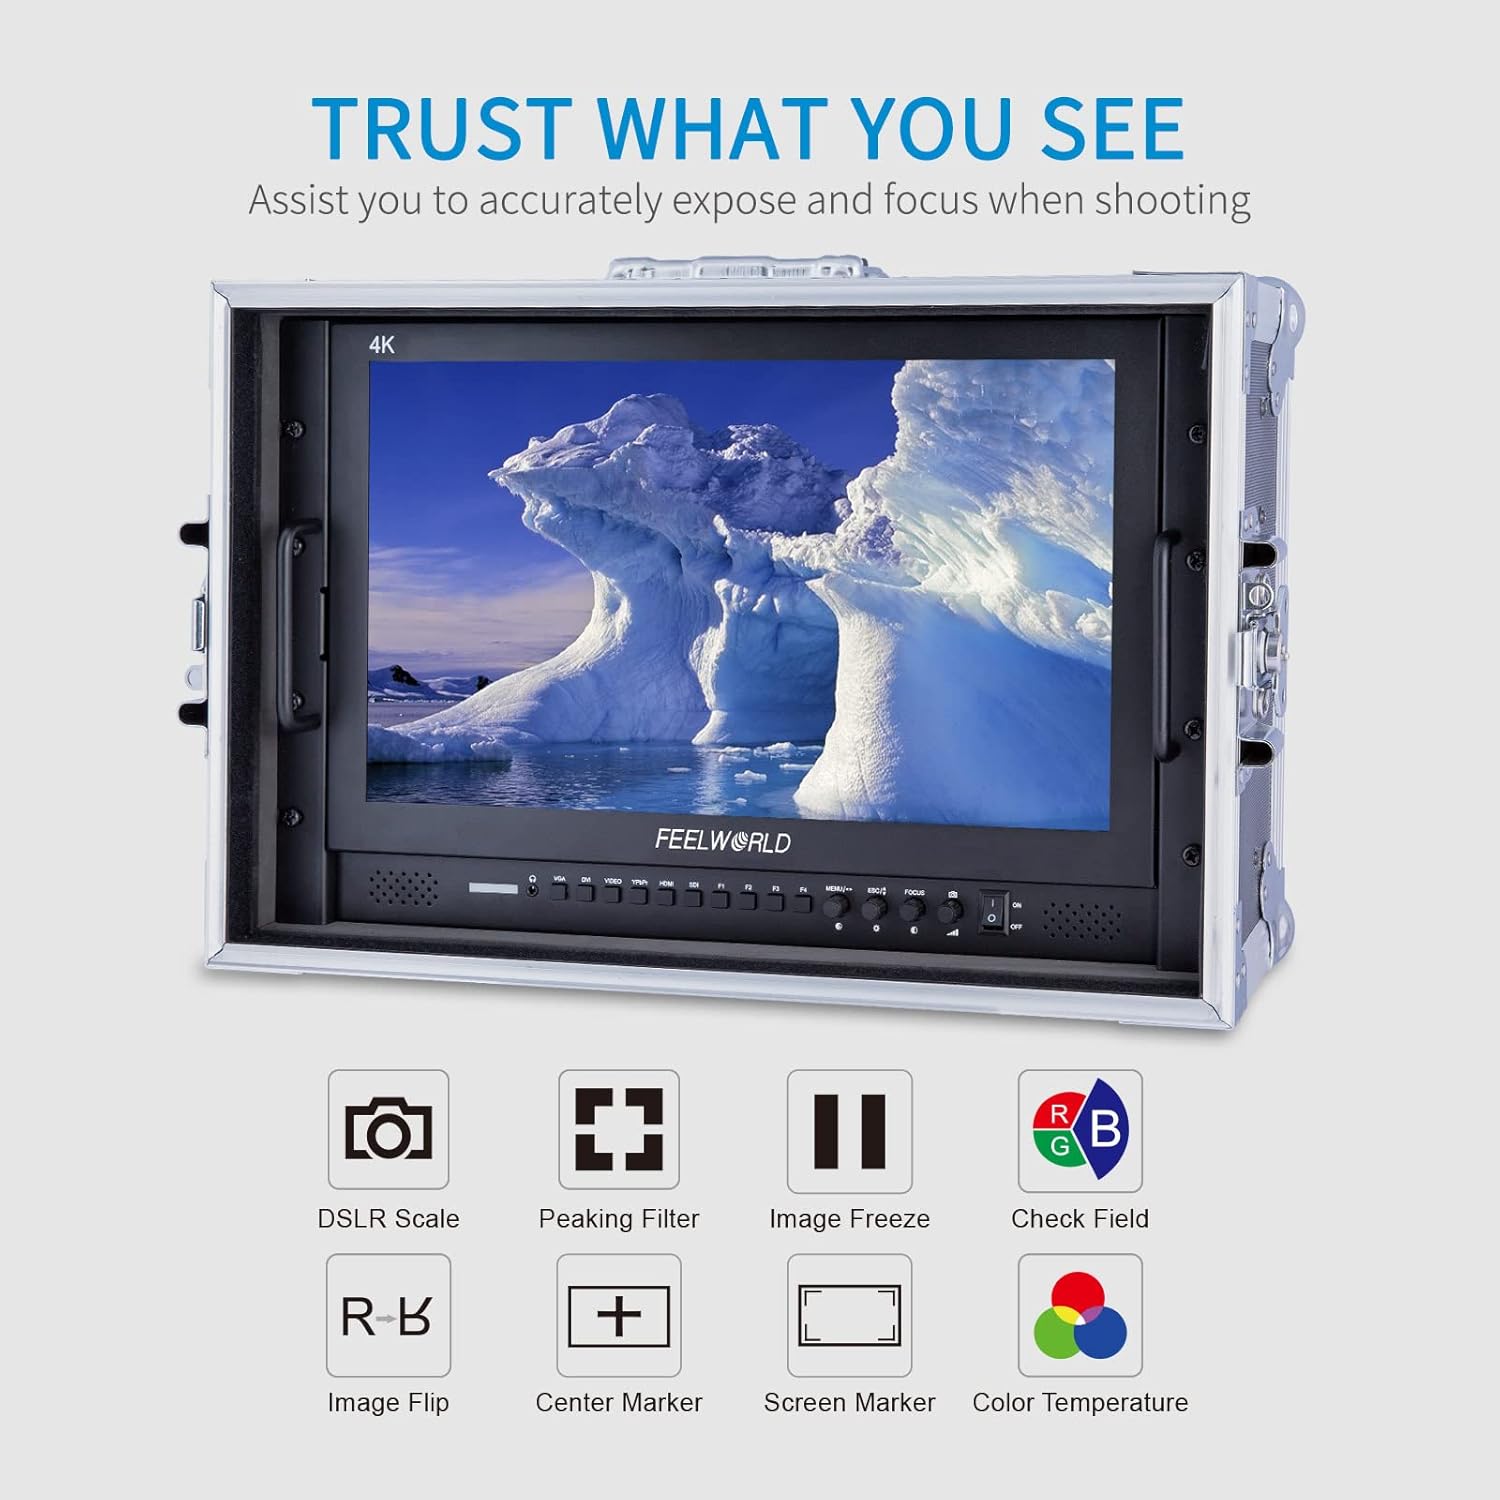
Image 3.2: Visual representation of the monitor's advanced monitoring features.
3.3 Multiple Inputs and Outputs
The monitor provides a comprehensive range of input and output interfaces, including SDI, HDMI, YPbPr, DVI, and AV, catering to diverse professional video production requirements. It supports 4K HDMI input/output at various frame rates (30/29.97/25/24/23.98Hz for 3840x2160p and 24Hz for 4096x2160p).
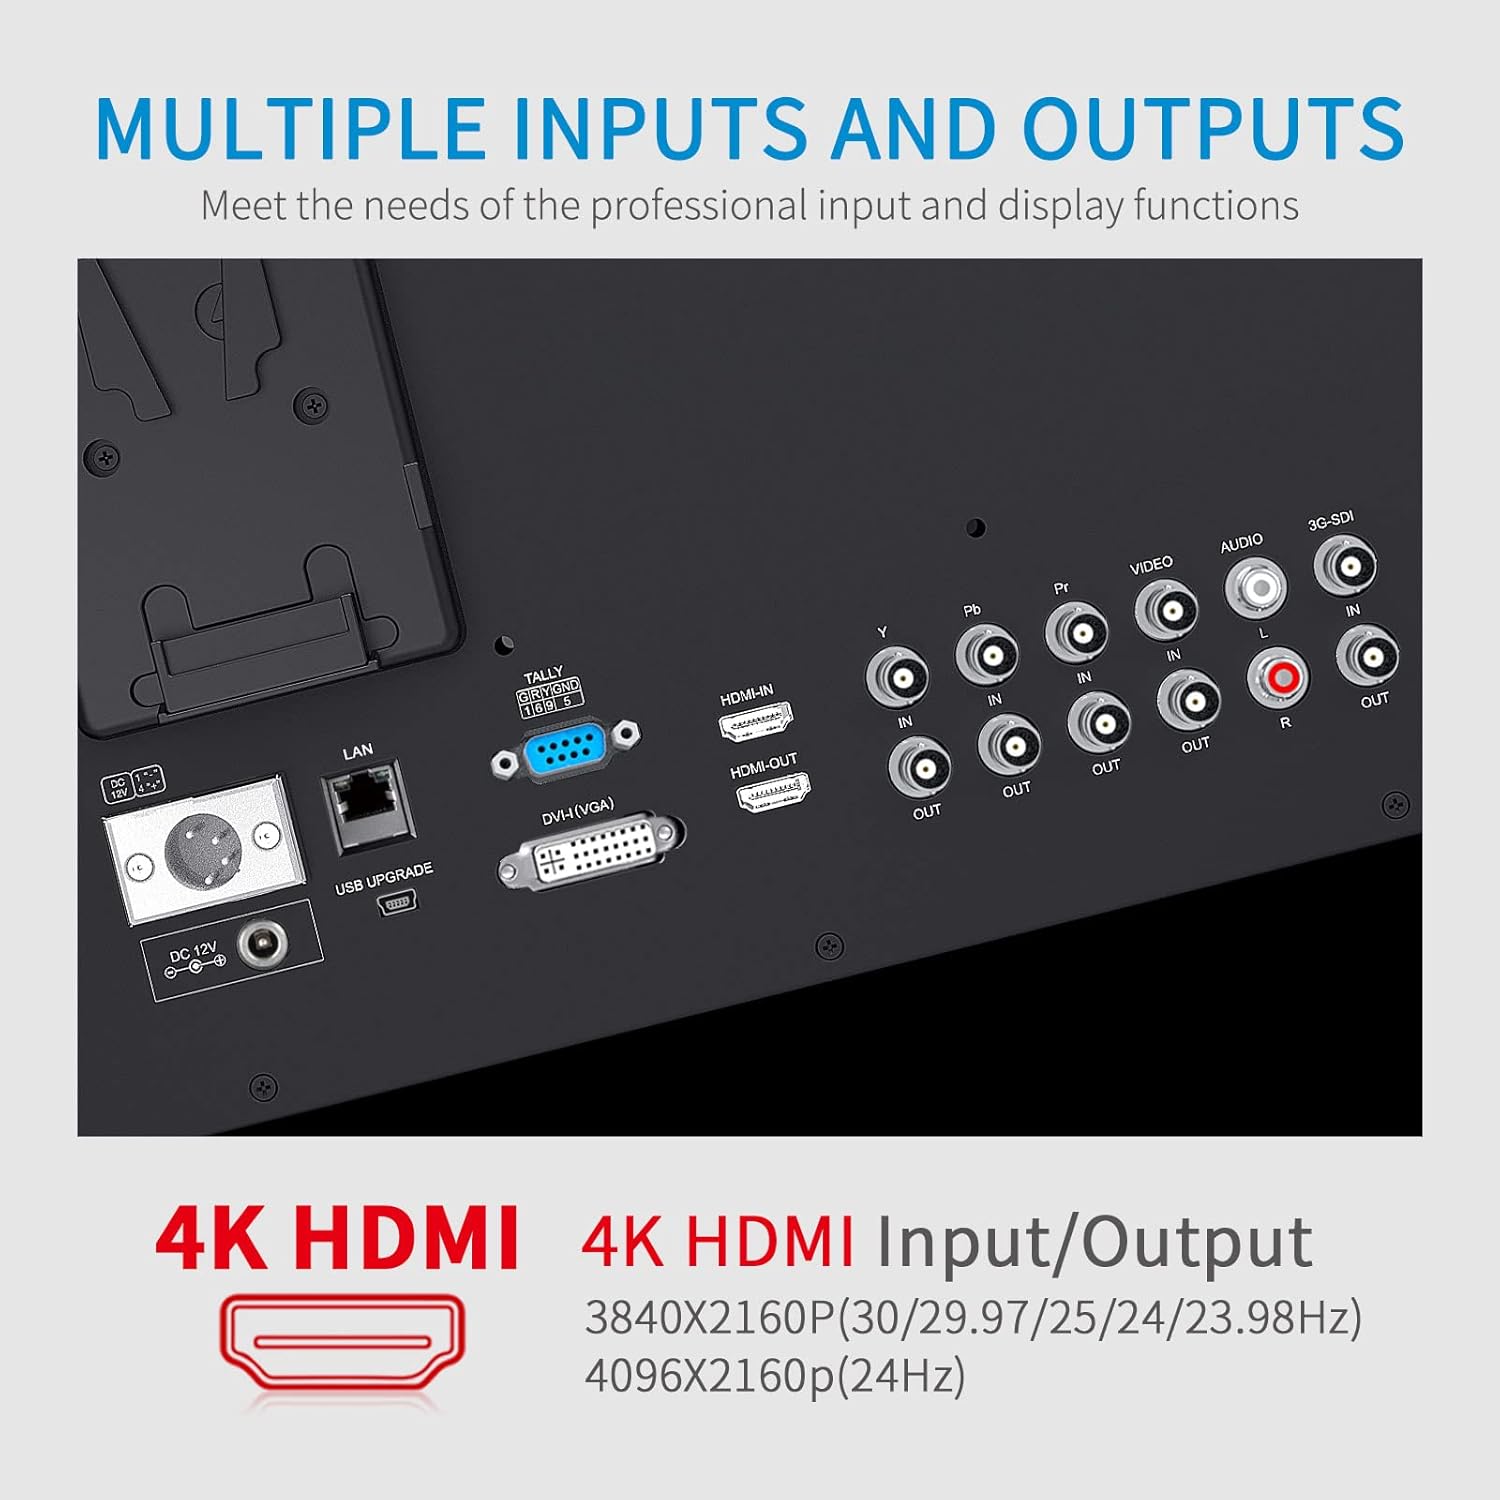
Image 3.3: Detailed view of the monitor's input and output ports.
3.4 OSD Operation and Control
The On-Screen Display (OSD) system allows for intuitive control using double functions and a knob coding switch, providing convenient and rapid operation for adjusting settings.
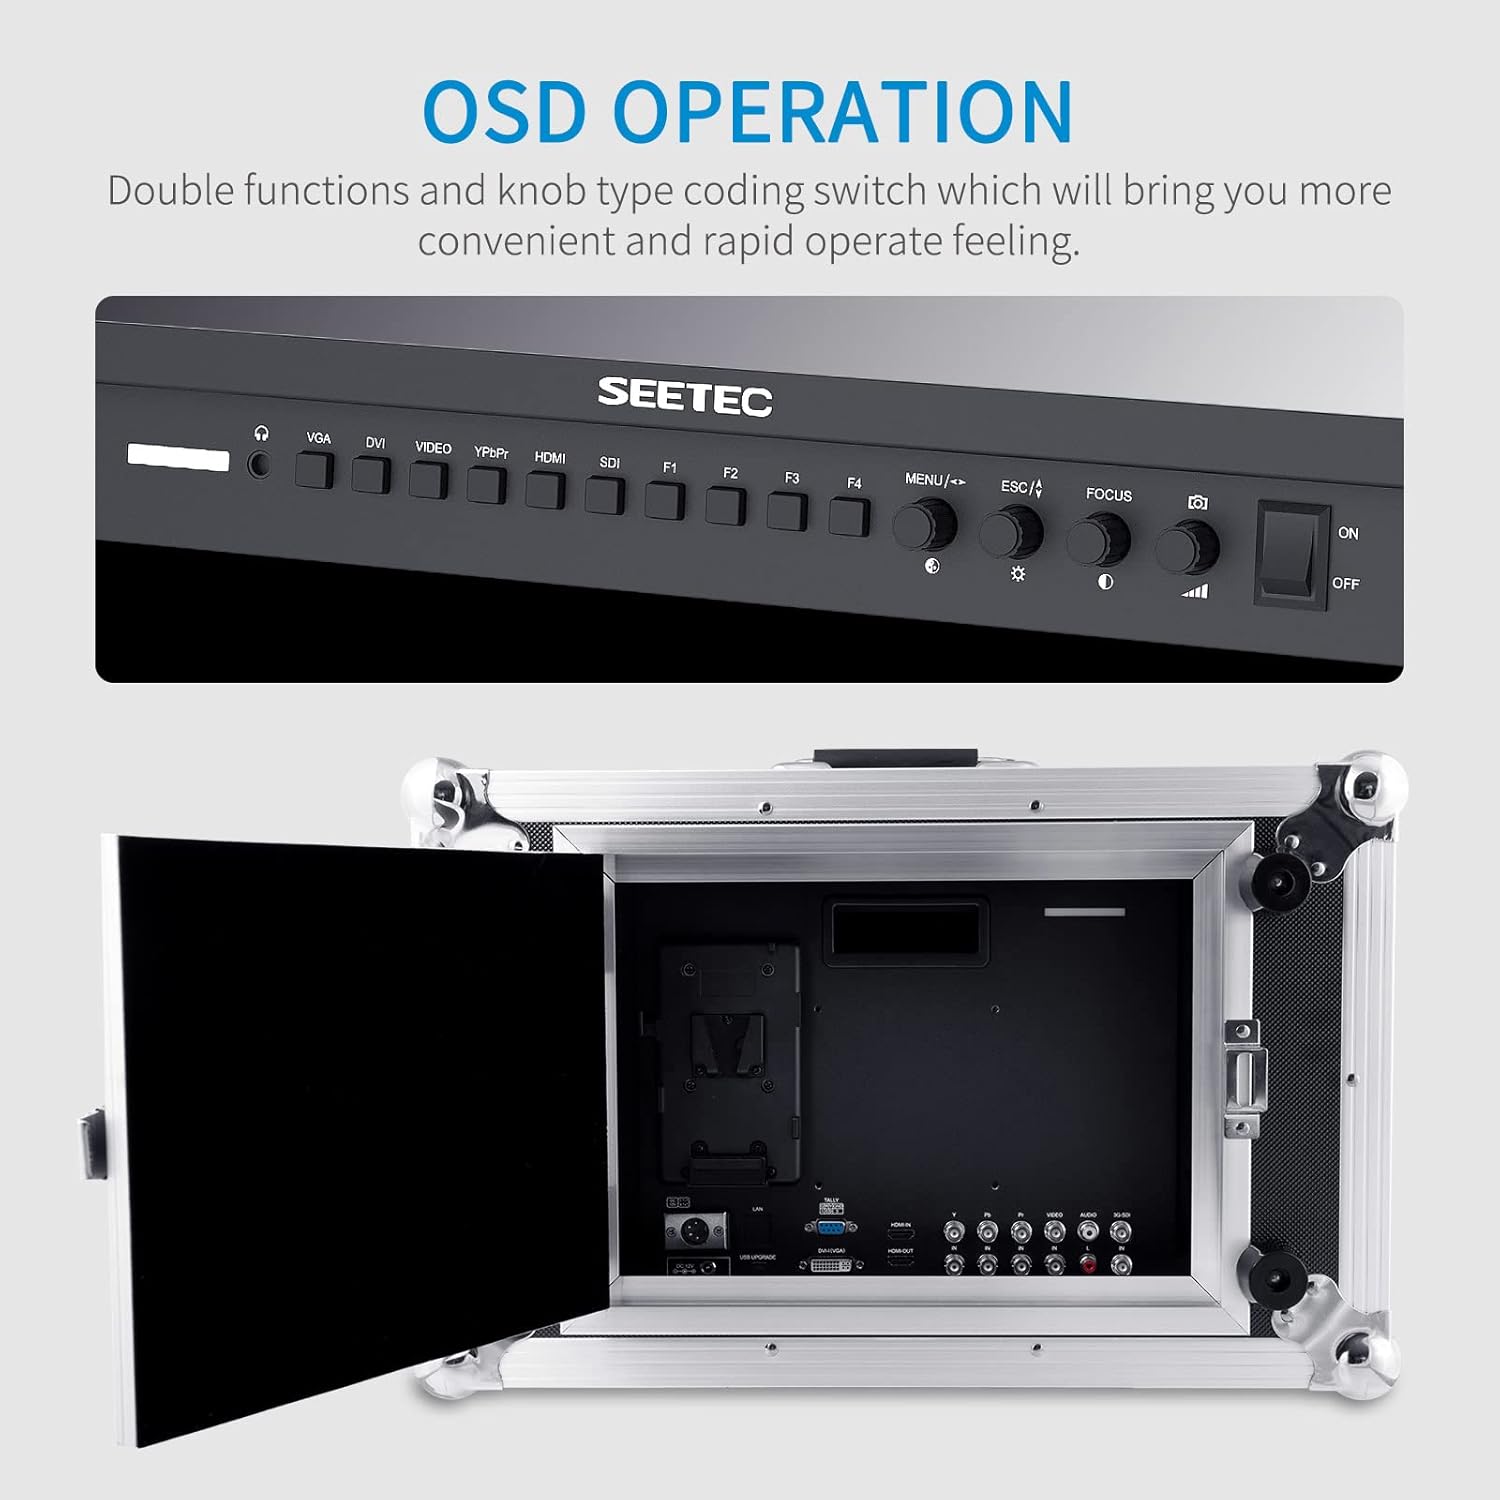
Image 3.4: The monitor's control panel for OSD operation.
3.5 3-Color Tally Light
A built-in 3-color Tally light system provides visual cues to indicate the recording state, assisting camera operators in live production environments.

Image 3.5: The monitor displaying the 3-color Tally light feature.
3.6 Portable Case Design
The monitor is integrated into a durable, portable case, making it ready for quick deployment and use in various shooting locations.

Image 3.6: The monitor's portable case for easy transport and quick setup.
4. Setup
- Unpacking: Carefully remove the monitor and all accessories from the suitcase.
- Power Connection: Connect the provided 3A DC Power Adapter to the 'DC IN' port on the monitor. Plug the adapter into a suitable power outlet. Alternatively, attach a compatible V-mount battery to the V Battery Plate for portable power.
- Video Input Connection: Connect your video source (e.g., camera, video switcher) to the desired input port on the monitor (SDI, HDMI, YPbPr, DVI, AV) using appropriate cables. For HDMI, use the provided Mini HDMI Cable if applicable.
- Audio Connection (Optional): If external audio monitoring is required, connect audio cables to the 'AUDIO IN' or 'AUDIO OUT' ports as needed.
- Tally Light Connection (Optional): Connect the Tally Kit to the monitor's Tally port if you intend to use the Tally light feature with a compatible video switcher.
- Sunshade Installation (Optional): Attach the sunshade to the monitor's frame to reduce glare in bright environments.
5. Operating Instructions
5.1 Power On/Off
- To power on, press the ON/OFF switch located on the control panel.
- To power off, press the ON/OFF switch again.
5.2 Input Selection
Use the dedicated input buttons (VGA, DVI, VIDEO, YPbPr, HDMI, SDI) on the control panel to switch between different video sources.
5.3 OSD Menu Navigation
- Press the MENU button to access the On-Screen Display menu.
- Use the knob coding switch (often labeled with arrows or a scroll function) to navigate through menu options.
- Press the knob or a dedicated ENTER button (if available) to select an option or confirm a setting.
- Use the ESC button to go back to the previous menu or exit the OSD.
5.4 Adjusting Display Settings
Within the OSD menu, you can adjust various display parameters:
- Brightness: Adjust the overall luminance of the screen.
- Contrast: Modify the difference between the brightest and darkest areas.
- Color Temperature: Select from preset color temperatures or customize for accurate color reproduction.
- Aspect Ratio: Choose between 16:9, 4:3, or other available aspect ratios.
5.5 Using Monitoring Functions (F1-F4 Buttons)
The programmable function buttons (F1-F4) can be assigned to quickly access various monitoring tools. Refer to the OSD menu for assigning functions such as:
- Peaking Filter: Highlights sharp edges to assist with focus.
- Image Freeze: Pauses the current video frame.
- Check Field: Displays a single color channel (Red, Green, Blue, or Mono) for calibration.
- Image Flip: Flips the image horizontally or vertically.
- Center Marker: Displays a crosshair in the center of the screen.
- Screen Marker: Displays various aspect ratio markers.
- DSLR Scale: Adjusts the display to match DSLR camera output.
6. Maintenance
- Cleaning the Screen: Use a soft, lint-free cloth specifically designed for electronics screens. Do not use harsh chemicals, abrasive cleaners, or alcohol-based solutions. Lightly dampen the cloth with water if necessary.
- Cleaning the Casing: Wipe the monitor's casing with a soft, dry cloth. For stubborn dirt, a slightly damp cloth can be used, followed by a dry cloth.
- Storage: When not in use for extended periods, store the monitor in its original suitcase in a cool, dry place, away from direct sunlight and extreme temperatures.
- Avoid Liquids: Keep the monitor away from water and other liquids. Do not operate the monitor with wet hands.
- Ventilation: Ensure that the ventilation openings on the monitor are not blocked to prevent overheating.
7. Troubleshooting
| Problem | Possible Cause | Solution |
|---|---|---|
| No power | Power adapter not connected or faulty; battery depleted. | Check power adapter connection and outlet. Ensure battery is charged or replace it. |
| No video signal | Incorrect input selected; cable loose or faulty; video source off or not outputting signal. | Select the correct input source. Check video cable connections. Verify video source is active. |
| Image is distorted or discolored | Incorrect display settings; faulty cable; incompatible signal. | Adjust brightness, contrast, and color temperature in OSD. Try a different video cable. Ensure input signal matches monitor's supported resolutions. |
| OSD menu not appearing | MENU button not pressed correctly; monitor frozen. | Press the MENU button firmly. If unresponsive, power cycle the monitor. |
| Tally light not working | Tally kit not connected; video switcher not sending tally signal. | Ensure Tally Kit is properly connected. Check video switcher's tally output settings. |
8. Specifications
| Feature | Specification |
|---|---|
| Brand | FEELWORLD |
| Model Number | 4K173-9HSD-CO |
| Screen Size | 17.3 Inches |
| Native Resolution | 1920 x 1080 (FHD 1080p) |
| Aspect Ratio | 16:9 |
| Display Type | LCD |
| Brightness | 400 nits |
| Contrast Ratio | 600:1 |
| Connectivity Technology | HDMI, SDI, YPbPr, DVI, AV |
| Total Number of HDMI Ports | 2 |
| Item Weight | 12.65 Kilograms |
9. Warranty and Support
9.1 Warranty Information
The FEELWORLD 4K173-9HSD-CO Broadcast Monitor comes with a 1-year limited warranty from the date of purchase. This warranty covers manufacturing defects and workmanship under normal use. It does not cover damage caused by misuse, accidents, unauthorized modifications, or improper installation.
Please retain your proof of purchase for warranty claims.
9.2 Customer Support
For technical assistance, troubleshooting beyond this manual, or warranty inquiries, please contact FEELWORLD customer support. Refer to the official FEELWORLD website or your purchase documentation for the most current contact information.
When contacting support, please have your monitor's model number (4K173-9HSD-CO) and purchase details readily available.