1. Introduction
Thank you for purchasing the Lepro USB Rechargeable Retro LED Lantern. This manual provides essential information for the safe and efficient use of your new lantern. Please read it thoroughly before use and keep it for future reference.

Image 1.1: The Lepro Retro LED Lantern illuminating a campsite.
2. Product Overview
2.1. Key Features
- Stylish Retro Design: This LED lantern features a stylish retro design, creating a warm and inviting atmosphere. Its classic design blends seamlessly with various settings, from modern to traditional. Ideal for camping, as a table light, or a night light.
- 3 Color Modes & Stepless Dimming: Choose between warm light for a cozy ambiance, daylight for reading or working inside a tent, and cool white for cooking or other tasks. The dial switch allows for stepless dimming and color temperature adjustment, enabling you to create the perfect lighting for any mood or situation.
- Convenient USB Charging & Power Bank Function: Equipped with a PSE-certified rechargeable battery, it can be easily charged via the included Type-C USB cable, eliminating the need for frequent battery replacement. It also functions as a power bank, allowing you to charge smartphones or tablets via its USB output port, which is very useful in emergencies. A battery level indicator provides a quick and easy way to check the remaining power. (Note: The rated voltage of the lantern is DC5V. Avoid charging with higher voltages.)
- Compact, Lightweight & Easy to Use: The lantern is freestanding, allowing placement anywhere. It also features a hook-shaped handle for hanging, making it versatile for use on lantern stands, inside tents, on tree branches, or in camping vehicles. Weighing approximately 295g, its lightweight design makes it easy to carry, perfect for outdoor activities, camping, night fishing, and walks.
- Versatile for Indoor & Outdoor Use: With stepless adjustment from warm white to cool white, it's suitable for home use (reading, nighttime feeding, diaper changes) and essential as a disaster preparedness item for typhoons, power outages, or emergencies in homes, entrances, cars, or offices. It's also ideal for creating ambiance during camping, hiking, on porches or decks, short trips, car camping, and touring.
2.2. Package Contents
- Lepro Retro LED Lantern (Model: PR330039-JP)
- Type-C USB Charging Cable
- User Manual
3. Safety Information
Please observe the following safety precautions to prevent injury or damage to the product:
- Do not disassemble, repair, or modify the lantern.
- Keep the lantern away from water and moisture, unless specified for waterproof use.
- Do not expose the lantern to extreme temperatures or direct sunlight for prolonged periods.
- Use only the provided or a certified Type-C USB cable for charging.
- Ensure the charging voltage does not exceed DC5V to prevent damage to the battery.
- Keep out of reach of children.
4. Setup
4.1. Initial Charge
Before first use, fully charge the lantern. Connect the included Type-C USB cable to the lantern's charging port and a compatible USB power adapter (not included). The battery indicator lights will show the charging progress.

Image 4.1: Charging the lantern via Type-C USB.
4.2. Battery Level Indicator
The lantern is equipped with a battery level indicator to easily check the remaining power. Typically, four indicator lights represent 25%, 50%, 75%, and 100% charge respectively.

Image 4.2: Battery level indicator on the lantern.
5. Operating Instructions
5.1. Power On/Off and Brightness Adjustment
The lantern is operated using a dial switch located on the top. Rotate the dial to turn the lantern on and adjust the brightness. The brightness can be steplessly dimmed from 15 lumens to 450 lumens.

Image 5.1: Dial switch for brightness and color adjustment.
5.2. Color Mode Selection
Press the dial switch to cycle through the three available color modes: warm light (bulb color), daylight, and cool white. Select the mode that best suits your environment or activity.
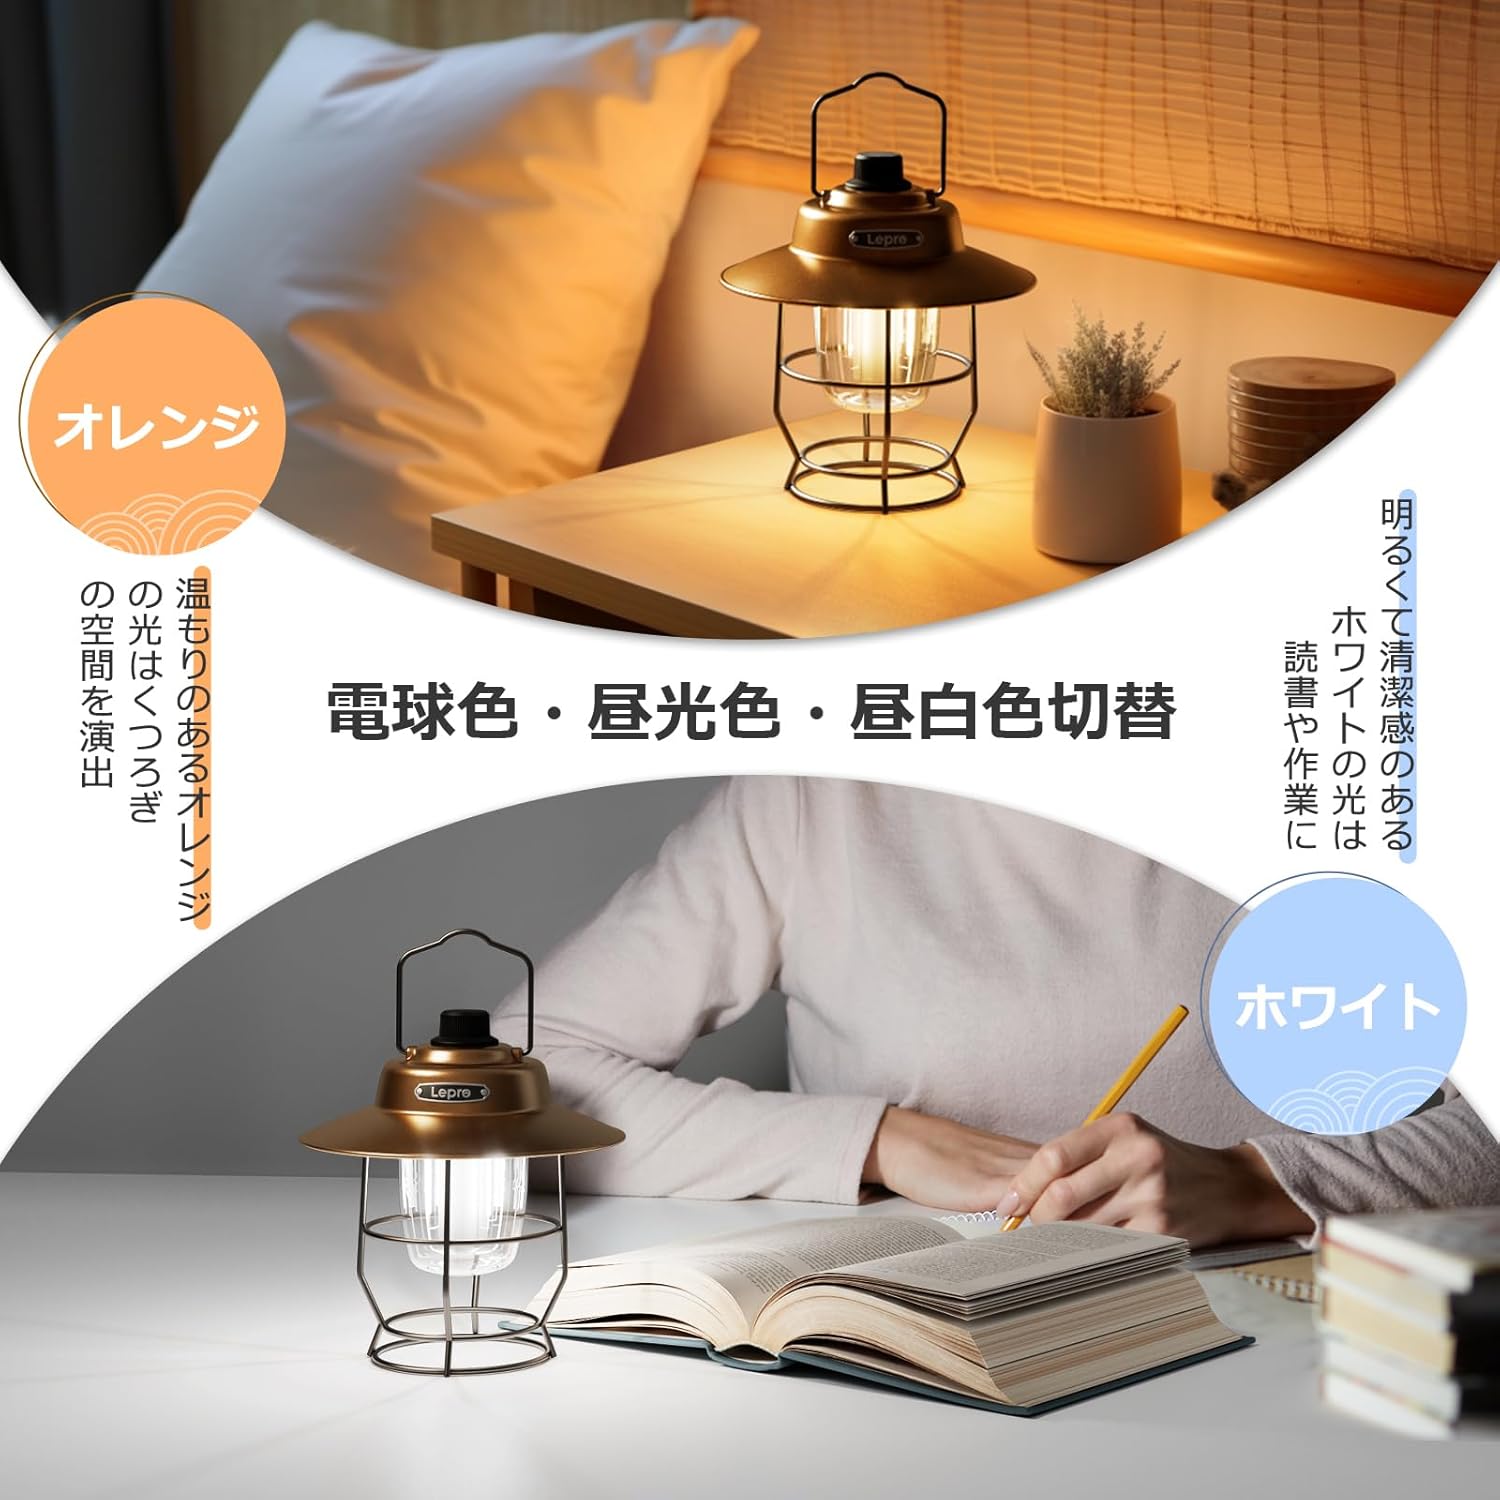
Image 5.2: Warm orange light for ambiance and cool white light for tasks.
5.3. Versatile Placement
The lantern can be used freestanding on any flat surface or hung using its integrated hook handle. This allows for flexible lighting solutions in various outdoor and indoor scenarios.
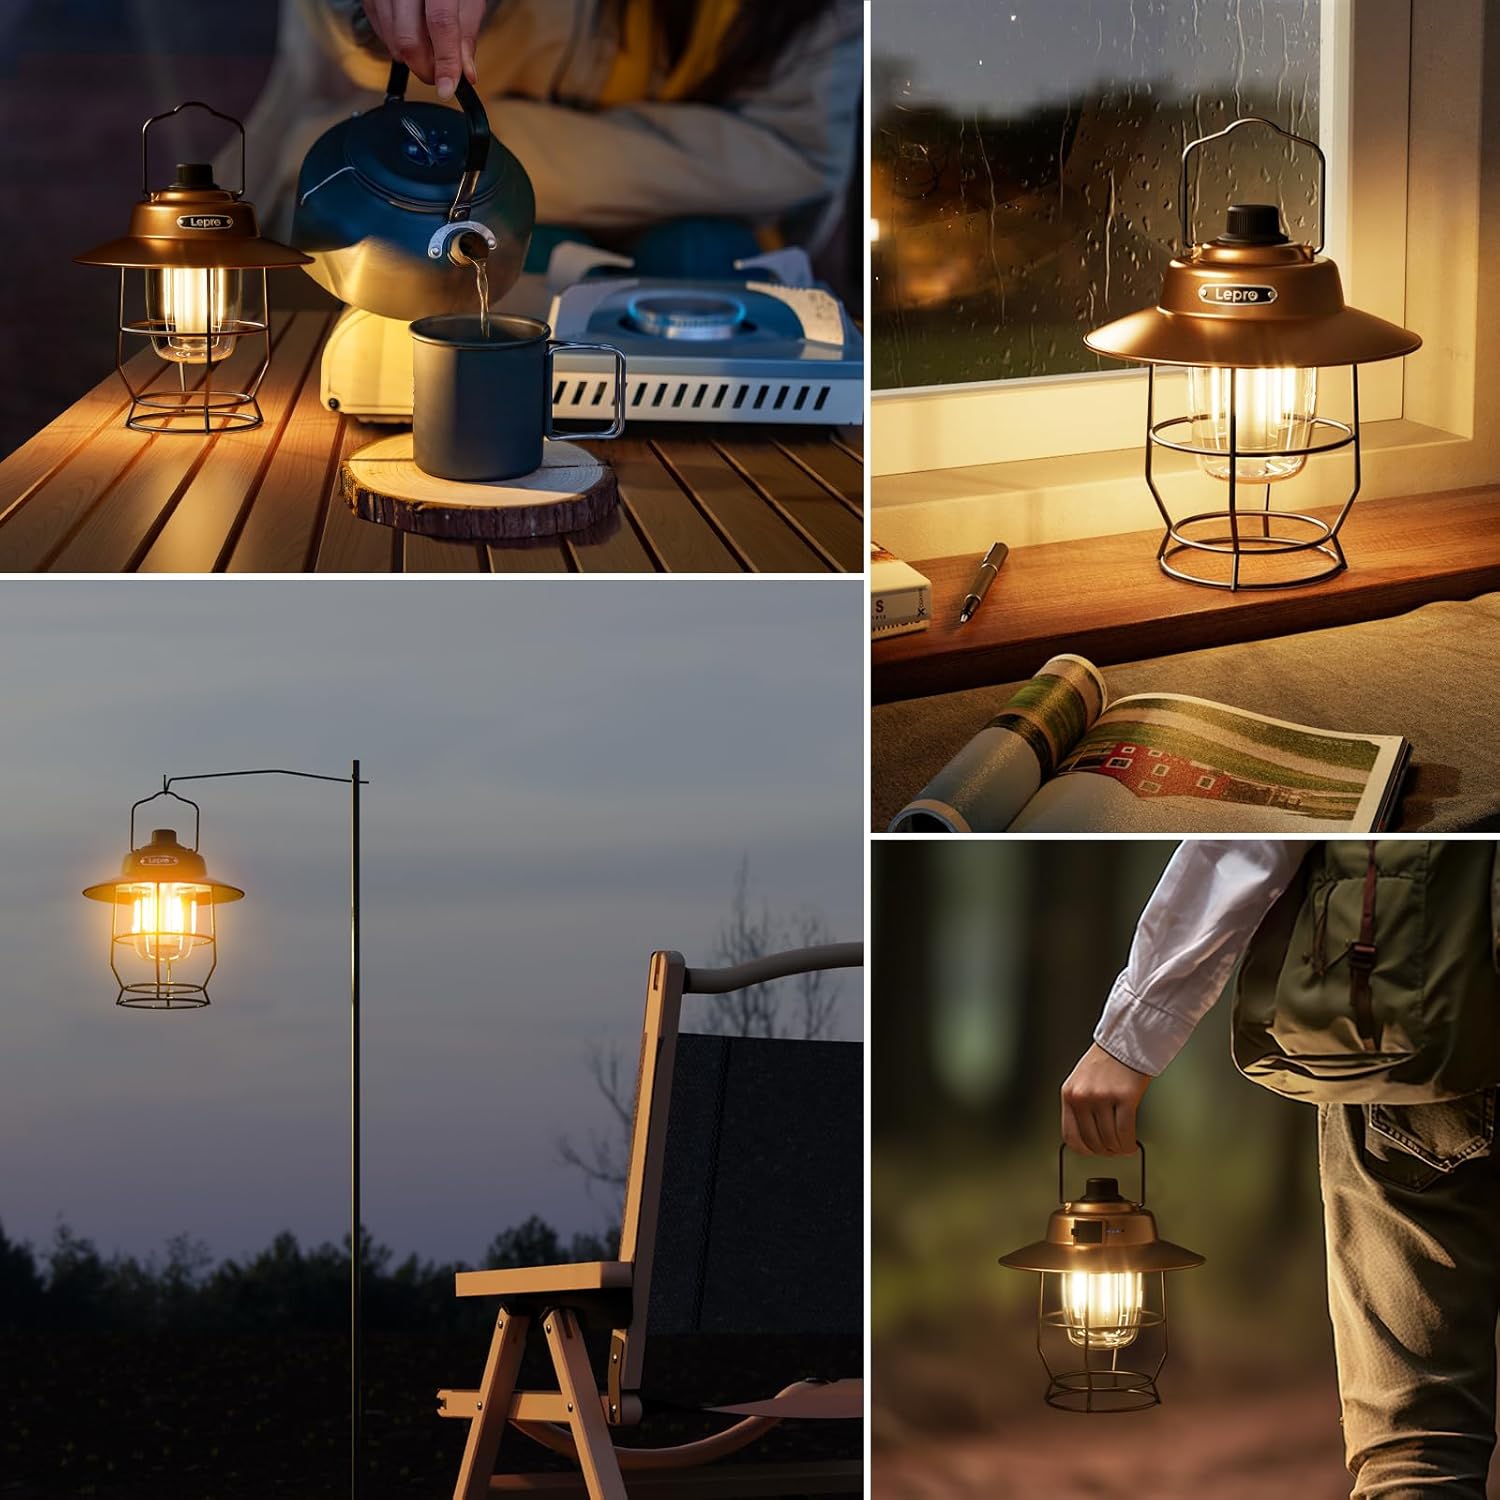
Image 5.3: Examples of lantern placement and use.
6. Charging and Power Bank Function
6.1. Recharging the Lantern
To recharge the lantern, connect the Type-C USB cable to the input port on the lantern and a standard USB power source (e.g., wall adapter, computer USB port). The battery indicator lights will illuminate to show charging status.
6.2. Using as a Power Bank
The lantern can also serve as a portable power bank. Connect your smartphone, tablet, or other USB-powered device to the USB-A output port on the lantern using your device's charging cable. This feature is particularly useful for emergency charging of small electronic devices.
Image 6.1: Demonstrating the lantern's charging and power bank capabilities.
Video 6.2: This video demonstrates the Type-C USB charging and power bank function of the lantern, including battery level display.
7. Maintenance
7.1. Cleaning
Wipe the lantern with a soft, dry cloth. Do not use abrasive cleaners or solvents, as they may damage the finish. Ensure the charging ports are free of dust and debris.
7.2. Storage
When not in use for extended periods, store the lantern in a cool, dry place. It is recommended to charge the battery every 3-6 months to maintain its lifespan.
8. Troubleshooting
| Problem | Possible Cause | Solution |
|---|---|---|
| Lantern does not turn on. | Low battery. | Charge the lantern fully. |
| Lantern does not charge. | Charging cable or adapter faulty; charging port obstructed. | Try a different Type-C USB cable and power adapter. Clean the charging port. |
| Brightness or color adjustment not working. | Dial switch malfunction. | Ensure the dial is clean and free of obstructions. If the issue persists, contact customer support. |
| Power bank function not working. | Low battery; incorrect cable; device incompatibility. | Ensure the lantern is sufficiently charged. Use a compatible charging cable for your device. |
Video 8.1: This video illustrates the operation and dimming of an LED lantern, which may be helpful for troubleshooting.
9. Specifications
| Feature | Detail |
|---|---|
| Brand | Lepro |
| Model Number | PR330039-JP |
| Color | Brown |
| Power Source | LED |
| Product Dimensions (L x W x H) | 16 x 16 x 17.5 cm |
| Item Weight | 295 g (10.4 ounces) |
| Maximum Light Output | 450 lumens |
| Light Color Modes | Warm Light, Daylight, Cool White (3 modes) |
| Dimming | Stepless (15 to 450 lumens) |
| Battery Type | 1 Lithium Ion battery (included) |
| Charging Port | Type-C USB |
| Power Bank Output | USB-A |
| Country of Origin | China |
Video 9.1: This video showcases the retro design and features of a similar LED lantern, highlighting its aesthetic and functional aspects.
10. Warranty and Support
10.1. Manufacturer's Warranty
This Lepro LED Lantern comes with a 1-year manufacturer's warranty from the date of purchase. The warranty covers defects in materials and workmanship under normal use. Please retain your proof of purchase for warranty claims.
10.2. Customer Support
If you encounter any issues or have questions regarding your product, please contact Lepro JP customer support. You can typically find contact information on the seller's page or through your purchase platform. When contacting support, please provide your model number (PR330039-JP) and a detailed description of the issue.