1. Introduction
This manual provides detailed instructions for the proper use and maintenance of your SVBONY SV705C Color Telescope Imaging Camera. The SV705C is designed for astrophotography, including planetary, lunar, solar, and deep-sky imaging (EAA). It features a high-sensitivity IMX585 CMOS sensor, USB3.0 connectivity, and an ST4 guiding port.
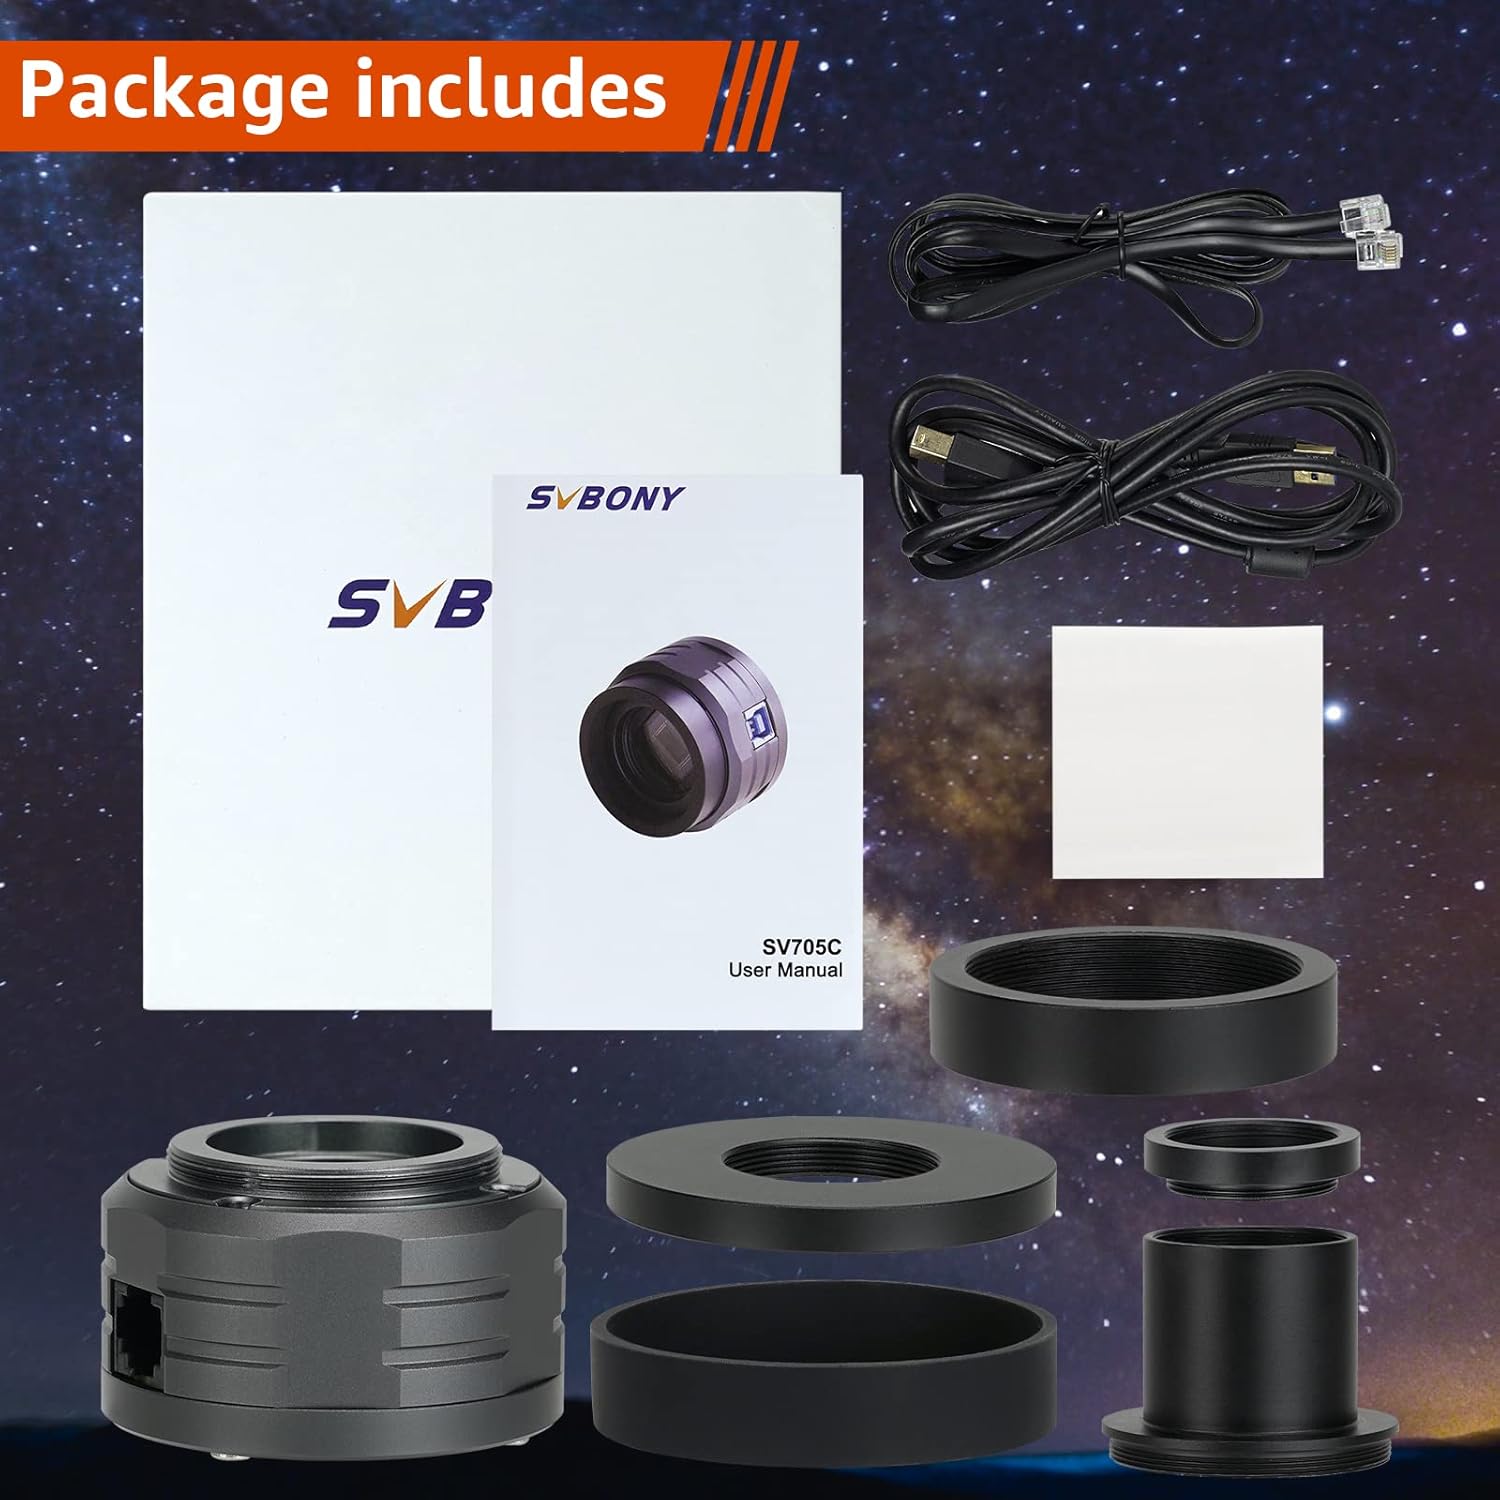
2. Package Contents
Verify that all items listed below are included in your package:
- SVBONY SV705C Color Imaging Camera (x1)
- USB3.0 Data Cable (x1)
- ST4 Guiding Cable (x1)
- 1.25-inch Extension Tube (x1)
- M42-CS/1.25-inch T-mount Adapter (x1)
- CS-C Adapter Ring (x1)
- T2 Adapter Ring (x1)
3. Product Features
- IMX585 Color CMOS Sensor: Features a large 1/1.2-inch sensor format with 8.3MP resolution and 2.9µm pixels, suitable for planetary and EAA imaging.
- Zero Amp Glow: Designed to eliminate amplifier glow, ensuring a clean, black background even during long exposures or high gain settings.
- Back-Illuminated Structure: Utilizes advanced pixel technology for low read noise (0.7e) and a high full-well capacity (up to 38ke), enhancing sensitivity for faint objects.
- USB3.0 High-Speed Transmission: Offers plug-and-play functionality with frame rates up to 45 FPS in 12-bit mode for efficient planetary, lunar, and solar imaging.
- ST4 Guiding Port: Compatible with PHD2 and ASCOM platforms, allowing direct connection to a telescope mount for precise guiding.
- HCG Digital Noise Reduction: Significantly reduces read noise while maintaining high dynamic range for long exposures and high gain.
- AR Coating: Reduces light reflection and increases light transmission, improving image contrast and resolution.
- 1/4 Thread Interface: Allows mounting with CS lenses for all-day camera use or meteor monitoring.


4. Setup
4.1 Driver Installation
Before connecting the camera, install the necessary drivers. Drivers are typically available on the SVBONY official website. Ensure you download the correct drivers for your operating system (Windows, Linux, Raspberry Pi, Mac OS, Chrome OS).
4.2 Connecting the Camera to a Telescope
- Attach the appropriate adapter ring (e.g., 1.25-inch T-mount adapter) to the camera's front opening.
- Insert the camera, with the adapter, into the telescope's focuser. Secure it using the focuser's thumbscrews.
- For guiding, connect the ST4 guiding cable from the camera's ST4 port to your telescope mount's guiding port.

4.3 Connecting to a Computer
Connect the camera to your computer using the provided USB3.0 data cable. The camera is plug-and-play once drivers are installed.

4.4 Mounting with a Tripod (Optional)
The camera includes a 1/4-inch thread interface, allowing it to be mounted on a standard photographic tripod or used with CS lenses for wider field applications like meteor monitoring.

5. Operating Instructions
5.1 Software Compatibility
The SV705C camera is compatible with various astrophotography software, including SharpCap, FireCapture, PHD2 (for guiding), and ASCOM-compatible applications. Ensure your software is updated to the latest version for optimal performance.
5.2 Capturing Images
- Launch your preferred astrophotography software (e.g., SharpCap).
- Select the SVBONY SV705C camera from the device list.
- Adjust exposure time, gain, and other camera settings within the software. Start with shorter exposures for bright objects like the Moon and planets, and longer exposures for deep-sky objects.
- Utilize the Region of Interest (ROI) function to focus on specific areas of the celestial image, improving frame rates and reducing file sizes for planetary imaging.
- Begin capturing frames or video sequences. For planetary imaging, capturing a large number of short video frames is common, which are then stacked using specialized software.


5.3 Guiding
When using the ST4 guiding port, configure your guiding software (e.g., PHD2) to recognize the SV705C as the guide camera. Calibrate the guiding system according to the software's instructions to ensure accurate tracking during long exposures.
6. Maintenance
Proper maintenance ensures the longevity and performance of your camera.
- Cleaning the Sensor: The camera sensor is a delicate component. If dust or smudges appear on your images, clean the sensor only with specialized optical cleaning kits designed for camera sensors. Avoid touching the sensor directly with bare hands.
- Exterior Cleaning: Use a soft, dry cloth to clean the camera body. Do not use harsh chemicals or abrasive materials.
- Storage: Store the camera in a dry, dust-free environment, preferably in its original packaging or a padded case, when not in use. Avoid extreme temperatures and humidity.
7. Troubleshooting
- Camera Not Detected:
- Ensure drivers are correctly installed for your operating system.
- Check USB cable connection; try a different USB port or cable.
- Restart your computer and imaging software.
- Poor Image Quality (Noise/Glow):
- Verify camera settings (gain, exposure). While the SV705C has zero amp glow, excessive gain or very long exposures in light-polluted areas can still introduce noise.
- Ensure the sensor is clean (refer to Maintenance section).
- Guiding Issues:
- Confirm the ST4 cable is securely connected to both the camera and the mount.
- Recalibrate your guiding software (e.g., PHD2).
- Check mount tracking accuracy independently.
- Software Compatibility Issues:
- If encountering issues with specific software (e.g., FireCapture as noted in some user experiences), ensure you have the latest drivers and software versions. Contact SVBONY support if problems persist after updating.
8. Specifications
| Feature | Detail |
|---|---|
| Sensor | IMX585 Color CMOS |
| Sensor Size | 1/1.2 inches |
| Resolution | 8.3 MP (3856x2180) |
| Pixel Size | 2.9µm x 2.9µm |
| Read Noise | 0.7e |
| Full Well Capacity | Up to 38ke |
| Interface | USB3.0, ST4 Guiding Port |
| Frame Rate (12-bit) | Up to 45 FPS |
| Exposure Control | Automatic |
| Compatible Devices | Windows, Linux OS, Raspberry Pi, Mac OS, Chrome OS |
| Dimensions (L x W x H) | 5.8 x 5.8 x 3.8 cm |
| Weight | 590 grams |
| Model Number | EUF9198J |
9. Warranty and Support
SVBONY provides a lifetime warranty for the SV705C telescope camera. Additionally, a 30-day no-reason return policy is offered. Beyond the initial warranty period, maintenance services are available, with buyers responsible for associated costs.
For any inquiries or support, please contact SVBONY directly through Amazon. You can expect a response within 12 hours.