Smart Charger (Compatible with 330-Replacement Charger)
Generic Smart Charger Instruction Manual
For Segway Ninebot Kids eKickScooter C2, C2 Lite, C2 Pro, C2 Pro SE
Introduction
Thank you for choosing the Generic Smart Charger. This manual provides essential information for the safe and efficient use of your charger, designed for compatibility with Segway Ninebot Kids eKickScooter models C2, C2 Lite, C2 Pro, and C2 Pro SE. Please read this manual thoroughly before use and retain it for future reference.
Important Safety Instructions
WARNING: Failure to follow these safety instructions may result in fire, electric shock, or injury.
- Indoor Use Only: This charger is designed for indoor use in dry locations. Do not expose to rain, moisture, or extreme temperatures.
- Proper Voltage: Ensure the power outlet voltage matches the charger's input specifications (100-240V).
- Avoid Damage: Do not use the charger if the cord, plug, or casing is damaged. Inspect regularly for signs of wear.
- Ventilation: Ensure adequate ventilation around the charger during use. Do not cover the charger.
- Children and Pets: Keep the charger out of reach of children and pets. Adult supervision is required when charging children's devices.
- Disconnect Power: Always unplug the charger from the wall outlet before cleaning or when not in use.
- No Disassembly: Do not attempt to disassemble or modify the charger. Refer all servicing to qualified personnel.
- Dedicated Use: Use this charger only for its intended purpose with compatible Segway Ninebot Kids eKickScooters.
Product Overview
The Generic Smart Charger is a reliable power adapter designed to efficiently charge your compatible eKickScooter. It features an automatic stop charging function when the battery is full.
Charger Components

Image Description: This image displays the main body of the Generic Smart Charger. Key labels visible include 'Compatible with eKickScooter', 'MODEL: 330-Replacement Charger', 'INPUT: 100-240V~1.5A 50-60Hz', 'OUTPUT: 25.2V === 2A'. It also shows the LED Charging Status panel with 'Green-Charging Complete' and 'Red-Charging' indicators, along with safety certifications like CE and RoHS, and a 'CAUTION: INDOOR USE ONLY' warning. The DC output plug is also visible.
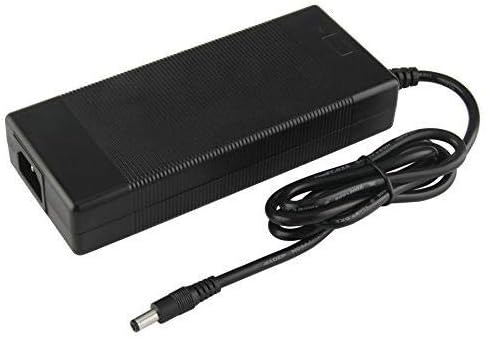
Image Description: This image shows a side view of the charger, highlighting the AC power input port where the detachable power cord connects.

Image Description: This image shows the detachable AC power cord with a standard US plug, used to connect the charger to a wall outlet.
LED Indicator

Image Description: This diagram illustrates the LED charging status. A red light indicates 'Charging', while a green light indicates 'Complete Stop Charging'.
Setup
Unpacking
Carefully remove the charger and its components from the packaging. Inspect all parts for any signs of damage. If any damage is found, do not use the charger and contact the seller.
Connecting the Charger
- Ensure the charger is placed on a stable, flat surface in a well-ventilated, dry indoor area.
- Connect the detachable AC power cord to the charger's AC input port.
- Plug the AC power cord into a standard wall outlet (100-240V).
- Connect the DC output plug of the charger to the charging port on your Segway Ninebot Kids eKickScooter.
Operating Instructions
Charging Process
- After connecting the charger to both the power outlet and the eKickScooter, the LED indicator on the charger will illuminate.
- The charger will automatically begin charging the scooter's battery.
- Once the eKickScooter's battery is fully charged, the smart charger will automatically stop charging to prevent overcharging.
- To disconnect, first unplug the DC output plug from the eKickScooter, then unplug the AC power cord from the wall outlet.
Charging Status Indicators
| LED Color | Status |
|---|---|
| Red | Charging |
| Green | Charging Complete / Standby |
Maintenance
- Cleaning: Disconnect the charger from all power sources before cleaning. Use a soft, dry cloth to wipe the exterior. Do not use liquid cleaners or solvents.
- Storage: Store the charger in a cool, dry place away from direct sunlight and moisture when not in use.
- Cord Care: Avoid bending or crimping the power cord excessively. Do not place heavy objects on the cord.
Troubleshooting
If you encounter issues with your charger, please refer to the table below for common problems and solutions.
| Problem | Possible Cause | Solution |
|---|---|---|
| Charger LED does not light up. | No power from outlet; loose connection; faulty charger. | Check wall outlet with another device. Ensure all connections are secure. If problem persists, the charger may be faulty. |
| Charger LED is green but scooter is not charging. | Scooter battery is already full; scooter charging port issue; faulty charger. | Verify scooter battery level. Check scooter's charging port for debris or damage. If the scooter is not full and connections are good, the charger or scooter may be faulty. |
| Charger sparks or emits smoke. | Internal short circuit; severe damage. | Immediately unplug the charger from the wall outlet. Do NOT use the charger again. This indicates a serious safety hazard. Contact the seller for assistance. |
| Charger stops working after a period of use. | Internal component failure; overheating. | Ensure adequate ventilation during use. If the charger fails, discontinue use and contact the seller. |
Specifications
| Feature | Detail |
|---|---|
| Model | 330-Replacement Charger (Compatible) |
| Brand | Generic |
| Manufacturer | GTXPowerr |
| Input | 100-240V~1.5A, 50-60Hz |
| Output | 25.2V === 2A |
| Current Rating | 2 Amps |
| Item Weight | 10.2 ounces |
| Package Dimensions | 6.02 x 4.13 x 1.65 inches |
| ASIN | B0BJ1PSBVM |
| UPC | 689340681645 |
| Date First Available | June 23, 2023 |
Warranty and Support
Specific warranty information for this Generic Smart Charger is not provided in this manual. For warranty claims, technical support, or any product-related inquiries, please contact the seller or manufacturer directly through your purchase platform.
Ask a question about this manual
Ask about setup, troubleshooting, compatibility, parts, safety, or missing instructions. Manuals+ will review the question and use this page’s manual context to help answer it.