1. Introduction
This manual provides detailed instructions for the installation, operation, and maintenance of your DOUXURY Wireless Backup Camera System. This system is designed to enhance driving safety by providing clear rear and side views for various large vehicles.
2. Product Features
- 3 Channel Monitor System: Offers 1-full-screen, 2-split-screen, and 4-split-screen modes for comprehensive viewing. Includes two side view cameras and one rear view camera.
- Upgraded Digital Wireless Signal: Provides a stable signal range of up to 825 feet in open areas and up to 320 feet within vehicle range, ensuring minimal lag.
- Touch Buttons & HD 1080P Display: Features durable touch buttons for extended lifespan and a 1080p HD display for bright, clear images day and night.
- DVR Record Function: Includes a loop recording function to capture footage, compatible with RVs, trucks, buses, trailers, campers, and semi-trucks.
- IP69 Waterproof Cameras: Utilizes upgraded sealing technology and all-metal construction for IP69 waterproof rating, capable of withstanding extreme weather conditions without fogging.
- Easy Installation: Designed for straightforward power connection to the monitor and cameras, simplifying the setup process for various vehicles.
3. What's in the Box
- HD Monitor x 1
- Side View Camera x 2
- Rear View Camera x 1
- Power Cable x 4
- Antenna x 7
- Cigarette Lighter Charger x 1
- "U" Shape Bracket x 1
- Monitor Bracket x 1
- Sunshade x 1
- User Manual x 1
- Other Parts (screws, etc.)
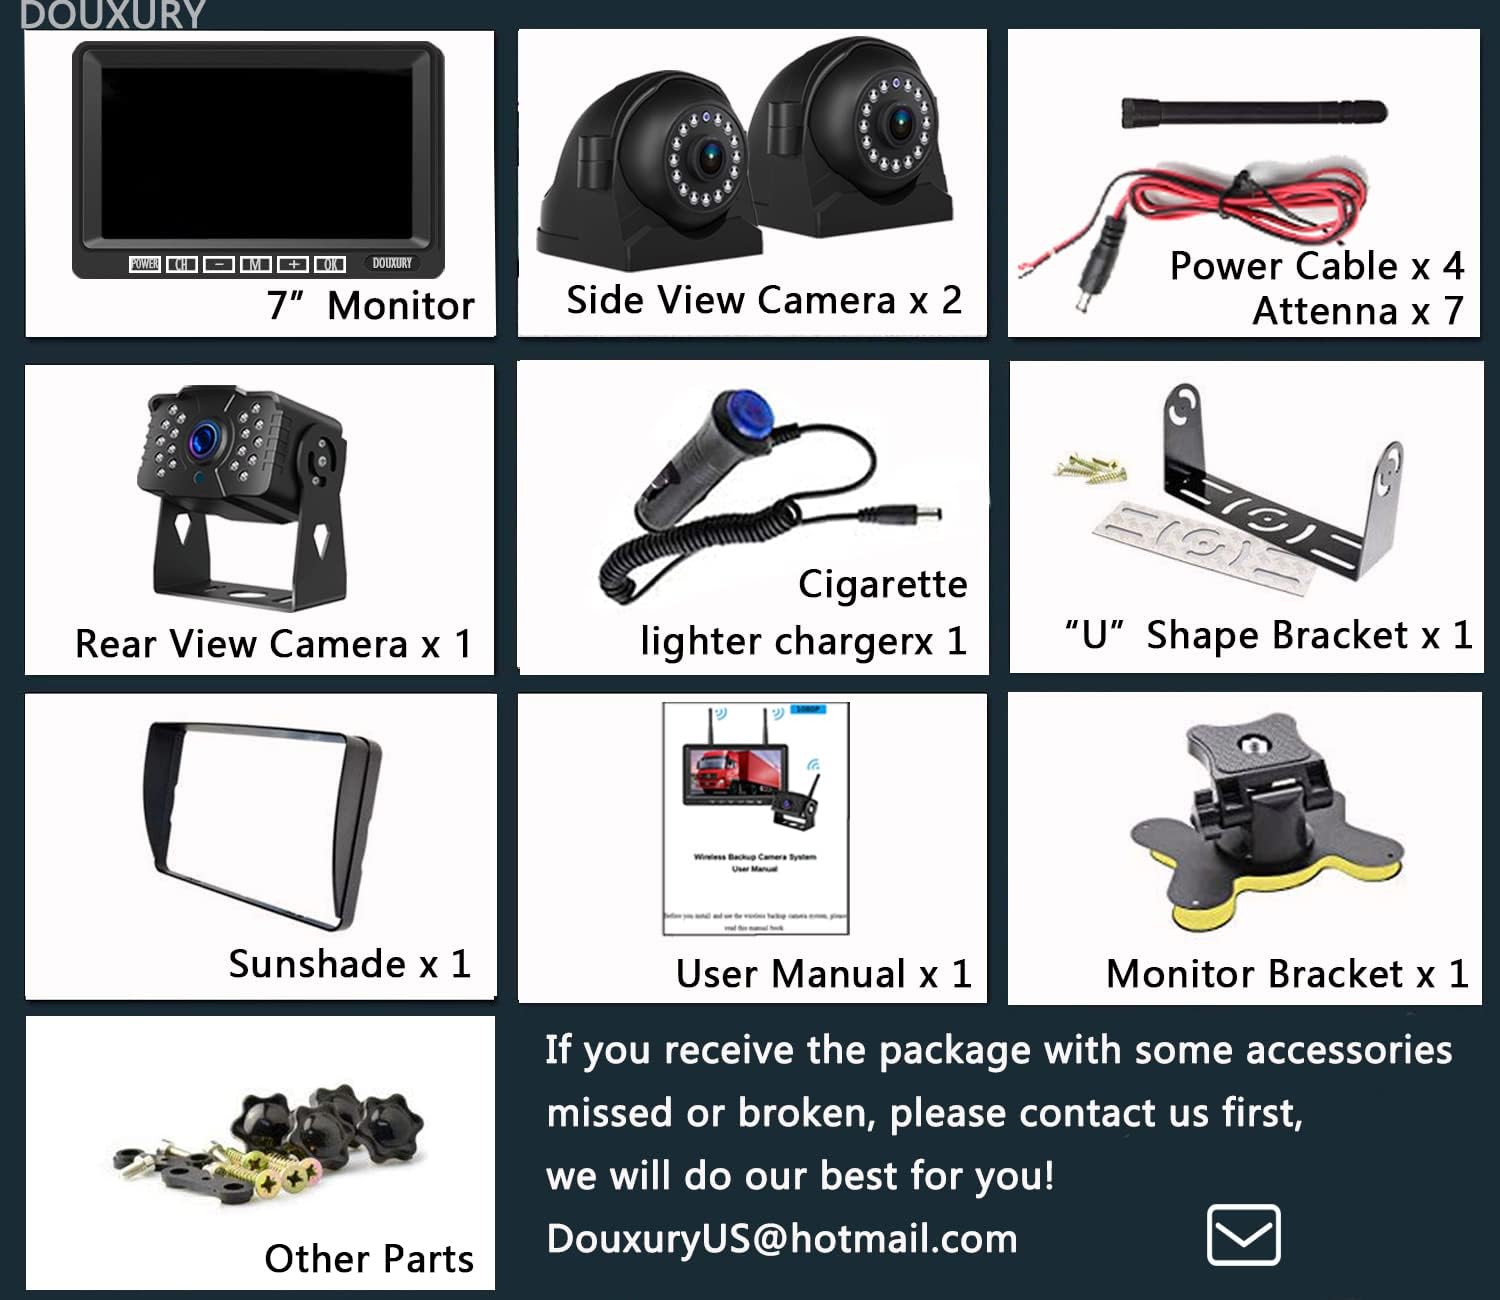
Image: All components included in the DOUXURY Wireless Backup Camera System package.
4. Setup Instructions
4.1 Powering the System
- Connect the monitor to power using the provided cigarette lighter charger or a direct 12-36V DC power source.
- Connect each camera to a 12-36V DC power source. For rear cameras, this is often connected to the taillight power.

Image: Diagram showing how to connect the monitor via cigarette lighter charger and cameras to a 12-36V DC power source, typically the taillight for the rear camera.
4.2 Camera Installation
The cameras can be installed in various locations on your vehicle (RV, truck, trailer, camper, bus, 5th wheel) to provide optimal viewing angles. Ensure antennas are securely attached to both cameras and the monitor for best signal reception.

Image: Example installation of the wireless cameras on an RV and truck, showing placement for rear and side views.
4.3 Furrion Pre-Wired RVs
For Furrion pre-wired RVs, an additional bracket adapter and pigtail wire may be required. Please contact customer support for assistance with these specific components.
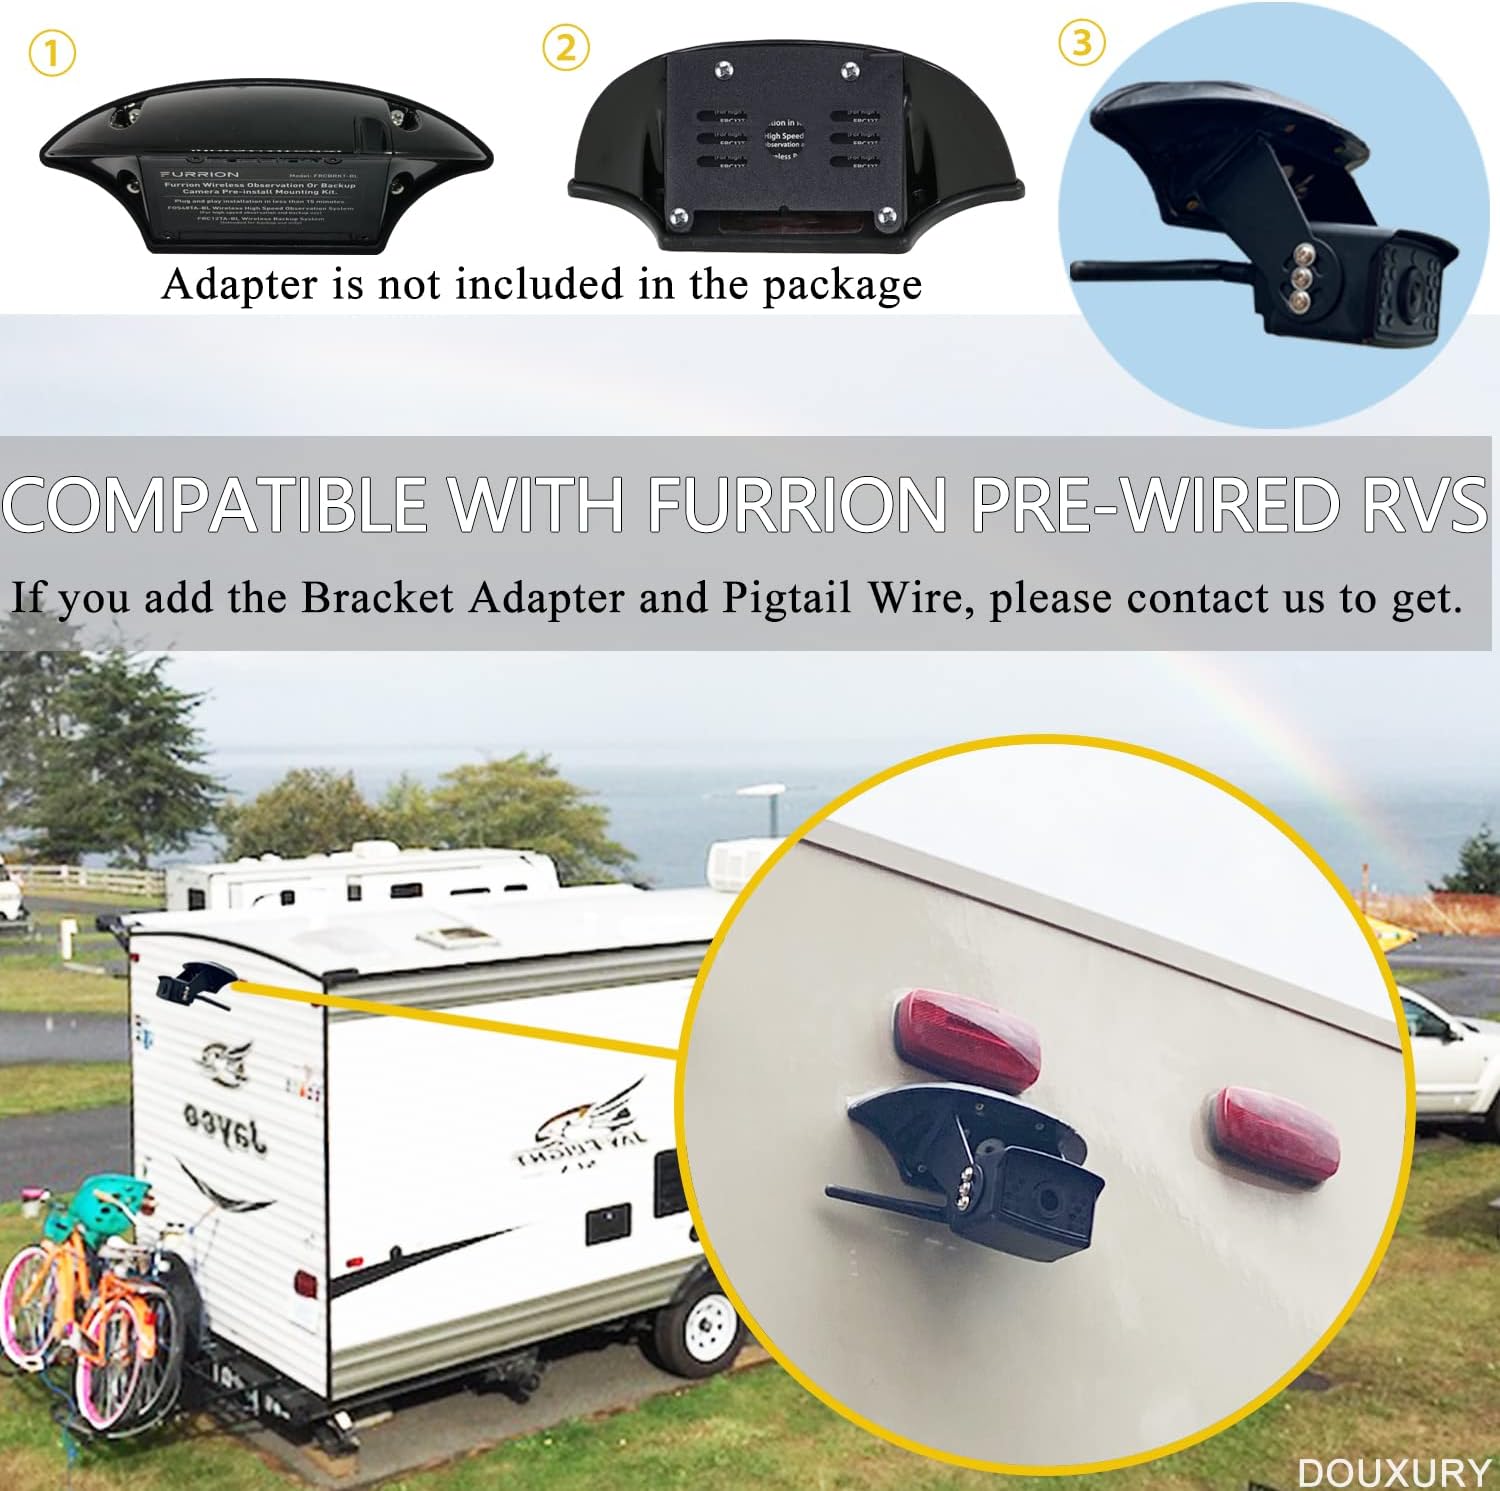
Image: Illustration of a camera mounted on a Furrion pre-wired RV, noting that an adapter is not included in the standard package.
4.4 SD Card Insertion
To enable the DVR recording function, insert a compatible SD card into the designated slot on the monitor. Ensure the card is inserted correctly until it clicks into place.
5. Operating Instructions
5.1 Monitor Display Modes
The 7-inch monitor supports multiple display modes:
- Full Screen Mode: Displays a single camera view.
- 2-Split Screen Mode: Displays two camera views simultaneously.
- 4-Split Screen Mode (Quad): Displays all four camera views simultaneously (if four cameras are connected).
Use the 'CH' button on the monitor to cycle through the available camera channels and 'M' button to change display modes.

Image: The monitor interface showing different split-screen configurations for multiple camera views.
5.2 Parking Assist Lines
The system features adjustable parking assist lines to aid in maneuvering. These lines can be turned on/off, and their position (up/down, left/right) and width can be adjusted via the monitor settings.

Image: The monitor display showing adjustable parking assist lines on a road view.
5.3 Image Mirror & Flip
The camera images can be mirrored or flipped to suit installation orientation and user preference. This setting is accessible through the monitor's menu.

Image: The monitor displaying options for normal, mirror, flip, and flip & mirror image orientations.
5.4 DVR Recording
With an SD card inserted, the system automatically records footage in a loop. Recorded videos can be played back directly on the monitor.
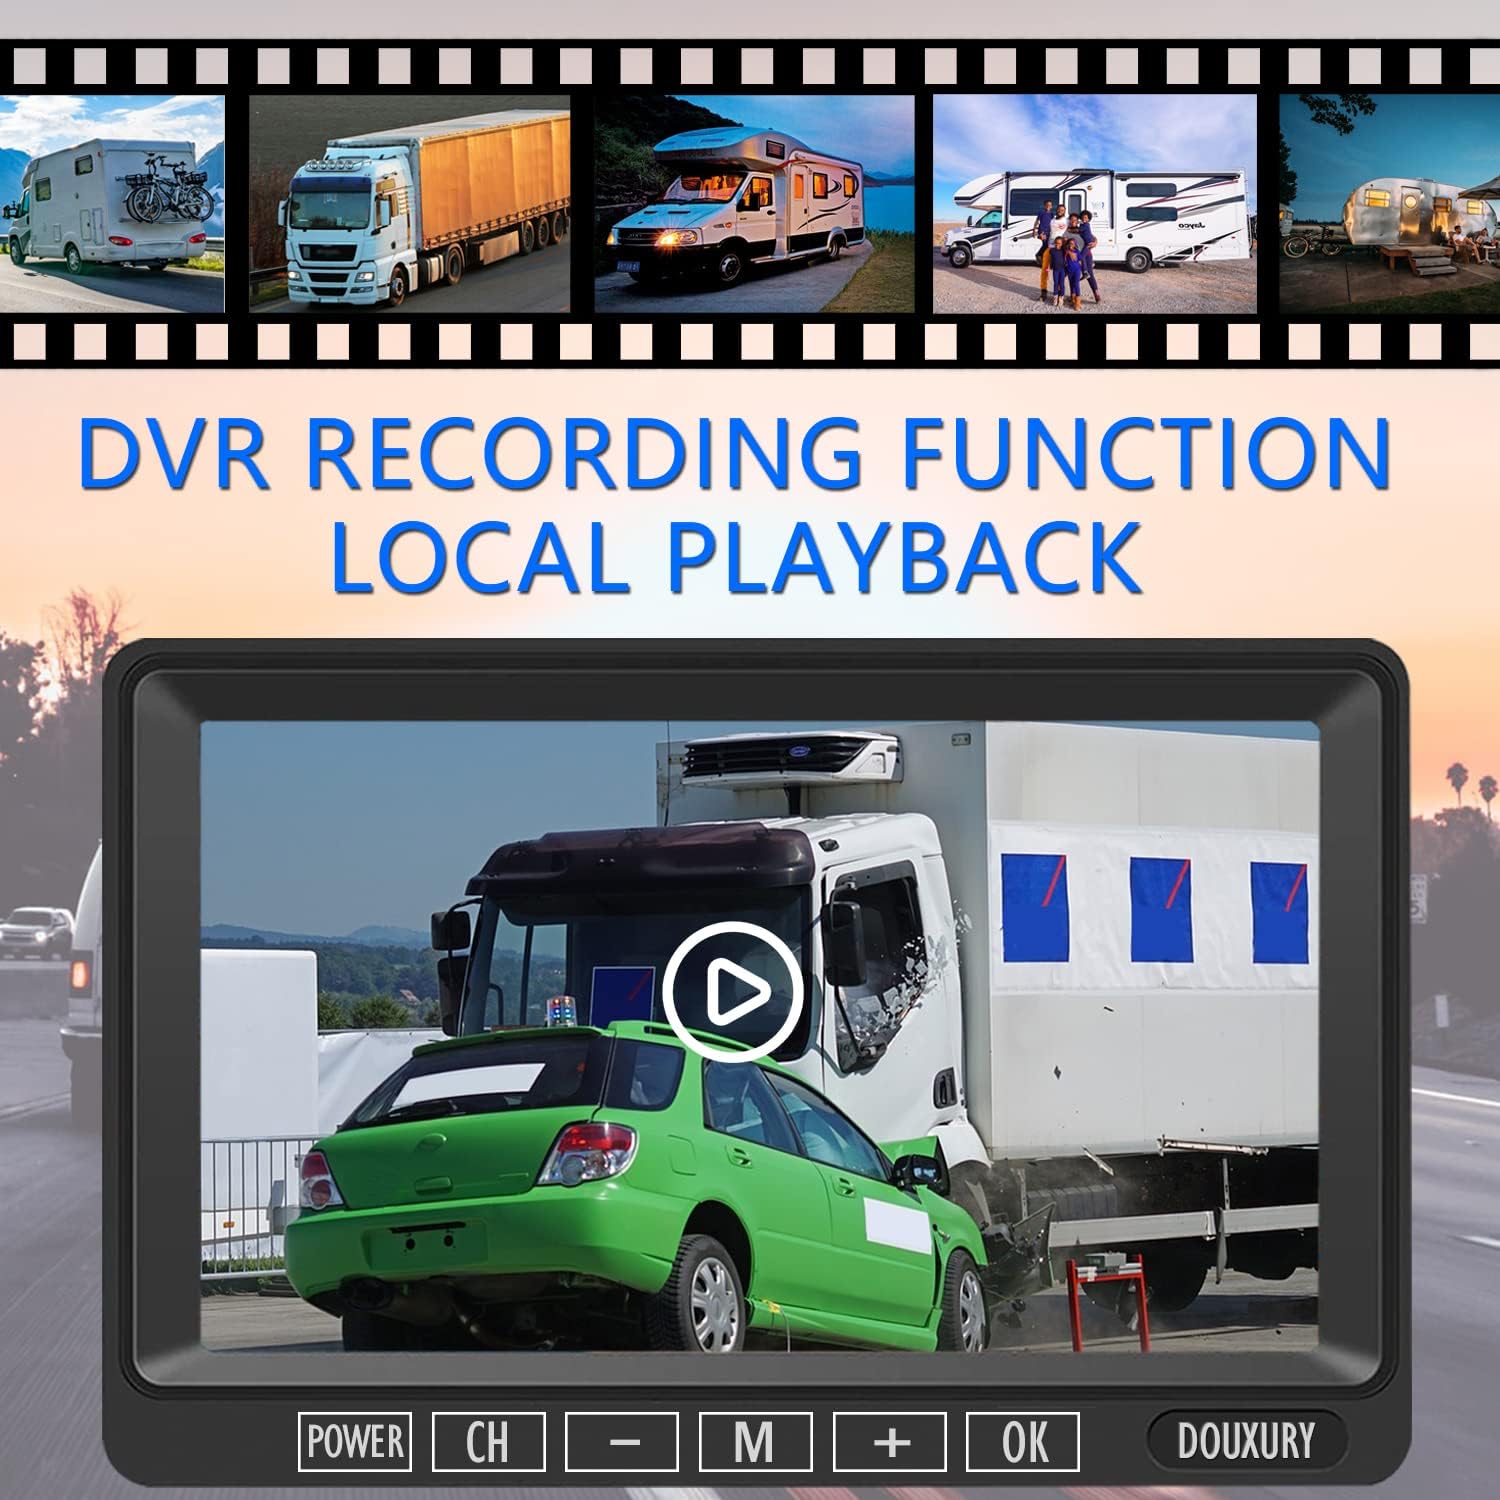
Image: The monitor showing a video playback interface, indicating the DVR recording function.
6. Maintenance
- Cleaning: Use a soft, damp cloth to clean the monitor screen and camera lenses. Avoid abrasive cleaners or solvents.
- Cable Inspection: Periodically check all power cables and connections for wear or damage. Ensure they are securely fastened.
- Antenna Care: Ensure camera and monitor antennas are upright and unobstructed for optimal signal strength.
- Storage: If storing the vehicle for an extended period, consider disconnecting the system from power.
7. Troubleshooting
- No Signal:
- Ensure all cameras and the monitor are powered on.
- Check all power connections for looseness or damage.
- Verify that camera antennas are securely attached and positioned correctly.
- If the vehicle is very long, consider the signal range (up to 320 feet within vehicle range). Obstructions can reduce range.
- Try re-pairing the cameras with the monitor if the issue persists.
- Flickering Image:
- Check for potential sources of interference (e.g., other wireless devices, strong electrical fields).
- Ensure antennas are properly connected and positioned.
- DVR Not Recording:
- Ensure an SD card is correctly inserted into the monitor.
- Check if the SD card is full; format it if necessary (this will erase all data).
- Verify the DVR function is enabled in the monitor settings.
8. Specifications
| Feature | Detail |
|---|---|
| Brand | DOUXURY |
| Screen Size | 7 Inches |
| Product Dimensions | 9"L x 7"W x 4"H |
| Compatible Devices | RV, Semi, Box Truck, Trailer |
| Installation Type | Surface Mount |
| Voltage | 12 Volts (System supports 12-36V DC) |
| Optical Sensor Technology | CMOS |
| Lens Type | Wide Angle |
| Real Angle of View | 170 Degrees |
| Connector Type | Wireless |
| Lux Rating | 1 Lux |
| Display Technology | LCD |
| Video Capture Resolution | 1080p |
9. Warranty and Support
9.1 Warranty Information
This DOUXURY product comes with a 365-day warranty from the date of purchase. Please retain your proof of purchase for warranty claims.
9.2 Customer Support
For any questions, technical assistance, or warranty inquiries, please contact DOUXURY customer support:
- Email: DouxuryUS@hotmail.com
When contacting support, please provide your product model (3CAM) and purchase details for faster service.