1. Introduction
Thank you for choosing the Eaglerich 2Din Car Radio. This device integrates a 7-inch touchscreen, Android 10.0 operating system, GPS navigation, WiFi, FM radio, Bluetooth connectivity, and supports smartphone mirroring. This manual provides essential information for installation, operation, and maintenance to ensure optimal performance and user experience.
2. Safety Information
- Read all instructions carefully before installation and operation.
- Installation should be performed by a qualified professional to prevent damage to the unit or vehicle.
- Do not operate the device in a manner that distracts you from driving. Always prioritize road safety.
- Avoid exposing the unit to extreme temperatures, direct sunlight for prolonged periods, or excessive moisture.
- Use only specified power sources (DC 12V - 14.4V).
- Do not attempt to disassemble or modify the unit. This may void the warranty and cause damage.
3. Package Contents
Verify that all items are present in the package:
- 1 x In-car Android GPS Multimedia Player
- 1 x ISO Wiring (optional, depending on purchase variant)
- 1 x 12LED Camera (optional, depending on purchase variant)
- 1 x Android DVR (optional, depending on purchase variant)
- 2 x USB Data Cable
- 1 x GPS Antenna
- 1 x RCA Cable
- 1 x Power Cable
- 1 x User Manual
4. Product Overview
The Eaglerich 2Din Car Radio features a 7-inch high-definition digital display and a user-friendly interface. Key components include the touchscreen, physical buttons (if present), USB ports, microphone input, and reset button.

5. Setup and Installation
Professional installation is recommended for this device. Ensure the vehicle's power is disconnected before beginning installation.
5.1 Wiring Connections
Connect the power cable, RCA cables, USB cables, and GPS antenna according to the provided wiring diagram (typically found in the included user manual or on the unit itself). Ensure all connections are secure to prevent intermittent issues.
5.2 Rear View Camera Installation (Optional)
If your package includes a 12LED camera, install it at the rear of your vehicle. Connect the camera's video output to the designated rear video input on the car radio. Connect the camera's power to the vehicle's reverse light circuit so it activates automatically when shifting into reverse.
5.3 Android DVR Installation (Optional)
If your package includes an Android DVR, connect it to one of the USB ports on the car radio. Follow the DVR's specific instructions for mounting and software setup within the Android system.

6. Operating Instructions
6.1 Basic Operation
- Power On/Off: Press and hold the power button (if available) or turn on your vehicle's ignition.
- Touchscreen: Navigate the interface by tapping, swiping, and pinching on the 7-inch HD display.
- Volume Control: Adjust volume using the on-screen controls or steering wheel controls.
6.2 Android 10.0 System
The unit runs on Android 10.0, providing access to various applications and settings. The home screen displays frequently used apps and widgets. You can customize the layout and download additional apps from the Google Play Store (requires internet connection).
6.3 GPS Navigation
The built-in GPS receiver supports online and offline maps. To use navigation:
- Ensure the GPS antenna is properly connected and positioned for optimal signal reception.
- Open the pre-installed navigation app (e.g., Google Maps) or download your preferred navigation app.
- Follow the on-screen prompts to set your destination and start navigation.
6.4 WiFi Connection
Connect the car radio to a WiFi network or mobile hotspot to access online features, download apps, and browse the internet.
- Go to Settings > Network & Internet > Wi-Fi.
- Turn on Wi-Fi and select your desired network from the list.
- Enter the password if prompted and connect.

6.5 Bluetooth Connectivity
The built-in Bluetooth 4.4 module supports hands-free calling, phonebook synchronization, and A2DP music streaming.
- Go to Settings > Connected devices > Bluetooth.
- Turn on Bluetooth on both the car radio and your mobile device.
- Search for available devices on your mobile phone and select the car radio (e.g., "Eaglerich Car BT").
- Confirm the pairing code if prompted.
- Once paired, you can make/receive calls and stream audio.

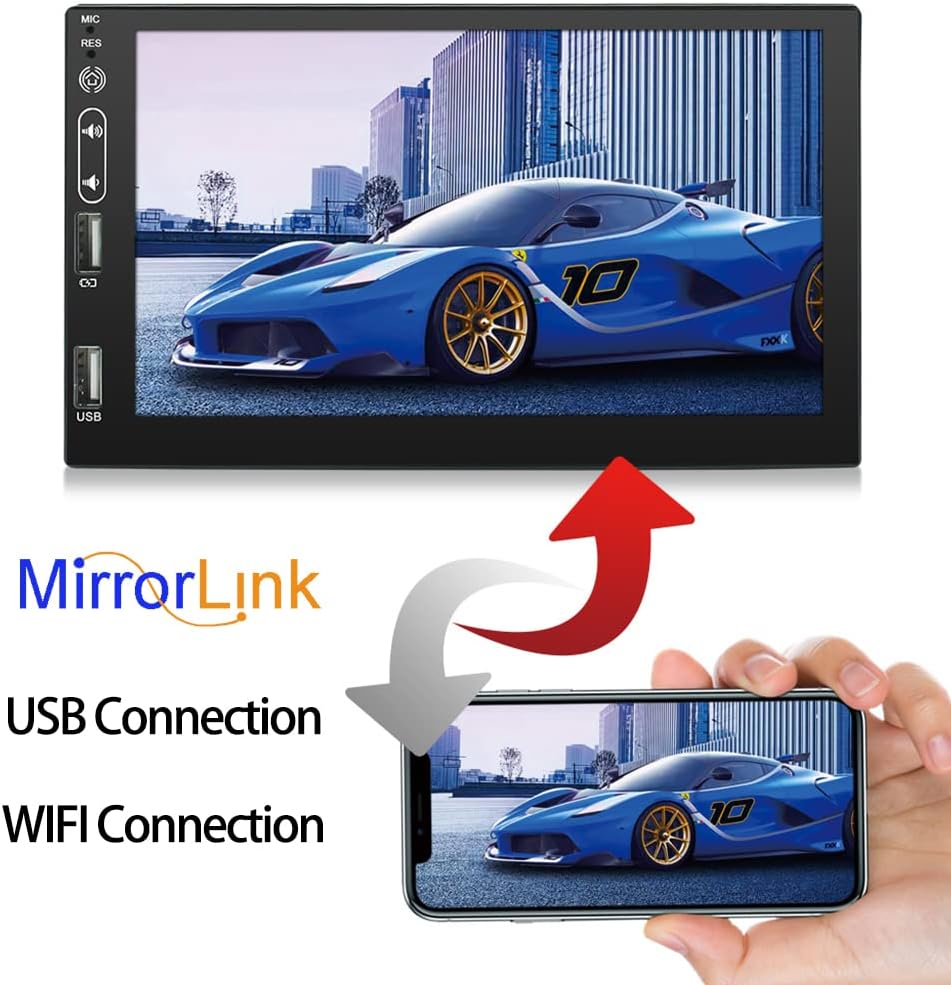
6.6 Mirror Link
The Mirror Link function allows you to project your Android phone's screen onto the car radio display, enabling dual control.
- Connect your Android phone to the car radio using a USB data cable.
- Follow the on-screen instructions on both the car radio and your phone to establish the Mirror Link connection.
- Once connected, your phone's screen will be mirrored, and you can control it from the car radio's touchscreen.
6.7 FM Radio
Access the FM radio function to listen to your favorite stations.
- Open the Radio application from the main menu.
- Use the on-screen controls to scan for stations, manually tune, or select from preset stations.
- The unit supports 18 preset stations.

6.8 Steering Wheel Control
If your vehicle supports steering wheel controls, you can configure them to operate the car radio for convenience and safer driving. Refer to the unit's settings for steering wheel control learning/mapping.
6.9 Rear View Camera Function
When a compatible rear view camera is connected and the vehicle is shifted into reverse, the car radio will automatically display the reverse image on the screen, aiding in parking and maneuvering.

6.10 Multimedia Playback
The unit supports various media formats for audio and video playback from USB drives or internal storage.
- Supported Media Formats: AVI, ASF, MKV, FLV, RMVB, WMV, RM, MP3, MP4, MOV, MPEG, VOB.
- Insert a USB drive containing media files into one of the USB ports.
- Open the appropriate media player app (e.g., Video, Music) to browse and play your files.

7. Maintenance
- Cleaning the Screen: Use a soft, lint-free cloth to gently wipe the touchscreen. For stubborn smudges, slightly dampen the cloth with water or a screen cleaner designed for electronics. Do not use abrasive cleaners or solvents.
- General Cleaning: Keep the unit free from dust and debris. Use a soft brush or compressed air to clean around buttons and ports.
- Software Updates: Periodically check for software updates through the system settings or the manufacturer's website to ensure optimal performance and access to new features.
8. Troubleshooting
If you encounter issues, refer to the following common problems and solutions:
| Problem | Possible Cause | Solution |
|---|---|---|
| Unit does not power on. | Incorrect wiring; Blown fuse; Vehicle power issue. | Check power connections and fuses. Ensure vehicle ignition is on. Consult a professional for wiring inspection. |
| No sound. | Volume too low; Mute activated; Speaker wiring issue. | Increase volume. Check if mute is active. Verify speaker connections. |
| GPS signal lost or inaccurate. | GPS antenna improperly connected or obstructed. | Ensure GPS antenna is securely connected and has a clear view of the sky. Relocate antenna if necessary. |
| Bluetooth connection unstable. | Interference; Device too far; Pairing issue. | Ensure devices are within range. Re-pair the Bluetooth device. Avoid other strong wireless signals. |
| Touchscreen unresponsive. | Temporary software glitch. | Press the 'RES' (Reset) button with a thin object (e.g., paperclip). If issue persists, power cycle the unit. |
| Rear view camera not displaying. | Camera wiring issue; Camera power issue; Incorrect input selected. | Check camera video and power connections. Ensure the vehicle is in reverse. |
9. Specifications
| Feature | Specification |
|---|---|
| Model Number | 9711 |
| Operating System | Android 10.0 |
| CPU | 4 Cores (Q92*4) |
| RAM + ROM | 2GB RAM + 16GB ROM |
| Display Size | 7 Inches |
| Display Resolution | 1080*400 HD Digital Display |
| Amplifier Output | 4x50 W |
| FM Frequency Range | 87.5 - 108 MHz |
| Bluetooth Version | 4.4 |
| Connectivity | Bluetooth, Wi-Fi |
| Input Voltage | DC 12V - 14.4V |
| Net Weight | 920g |
| Product Dimensions | 17.8 x 4.5 x 10.2 cm |
| Human Interface Input | Buttons, Touchscreen |
10. Warranty and Support
For warranty information and technical support, please refer to the documentation provided at the time of purchase or contact your retailer. Keep your purchase receipt as proof of purchase for warranty claims.