
1. Product Overview
This manual provides essential information for the proper installation, operation, and maintenance of your POWER PRODUCTS Fuel Tank 154 CARB. This fuel tank is designed for compatibility with various gas generators, including specific models from Predator, Pulsar, Champion, and Sigma. It features a 5.7L (1.5 Gallon) capacity and includes a vent for proper fuel system function.
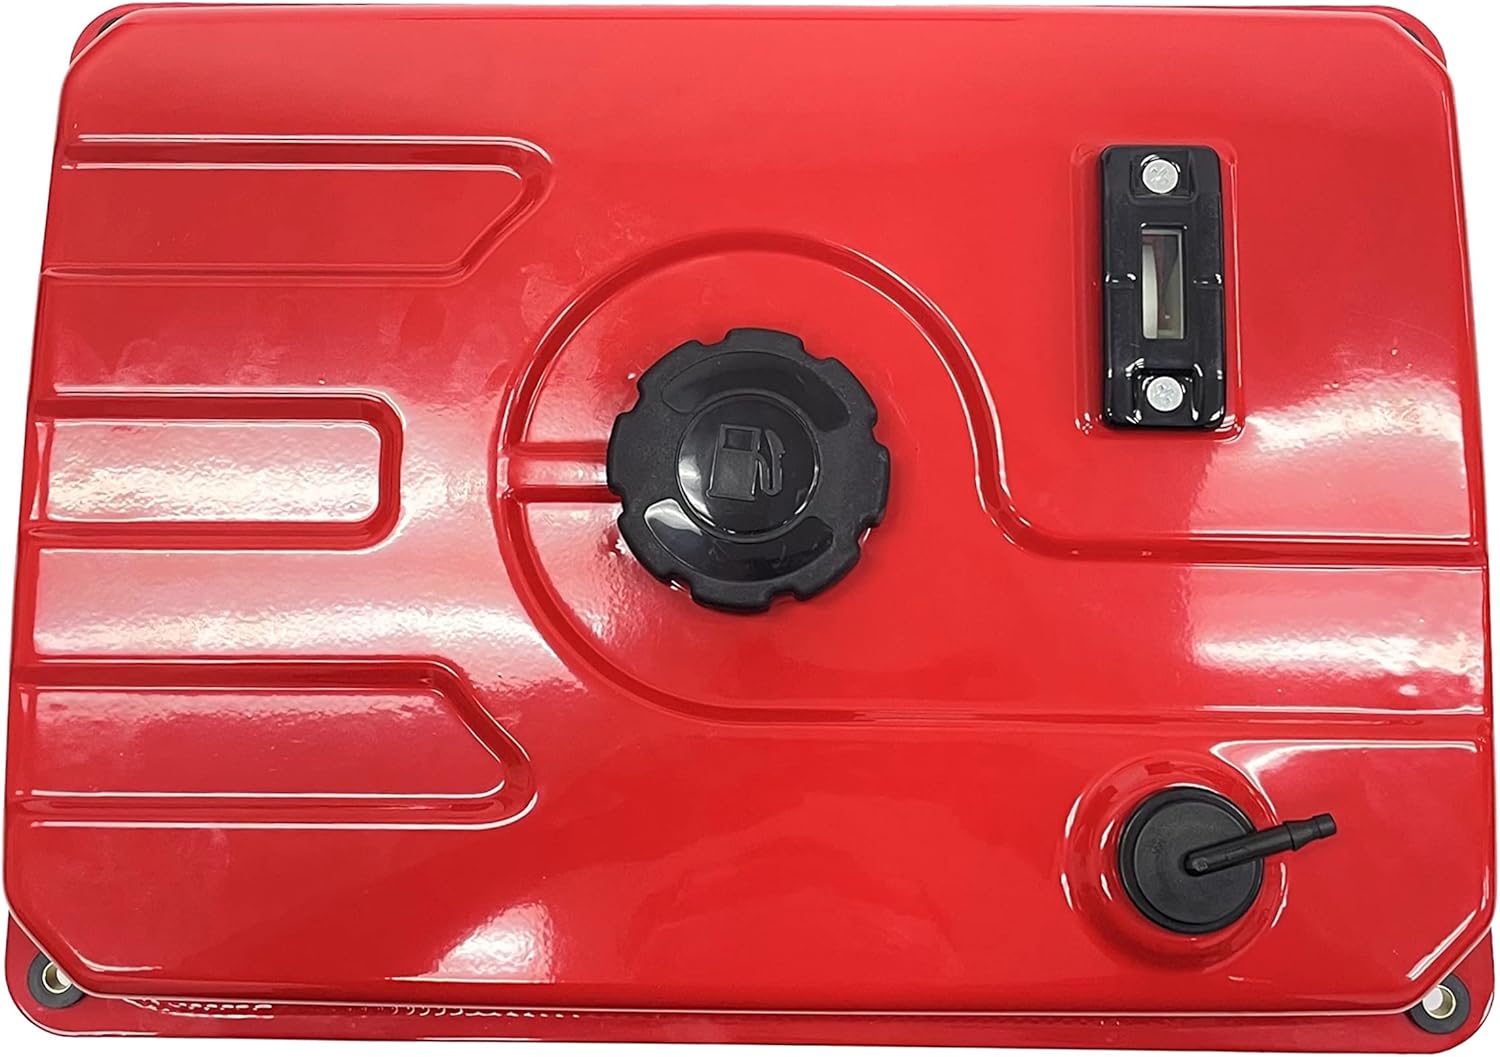
Figure 1: Top view of the POWER PRODUCTS Fuel Tank 154 CARB, showing the fuel cap and integrated fuel gauge.
Key Features:
- Capacity: 5.7 Liters (1.5 Gallons)
- Integrated fuel gauge for easy level monitoring.
- Includes a vent for proper fuel system operation.
- Compatible with various generator models (e.g., Predator 1800/1400 Watts, Pulsar 3HP PG2000/PG2200, Champion CPE 1200W/1500W, Sigma Rural King Tool Shed 1800/2000W).
2. Safety Information
Always prioritize safety when handling fuel and fuel system components. Failure to follow these instructions could result in fire, explosion, serious injury, or death.
- Fuel Handling: Gasoline is highly flammable. Always refuel in a well-ventilated area, away from open flames, sparks, or heat sources.
- Ventilation: Ensure adequate ventilation when working with fuel tanks to prevent the buildup of flammable vapors.
- Personal Protective Equipment: Wear appropriate safety glasses and gloves when handling fuel or performing maintenance.
- Spill Prevention: Use a funnel when filling the tank to prevent spills. Clean up any spills immediately.
- Compatibility Check: Before installation, verify that this fuel tank is compatible with your specific generator model by checking measurements and specifications.
- Disposal: Dispose of old fuel and fuel system components according to local regulations.
3. Package Contents
The package includes the following components:

Figure 2: Exploded view of the fuel tank assembly, showing the tank, fuel valve, fuel cap, and vent cap.
- 1 x Fuel Tank Assembly (Red Tank with integrated fuel gauge)
- 1 x Fuel Shut-off Valve
- 1 x Fuel Cap
- 1 x Vent Cap
- 1 x Fuel Filter (internal to tank, or separate if applicable)

Figure 3: Close-up view of the fuel filter, which helps prevent debris from entering the fuel system.
4. Installation
Follow these steps to properly install the fuel tank and its components. Refer to your generator's specific manual for detailed mounting instructions.
4.1. Fuel Valve Installation
The fuel shut-off valve controls the flow of fuel from the tank to the carburetor.
- Locate the threaded opening on the underside of the fuel tank, typically near one corner.
- Carefully thread the fuel shut-off valve into this opening. Ensure it is hand-tightened first, then use an appropriate wrench to secure it, being careful not to overtighten.
- Ensure the valve's outlet points in the correct direction for connection to your generator's fuel line.
Video 1: Demonstration of installing the fuel shut-off valve, fuel cap, and vent cap onto the fuel tank.
4.2. Fuel Cap and Vent Cap Installation
The fuel cap seals the main fuel opening, and the vent cap allows air into the tank as fuel is consumed, preventing a vacuum.
- Place the fuel cap over the main fuel opening on the top of the tank and turn clockwise until securely tightened.
- Insert the vent cap into its designated opening, typically a smaller hole near the fuel cap. Ensure it is seated firmly.
4.3. Mounting the Fuel Tank
The fuel tank is designed to be mounted securely to your generator frame. Always ensure the tank is stable and level.
- Refer to your generator's instruction manual for specific mounting points and hardware requirements.
- Ensure all mounting bolts are tightened to the manufacturer's specifications.
- Connect the fuel line from the fuel shut-off valve to the carburetor. Secure connections with appropriate clamps.

Figure 4: Fuel tank dimensions, including overall length (16-9/64 inches), overall width (11-13/16 inches), center-to-center length (14-61/64 inches), and center-to-center width (10-5/8 inches). Verify these measurements against your generator's requirements.
5. Operation
5.1. Filling the Fuel Tank
- Ensure the generator is turned off and cooled down before refueling.
- Open the fuel cap.
- Using a clean funnel, slowly pour fresh, unleaded gasoline into the tank. Do not overfill; leave some space for fuel expansion.
- Securely replace the fuel cap and ensure the vent cap is properly seated.
- Wipe away any spilled fuel immediately.
5.2. Checking Fuel Level
The fuel tank is equipped with an integrated fuel gauge for convenient monitoring of fuel levels.
- Visually inspect the fuel gauge located on the top surface of the tank.
- Refuel as necessary to prevent the generator from running out of fuel during operation.

Figure 5: Side view of the fuel tank, highlighting the fuel gauge for easy monitoring.
6. Maintenance
Regular maintenance ensures the longevity and safe operation of your fuel tank.
- Inspection: Periodically inspect the fuel tank for any signs of damage, cracks, or leaks. Check the fuel lines and connections for wear or deterioration.
- Cleaning: Keep the exterior of the fuel tank clean. Avoid using harsh chemicals that could damage the finish.
- Fuel Filter: The fuel tank includes an internal fuel filter. If fuel flow issues occur, inspect and clean or replace the filter as needed.
- Storage: If storing the generator for an extended period, drain the fuel tank or use a fuel stabilizer to prevent fuel degradation.
7. Troubleshooting
This section addresses common issues you might encounter with the fuel tank.
| Problem | Possible Cause | Solution |
|---|---|---|
| Fuel Leakage | Loose connections, damaged tank, faulty fuel valve. | Tighten all connections. Inspect the tank for cracks. Replace damaged components. |
| No Fuel Flow to Generator | Fuel valve closed, clogged fuel filter, empty tank. | Open the fuel valve. Check and clean/replace the fuel filter. Refill the tank. |
| Fuel Gauge Malfunction | Sensor issue, physical damage. | Ensure the tank is level. If persistent, the gauge may need replacement. |
8. Specifications
| Attribute | Detail |
|---|---|
| Brand | POWER PRODUCTS |
| Model | Fuel Tank 154 CARB |
| Fuel Type | Gasoline |
| Capacity | 5.7 Liters (1.5 Gallons) |
| Overall Dimension (L x W x H) | 16-9/64 x 11-13/16 x 4-21/64 inches |
| Center to Center (L x W) | 14-61/64 x 10-5/8 inches |
| Item Weight | 5 pounds |
| Exterior Finish | Alloy Steel |
| UPC | 638457680317 |


