
ZNIARAKL 254KM+M105+W4+Z1
ZNIARAKL 4K Video Camera Camcorder User Manual
Model: 254KM+M105+W4+Z1
Introduction
This user manual provides comprehensive instructions for operating your ZNIARAKL 4K Video Camera Camcorder. Designed for amateur use, this camcorder offers a 13-megapixel CMOS image sensor, 48.0 MP image resolution, and a 3.0-inch 270-degree rotatable touch screen. It features 16X digital zoom, IR night vision, Wi-Fi connectivity, and can function as a webcam. Please read this manual carefully before use to ensure proper operation and to maximize your experience with the device.
Important Note: This camcorder does not support autofocus or optical zoom. The lens is fixed, and a shooting distance above 1.5m/4ft is recommended for clear images and videos. A Class 10 or higher SD card (4-128GB) is required and not included.
Package Contents
Upon opening the package, please verify that all the following items are included:
- 4K Video Camera Camcorder
- Handheld Stabilizer
- External Microphone
- Lens Hood
- Remote Control
- 2 x Rechargeable Lithium Batteries
- USB Cable
- HDMI Cable
- Charging Adapter
- User Manual
- Carrying Case
- Lens Cover
- Microphone Cable
- Camcorder Bag

Figure 1: All included accessories for the ZNIARAKL 4K Video Camera Camcorder.
Setup
1. Charging the Batteries
Insert the included rechargeable lithium-ion batteries into the camera or an external charger (if provided). Connect the charging adapter to a power source. The indicator light will show charging status. Ensure batteries are fully charged before first use. One full-charged battery provides approximately 90-150 minutes of continuous use.
2. Inserting the Memory Card
Locate the SD card slot on the camcorder. Insert a Class 10 or higher SD card (4-128GB, not included) until it clicks into place. For first-time use, it is highly recommended to format the memory card directly through the camera's settings menu to ensure compatibility and optimal performance.
3. Attaching the External Microphone
Slide the external microphone onto the hot shoe mount located on top of the camcorder. Connect the microphone cable to the MIC input jack on the camcorder. The microphone is designed to effectively reduce background and wind noise, with adjustable sensitivity from -10dB to +20dB.

Figure 2: Attaching the external stereo microphone.
4. Assembling the Handheld Stabilizer
Attach the camcorder to the foldable handheld stabilizer. This accessory helps maintain camera stability during recording, making it ideal for low-angle shots and extending filming distance. The stabilizer offers multi-angle use and 360-degree rotation for versatile shooting.

Figure 3: Handheld stabilizer assembly and usage.
5. Attaching the Lens Hood
Secure the lens hood to the front of the camcorder lens. The lens hood helps block excess light, reducing glare and improving overall color and contrast in your recordings. It also provides protection for the camcorder lens.
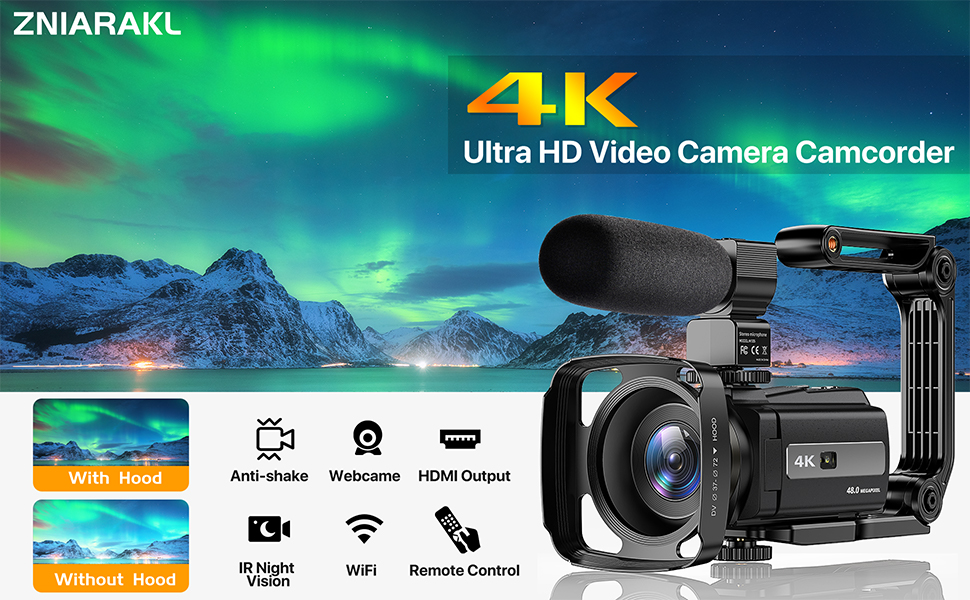
Figure 4: Camcorder with and without lens hood.
Operating Instructions
1. Powering On/Off
Press and hold the power button to turn the camcorder on or off. The 3.0-inch touch screen will illuminate upon startup.
2. Recording Videos and Taking Photos
Navigate through the touch screen interface to select video recording or photo capture mode. Press the record button to start/stop video recording or the shutter button to take a photo. The camcorder supports 4K Ultra HD video and 48.0 MP still images.

Figure 5: Key features and specifications for video and photo capture.
3. Using Wi-Fi Functionality
Enable Wi-Fi in the camcorder's settings. Download the "RoadCam" application on your Android or iOS smartphone/tablet. Connect your mobile device to the camcorder's Wi-Fi network. This allows for remote viewing, image capture, video shooting, browsing, transferring, and sharing media, as well as remote control of the camera by the app.

Figure 6: Wi-Fi connectivity and app usage.
4. IR Night Vision
To activate infrared (IR) night vision, press the 'OK' button on the camcorder. The built-in infrared LED light allows you to capture clear black and white photos or videos in low-light or dark conditions.

Figure 7: IR Night Vision capability.
5. Webcam Function and HDMI Output
Connect the camcorder to your PC via the USB cable. Select 'USB Camera' mode on the camcorder to use it for video chatting or live streaming. For viewing content on a larger screen, connect the camcorder to a TV using an HDMI cable.

Figure 8: Webcam and HDMI output functions.
6. Using the Remote Control
The included 2.4G wireless remote control allows you to operate the camcorder from up to 60 feet away in any direction. Ensure the remote has a working battery (a review mentions it might come with a dead battery, so check and replace if necessary).
7. Special Features
The camcorder includes several advanced features accessible via the touch screen menu:
- Anti-shake: Helps stabilize footage, reducing blur from camera movement.
- Pause Function: Allows you to pause and resume recording within the same video file.
- Time-lapse: Captures images at set intervals to create a sped-up video.
- Slow Motion: Records video at a higher frame rate for slow-motion playback.
- Continuous Shooting: Takes multiple photos in quick succession.
- Face Capture/Detection: Optimizes settings for faces in the frame.
- Self-timer: Delays photo capture for self-portraits or group shots.
- Beauty Function: Enhances facial features in photos/videos.
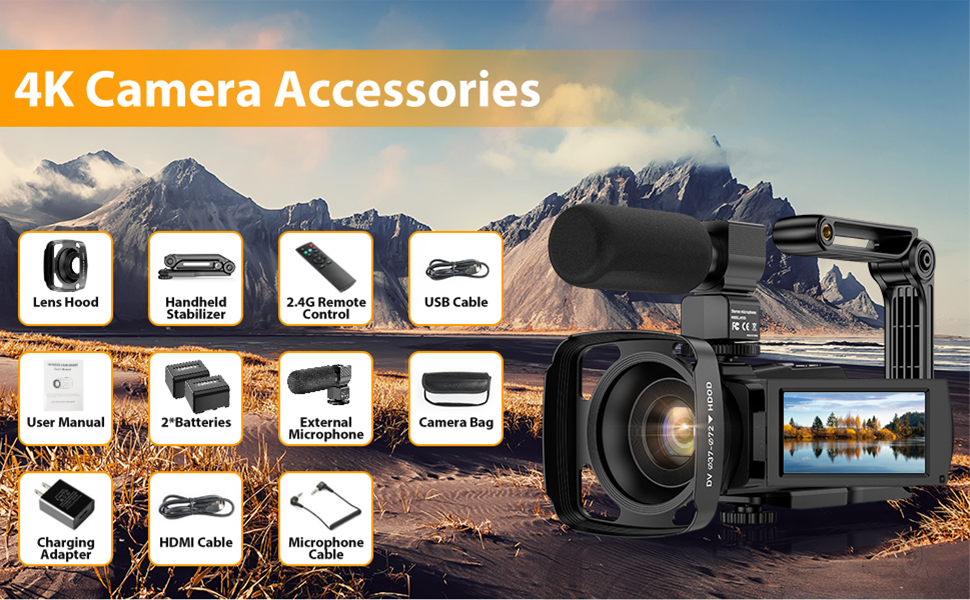
Figure 9: Camcorder special features.
Maintenance
Cleaning the Camcorder
Use a soft, dry cloth to clean the exterior of the camcorder. For the lens and touch screen, use a specialized lens cleaning cloth and solution to avoid scratches. Do not use abrasive cleaners or solvents.
Battery Care
Store batteries in a cool, dry place when not in use. Avoid fully discharging batteries for extended periods. If the camcorder will not be used for a long time, remove the batteries.
Storage
When not in use, store the camcorder in its carrying case to protect it from dust, moisture, and physical damage. Avoid extreme temperatures.
Troubleshooting
| Problem | Possible Cause | Solution |
|---|---|---|
| Camera does not power on. | Battery is low or not inserted correctly. | Ensure batteries are fully charged and correctly inserted. |
| Images/Videos are blurry. | Subject is too close (no autofocus), insufficient lighting, or camera shake. | Maintain a shooting distance of at least 1.5m/4ft. Ensure adequate lighting or use IR Night Vision. Activate anti-shake function or use the handheld stabilizer. |
| Memory card error. | Card not formatted, incompatible, or damaged. | Format the SD card through the camera. Ensure it is a Class 10 or higher, 4-128GB card. Try a different SD card. |
| Poor audio quality / background noise. | Microphone not connected properly, or sensitivity settings. | Ensure the external microphone is securely connected. Adjust microphone sensitivity settings (-10dB to +20dB) in the menu. |
| Remote control not working. | Remote battery is dead. | Replace the battery in the 2.4G wireless remote control. |
| Wi-Fi connection issues. | Incorrect app, network issues, or camcorder Wi-Fi not enabled. | Ensure you are using the "RoadCam" app. Verify Wi-Fi is enabled on the camcorder and your mobile device. Restart both devices. |
Specifications
| Feature | Detail |
|---|---|
| Brand | ZNIARAKL |
| Model Number | 254KM+M105+W4+Z1 |
| Image Sensor | 13 Megapixels CMOS |
| Image Resolution | 48.0 MP (7920*5940) |
| Video Capture Resolution | 4K; 2.7K 30FPS; 1080P 120FPS; 1080P 60FPS; 1080P 30FPS; 720P 240FPS; 720P 60FPS; 720P 30FPS |
| Digital Zoom | 16X |
| Screen Size | 3 Inches (270-degree rotatable touch screen) |
| Connectivity | Wi-Fi, HDMI, Mini USB2.0 |
| Flash Memory Type | SD (Supports 4-128GB, Class 10 or higher) |
| Battery Type | Lithium Ion (2 included) |
| Special Features | IR Night Vision, Webcam Function, Anti-shake, Pause Function, Time-lapse, Slow Motion, Continuous Shooting, Face Capture, Self-timer, Beauty Function, Hot Shoe, External Mic Jack |
| Item Weight | 1.98 pounds |
| Product Dimensions | 7.24 x 5.94 x 4.17 inches |
Warranty and Support
ZNIARAKL offers a 1-year hassle-free warranty for this product. For any technical assistance, troubleshooting, or warranty claims, please contact ZNIARAKL customer support. Support is available 24 hours online to assist you with any inquiries.
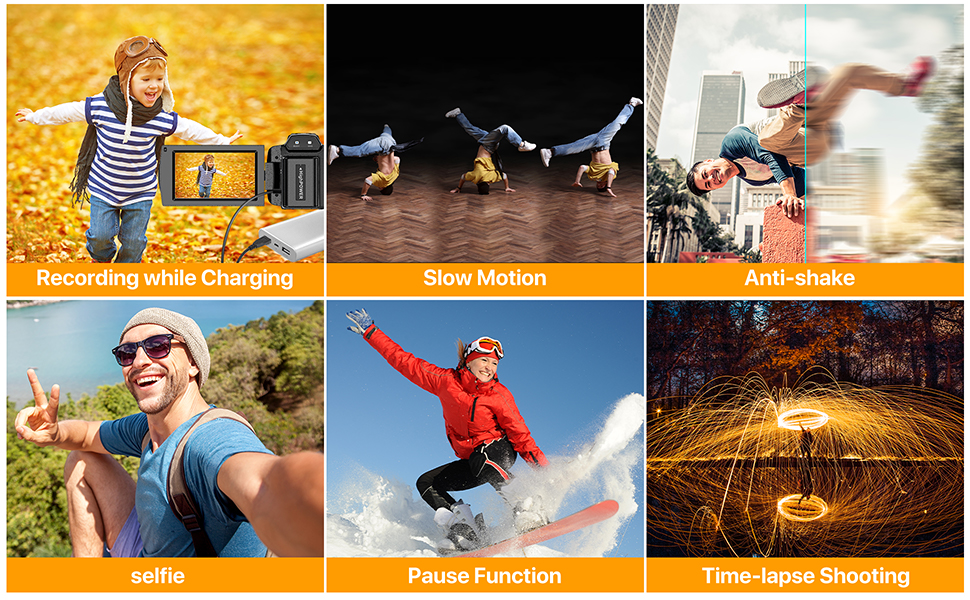
Figure 10: Warranty and Support Information.
Ask a question about this manual
Ask about setup, troubleshooting, compatibility, parts, safety, or missing instructions. Manuals+ will review the question and use this page’s manual context to help answer it.