Introduction
This instruction manual provides essential information for the safe and effective installation, operation, and maintenance of your new Generic Replacement Stainless Steel Burner. This burner is designed as a compatible replacement part for various gas grill models from Broil King, Grillpro, Broil-Mate, Huntington, Master Forge, Perfect Flame, and Sterling. Please read this manual thoroughly before attempting any installation or maintenance.
Safety Information
WARNING: Failure to follow these safety instructions could result in fire, explosion, or serious injury.
- Always disconnect the gas supply to your grill before installing, removing, or servicing any components.
- Ensure the grill is completely cool before handling any parts.
- Wear appropriate safety gear, such as gloves, to protect your hands from sharp edges or heat.
- Refer to your grill's original manufacturer manual for specific disassembly and reassembly instructions.
- Perform a leak test after any gas line connection or component replacement.
- Do not operate the grill if you smell gas. Immediately shut off the gas supply and ventilate the area.
Package Contents
Your package should contain the following item:
- 1 x Stainless Steel Replacement Burner
Setup and Installation
This section outlines the general steps for replacing a grill burner. Always consult your specific grill's owner's manual for detailed instructions and safety precautions.
- Disconnect Gas Supply: Turn off the gas supply at the propane tank or natural gas line.
- Cool Down: Ensure the grill is completely cool before proceeding.
- Remove Cooking Grates and Heat Shields: Carefully lift out the cooking grates and heat shields (flavorizer bars) to expose the old burners.
- Disconnect Old Burner: Locate the fasteners or clips holding the old burner in place. Carefully disconnect the burner from the gas valve orifice. Note how the old burner is positioned.
- Remove Old Burner: Remove the old burner from the grill.
- Install New Burner: Position the new stainless steel replacement burner in the same manner as the old one. Ensure the end of the burner properly engages with the gas valve orifice. Secure it with any existing fasteners or clips.
- Reassemble: Replace the heat shields and cooking grates.
- Reconnect Gas Supply: Turn on the gas supply.
- Leak Test: Perform a leak test on all gas connections using a soapy water solution. Bubbles indicate a leak. If a leak is detected, turn off the gas immediately and tighten connections or replace faulty parts. Do not operate the grill if a leak is present.
- Test Burner: Light the burner according to your grill's instructions to ensure proper flame distribution.
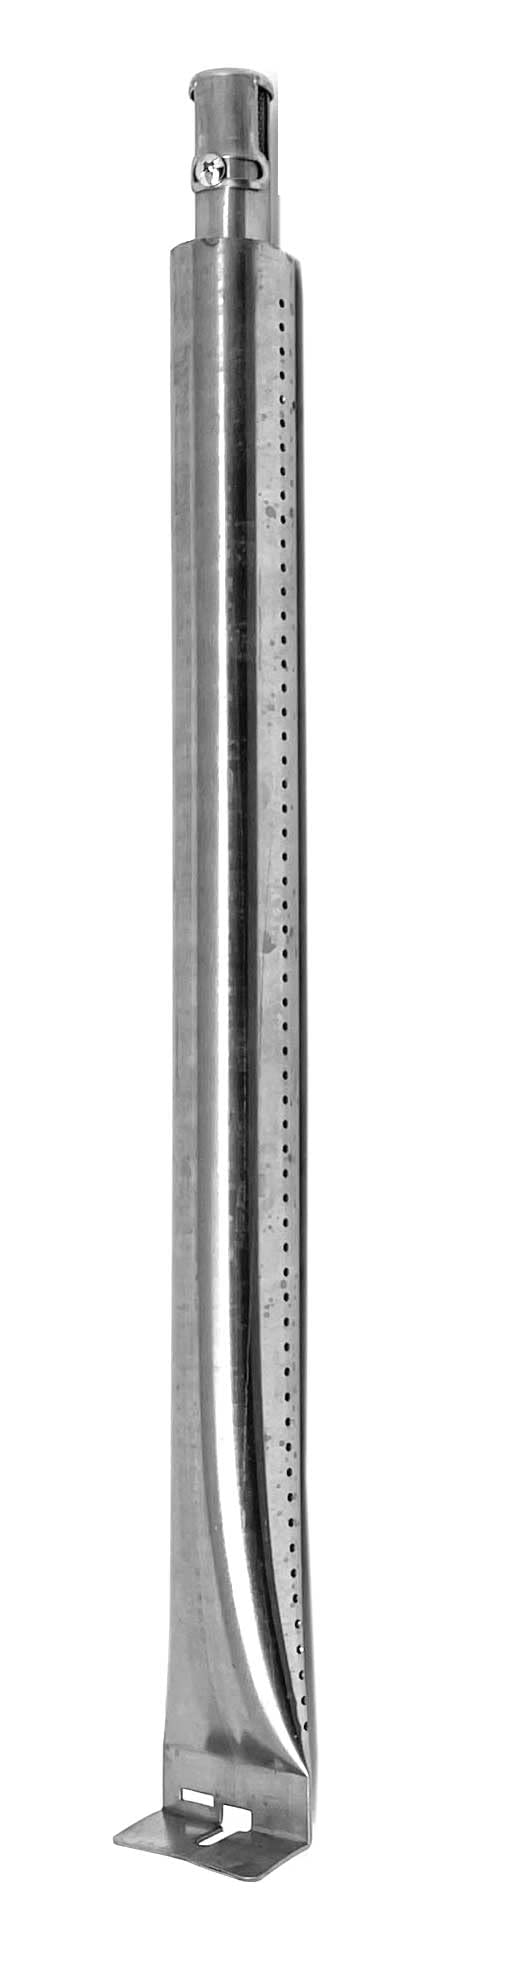
Image 1: Generic Replacement Stainless Steel Burner. This image shows the full length of the stainless steel burner, highlighting its perforated surface for gas distribution and the connection point. The dimensions are approximately 17-1/8 inches by 1-1/4 inches.
Operating the Burner (Post-Installation)
Once installed, the replacement burner functions identically to the original. Ensure the following for optimal performance:
- Even Flame: When lit, the burner should produce a consistent, blue flame along its entire length. Yellow or orange flames, or uneven distribution, may indicate an issue with gas flow or burner alignment.
- Ignition: The burner should ignite promptly when the control knob is turned to the "light" position and the igniter is activated.
- Heat Output: The grill should reach desired temperatures efficiently.
Maintenance
Regular maintenance helps prolong the life of your burner and ensures safe operation.
- Cleaning: Periodically clean the burner ports to prevent blockages. Use a wire brush or a stiff wire to clear any debris. Ensure the gas supply is off and the burner is cool before cleaning.
- Inspection: Regularly inspect the burner for signs of corrosion, cracks, or excessive wear. Replace the burner if significant damage is observed.
- Spider/Insect Nests: Check the burner tubes and air shutters for spider webs or insect nests, which can obstruct gas flow and cause flashback fires. Clean as necessary.
Troubleshooting
If you encounter issues after installing the new burner, consider the following:
| Problem | Possible Cause | Solution |
|---|---|---|
| Burner does not light. | Gas supply off, igniter not working, burner not properly seated, clogged orifice. | Check gas supply. Verify igniter spark. Re-seat burner onto orifice. Consult grill manual for orifice cleaning. |
| Uneven or yellow flame. | Clogged burner ports, improper air shutter adjustment, low gas pressure. | Clean burner ports. Adjust air shutter (if applicable, refer to grill manual). Check gas tank level or regulator. |
| Smell of gas. | Gas leak. | Immediately turn off gas supply. Perform leak test with soapy water. Tighten connections or replace faulty parts. Do not operate until leak is resolved. |
For issues not covered here, please refer to your grill's original manual or contact the seller for assistance.
Specifications
- Product Dimensions: 17-1/8" x 1-1/4" (approximately 17 x 1 x 1 inches)
- Material: Stainless Steel
- Model Number: 30028633-1PK
- Compatible Part Numbers: 11051, 11071, 18633, 22909-104, 22909-104LP, 22909-104NG, 62904-144
- Manufacturer: China
This burner is a replacement part and is not an original manufactured part from the grill brands listed.
Warranty and Support
For warranty information or technical support regarding this replacement burner, please contact the seller directly. Keep your purchase receipt as proof of purchase.