Introduction
Thank you for choosing the Woltu SRX16ws Vertical Shoe Rack. This manual provides important information regarding the assembly, operation, and maintenance of your new shoe rack. Please read it thoroughly before assembly and keep it for future reference.
This shoe rack is designed to provide a space-saving and organized storage solution for your footwear and small items in various rooms such as entryways, hallways, bedrooms, or closets.
Safety Information
- Always follow the assembly instructions carefully to ensure proper and safe construction.
- Ensure all screws and fasteners are securely tightened before use. Periodically check and re-tighten if necessary.
- Use the provided anti-tip kit to secure the shoe rack to a wall, especially if children or pets are present, to prevent accidental tipping.
- Do not overload the shelves. Refer to the specifications for weight limits per shelf.
- Keep small parts and packaging materials away from children to prevent choking hazards.
- Place the shoe rack on a flat, stable surface to prevent wobbling.
Parts List
Before starting assembly, verify that all parts listed below are present and undamaged. If any parts are missing or damaged, please contact customer support.
| Part No. | Description | Quantity |
|---|---|---|
| A | Main Vertical Panel | 1 |
| B | Left Shelves | 6 |
| C | Right Shelves | 6 |
| D | Top Shelf with Raised Edges | 1 |
| E | Base Panel | 1 |
| F | Screws (various sizes) | Assorted |
| G | Anti-tip Kit | 1 set |
| H | Allen Wrench | 1 |
 Image showing an exploded view of the shoe rack components, illustrating how different parts connect during assembly.
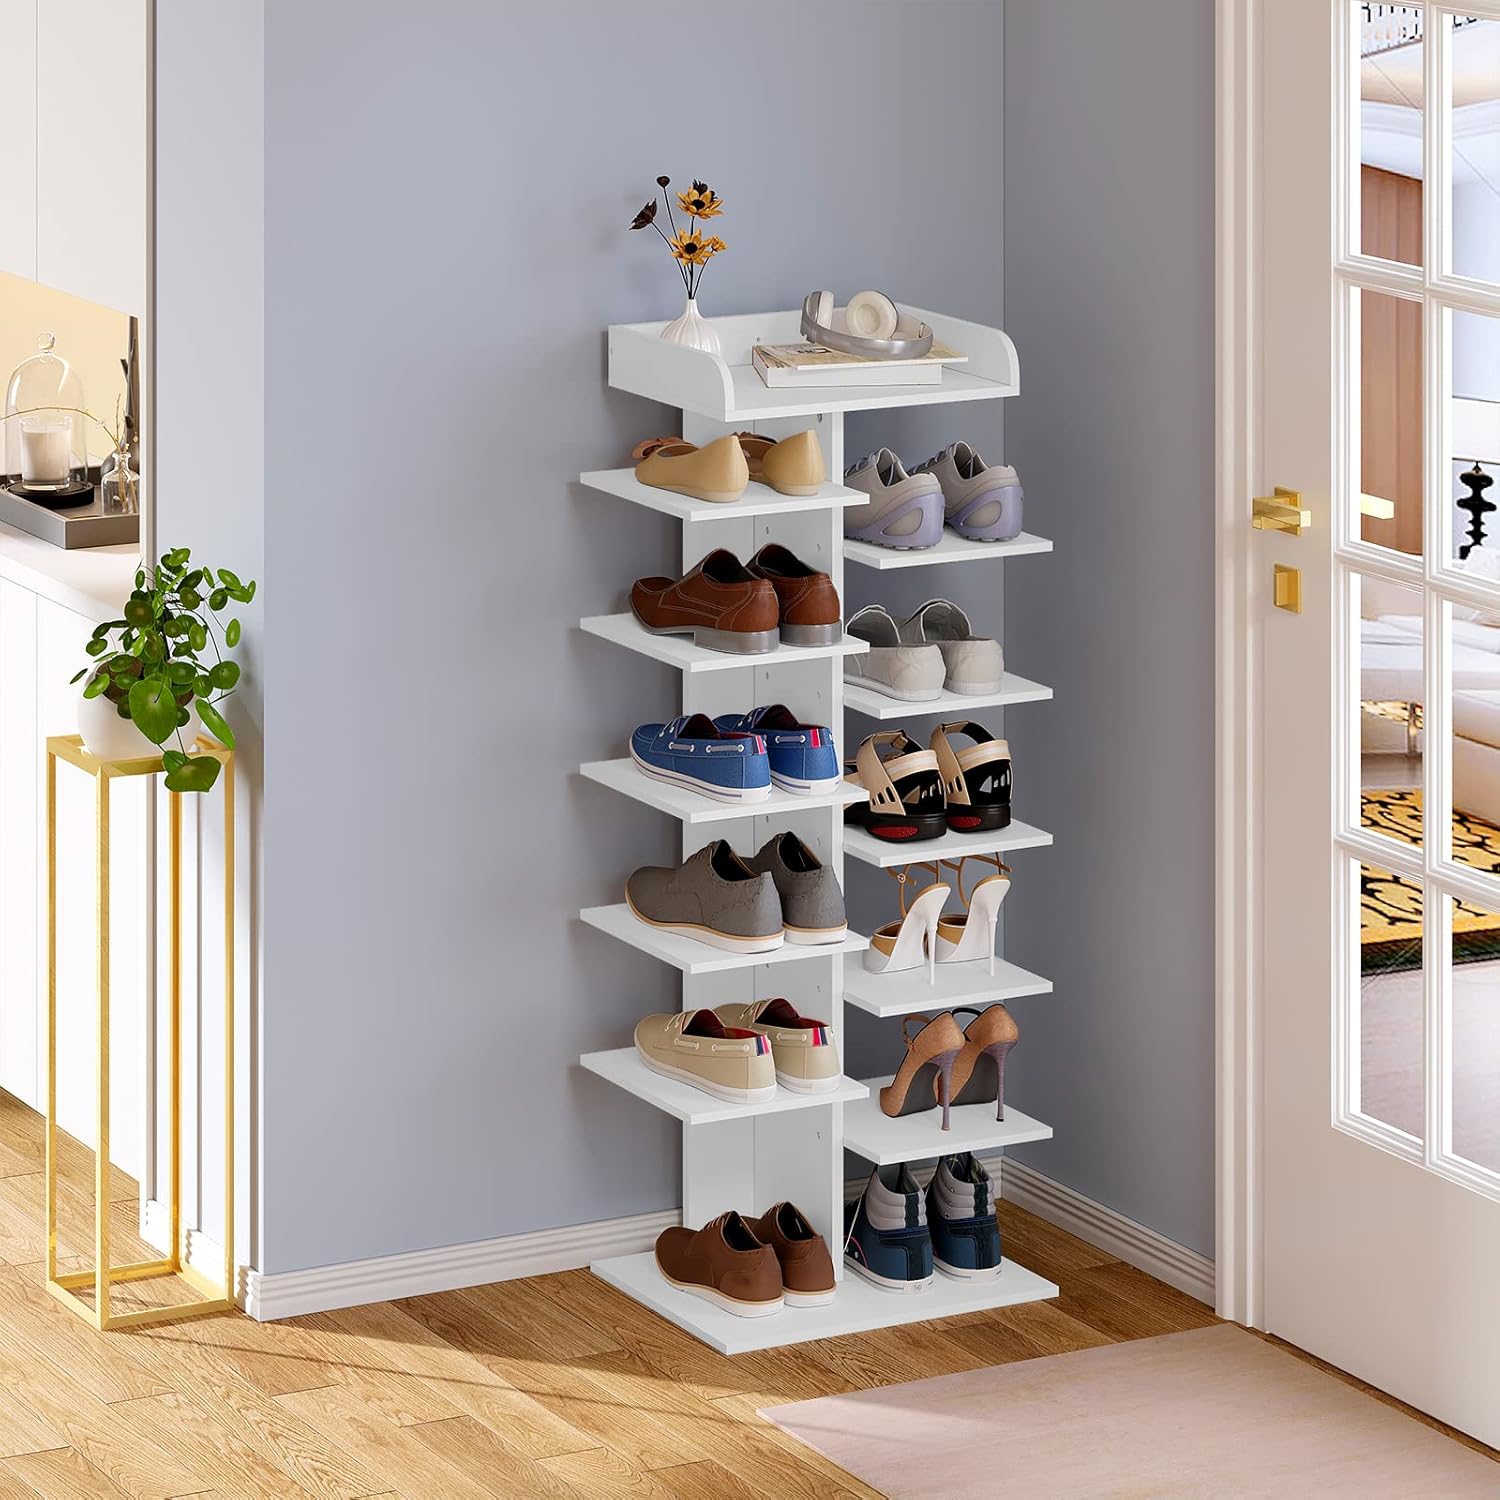 Diagram illustrating the dimensions of the shoe rack (114cm height, 45cm width, 30cm depth) and individual shelf dimensions, along with weight capacities for the top shelf (10kg) and other shelves (2.5kg).
Setup & Assembly
Follow these steps to assemble your Woltu SRX16ws shoe rack. It is recommended to assemble the unit on a soft, clean surface to prevent scratches.
- Step 1: Attach the Base Panel. Secure the Base Panel (E) to the bottom of the Main Vertical Panel (A) using the appropriate screws (F). Ensure it is firmly attached and level.
- Step 2: Install Lower Shelves. Attach the first pair of Left (B) and Right (C) shelves to the Main Vertical Panel (A) above the base. Use the designated screw holes and tighten securely.
- Step 3: Continue Installing Shelves. Repeat Step 2 for the remaining five pairs of Left (B) and Right (C) shelves, working your way upwards. Ensure each shelf is level and securely fastened.
- Step 4: Attach the Top Shelf. Secure the Top Shelf with Raised Edges (D) to the very top of the Main Vertical Panel (A). This shelf is designed for smaller items and has a higher weight capacity.
- Step 5: Install Anti-tip Kit. For safety, attach the anti-tip kit (G) to the top rear of the shoe rack and secure it to a wall stud or appropriate wall anchor. This prevents the unit from tipping over.
 Close-up image highlighting the raised edges on the top shelf for secure item placement and the smooth, burr-free finish of the shelf edges.
Operating Instructions
The Woltu SRX16ws shoe rack is designed for straightforward use. Here are some guidelines for optimal functionality:
- Shoe Placement: Utilize the 12 open shelves to store various types of footwear, including sandals, sports shoes, high heels, and flat shoes. Arrange them neatly for easy access.
- Top Shelf Use: The top shelf with raised edges is ideal for storing smaller items such as keys, wallets, decorative items, or small potted plants.
- Weight Distribution: Distribute weight evenly across the shelves. Avoid placing excessively heavy items on a single shelf.
- Versatile Placement: This shoe rack can be placed in various locations suchs as an entryway, hallway, bedroom, or closet to maximize space utilization.
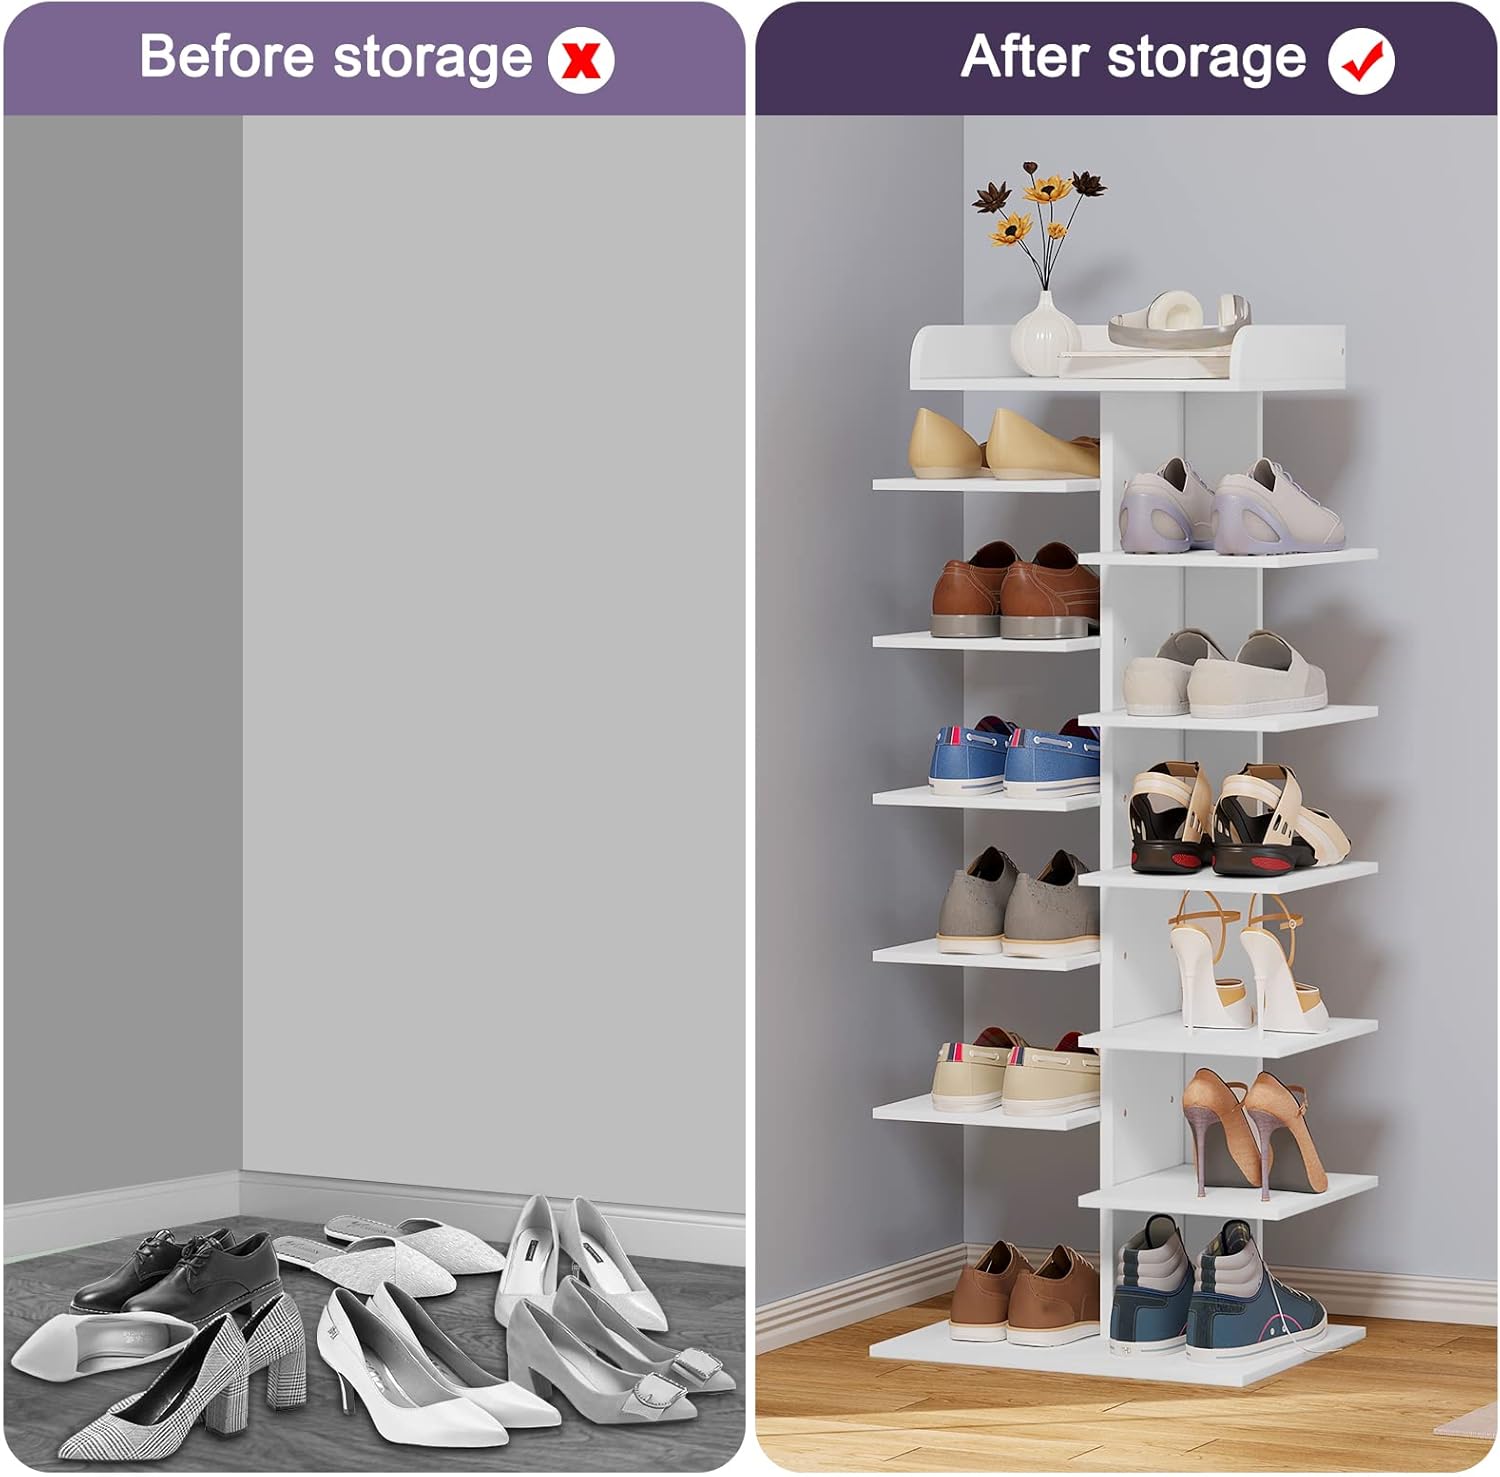 Image demonstrating the shoe rack's versatility, showing it placed in a living room, doorway, bedroom, and downstairs area, highlighting its adaptability to different home environments.
 Before and after comparison showing a cluttered corner with shoes on the floor versus the same corner neatly organized with the Woltu SRX16ws shoe rack.
Maintenance
Proper maintenance will extend the life and appearance of your shoe rack.
- Cleaning: Wipe the surfaces with a soft, damp cloth. Avoid using harsh chemicals or abrasive cleaners, which can damage the finish.
- Dusting: Regularly dust the shelves to prevent buildup.
- Tightening Fasteners: Periodically check all screws and fasteners and re-tighten them as needed to maintain stability.
- Avoid Moisture: Keep the shoe rack away from excessive moisture or direct sunlight to prevent warping or discoloration of the wood material.
Troubleshooting
| Problem | Possible Cause | Solution |
|---|---|---|
| Shoe rack is wobbly. | Screws are loose; uneven floor surface. | Ensure all screws are tightened. Move the rack to a level surface or use shims if necessary. |
| Shelves are not level. | Incorrect assembly; screws not fully tightened. | Disassemble and reassemble the affected shelves, ensuring they are properly aligned and screws are fully tightened. |
| Missing parts. | Packaging error. | Contact customer support with your purchase details and the specific missing parts. |
Specifications
- Model: SRX16ws
- Brand: Woltu
- Material: E1 Grade Particle Board (FSC Certified Wood)
- Color: White
- Dimensions (Depth x Width x Height): 30 cm x 45 cm x 114 cm
- Number of Shelves: 12
- Shelf Type: Tiered, Open
- Mounting Type: Freestanding (with anti-tip wall attachment)
- Special Features: Space-saving vertical design, raised edges on top shelf, smooth finish.
- Style: Modern
- Finish Type: Varnish
- Shape: Trapezoidal
Warranty and Support
For warranty information or customer support, please refer to the documentation included with your purchase or visit the official Woltu website. If you encounter any issues or have questions, please contact our customer service team for assistance.
Contact Information: Please refer to your purchase receipt or the manufacturer's website for the most up-to-date contact details.


