
1. Introduction
Thank you for choosing the Microtek Energy Saver Advanced Digital Inverter/UPS. This device is designed to provide reliable power backup for your home, office, or shop, ensuring uninterrupted operation of your electrical appliances. This manual provides essential information for the safe and efficient installation, operation, and maintenance of your inverter/UPS. Please read it thoroughly before using the product and retain it for future reference.
2. Important Safety Instructions
- Read all instructions: Before installation and operation, read all safety and operating instructions.
- Electrical Hazard: This unit contains high voltage. Do not attempt to open or service the unit yourself. Refer all servicing to qualified service personnel.
- Ventilation: Ensure adequate ventilation around the unit. Do not block ventilation openings.
- Location: Install the unit in a dry, well-ventilated area, away from direct sunlight, heat sources, flammable materials, and corrosive substances.
- Battery Safety: Batteries contain corrosive acid. Avoid contact with skin and eyes. Wear protective gear when handling batteries. Ensure proper battery polarity during connection.
- Grounding: The unit must be properly grounded to prevent electrical shock.
- Overload: Do not overload the inverter/UPS beyond its specified capacity (740W).
- Children: Keep the unit out of reach of children.
3. Product Overview
3.1 Key Features
- Micro Controller Based Intelligent Control Design.
- LED Display Indications for UPS Status and Fault.
- CCCV Technology with Auto Trickle Mode for efficient battery charging.
- Smart Overload Sense and Short Circuit Protection.
- Battery State Monitoring for optimal battery health.
- Pure Sine Wave Electrical Output Waveform.
3.2 Unit Components
The Microtek Energy Saver Inverter/UPS features a user-friendly design with clear indicators and controls.
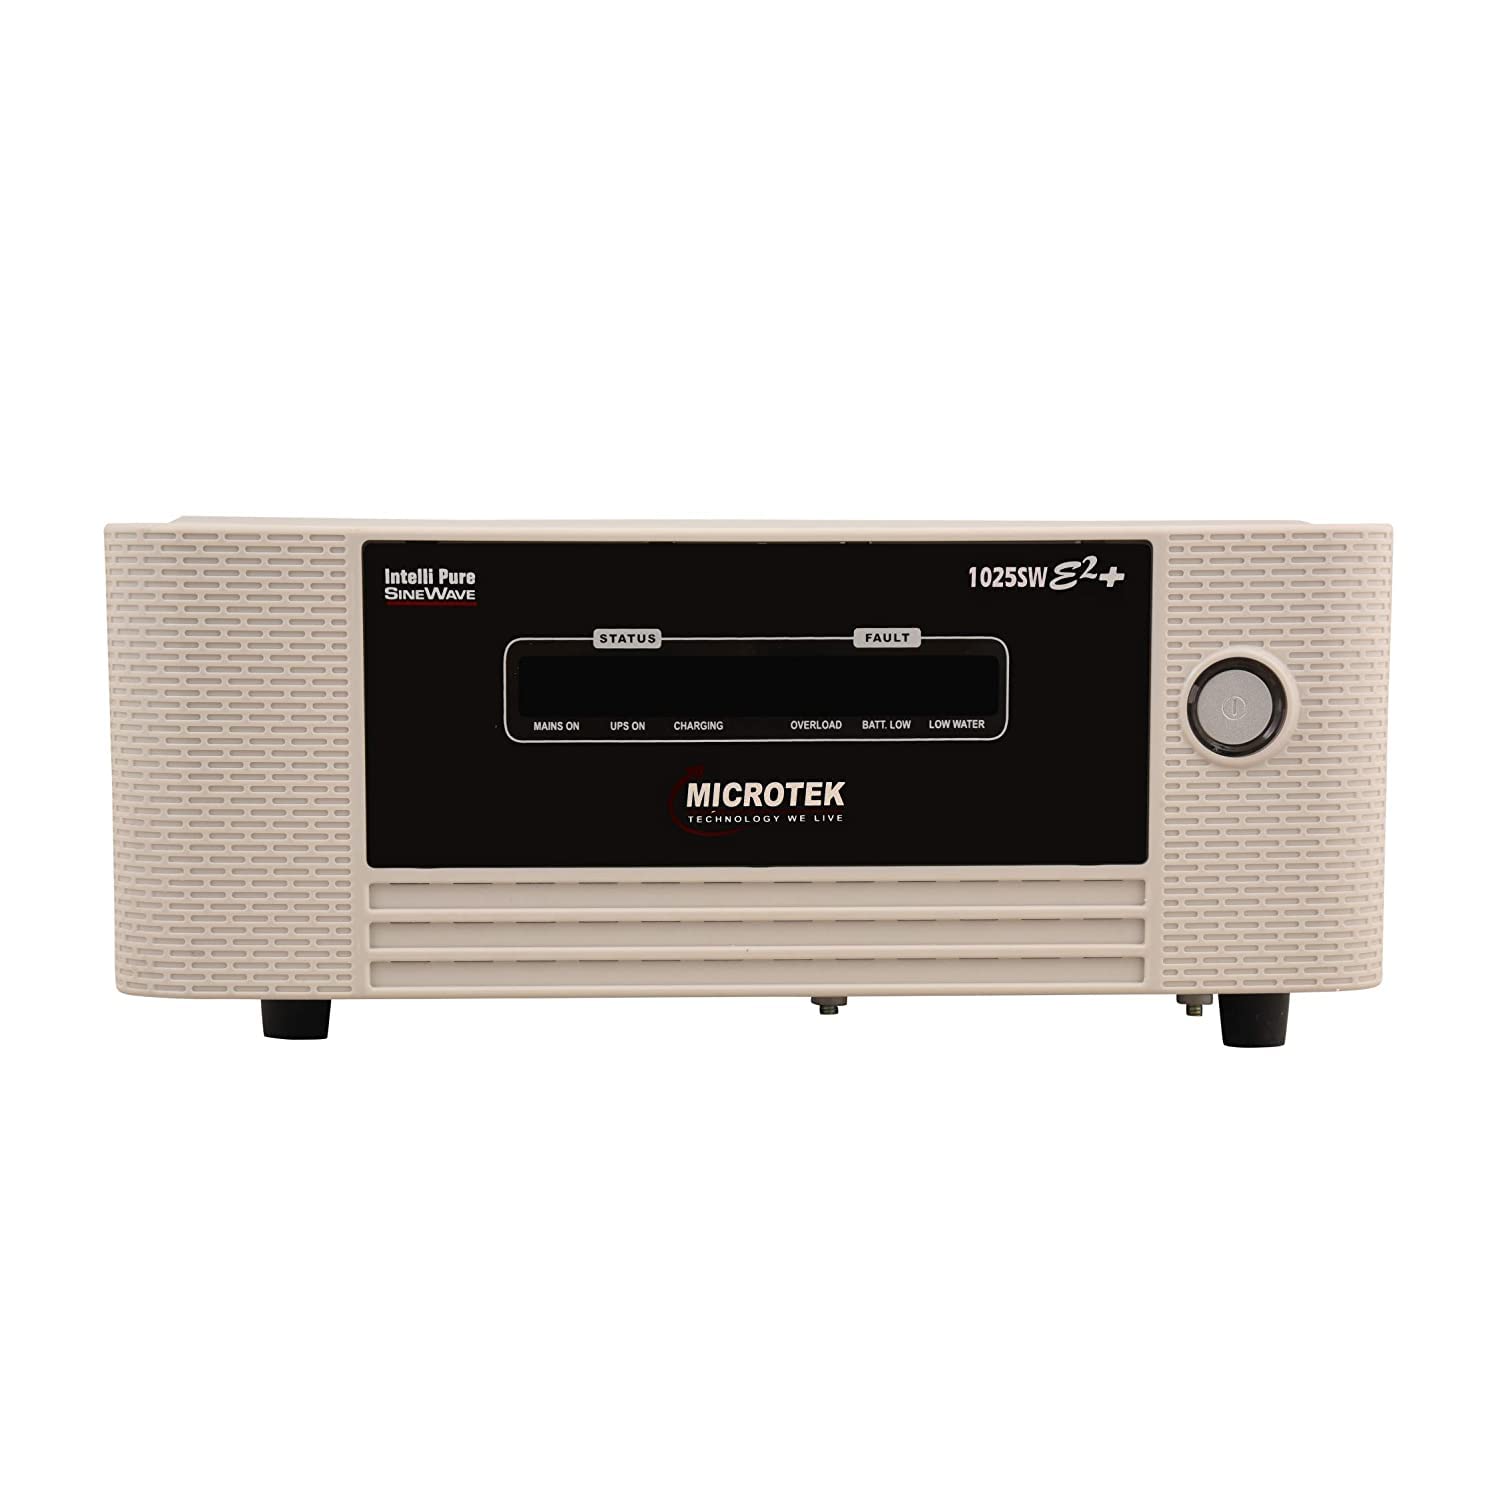
Figure 1: Front view of the Microtek Energy Saver Advanced Digital Inverter/UPS. This image shows the front panel with the 'ENERGY SAVER' branding, status and fault indicators, and the power button.
Front Panel Indicators and Controls:
- Power Button: Used to turn the inverter/UPS ON or OFF.
- Status Indicators (LEDs):
- MAINS ON: Indicates that the unit is receiving AC input power from the utility grid.
- UPS ON: Indicates that the unit is operating in UPS mode, providing power from the battery.
- CHARGING: Indicates that the battery is currently being charged.
- Fault Indicators (LEDs):
- OVERLOAD: Indicates that the connected load exceeds the inverter's capacity.
- BATT LOW: Indicates that the battery charge level is critically low.
- C/TRIP: Indicates a short circuit or other critical fault.
Rear Panel (Typical Connections):
- AC Input Socket: For connecting the unit to the main AC power supply.
- AC Output Sockets: For connecting your appliances.
- Battery Terminals (Positive & Negative): For connecting the external battery. Ensure correct polarity.
- Cooling Fan: For heat dissipation. Ensure it is not obstructed.
4. Installation and Setup
4.1 Unpacking
- Carefully unpack the inverter/UPS unit from its packaging.
- Inspect the unit for any signs of damage during transit. If damaged, do not proceed with installation and contact your dealer.
- Ensure all accessories are present.
4.2 Placement
- Place the inverter/UPS on a flat, stable surface.
- Ensure the location is well-ventilated and free from dust, moisture, and direct sunlight.
- Maintain at least 10-15 cm of clear space around all sides of the unit for proper airflow.
- Keep the unit away from heat-emitting appliances and flammable materials.
4.3 Battery Connection
WARNING: Ensure the inverter/UPS is OFF and disconnected from the AC mains before connecting the battery.
- Connect the RED battery cable to the POSITIVE (+) terminal of the battery and the POSITIVE (+) terminal on the inverter/UPS.
- Connect the BLACK battery cable to the NEGATIVE (-) terminal of the battery and the NEGATIVE (-) terminal on the inverter/UPS.
- Ensure all connections are tight and secure to prevent sparking and overheating.
4.4 Mains Connection
- Plug the inverter/UPS's AC input cord into a properly grounded wall outlet.
- Ensure the wall outlet provides stable AC power within the specified voltage range.
4.5 Load Connection
- Connect your appliances (lights, fans, computers, etc.) to the AC output sockets on the rear panel of the inverter/UPS.
- Ensure the total wattage of connected appliances does not exceed the inverter's capacity (740W).
5. Operating Instructions
5.1 Powering On/Off
- To Power ON: Press and hold the power button on the front panel for a few seconds until the unit beeps and the indicators light up.
- To Power OFF: Press and hold the power button again for a few seconds until the unit beeps and the indicators turn off.
5.2 Understanding LED Indicators
Monitor the front panel LEDs for the current status of your inverter/UPS:
| Indicator | Status | Description |
|---|---|---|
| MAINS ON | Lit | AC utility power is present and the unit is operating in mains mode. |
| UPS ON | Lit | The unit is providing power from the battery (inverter mode) due to mains failure. |
| CHARGING | Lit | The connected battery is currently being charged. |
| OVERLOAD | Lit (and usually beeping) | The total load connected exceeds the inverter's maximum capacity. Reduce the load immediately. |
| BATT LOW | Lit (and usually beeping) | The battery charge level is low. The unit will soon shut down to protect the battery. |
| C/TRIP | Lit (and usually beeping) | Indicates a short circuit or internal fault. Disconnect all loads and contact service. |
6. Maintenance
- Cleaning: Keep the unit clean and free from dust. Use a dry cloth to wipe the exterior. Do not use liquid cleaners.
- Ventilation: Regularly check that the ventilation openings are not blocked by dust or debris. Ensure proper airflow.
- Battery Care:
- Ensure battery terminals are clean and free from corrosion. Apply petroleum jelly if necessary.
- For lead-acid batteries, check electrolyte levels periodically and top up with distilled water if required (refer to battery manufacturer's instructions).
- Avoid deep discharge of the battery. Allow the inverter/UPS to recharge the battery fully after a power outage.
- Connections: Periodically check all electrical connections (mains, battery, load) to ensure they are secure.
7. Troubleshooting
Before contacting customer service, please refer to the following table for common issues and their solutions:
| Problem | Possible Cause | Solution |
|---|---|---|
| Inverter/UPS does not turn ON. | No battery connected or battery discharged. Power button not pressed correctly. | Check battery connections and charge level. Press and hold the power button firmly. |
| OVERLOAD LED is lit. | Too many appliances connected. | Disconnect some appliances to reduce the load below 740W. |
| BATT LOW LED is lit. | Battery is low on charge. | Ensure mains power is available for the battery to recharge. Reduce load if operating on battery. |
| C/TRIP LED is lit. | Short circuit in output or internal fault. | Disconnect all loads. Turn off the unit. If the fault persists, contact customer service. |
| No output power in UPS mode. | Battery fully discharged. Output circuit breaker tripped. | Allow battery to recharge. Check and reset the output circuit breaker if present. |
8. Technical Specifications
| Feature | Specification |
|---|---|
| Brand | MICROTEK |
| Model Name | Microtek Brand Energy Saver Advanced Digital Inverter/UPS for Home, Office & Shops - 925VA/740W (1025-12V) |
| Model Number | ENERGYSAVER-1025-DG-1 |
| Recommended Uses | Home, Office |
| Power Source | AC/DC |
| Wattage | 740 Watts |
| Voltage | 12 Volts |
| Input Voltage | 12 Volts |
| Electrical Output Waveform | Pure Sine Wave |
| Frequency | 50 Hz |
| Item Dimensions (L x W x H) | 21.1L x 40.6W x 43.6H Centimeters |
| Item Weight | 2360 Grams |
| Colour | MULTI |
9. Warranty and Customer Support
9.1 Warranty Information
This Microtek Inverter/UPS comes with a 3-Year Warranty. Please retain your purchase receipt for warranty claims. The warranty covers manufacturing defects under normal use conditions. It does not cover damage due to improper installation, misuse, accidents, or unauthorized repairs.
9.2 Customer Support
For technical assistance, service, or warranty claims, please contact Microtek International Pvt. Ltd. directly.
- Manufacturer: Microtek International Pvt. Ltd.
- Contact Information: Refer to the official Microtek website or your product packaging for the most current contact details.
