1. Introduction
This manual provides detailed instructions for the proper use and maintenance of your Generic V619 OBD2 Scanner Code Reader Tool. This device is designed to assist vehicle owners and technicians in diagnosing engine-related issues by reading and clearing diagnostic trouble codes (DTCs) from OBDII compliant vehicles. Please read this manual thoroughly before operating the device to ensure correct usage and to prevent damage.
2. Product Overview
The V619 OBD2 Scanner is a professional-grade diagnostic tool equipped with a 1.8-inch color display and a user-friendly interface. It offers a comprehensive set of functions to help identify and resolve engine light issues efficiently.
2.1 Key Features
- Multi-Functions: Read and Clear DTCs, view Freeze Frame data, I/M Readiness status, retrieve Vehicle Information, Live Data stream, Data stream, built-in 35,901 DTC library, Voltage test, RT curve, O2 sensor test, and EVAP test.
- Wide Compatibility: Supports 9 OBDII protocols and is compatible with most vehicles manufactured after 1996 (USA), 1998 (Canada), 2002 (EU), and 2008 (Asia).
- Extensive DTC Database: Features a database of up to 35,901 DTCs for quick diagnosis.
- User-Friendly Design: 1.8-inch color display (240 x 320 pixels) for clear visibility, 90cm flexible cable, and support for 8 languages (English, German, Chinese, Spanish, French, Italian, Russian, Dutch).
- Plug and Play: No batteries or chargers required; powered directly by the vehicle's OBDII port.
2.2 Package Contents
- 1 x OBD2 Scanner Tool (Model V619)

Figure 2.1: Front view of the V619 OBD2 Scanner, showing the display and control buttons.

Figure 2.2: Overview of the V619 scanner's powerful functions, including engine diagnosis, DTC library, O2 sensor test, and real-time data.
3. Setup
The V619 OBD2 Scanner is designed for simple plug-and-play operation. Follow these steps to set up the device:
- Locate the OBDII Port: The OBDII port is typically located under the dashboard on the driver's side of the vehicle. Refer to your vehicle's owner's manual if you cannot locate it.
- Connect the Scanner: With the vehicle's ignition turned off, firmly plug the V619 scanner's 16-pin connector into the vehicle's OBDII port.
- Turn on Ignition: Turn the vehicle's ignition to the "ON" position (do not start the engine). The scanner will power on automatically.
- Initial Screen: The scanner's display will light up, and the main menu will appear.
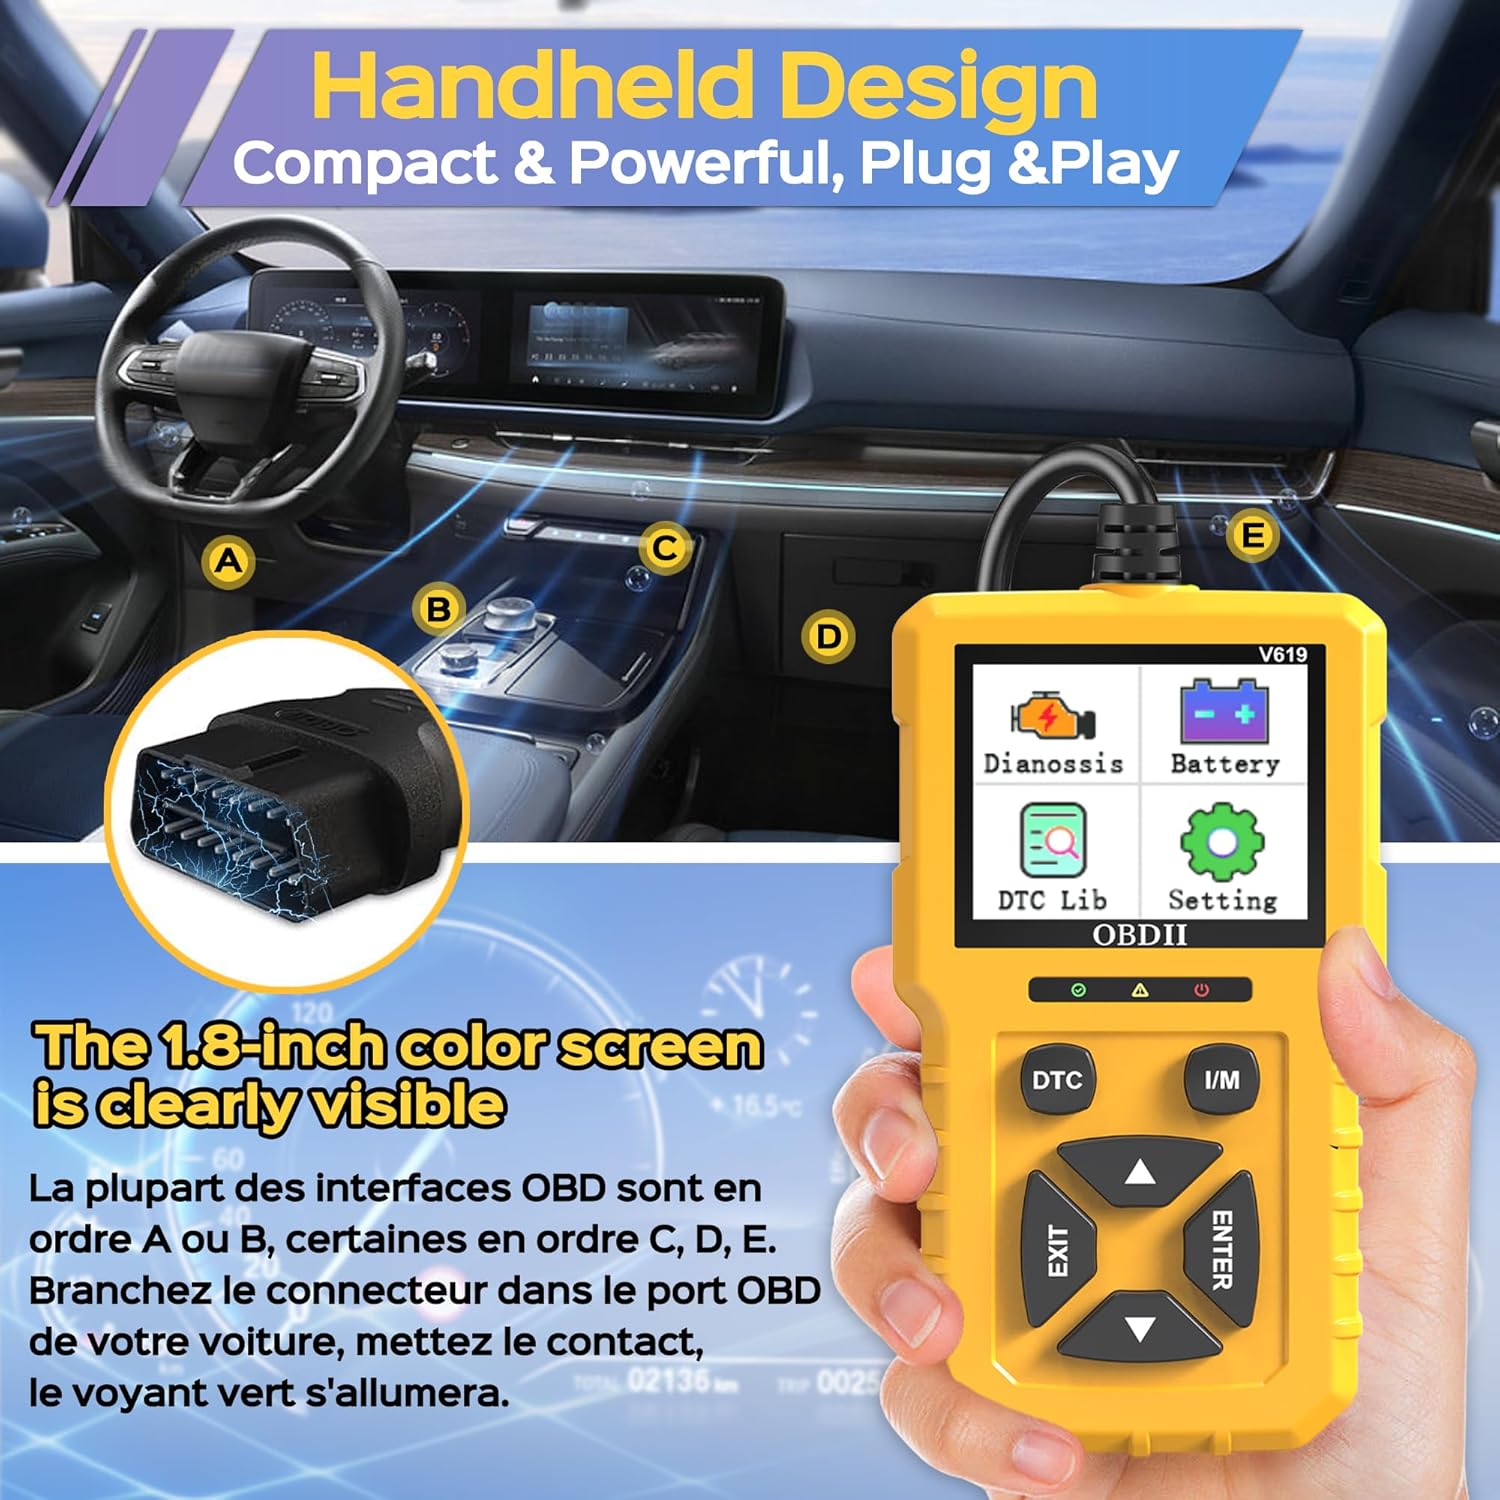
Figure 3.1: Illustration of the V619 scanner's compact design and typical location of the OBDII port in a vehicle.
4. Operating Instructions
Navigate the scanner using the directional buttons (UP, DOWN, LEFT, RIGHT) and the ENTER/EXIT buttons. The main menu provides access to various diagnostic functions.
4.1 Main Menu Functions
- Dianossis (Diagnosis): Accesses the primary diagnostic functions.
- Battery: Displays real-time battery voltage.
- DTC Lib (DTC Library): Allows lookup of Diagnostic Trouble Codes.
- Setting: Configures device settings, including language.
4.2 Diagnostic Functions
From the "Dianossis" menu, you can perform the following operations:
- Read Codes:
Select "Read Codes" to retrieve current, pending, and permanent Diagnostic Trouble Codes (DTCs) from the vehicle's engine control unit (ECU). The codes will be displayed on the screen along with a brief description if available in the internal database.
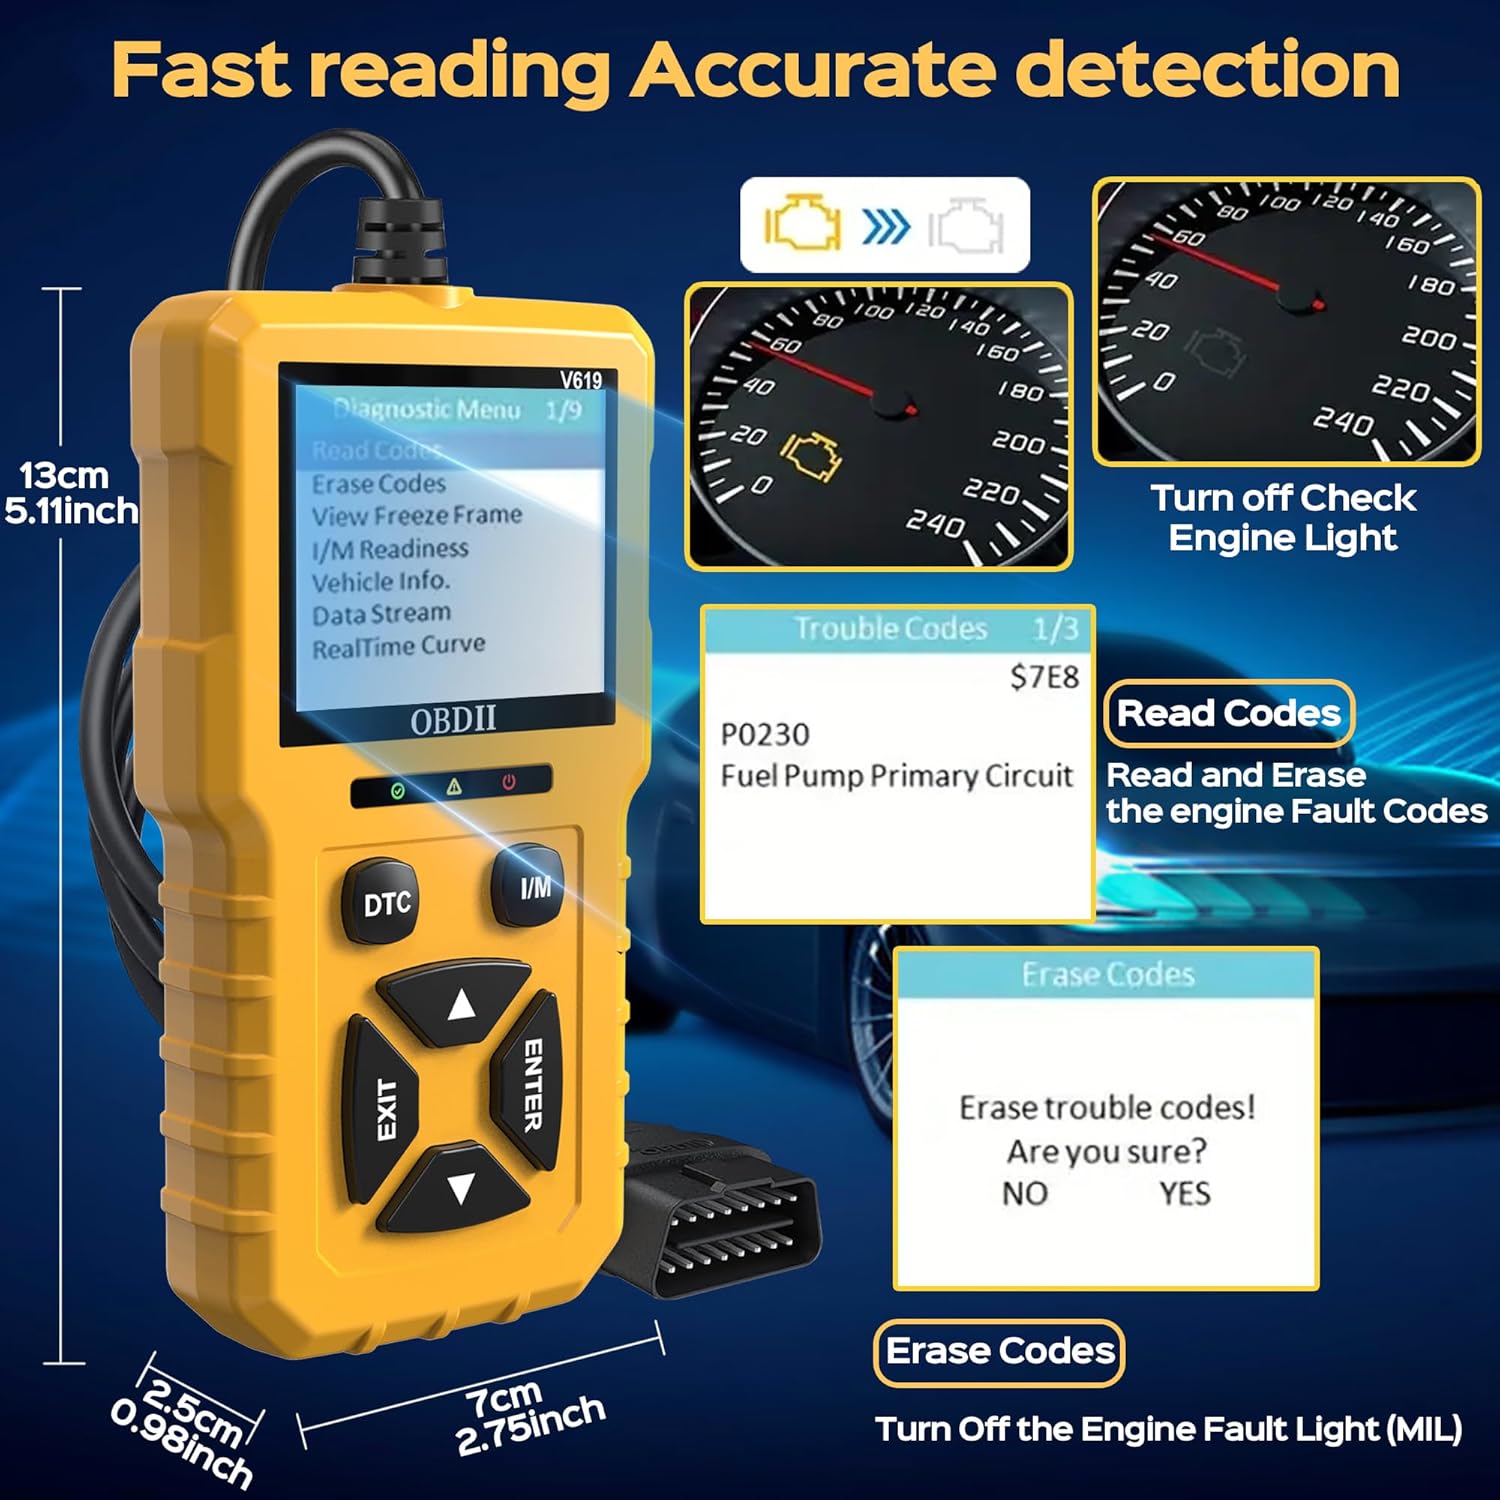
Figure 4.1: Display showing the "Read Codes" and "Erase Codes" options, and an example of a displayed trouble code.
- Erase Codes:
After addressing the underlying issue that triggered the DTCs, select "Erase Codes" to clear the codes from the vehicle's ECU and turn off the Check Engine Light (MIL). Confirm the action when prompted. Note: Clearing codes without fixing the underlying problem will likely result in the codes reappearing.
- View Freeze Frame:
When an emission-related fault occurs, the vehicle's computer records certain vehicle operating conditions at the time of the fault. This data is called Freeze Frame Data. Select "View Freeze Frame" to review this snapshot of data, which can help in diagnosing the cause of the fault.
- I/M Readiness:
I/M Readiness (Inspection/Maintenance Readiness) indicates whether the various emission-related systems on the vehicle are operating correctly and have completed their self-tests. This function is useful for checking if a vehicle is ready for an emissions test. A dedicated "I/M" button is available for quick access.
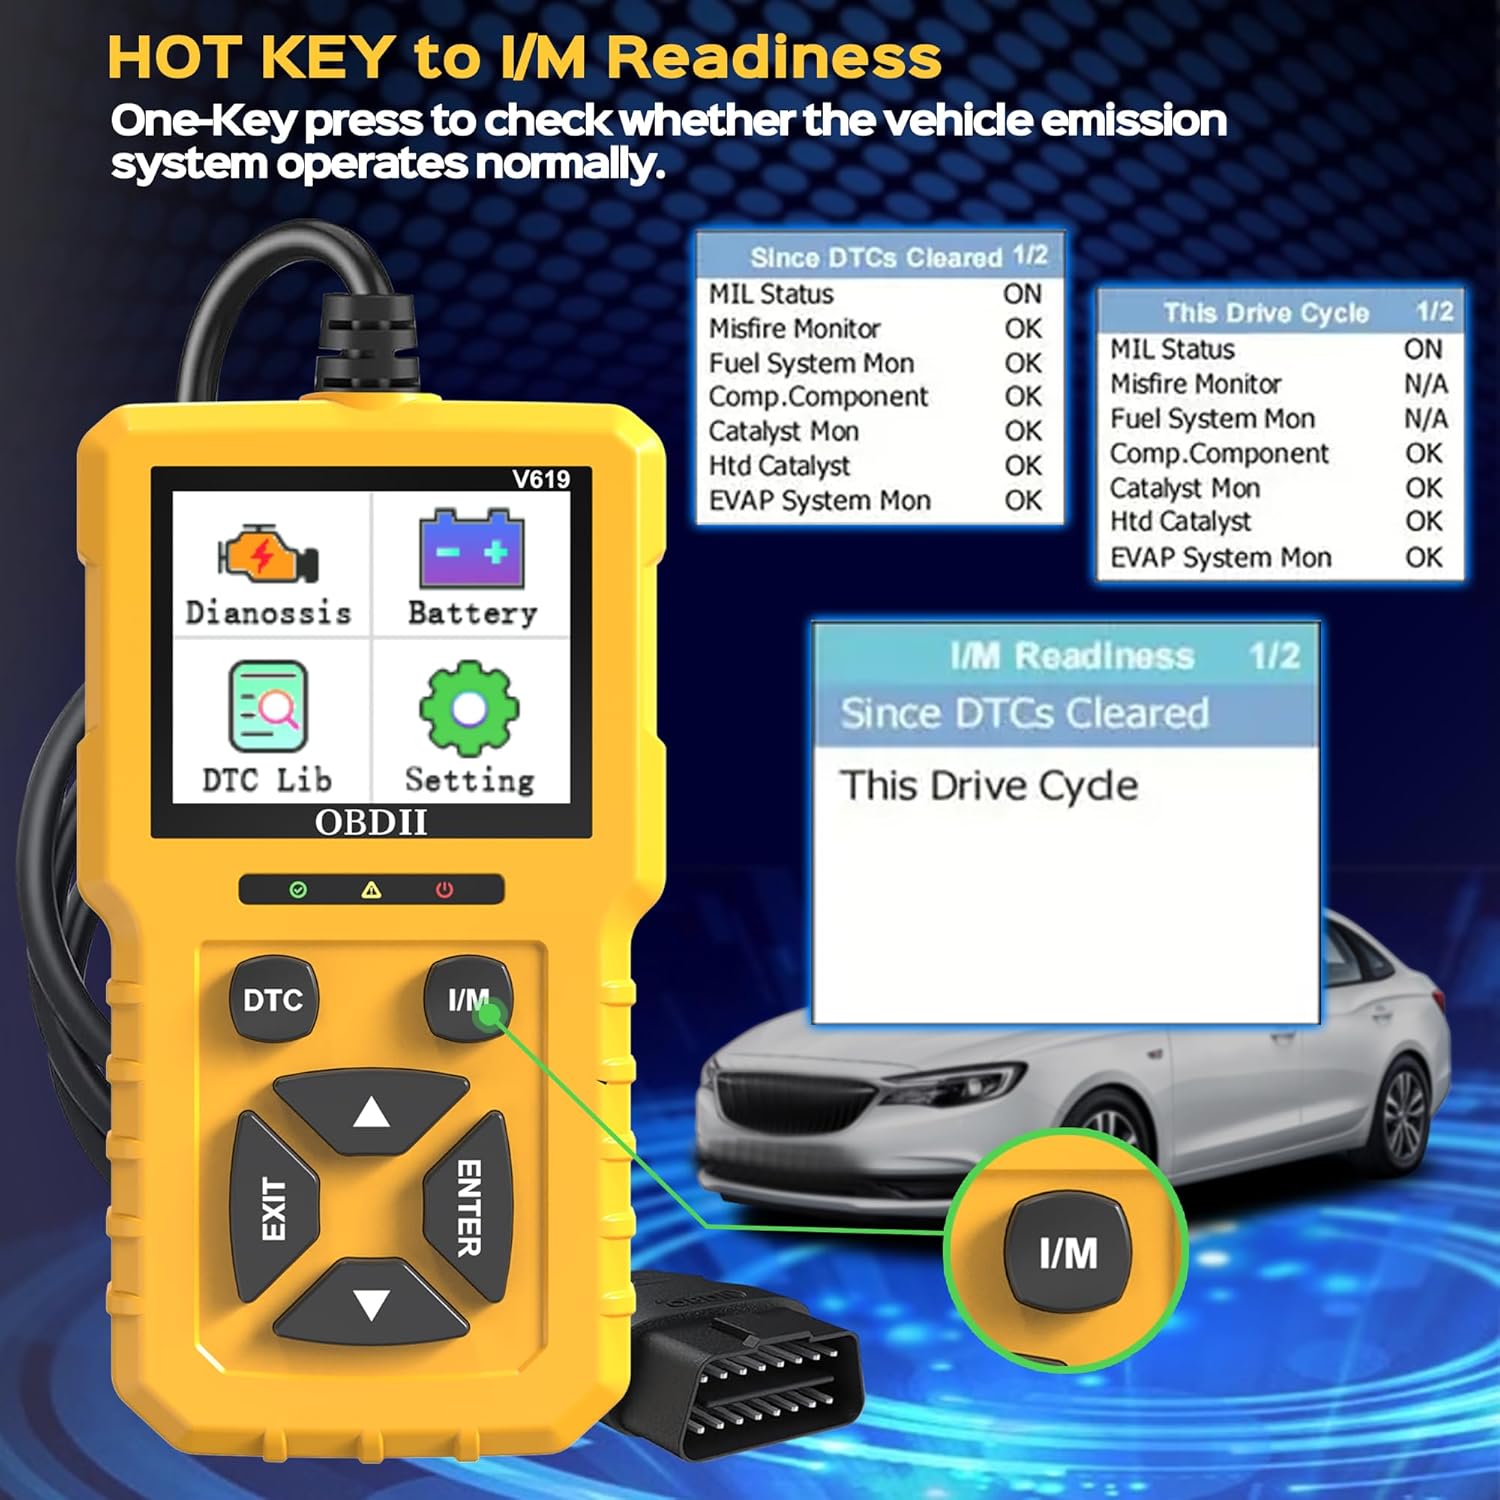
Figure 4.2: The dedicated I/M Readiness button and a sample display of I/M readiness monitors.
- Retrieve Vehicle Info:
This function allows you to retrieve the Vehicle Identification Number (VIN), Calibration ID (CALID), and Calibration Verification Number (CVN) from the vehicle's ECU.
- Live Data:
View real-time operational data from the vehicle's sensors and components. This includes engine RPM, vehicle speed, coolant temperature, oxygen sensor readings, and more. This data can be viewed as a list or as a real-time curve (graph).
- Voltage Test:
Perform a real-time voltage test of the vehicle's battery. This helps in assessing the battery's health.

Figure 4.3: Display showing the real-time voltage test result and the DTC Lookup interface.
- O2 Sensor Test:
Retrieves O2 sensor monitoring test results for the most recently completed tests from the vehicle's on-board computer.
- EVAP Test:
Initiates a test of the Evaporative Emission Control System (EVAP) for leaks.
4.3 DTC Library Lookup
The built-in DTC library allows you to look up the meaning of Diagnostic Trouble Codes directly on the device. From the main menu, select "DTC Lib", then enter the code using the directional buttons to get its description.
4.4 Language Settings
To change the display language, navigate to the "Setting" menu from the main screen. Select "Language" and choose your preferred language from the available options (English, German, Chinese, Spanish, French, Italian, Russian, Dutch).
5. Maintenance
Proper maintenance ensures the longevity and reliable operation of your V619 OBD2 Scanner.
- Cleaning: Use a soft, dry cloth to clean the scanner's casing and screen. Do not use abrasive cleaners or solvents.
- Storage: Store the device in a clean, dry environment away from extreme temperatures, direct sunlight, and excessive moisture.
- Cable Care: Avoid bending or crimping the OBDII cable excessively. Always grasp the connector when plugging or unplugging to prevent damage to the pins.
- Software Updates: Check the manufacturer's website periodically for any available software updates to ensure optimal performance and compatibility with newer vehicle models.
6. Troubleshooting
If you encounter issues while using the V619 OBD2 Scanner, refer to the following common problems and solutions:
| Problem | Possible Cause | Solution |
|---|---|---|
| Scanner does not power on. | Loose connection to OBDII port; Vehicle ignition not ON; Vehicle's OBDII port fuse blown. | Ensure the connector is firmly plugged in. Turn vehicle ignition to "ON" position. Check vehicle's fuse box for a blown fuse related to the OBDII port. |
| "Link Error" or "Communication Error" message. | Vehicle not OBDII compliant; Faulty connection; Vehicle's ECU issue. | Verify your vehicle is OBDII compliant (most cars after 1996 in USA). Check cable connection. Try on another OBDII compliant vehicle if possible. Consult a professional mechanic. |
| Cannot clear codes. | Underlying fault still present; Ignition not ON. | Ensure the vehicle's ignition is ON (engine off). The codes cannot be cleared if the underlying issue causing them has not been resolved. Address the fault first. |
| Incorrect language displayed. | Language setting is incorrect. | Go to "Setting" > "Language" and select the desired language. |
Note: This device is specifically designed to diagnose and clear engine-related faults and is not suitable for non-OBDII fault inquiries, such as ABS, Airbag, or SRS codes.
7. Specifications
| Feature | Detail |
|---|---|
| Model | V619 |
| Brand | Generic |
| Screen Size | 1.8 Inches (240 x 320 pixels) |
| Supported Protocols | SAE J1850 PWM, SAE J1850 VPW, ISO9141-2, ISO14230-4 KWP (5 baud init), ISO14230-4 KWP (fast init), ISO15765-4 CAN (11 bit ID, 500 Kbaud), ISO15765-4 CAN (29 bit ID, 500 Kbaud), ISO15765-4 CAN (11 bit ID, 250 Kbaud), ISO15765-4 CAN (29 bit ID, 250 Kbaud) |
| Supported Languages | English, German, Chinese, Spanish, French, Italian, Russian, Dutch |
| Operating Voltage | Powered directly from vehicle OBDII port (8-18V) |
| Cable Length | 90 cm |
| Dimensions (approx.) | 13cm (H) x 7cm (W) x 2.5cm (D) |
| UPC | 768459503243 |
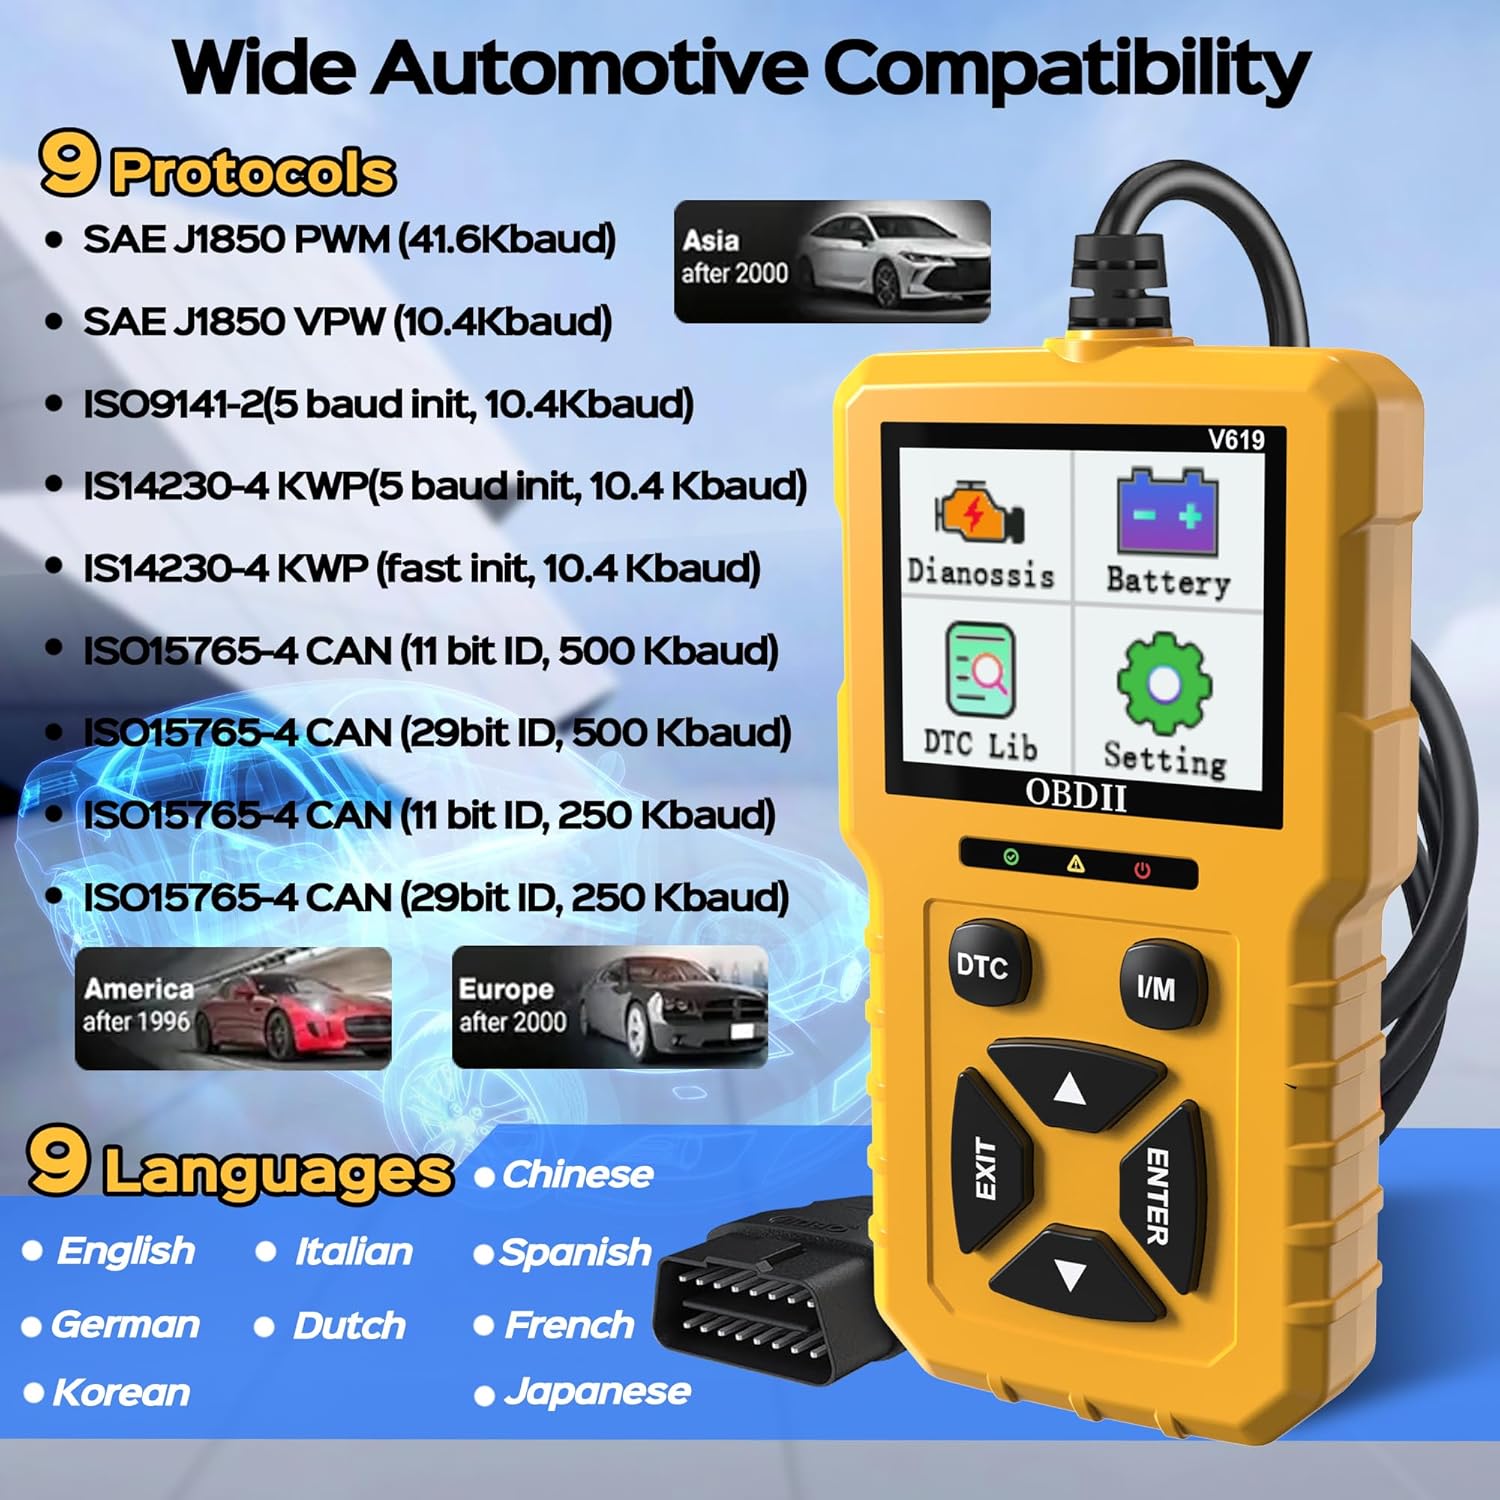
Figure 7.1: Diagram illustrating the wide automotive compatibility and the 9 supported protocols and languages.
8. Warranty and Support
This product is designed for reliability and performance. For information regarding warranty coverage, please refer to the purchase documentation or contact your retailer. For technical support or inquiries, please reach out to the manufacturer or seller through the platform where the product was purchased.
Return Policy: The product typically comes with a 30-day return policy for refund or replacement, as per the seller's terms.