Introduction
Thank you for purchasing the TAKRINK Digital Projection Alarm Clock. This manual provides detailed instructions for setting up, operating, and maintaining your new device. Please read this manual thoroughly before use to ensure proper functionality and to maximize your user experience.

The TAKRINK Digital Projection Alarm Clock, featuring a large display, time projection, and USB charging capabilities.
Setup
Package Contents
Before you begin, please verify that all items are present in the package:
- TAKRINK Digital Projection Alarm Clock
- USB Power Cable
- Power Adapter
- CR2 Battery (pre-installed)
- User Manual (this document)
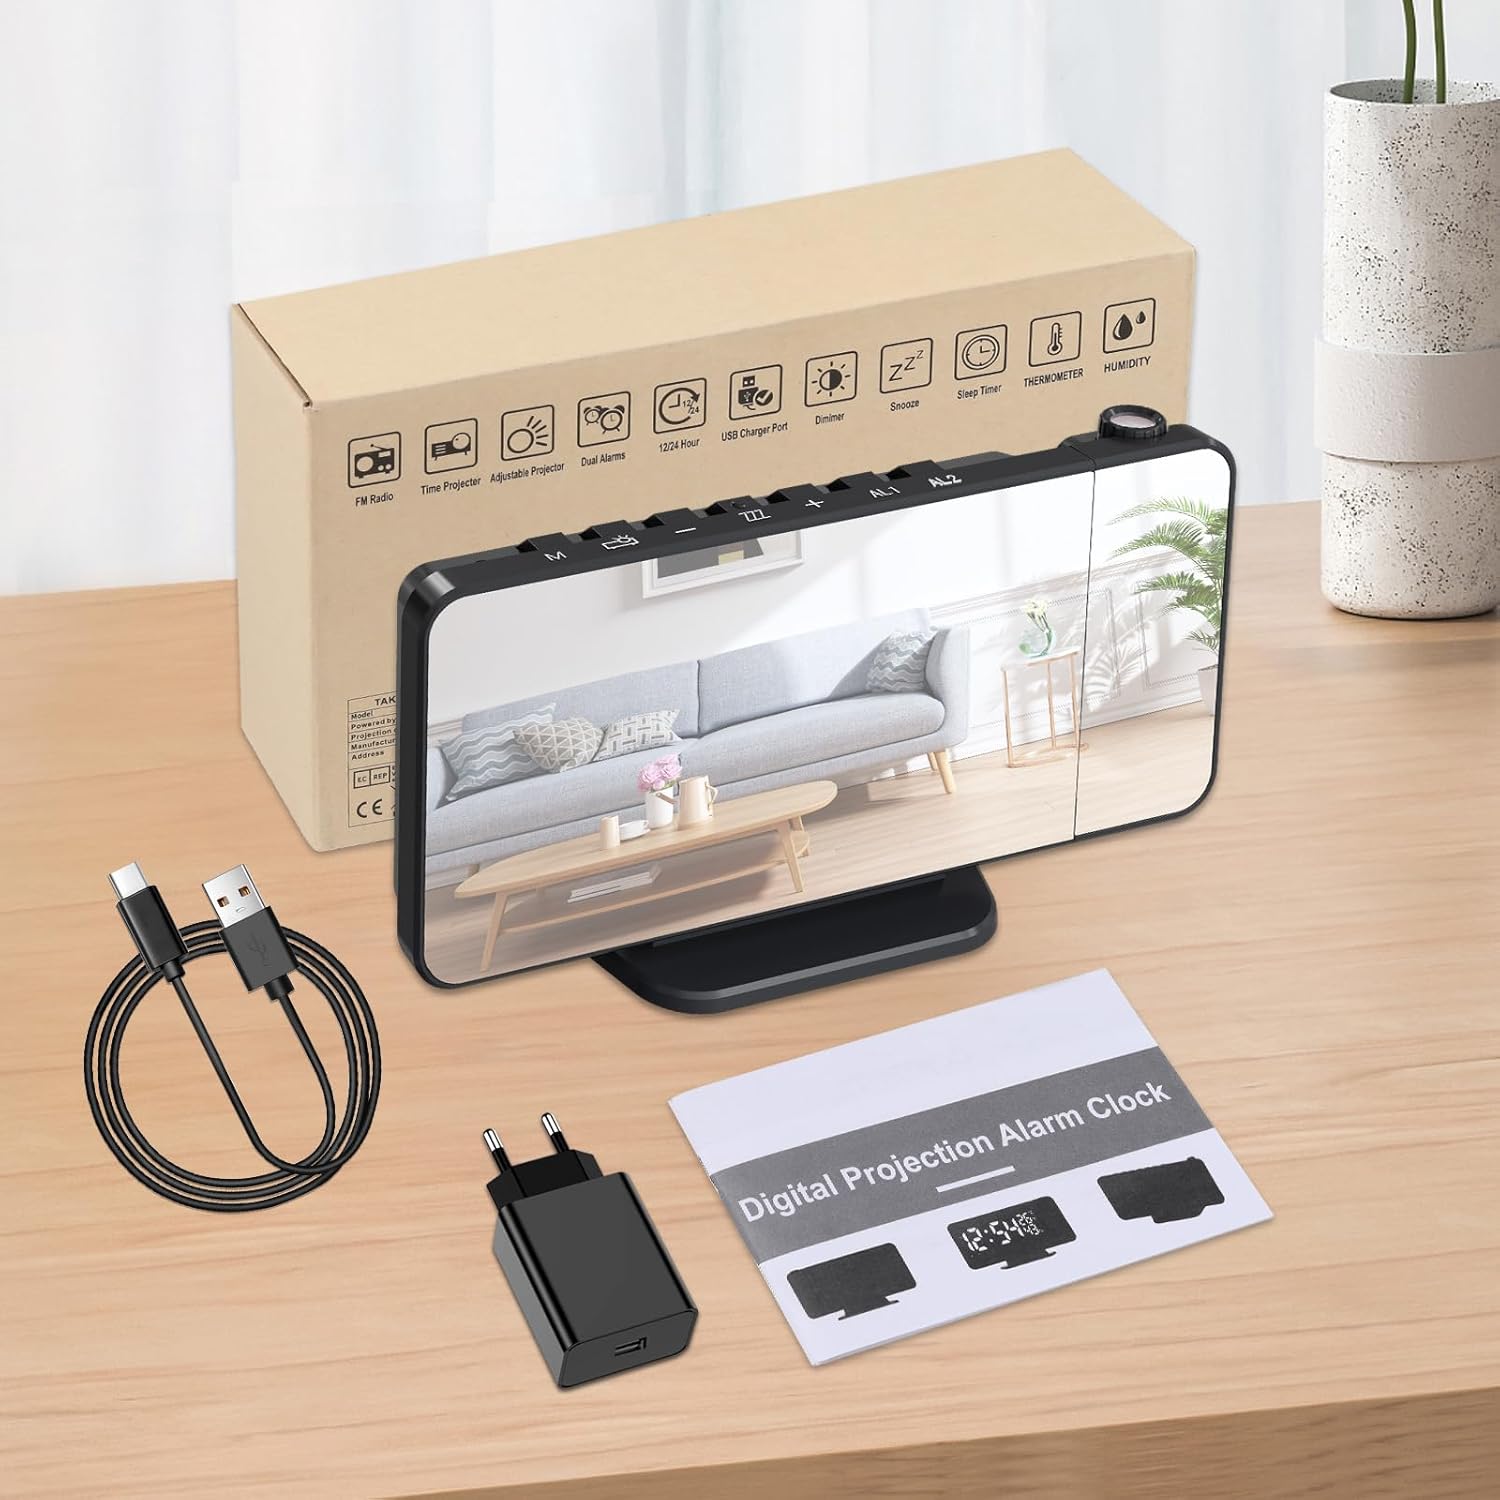
Contents of the TAKRINK Digital Projection Alarm Clock package.
Power Connection
The alarm clock operates via USB power. Connect the provided USB power cable to the clock's Type-C port and plug the other end into the power adapter. Then, plug the adapter into a standard wall outlet. The pre-installed CR2 battery serves as a backup for time settings during power outages.
Identifying Controls and Ports
Familiarize yourself with the buttons and ports on your alarm clock:

Overview of the TAKRINK Digital Projection Alarm Clock's controls and ports.
- M (Mode) Button: Used to switch between time, alarm, and radio modes.
- SET/RADIO Button: For setting time/alarm and controlling radio functions.
- PROJECT Button: Activates and adjusts the projection.
- ZZZ/LIGHT Button: Activates snooze and adjusts display brightness.
- +/- Buttons: Adjust values (time, volume, etc.).
- AL1/AL2 Buttons: Control Alarm 1 and Alarm 2 settings.
- USB-A Output Port: For charging external devices.
- Type-C Input Port: For main power connection.
- Antenna: For FM radio reception.
Operating Instructions
Setting the Time
- In clock mode, press and hold the SET/RADIO button for 3 seconds to enter time setting. The hour will flash.
- Use the +/- buttons to adjust the hour.
- Press SET/RADIO again to confirm and move to minute setting. Adjust minutes with +/-.
- Repeat for 12/24 hour format selection.
- Press SET/RADIO to exit setting mode.

The clock supports both 12-hour and 24-hour time formats.
Display Brightness Adjustment
The clock display has 4 adjustable brightness levels (Off, Low, Medium, High).
- In clock mode, short press the ZZZ/LIGHT button to cycle through brightness levels.
- To enable/disable automatic dimming, press and hold the ZZZ/LIGHT button for 3 seconds. When automatic dimming is on, the display will automatically enter low brightness in dark environments.

Adjustable display brightness levels for optimal viewing day and night.

Instructions for manually adjusting brightness and enabling automatic dimming.
Night Mode Setting
Night mode automatically sets the display to low brightness during a specified period.
- Short press the M button to enter night mode setting. The display will show "OFF" or "ON".
- Use +/- to switch between "OFF" and "ON".
- If "ON", long press M for 3 seconds to set the night mode time range (e.g., 18:00-6:00). Use +/- to adjust hours and minutes, and M to confirm.

Steps to configure the automatic night mode for the display.
Projection Features
The clock features a 180° rotatable projection that can display the time on your ceiling or wall.
- Adjusting Projection Angle: Manually rotate the projector lens up to 180 degrees (-90° to 90°) to direct the time display.
- Adjusting Projection Brightness: Short press the PROJECT button to cycle through 3 brightness levels (Off, Low Brightness, Highlight).
- Rotating Projected Time: Press and hold the PROJECT button for 3 seconds to rotate the projected time 180 degrees, ensuring correct orientation regardless of the clock's position.

The projection can be rotated 180 degrees and has adjustable brightness.

Choose from three levels of projection brightness to suit your environment.
Setting Alarms (Dual Alarms)
The clock supports two independent alarms (AL1 and AL2).
- Short press AL1 or AL2 button once to turn the alarm on or off.
- Press and hold the AL1 or AL2 button for 3 seconds to enter the alarm setting mode. The hour will flash.
- Use the +/- buttons to adjust the hour. Press the alarm button again to confirm and move to minute setting.
- Repeat for minute setting.
- Next, select the ring mode (Buzzer or Radio) using +/-.
- Press the alarm button to exit setting mode.

The clock features dual alarms and a customizable snooze function.

Detailed steps for setting the alarm time and snooze duration.
Snooze Function
When the alarm sounds, short press the ZZZ/LIGHT button to activate snooze. The alarm will sound again after the set snooze interval (default 5 minutes). You can adjust the snooze time from 5 to 60 minutes during alarm setting.
FM Radio Operation
The clock has a built-in FM radio (76.0 MHz - 108.0 MHz).
- Short press the SET/RADIO button to enter FM radio mode.
- Automatic Search and Save: In FM mode, long press the SET/RADIO button for 2 seconds to automatically search for and save available stations.
- Manual Tuning: Use the +/- buttons to manually tune to a specific frequency.
- Selecting Saved Channels: Short press +/- to cycle through saved stations.
- Adjusting Volume: While listening to the radio, use the +/- buttons to adjust the volume (0-15 levels).
- Turning Off Radio: Short press the SET/RADIO button again to exit FM radio mode.

Key features of the FM radio function, including frequency range and sleep timer.

Instructions for setting up and controlling the FM radio.
Sleep Timer
The sleep timer allows you to fall asleep to the radio, which will automatically turn off after a set duration (5-90 minutes).
- In FM radio mode, short press the M button to activate the sleep timer.
- Use the +/- buttons to adjust the sleep timer duration.
- The radio will automatically turn off after the selected time.
USB Charging Port
The clock is equipped with a USB-A output port on the back, allowing you to charge your mobile phone or other USB-powered devices.

The clock features temperature and humidity display, a USB charging port, and a mirror display.

The clock includes a convenient USB-A output port for charging your devices.
Temperature and Humidity Display
The clock displays both indoor temperature (in °C or °F) and humidity. Long press the M button to switch between Celsius and Fahrenheit.
Mirror Display
The large LED display surface also functions as a mirror, which can be useful for daily grooming.

The clock's display surface doubles as a practical mirror.
Maintenance
To ensure the longevity and optimal performance of your TAKRINK Digital Projection Alarm Clock, follow these simple maintenance guidelines:
- Cleaning: Use a soft, dry cloth to wipe the display and body of the clock. For stubborn smudges on the mirror display, a slightly damp cloth with a mild, non-abrasive cleaner can be used, followed by immediate drying. Avoid harsh chemicals or abrasive materials.
- Placement: Place the clock on a stable, flat surface away from direct sunlight, extreme temperatures, and high humidity. Ensure adequate ventilation around the device.
- Power: Always use the provided power adapter and USB cable. Do not expose the clock to water or other liquids.
- Battery: The CR2 backup battery is designed for power outages. If the clock is unplugged for extended periods, the battery may drain. Replace the battery if the time settings are lost frequently during brief power interruptions.
Troubleshooting
If you encounter any issues with your alarm clock, please refer to the following common problems and solutions:
| Problem | Possible Cause | Solution |
|---|---|---|
| Display is blank or not turning on. | No power connection or faulty adapter/cable. | Ensure the USB cable is securely connected to the clock and the power adapter is plugged into a working outlet. Try a different USB port or adapter if available. |
| Time/settings are lost after power disconnection. | Backup battery is dead or not installed correctly. | Check if the CR2 battery is properly installed. Replace the CR2 battery if it is old or depleted. |
| Projection is blurry or unclear. | Projection distance is too far or too close; lens needs cleaning. | Adjust the distance of the clock from the projection surface (optimal 3m, max 5m). Clean the projector lens with a soft cloth. |
| Alarm is not sounding. | Alarm is not activated or volume is too low. | Ensure AL1/AL2 is turned ON (indicated by icon on display). Increase alarm volume. Check alarm time setting. |
| Poor FM radio reception. | Weak signal or antenna not extended. | Fully extend the antenna. Reposition the clock to find a better signal. Perform an automatic station search. |
Specifications
| Feature | Detail |
|---|---|
| Brand | TAKRINK |
| Model Number | TYNZ132 |
| Color | Blue Violet |
| Display Type | Digital LED |
| Display Size | 7.28 inches |
| Display Brightness | 4 adjustable levels (Off, Low, Medium, High) |
| Projection Rotation | 180° (-90° to 90°) |
| Projection Brightness | 3 adjustable levels (Off, Low, Highlight) |
| Alarms | Dual Alarms |
| Snooze Duration | 5-60 minutes (default 5 minutes) |
| FM Radio Frequency | 76.0 MHz - 108.0 MHz |
| Radio Volume Levels | 0-15 levels |
| Sleep Timer | 5-90 minutes |
| USB Output | USB-A charging port |
| Power Source | USB Powered (AC adapter included), CR2 Battery (backup) |
| Product Dimensions | 10.5 cm (L) x 5.1 cm (H) |
| Special Features | Temperature & Humidity Display, Mirror Display |
Warranty and Support
Information regarding product warranty and customer support was not available in the provided product data. Please refer to the product packaging or the manufacturer's official website for the most up-to-date warranty details and support contact information.