LIYSNPTY R500
LVLP Spray Gun R500 User Manual
Model: R500 | Brand: LIYSNPTY
Introduction
This manual provides comprehensive instructions for the safe and effective operation, maintenance, and troubleshooting of your LIYSNPTY R500 LVLP Spray Gun. Designed for automotive basecoats, clearcoats, primers, and various industrial and woodworking coatings, this spray gun offers high paint transfer efficiency and low paint consumption. Please read this manual thoroughly before using the product to ensure optimal performance and safety.
Important Safety Information
WARNING: This product can expose users to chemicals including titanium dioxide, which is known to the State of California to cause cancer. Always adhere to the following safety guidelines:
- Do not spray in the direction of people or pets.
- Use only with adequate ventilation. Ensure the work area is well-ventilated to prevent inhalation of fumes.
- Wear appropriate personal protective equipment (PPE), including protective clothing, gloves, and eye/face protection (e.g., safety glasses, respirator).
- After use, clean the spray gun and its components thoroughly according to the manufacturer's instructions.
- Do not dispose of paint or used spray gun parts in the environment. Follow local regulations for proper disposal.
Product Overview and Components
The LIYSNPTY R500 LVLP Spray Gun is constructed for durability and efficient paint application. Key components include:
- Heavy-duty Construction: One-piece all-steel gun body, rust-resistant stainless-steel nozzle, and solid brass cap for longevity.
- LVLP Technology: Low Volume Low Pressure design ensures high paint transfer efficiency and reduced paint consumption, making it economical and environmentally friendly.
- 1.3MM Nozzle: Optimized for atomizing waterborne paints and high-flow sprays, suitable for auto refinishing and household painting tasks such as furniture, fences, lockers, and small equipment.
- 600CC Plastic Cup: Made from practical PE material, lightweight and easy to clean.
- Pattern and Fluid Controls: Allow for soft spraying, easy control, and minimal overspray.
- Handle and Trigger: Ergonomically designed handle for comfortable grip, with an easy trigger to reduce operating fatigue.
- Air Volume Control Knob: For precise control of air flow.

Figure 1: Exploded view of the R500 spray gun highlighting its main components including the 600CC plastic cup, stainless steel nozzle, pattern and fluid controls, handle, trigger, and air volume control knob.

Figure 2: The LVLP Spray Gun R500 shown with its included accessories: paint cup, brass air inlet fitting, hexagonal wrench, cleaning brushes, and a filter.
Setup
- Unpacking: Carefully remove all components from the packaging. Verify that all included items are present: 1 spray gun, 1 paint cup, 1 tool kit (which typically includes cleaning brushes and a wrench).
- Assembly:
- Attach the paint cup to the top of the spray gun by screwing it into place. Ensure it is securely fastened to prevent leaks.
- Connect your air compressor hose to the 1/4" air inlet at the bottom of the gun handle. Ensure a tight, leak-free connection.
- Prepare Paint:
- Ensure your paint is properly thinned according to the paint manufacturer's recommendations for spray application. Improper thinning can lead to poor atomization or clogging.
- Strain the paint to remove any impurities or particles that could clog the nozzle.
- Pour the prepared paint into the 600CC plastic cup.
- Adjust Air Pressure: Connect the spray gun to an air compressor. Set the operating pressure between 28.8-51 PSI. The working pressure should be less than 10 PSI (HVLP).
Operating Instructions
Before painting, always test the spray pattern on a scrap piece of material to fine-tune settings.
- Adjusting Controls:
- Fluid Control Knob: Adjusts the amount of paint flowing through the gun. Turn clockwise to decrease flow, counter-clockwise to increase.
- Pattern Control Knob: Adjusts the shape of the spray pattern (from round to fan). Turn to achieve the desired pattern width (7.0''-10.9'').
- Air Volume Control Knob: Located at the bottom of the handle, this controls the air flow to the gun.
- Spraying Technique:
- Hold the gun perpendicular to the surface, maintaining a consistent distance (typically 6-8 inches).
- Use smooth, even strokes, overlapping each pass by about 50%.
- Release the trigger at the end of each stroke to avoid paint buildup.
- Apply multiple thin coats rather than one thick coat to prevent runs and sags.

Figure 3: Demonstrating the use of the R500 spray gun for automotive painting, showing proper distance and angle for application.
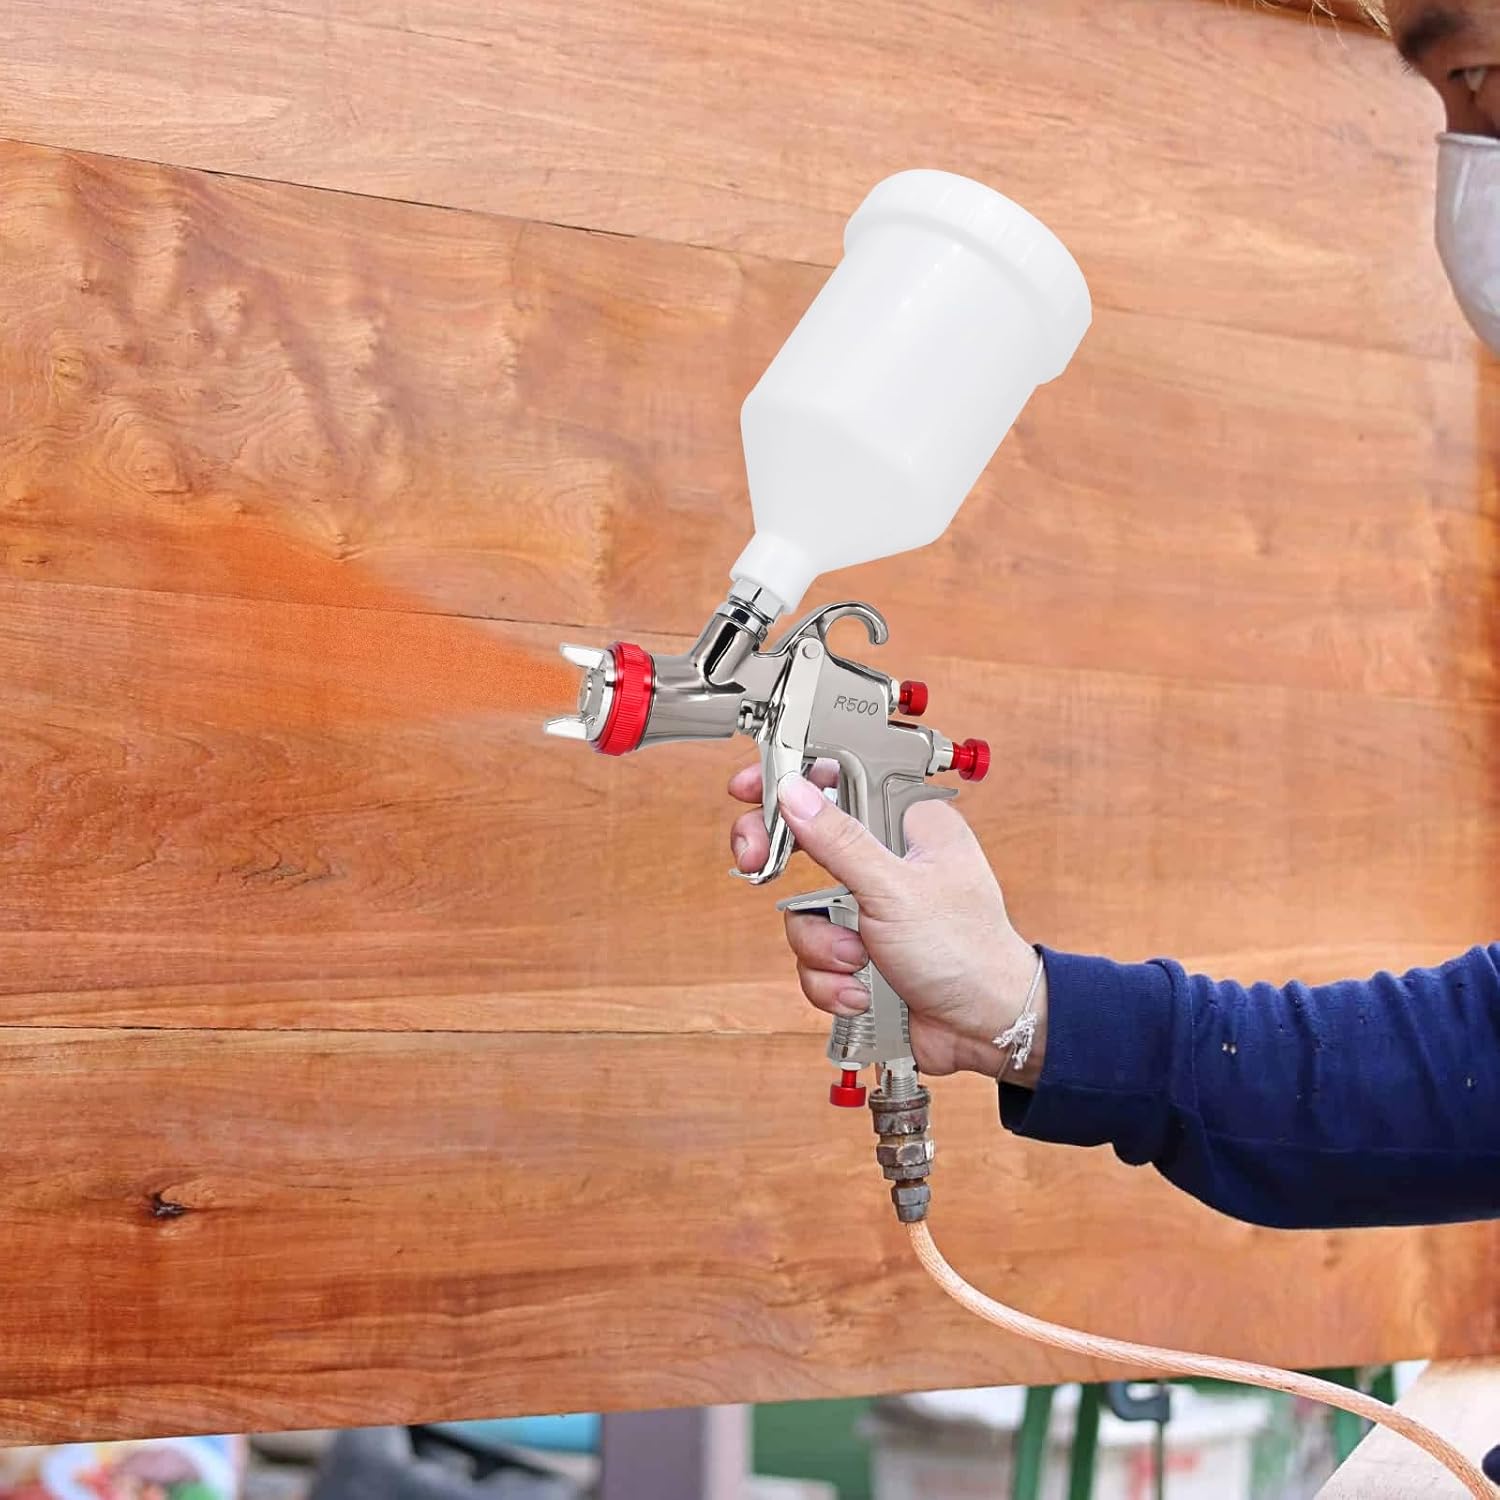
Figure 4: The R500 spray gun being used to apply coating to a wooden surface, illustrating its versatility for various materials.
Maintenance and Cleaning
Proper cleaning after each use is crucial for the longevity and performance of your spray gun.
- Empty Paint Cup: Remove any remaining paint from the cup.
- Initial Rinse: Pour a small amount of appropriate cleaning solvent (e.g., paint thinner for oil-based paints, water for water-based paints) into the cup. Spray the solvent through the gun into a waste container until the spray runs clear.
- Disassembly:
- Unscrew and remove the air cap and fluid nozzle using the provided wrench.
- Carefully remove the needle.
- Thorough Cleaning:
- Use the small cleaning brushes provided to clean the inside of the paint cup, fluid passages, air cap, nozzle, and needle.
- Pay special attention to the air cap holes and the fluid tip opening to ensure no paint residue remains.
- Do not use metal objects to clean the nozzle or air cap, as this can damage the precision openings.
- Drying: Once everything is clean, use compressed air to blast out any lingering water or solvent from the passages. Leave the gun disassembled to dry completely before reassembly or storage.
- Lubrication: Apply a small amount of spray gun lubricant to the needle packing and trigger pivot points periodically to ensure smooth operation.

Figure 5: The R500 spray gun disassembled, showing the main body, paint cup, and cleaning tools, illustrating the ease of disassembly for thorough cleaning.
Troubleshooting
This section addresses common issues you might encounter with your spray gun. For problems not listed here, please contact customer support.
| Problem | Possible Cause | Solution |
|---|---|---|
| Pulsating or Inconsistent Spray |
|
|
| No Paint Flow |
|
|
| Uneven Spray Pattern |
|
|
| Excessive Overspray |
|
|
Specifications
| Feature | Detail |
|---|---|
| Model Name | R500 |
| Brand | LIYSNPTY |
| Nozzle Size | 1.3mm (Larger 1.5mm, 1.7mm, 2.0mm atomizing sets available separately) |
| Air Consumption | 3.0-3.9 CFM |
| Operation Pressure | 28.8-51 PSI |
| Working Pressure (HVLP) | <10 PSI |
| Pattern Width | 7.0''-10.9'' |
| Air Inlet | 1/4" |
| Paint Transfer Ratio | ≥ 65%V |
| Tank Volume | 0.6 Liters (600CC) |
| Material | Chrome (Gun Body), Stainless Steel (Nozzle), Brass (Cap) |
| Item Weight | 0.96 Kilograms (2.1 pounds) |
| Product Dimensions | 6.3"W x 7.09"H |
| Power Source | Hand Powered (requires air compressor) |
| Included Components | 1pcs spray gun, 1pcs paint cup, 1pcs tool kit |
| UPC | 787996490267 |

Figure 6: Dimensional view of the R500 spray gun and its 600CC paint cup, showing measurements in centimeters.
Warranty and Support
The LIYSNPTY R500 LVLP Spray Gun comes with a 1 Year Warranty from the date of purchase. This warranty covers manufacturing defects and material flaws under normal use.
For warranty claims, technical assistance, or inquiries regarding larger atomizing sets (1.5mm, 1.7mm, 2.0mm) which are available separately, please contact LIYSNPTY customer support through your retailer or the official brand website.
Please retain your proof of purchase for warranty validation.
Ask a question about this manual
Ask about setup, troubleshooting, compatibility, parts, safety, or missing instructions. Manuals+ will review the question and use this page’s manual context to help answer it.