1. Product Overview
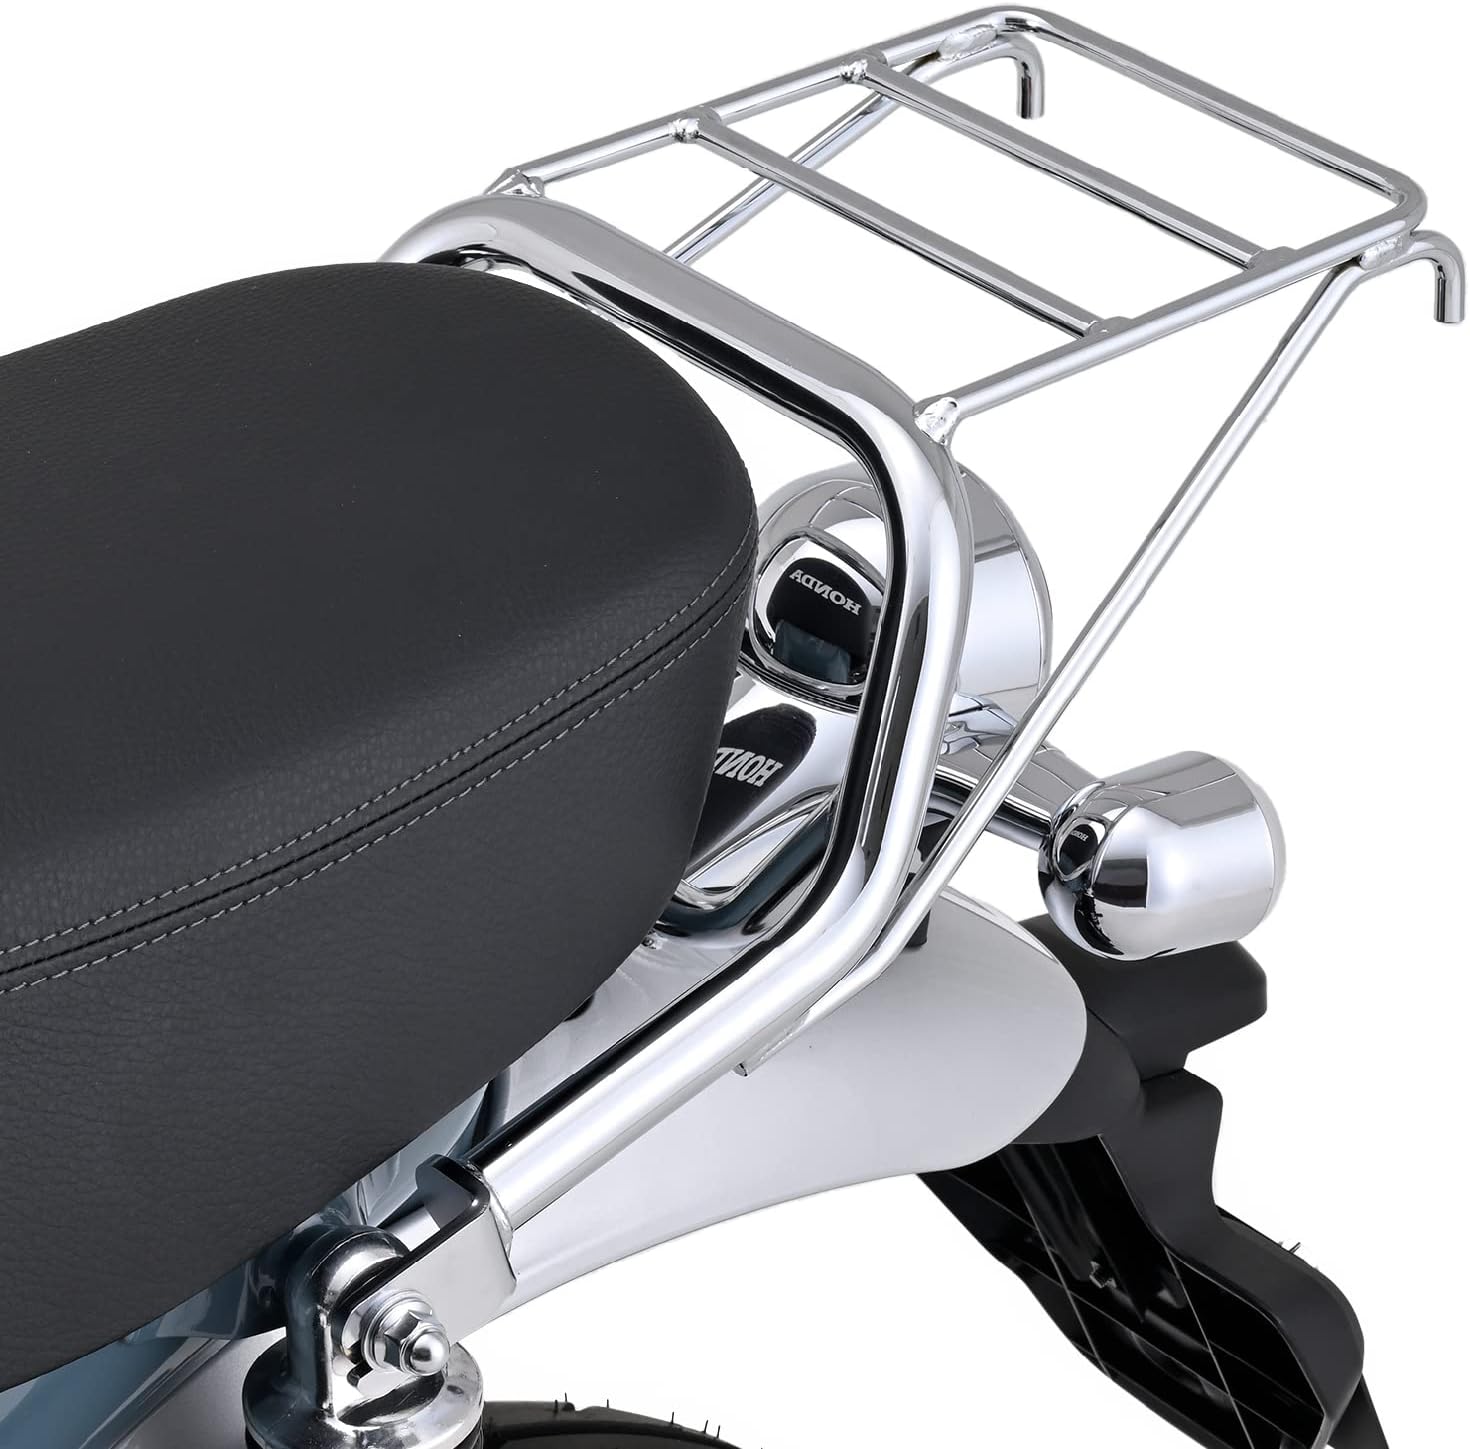
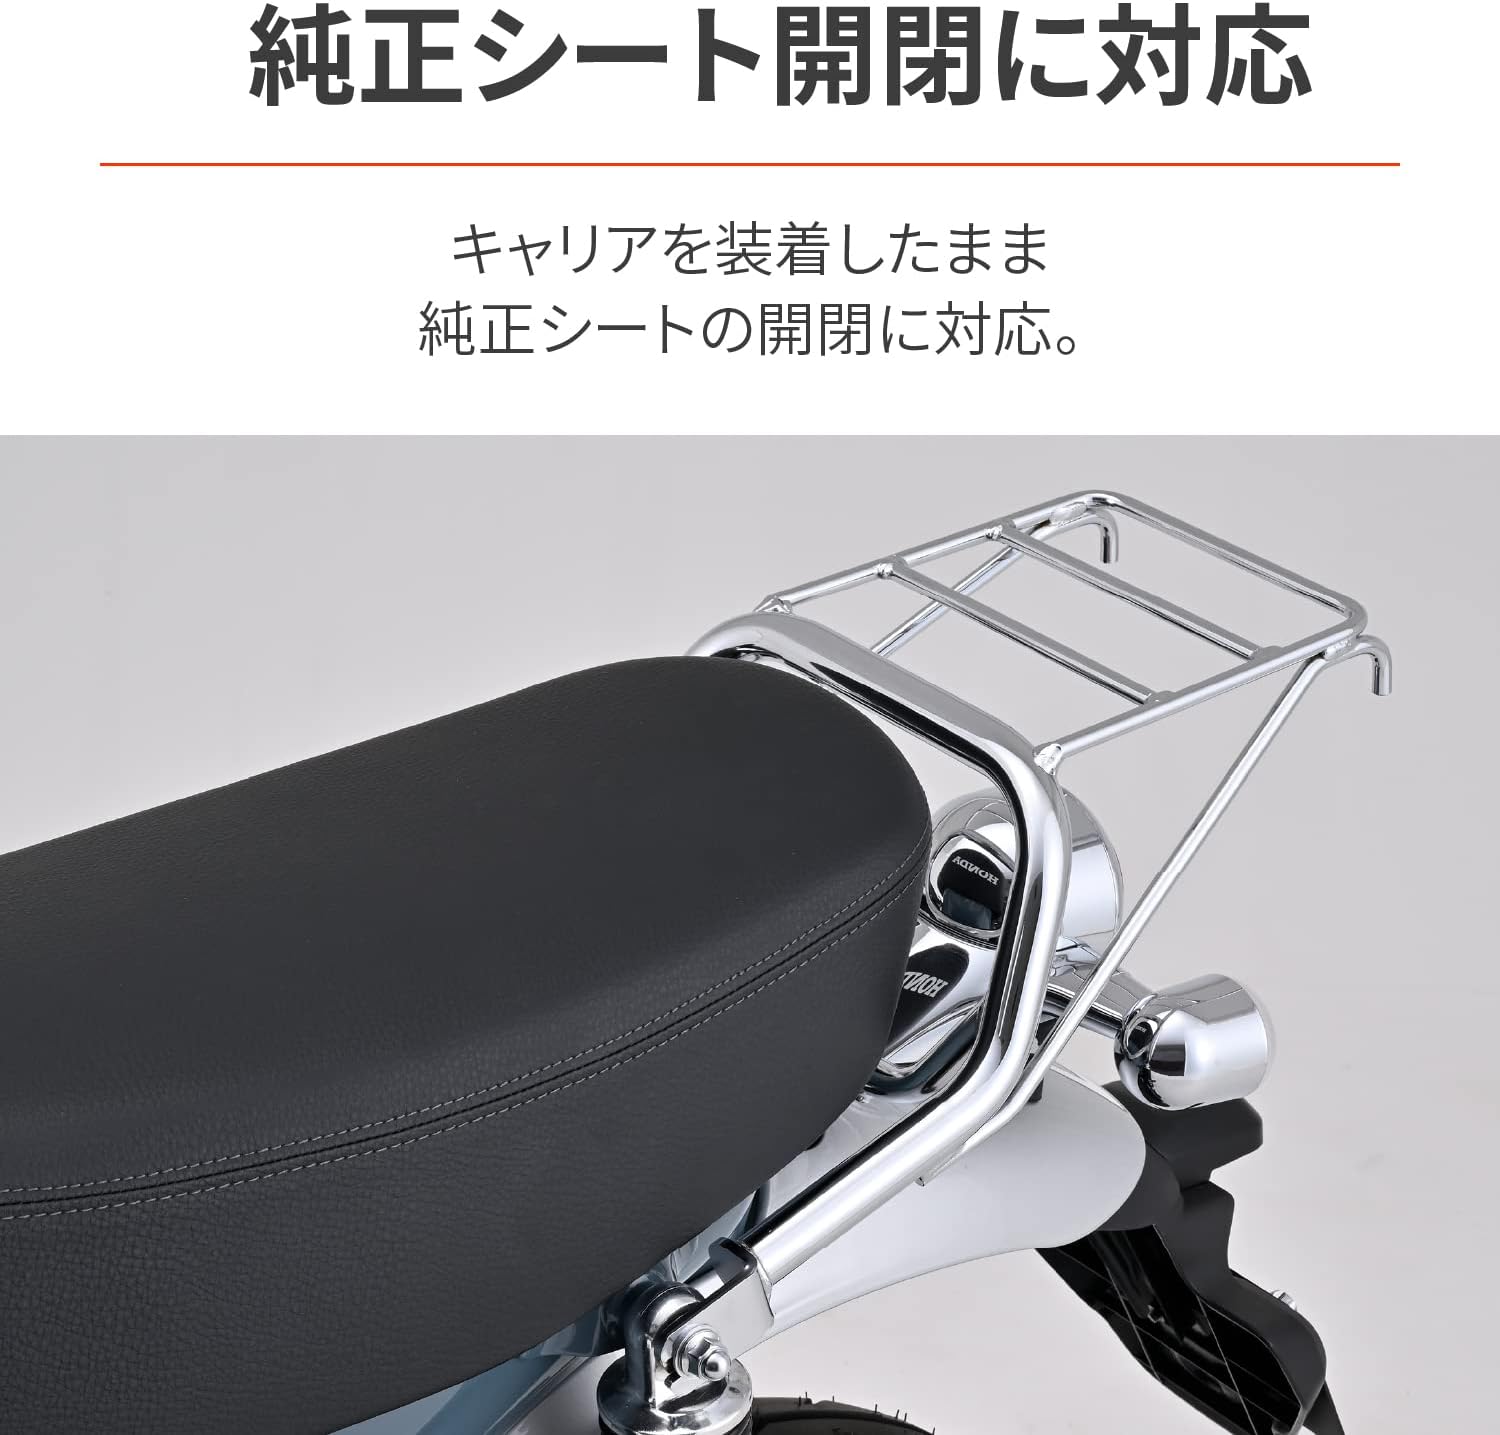
The Daytona Classic Rear Carrier (Model 27523) is specifically designed for the Dax125 (2023 model, [8BL-JB04]). It features a design that seamlessly integrates with the motorcycle's aesthetics, utilizing pipes of the same diameter as the genuine grab bar. This carrier enhances the utility of your Dax125 by providing additional luggage capacity while maintaining the ability to open and close the genuine seat.
Key Features:
- Vehicle-specific design for Dax125 (2023 model).
- Aesthetic integration with genuine grab bar pipe diameter.
- Allows full functionality of the genuine seat (opening/closing) with the carrier installed.
- Maximum load capacity of 4 kg.
- Compatible with Daytona Saddlebag Support (Part No. 27510) and Helmet Holder (Part No. 92651) for simultaneous installation (note: all three items cannot be installed simultaneously).
2. Safety Information
Please read and understand all safety instructions before installation and use. Failure to follow these instructions may result in injury or damage to the product or motorcycle.
- Load Capacity: Do not exceed the maximum load capacity of 4 kg. Overloading can affect motorcycle handling and stability, potentially leading to accidents.
- GIVI Boxes: If attaching a GIVI box, use only sizes 27L or smaller. Using larger GIVI boxes may cause damage to the motorcycle frame or the carrier itself.
- Installation: Ensure all bolts and fasteners are securely tightened according to the installation instructions. Regularly check for looseness, especially after initial installation and before each ride.
- Weight Distribution: Distribute luggage evenly on the carrier to maintain motorcycle balance.
- Accessory Compatibility: While this carrier can be installed with Daytona Saddlebag Support (Part No. 27510) and Helmet Holder (Part No. 92651), simultaneous installation of all three items is not recommended due to potential interference or structural limitations.
3. Package Contents
Verify that all components are present before beginning installation. If any parts are missing or damaged, please contact your retailer or Daytona customer support.
- Daytona Classic Rear Carrier (Model 27523) x 1
- Installation Hardware Kit (bolts, washers, etc.) x 1 set
- Instruction Manual x 1

4. Setup and Installation
This section provides general guidance for installing the Daytona Classic Rear Carrier. For detailed, step-by-step instructions, please refer to the included printed manual and diagrams.
- Preparation: Ensure the motorcycle is stable on its main stand or a suitable lift. Turn off the engine and remove the ignition key.
- Access Mounting Points: Locate the rear grab bar mounting points on your Dax125. These are typically where the genuine grab bar is attached.
- Remove Existing Components (if applicable): If a genuine grab bar or other accessories are currently installed at the mounting points, carefully remove them.
- Position the Carrier: Align the Daytona Classic Rear Carrier with the designated mounting points on the motorcycle. The design ensures a vehicle-specific fit.
- Secure with Hardware: Use the provided installation hardware (bolts, washers) to attach the carrier. Hand-tighten all bolts first to ensure proper alignment.
- Final Tightening: Once aligned, progressively tighten all bolts using appropriate tools. Refer to the printed manual for specific torque specifications. Ensure all connections are secure.
- Functionality Check: After installation, verify that the genuine seat can still be opened and closed without obstruction.


5. Operating Instructions
The Daytona Classic Rear Carrier is designed for straightforward use to transport luggage on your Dax125.
- Loading Luggage: Place items securely on the carrier platform. Use bungee cords, cargo nets, or straps to prevent movement during transit.
- Weight Limit: Always adhere to the maximum load capacity of 4 kg. Distribute weight evenly to maintain motorcycle balance and handling.
- Seat Access: The carrier is designed to allow the genuine seat to be opened and closed even when the carrier is installed. This provides convenient access to the under-seat storage.
- GIVI Box Usage: If using a GIVI box, ensure it is 27L or smaller and securely mounted to the carrier's universal base. Regularly check the mounting for security.

6. Maintenance
Regular maintenance will ensure the longevity and safe operation of your Daytona Classic Rear Carrier.
- Cleaning: Clean the carrier regularly with a mild detergent and water. Avoid abrasive cleaners or solvents that may damage the chrome finish.
- Inspection: Periodically inspect all mounting bolts and fasteners for tightness. Re-tighten if necessary. Check the carrier frame for any signs of damage, cracks, or corrosion.
- Corrosion Protection: The chrome finish provides good corrosion resistance, but regular cleaning and occasional application of a chrome polish can help maintain its appearance and protect against environmental elements.
7. Troubleshooting
This section addresses common issues you might encounter with the Daytona Classic Rear Carrier.
- Issue: Carrier feels loose after installation.
Solution: Re-check all mounting bolts and ensure they are tightened to the specified torque. If the issue persists, inspect the mounting points on the motorcycle for any damage or wear. - Issue: Genuine seat does not open/close smoothly.
Solution: Verify that the carrier is correctly aligned and not interfering with the seat mechanism. Ensure no foreign objects are obstructing the seat's movement. - Issue: Carrier shows signs of rust or corrosion.
Solution: Clean the affected area thoroughly. For minor surface rust, a chrome polish designed for motorcycles may help. For significant corrosion, consider professional repair or replacement. Regular cleaning and protection can prevent this. - Issue: Damage to carrier or motorcycle frame when using a GIVI box.
Solution: Ensure the GIVI box used is 27L or smaller, as specified. Larger boxes can exert excessive leverage and stress. If damage has occurred, discontinue use and consult a professional for assessment and repair.
8. Specifications
| Attribute | Detail |
|---|---|
| Brand | Daytona |
| Model Number | 27523 |
| Compatible Vehicle | Dax125 (2023 model) [8BL-JB04] |
| Color | Chrome Plated |
| Maximum Load Capacity | 4 kg |
| Loading Platform Dimensions | Length 192mm × Width (front) 186mm × Width (rear) 178mm |
| Product Weight | 2.61 kg |
| Package Dimensions | 55.1 x 35 x 20.4 cm |
| Mounting Type | Easy Snap, Vehicle-specific fit |
| GIVI Box Compatibility | Supports GIVI universal base (use 27L or smaller boxes) |
9. Warranty and Support
Warranty: This product comes with a 1-year warranty from the delivery date. The delivery slip is required for warranty claims. The warranty is limited to use within Japan.
For technical support, replacement parts, or warranty claims, please contact your authorized Daytona retailer or visit the official Daytona website for customer service information.
Daytona Official Website: www.daytona.co.jp


