1. Introduction
Welcome to your new Genmitsu LC-50 PLUS 10W Laser Engraver. This manual provides essential information for the safe and efficient operation, assembly, usage, and maintenance of your device. Please read this manual thoroughly before operating the machine to ensure proper function and safety.
2. Safety Information
Operating a laser engraver involves potential hazards. Adhere strictly to the following safety guidelines to prevent injury or damage.
- Eye Protection: Always wear appropriate laser safety goggles (OD4+ or higher) when the laser is active. Never look directly at the laser beam.
- Ventilation: Operate the machine in a well-ventilated area to dissipate smoke and fumes produced during engraving/cutting.
- Fire Hazard: Laser processing can ignite flammable materials. Keep a fire extinguisher nearby and never leave the machine unattended during operation.
- Material Compatibility: Only engrave or cut materials approved for laser processing. Avoid reflective, transparent, or unknown materials.
- Children and Pets: Keep children and pets away from the operating area.
- Emergency Stop: Familiarize yourself with the location and function of the Emergency Stop button.
- Laser Shield Protection: The device includes a laser shield for added safety. Ensure it is properly installed before use.

3. Product Overview
The Genmitsu LC-50 PLUS is a high-performance 10W compressed spot laser engraver and cutter, designed for precision and efficiency. Key features include:
- 10W Compressed Spot Laser Head: Provides high power and a fine laser spot for detailed engraving and efficient cutting.
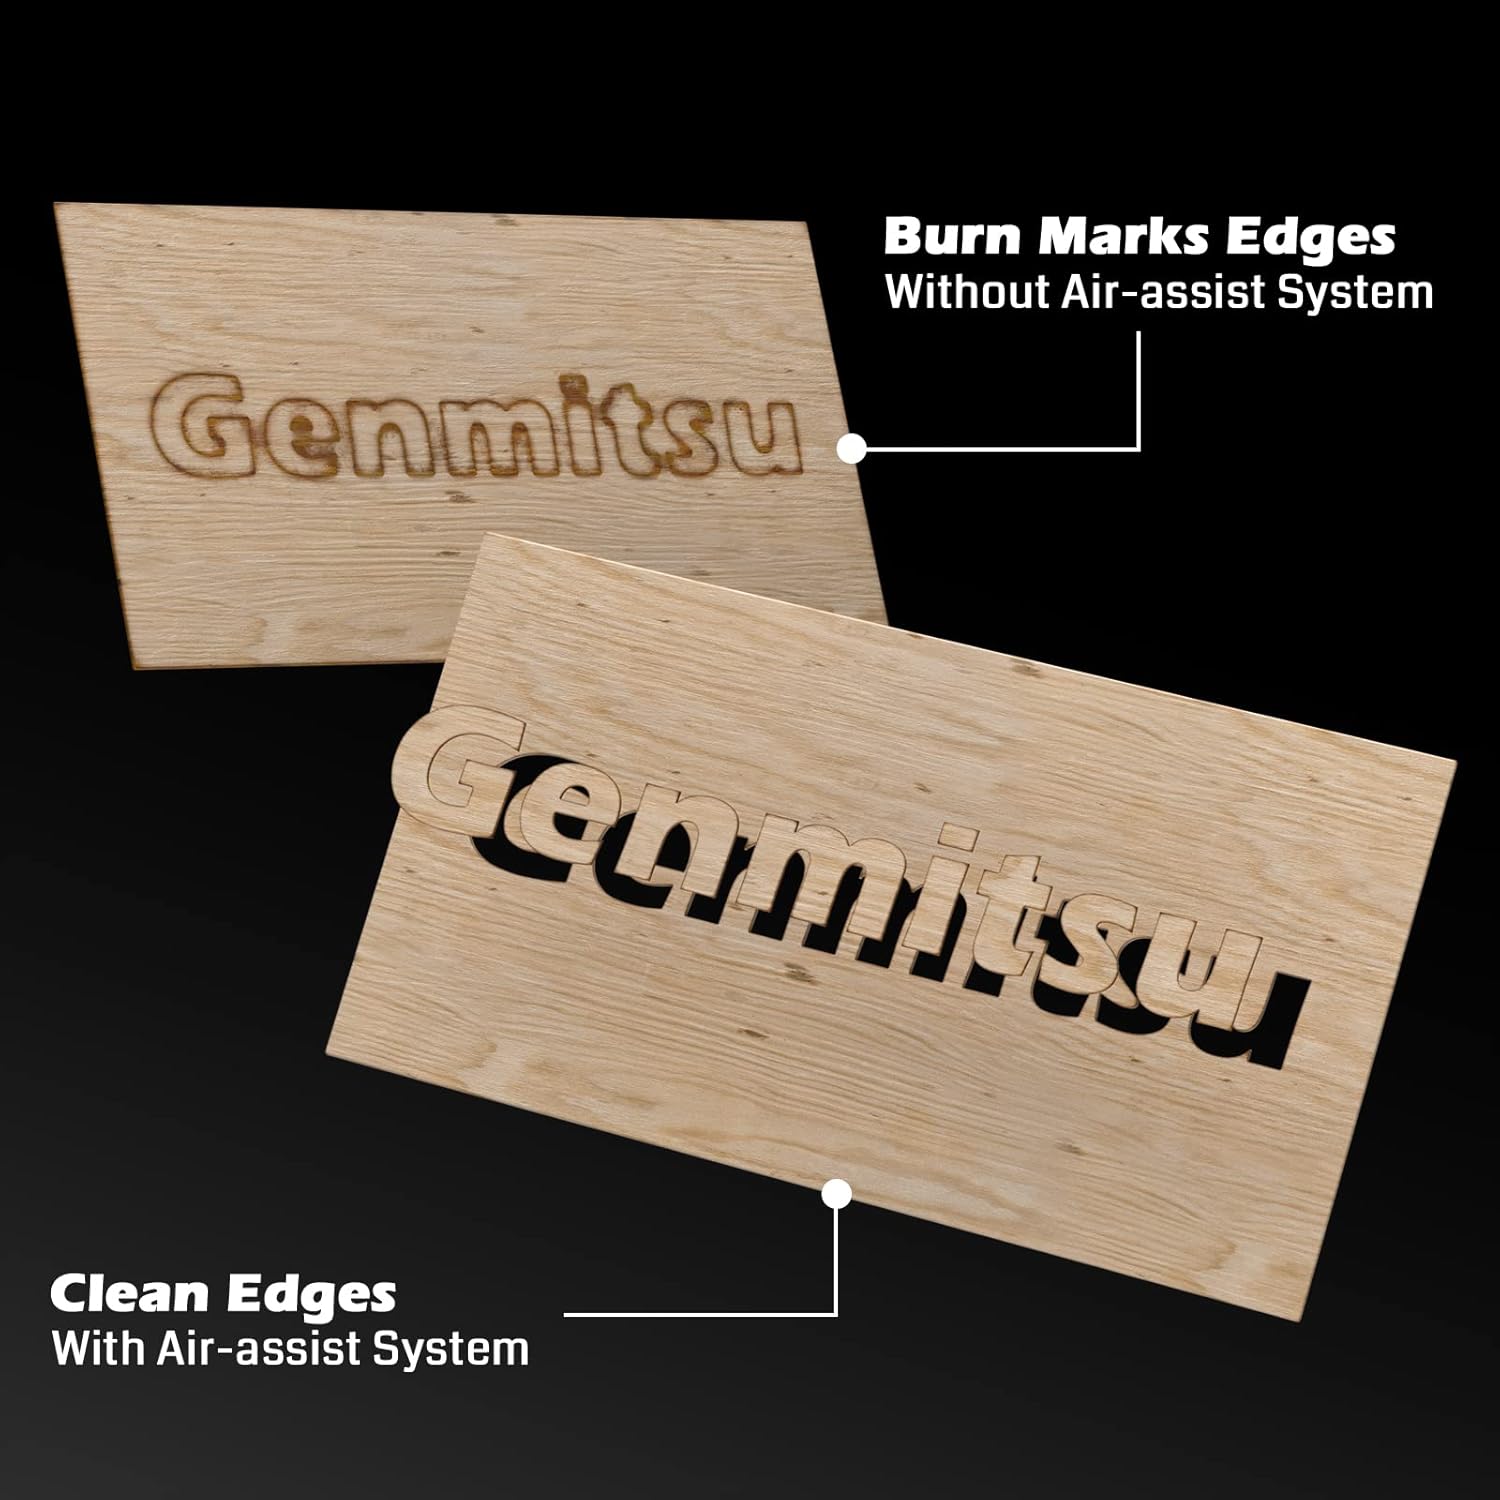
- Integrated Air Assist System: Enhances cutting performance by blowing away smoke and debris, resulting in cleaner cuts and increased efficiency.
- Linear Rails: Ensures higher stability and precision for consistent engraving and cutting results.
- X & Y-axis Tensioner: Allows for precise adjustment of timing belt tension, contributing to more accurate engraving.
- Limit Switches: Installed on both X and Y axes to prevent the laser module from colliding with boundaries, ensuring safe movement.
- Emergency Stop Button: Provides an immediate shutdown mechanism for safety.
- Raised Footpads: Optional accessories to increase working height for larger or cylindrical objects.


4. Assembly and Setup
Follow these steps to assemble and set up your Genmitsu LC-50 PLUS laser engraver.
4.1 Unboxing and Initial Assembly
- Carefully unpack all components and verify against the packing list.
- Assemble the main frame according to the included quick start guide or detailed assembly instructions.
- Install the laser module onto the gantry.
- Connect all cables securely, ensuring proper orientation.
4.2 X & Y-axis Tensioner Adjustment
The X & Y-axis tensioner design allows for precise adjustment of the timing belts, which is crucial for engraving accuracy. Refer to the detailed instructions video for visual guidance.
- Locate the M5 screws on the side of the X and Y axes.
- Loosen the No.1 screw slightly.
- Adjust the No.2 screw to achieve the desired belt tension. The belt should be taut but not overly tight.
- Tighten the No.1 screw to secure the tensioner.

4.3 Installing Raised Footpads (Optional)
If you need to engrave larger or cylindrical objects, install the Z-axis raised footpads to increase the working height by 35mm. The secure locking foot design allows for stable mounting.
5. Operating Instructions
This section outlines the basic steps for operating your laser engraver.
5.1 Software and Connection
- Install compatible laser control software (e.g., LightBurn, LaserGRBL) on your computer.
- Connect the engraver to your computer via USB.
- Ensure the necessary drivers are installed and the software recognizes the device.
5.2 Material Preparation and Placement
- Place the material to be engraved or cut securely on the working surface.
- Ensure the material is flat and properly aligned.
5.3 Focusing the Laser
Proper laser focus is critical for optimal engraving and cutting results. Follow the manufacturer's specific instructions for focusing the laser module.
5.4 Using the Air Assist System
The integrated Air Assist System significantly improves cutting quality by clearing smoke and debris from the laser's path. Ensure the air pump is connected and activated for cutting operations, especially on materials like wood and acrylic.
5.5 Starting an Engraving/Cutting Job
- Load your design file into the laser control software.
- Set appropriate parameters (power, speed, passes) for your material.
- Use the Test Fire feature to confirm the laser's exact position before starting the job.
- Initiate the job and monitor the process closely.
5.6 Compatible Materials
The Genmitsu LC-50 PLUS is capable of engraving and cutting a wide range of materials, including but not limited to:
- Wood (e.g., basswood plywood up to 10mm)
- Acrylic (up to 5mm)
- Metal (for engraving/marking)
- Leather
- Fabric
- Paper/Cardboard
- Rubber
- Glass (for engraving)

6. Maintenance
Regular maintenance ensures the longevity and optimal performance of your laser engraver.
- Clean the Laser Lens: Periodically clean the laser lens with a specialized lens cleaning solution and cloth to maintain laser power and focus.
- Clean Linear Rails: Keep the linear rails free from dust and debris. Lubricate them occasionally with appropriate lubricant as recommended by the manufacturer.
- Check Belts: Inspect the timing belts for wear and tear. Ensure they are properly tensioned (refer to Section 4.2).
- Clear Debris: Regularly remove any accumulated debris from the working area and around the laser module.
7. Troubleshooting
This section addresses common issues you might encounter and their potential solutions.
| Problem | Possible Cause | Solution |
|---|---|---|
| Laser not firing | Loose cable connection, software settings, laser module issue | Check all connections, verify software settings (power, enable laser), inspect laser module. |
| Poor engraving/cutting quality | Incorrect focus, wrong parameters, dirty lens, loose belts | Adjust laser focus, optimize power/speed settings, clean laser lens, check belt tension. |
| Machine not moving or erratic movement | Loose motor cables, software connection issue, limit switch triggered | Check motor connections, restart software/computer, ensure no obstructions are triggering limit switches. |
| Air assist not working | Air pump not connected, hose blocked, pump malfunction | Verify air pump connection and power, check air hose for kinks or blockages. |
8. Technical Specifications
| Feature | Detail |
|---|---|
| Model Number | LC50 Plus |
| Laser Power | 10W Compressed Spot Optical Power |
| Engraving Area | 500mm x 400mm |
| Max Engraving Speed | Up to 20000mm/min |
| Cutting Capacity (Basswood Plywood) | Up to 10mm (single pass) |
| Cutting Capacity (Acrylic) | Up to 5mm (single pass) |
| Frame Material | Full Aluminum Alloy |
| Motion System | Linear Guide Design |
| Product Dimensions | 75 x 23.5 x 18.5 cm |
| Item Weight | 8.37 kg |
9. Warranty and Support
For warranty information, technical support, or service inquiries, please refer to the official Genmitsu website or contact their customer service directly. Keep your purchase receipt as proof of purchase.