1. Introduction
This manual provides detailed instructions for the Buffbee RS11 Radio Alarm Clock. Please read this guide thoroughly before operating the device to ensure proper use and to maximize its features. Keep this manual for future reference.
Package Contents:
- 1 x Buffbee RS11 Radio Alarm Clock
- 1 x DC Power Adapter
- 1 x User Manual
- 1 x CR2032 Battery (may be pre-installed or included separately)
2. Safety Information
To prevent damage or injury, please observe the following safety precautions:
- Do not expose the device to water, moisture, or extreme temperatures.
- Do not disassemble or attempt to repair the device yourself. Refer all servicing to qualified personnel.
- Use only the provided DC power adapter. Using an incorrect adapter may damage the device and void the warranty.
- Keep the device away from heat sources and direct sunlight.
- Ensure proper ventilation around the device.
3. Product Overview
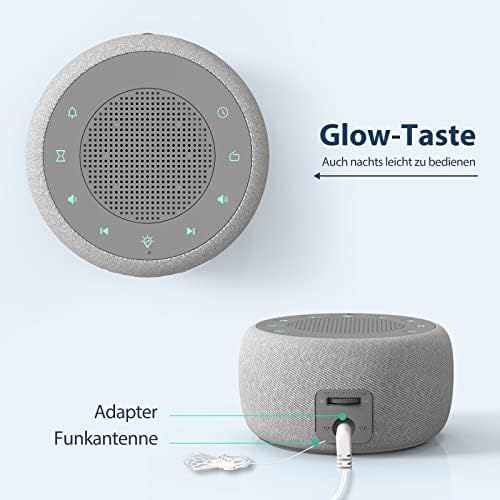
The Buffbee RS11 is a versatile radio alarm clock designed for your bedroom, combining an alarm clock, FM radio, and a 7-color night light in a compact unit. It features a 5W Hi-Fi speaker for clear sound, four distinct alarm sounds, a 0-100% dimmable display, and convenient glow buttons for easy nighttime operation.


4. Setup
4.1 Power Connection
- Connect the provided DC power adapter to the DC input port on the back of the alarm clock.
- Plug the adapter into a standard electrical outlet. The display will light up.
4.2 Backup Battery Installation (CR2032)
The CR2032 battery (included) serves as a backup to retain time and alarm settings during a power outage.
- Locate the battery compartment on the bottom of the unit.
- Open the compartment cover.
- Insert the CR2032 battery with the positive (+) side facing up.
- Close the battery compartment cover securely.
4.3 Initial Time Setting
- Press and hold the Time Set button (refer to product diagram for button layout).
- Use the +/- buttons to adjust the hour. Press Time Set again to confirm.
- Use the +/- buttons to adjust the minute. Press Time Set again to confirm.
- To switch between 12-hour and 24-hour format, press the 12/24H button during time setting or when the time is displayed.
5. Operating Instructions
5.1 Setting the Alarm
The device supports setting multiple alarms (if applicable, otherwise specify single alarm).
- Press the Alarm Set button. The alarm time will flash.
- Use the +/- buttons to adjust the alarm hour. Press Alarm Set to confirm.
- Use the +/- buttons to adjust the alarm minute. Press Alarm Set to confirm.
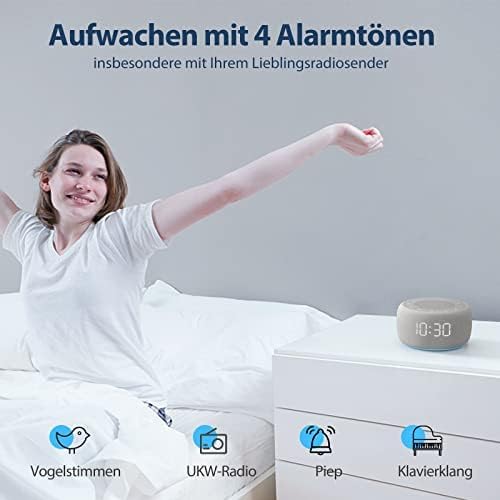
- Select your desired alarm sound (Bird, Piano, Beep, or FM Radio) using the Alarm Sound button or +/- buttons. Press Alarm Set to finalize.
- To activate/deactivate the alarm, press the Alarm ON/OFF button. An alarm icon will appear on the display when active.
- When the alarm sounds, press the Snooze button for a temporary pause, or any other button to turn off the alarm for the day.
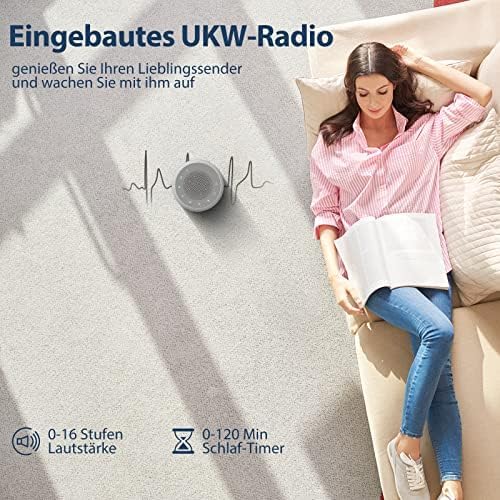
5.2 FM Radio Operation
- Extend the radio antenna for better reception.
- Press the Radio button to turn on the FM radio.
- Use the Tune +/- buttons to manually tune to a station.
- Press and hold Tune +/- to automatically scan for the next available station.
- Adjust the volume using the Volume +/- buttons (0-16 levels).
- To turn off the radio, press the Radio button again.
5.3 Night Light Function
- Press the Night Light button to turn on the night light.
- Press the Night Light button repeatedly to cycle through the 7 available colors.
- To turn off the night light, press the Night Light button until it switches off, or hold it down.
5.4 Display Dimmer
The display brightness can be adjusted from 0% to 100%.
- Use the dedicated Dimmer dial or buttons (refer to product diagram) to adjust the display brightness to your preference.
5.5 Sleep Timer
The sleep timer allows the radio or night light to turn off automatically after a set period (0-120 minutes).
- While the radio or night light is on, press the Sleep Timer button.
- Press repeatedly to cycle through available sleep timer durations (e.g., 15, 30, 60, 90, 120 minutes, or OFF).
- The device will automatically turn off the selected function after the set time.
5.6 Glow Buttons
The control buttons illuminate for 5 seconds when pressed, making operation easier in low-light conditions.
6. Maintenance
6.1 Cleaning
- Wipe the device with a soft, dry cloth.
- Do not use abrasive cleaners, waxes, or solvents.
6.2 Backup Battery Replacement
If the time and alarm settings are not retained during a power outage, the CR2032 backup battery may need replacement.
- Unplug the device from the power outlet.
- Open the battery compartment on the bottom of the unit.
- Remove the old CR2032 battery and dispose of it properly.
- Insert a new CR2032 battery with the positive (+) side facing up.
- Close the battery compartment cover.
7. Troubleshooting
If you encounter any issues, please refer to the following common problems and solutions:
| Problem | Possible Cause | Solution |
|---|---|---|
| Device does not power on. | Power adapter not connected or faulty. | Ensure the DC power adapter is securely plugged into the device and a working electrical outlet. Try a different outlet. |
| Alarm does not sound. | Alarm is not activated or volume is too low. | Check if the alarm icon is displayed. Ensure alarm volume is set to an audible level. Re-set the alarm. |
| FM Radio has poor reception/static. | Antenna not extended or poor signal area. | Fully extend the radio antenna. Try repositioning the device or the antenna for better signal. |
| Display is too dim or too bright. | Brightness setting needs adjustment. | Adjust the display brightness using the dedicated dimmer control. |
| Time/settings lost after power outage. | CR2032 backup battery is dead or missing. | Replace the CR2032 backup battery. Ensure it is inserted correctly. |
8. Specifications
| Feature | Specification |
|---|---|
| Model Number | RS11 |
| Brand | BUFFBEE |
| Dimensions (L x W x H) | 9.5 x 3.81 x 6 cm (3.74 x 1.5 x 2.36 inches) |
| Weight | 360 grams (0.79 lbs) |
| Color | Grey |
| Display Type | Digital |
| Special Features | Timer, Alarm, Radio, Automatic Dimmable Intensity, Night Light |
| Power Source | Electric Cable (DC Adapter) |
| Backup Battery | 1 x CR2032 (Included) |
| Mounting Type | Tabletop |
| Operating Mode | Electric |
| Connectivity Technology | DC Connector |
| Movement Type | Quartz |
| Material Type | Fabric, Plastic |
| UPC | 768477489574 |
9. Warranty and Support
This product comes with a standard manufacturer's warranty. For specific warranty details, please refer to the documentation provided with your purchase or contact Buffbee customer support.
If you encounter any issues not covered in the troubleshooting section, or require further assistance, please contact our customer support team through the retailer's platform or the official Buffbee website.