
Introduction
Thank you for choosing the astimey Lift Top Shoe Storage Bench, Model RQ-01. This manual provides essential information for the safe assembly, proper operation, and effective maintenance of your new shoe bench. Please read these instructions carefully before beginning assembly and retain them for future reference.

Figure 1: Assembled astimey Lift Top Shoe Storage Bench.
Safety Information
- Maximum Weight Capacity: The bench has a full weight bearing capacity of 220 pounds (approximately 99.8 kg). Do not exceed this limit to prevent damage or injury.
- Assembly: Ensure all components are securely fastened during assembly. Improper assembly may lead to instability.
- Placement: This bench is intended for indoor use only. Prolonged exposure to outdoor elements may compromise its structural integrity.
- Children: Keep children away from the lift-top mechanism during opening and closing to avoid pinching.
Setup and Assembly
The astimey Lift Top Shoe Storage Bench requires assembly. Please ensure all parts are present and undamaged before beginning. A detailed instruction manual and necessary tools are included in the packaging.
Components Overview
- Particleboard Panels (various sizes)
- Metal Frame Components
- Faux Leather Cushion (pre-assembled with lift-top mechanism)
- Adjustable Shelf Dividers
- Hardware (screws, dowels, adjustable feet, etc.)
Assembly Steps
- Unpack and Identify: Carefully unpack all components and compare them against the parts list in the included manual.
- Frame Assembly: Assemble the metal frame components according to the diagrams. Ensure all screws are tightened but do not overtighten until the entire frame is aligned.
- Panel Attachment: Attach the particleboard panels to the frame. Pay close attention to the orientation of each panel as indicated in the manual.
- Shelf Installation: Install the internal shelves. The middle partition is adjustable; refer to the manual for placement options.
- Cushion Top: Attach the lift-top cushion assembly. Ensure the hinges are correctly aligned and secured to allow smooth opening and closing.
- Final Adjustments: Once fully assembled, gently tighten all screws. Adjust the leveling feet at the bottom to ensure the bench is stable on uneven surfaces.

Figure 2: Product Dimensions for Assembly Reference.
Installation Video
For a visual guide on the assembly process, please refer to the official installation video provided by the manufacturer:
Video 1: Official Astimey Shoe Bench Installation Guide.
Operating Instructions
Lift-Top Hidden Storage
The bench features a lift-top design with a hidden storage compartment. To access, gently lift the faux leather cushion. The safe and strong hinges are designed to hold the lid open, preventing it from closing unexpectedly. To close, gently push the lid down until it rests securely.

Figure 3: Lift-Top Hidden Storage in Use.
Adjustable Shoe Rack
The lower section of the bench includes a 2-tier shoe rack with an adjustable middle partition. This allows for customized storage to accommodate various shoe sizes and types, including boots in the larger compartment. The bench can store up to 8 pairs of shoes, depending on their size.
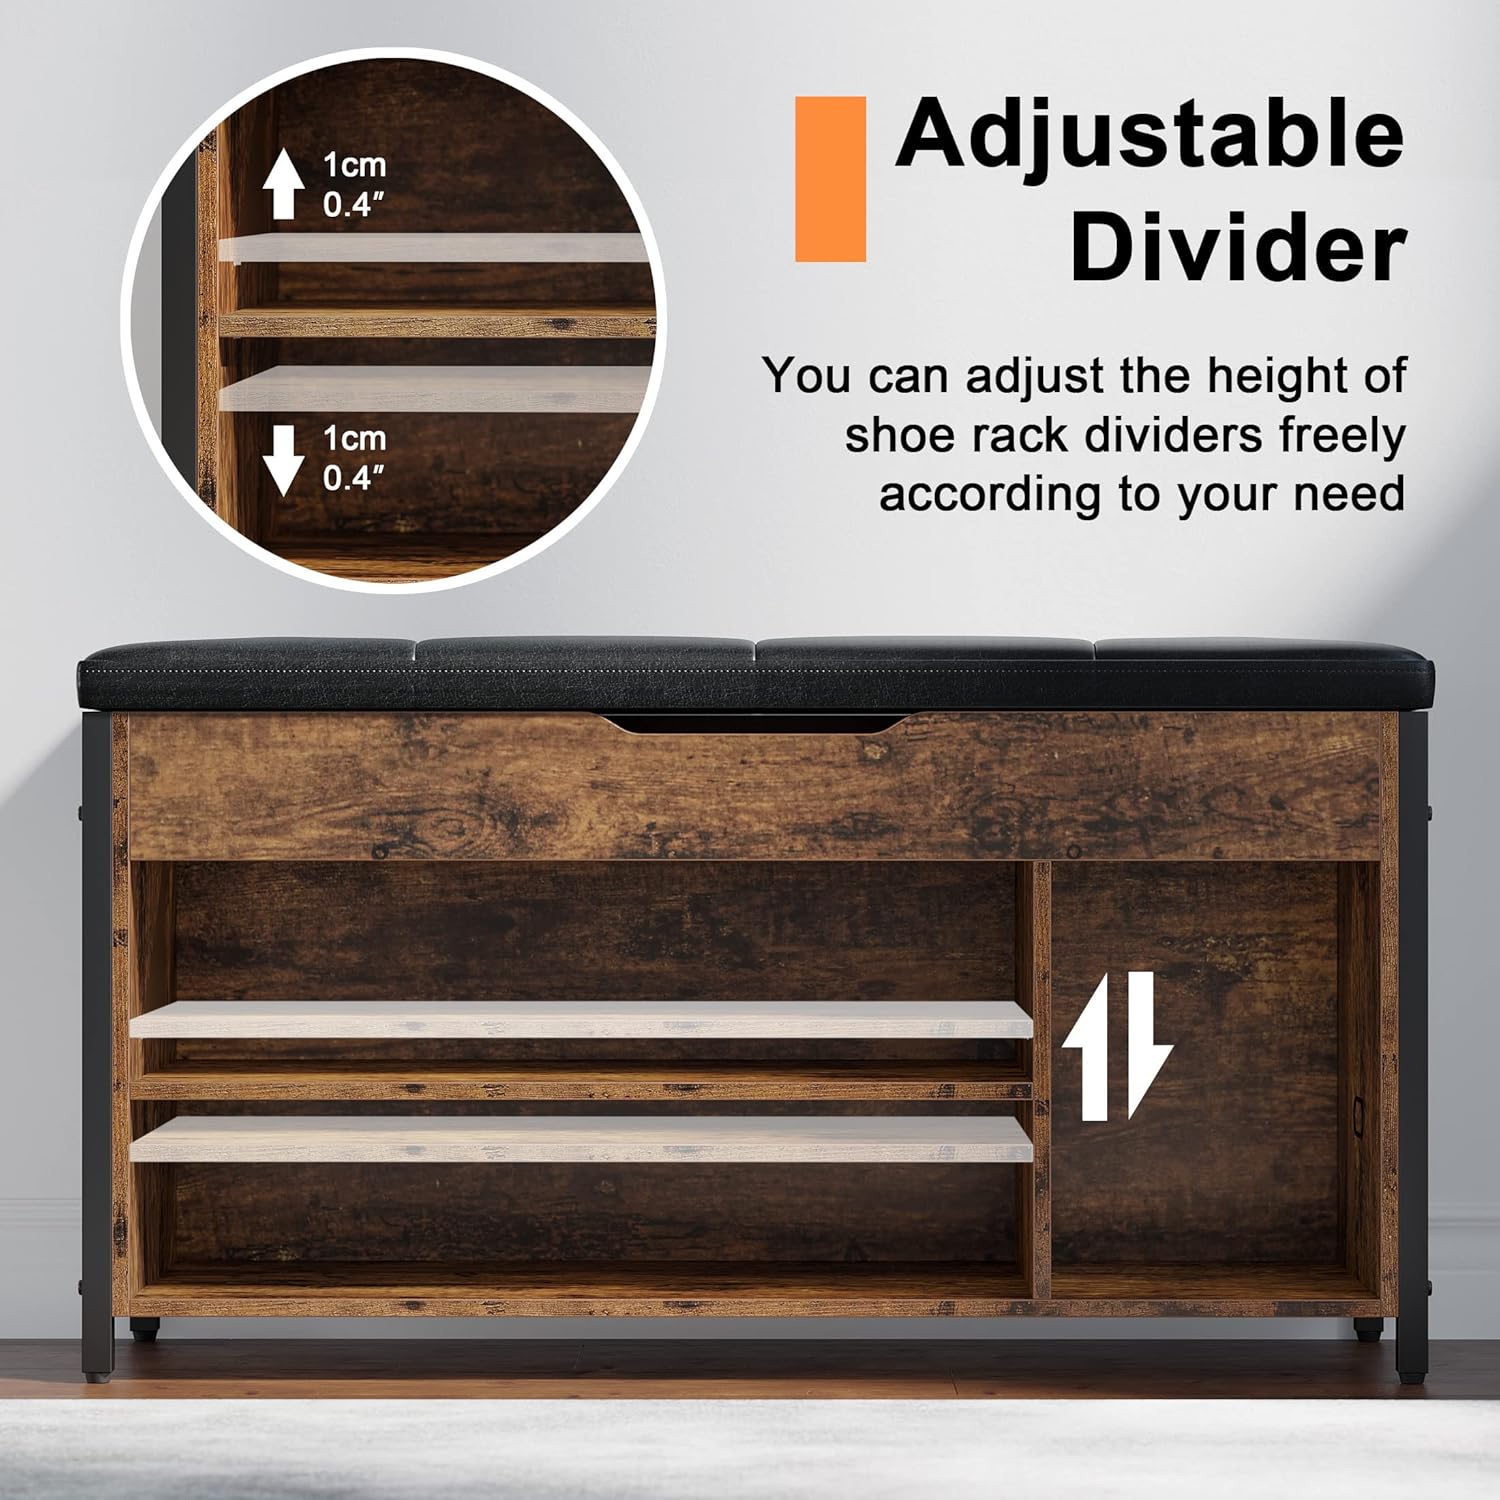
Figure 4: Adjustable Divider Mechanism.
Seating
The comfortable faux leather cushion provides a convenient seating area for changing shoes. Ensure the bench is placed on a stable, level surface before sitting.
Maintenance
- Cleaning: Wipe the bench surfaces with a damp cloth. Avoid using abrasive cleaners, harsh chemicals, or solvents, as these may damage the finish or upholstery.
- Inspection: Periodically check all screws and connections to ensure they remain tight. Retighten if necessary.
- Environment: Keep the bench in a dry, indoor environment. Avoid direct sunlight and extreme temperature changes to preserve the wood and metal components.
Troubleshooting
Assembly Difficulties
- Misaligned Holes/Parts: If components do not align correctly, loosen all screws slightly, adjust the parts to fit, and then retighten. Double-check the instruction manual diagrams for correct part orientation. Sometimes, parts may appear similar but have subtle differences.
- Missing Hardware: If any hardware is missing, do not attempt to substitute with incorrect parts. Contact customer support for replacement parts.
Instability
- Wobbling: Ensure the bench is placed on a flat, level surface. Use the adjustable feet at the bottom of the legs to compensate for minor unevenness in the floor. Turn the feet clockwise or counter-clockwise until the bench is stable.
- Loose Connections: Check all assembly screws and tighten them if they have become loose over time.
Specifications
| Feature | Detail |
|---|---|
| Model Number | RQ-01 |
| Product Dimensions (D x W x H) | 12.2"D x 35.5"W x 18.1"H |
| Material | Wood (Particleboard), Metal Frame |
| Color | Brown |
| Style | Vintage |
| Maximum Weight Recommendation | 220 pounds (99.8 kg) |
| Seating Capacity | 2 |
| Included Components | Shoe bench, assembly hardware |
| Product Care Instructions | Wipe with Damp Cloth |
Warranty Information
Specific warranty details for the astimey Lift Top Shoe Storage Bench, Model RQ-01, are not provided in this manual. For information regarding product warranty, including coverage and duration, please refer to the product packaging, the seller's website, or contact astimey customer support directly.
Customer Support
If you encounter any issues during assembly, operation, or maintenance of your astimey Lift Top Shoe Storage Bench, or if you have questions not addressed in this manual, please contact the manufacturer or seller for assistance. Have your product model number (RQ-01) and purchase details ready when contacting support.
You can typically find contact information on the product packaging, the retailer's website where you purchased the item, or by visiting the official astimey brand store online.