1. Introduction
This manual provides detailed instructions for the installation, operation, and maintenance of your iMeshbean Model 09554 Automatic Sliding Gate Opener. Please read this manual thoroughly before installation and use to ensure proper function and safety.
The iMeshbean Model 09554 is designed for sliding gates weighing up to 4400 lbs and up to 40 feet in length. It features a powerful 750W motor, multiple control options including APP, remote, and wireless keypad, and safety features such as obstruction detection and motor protection.
2. Safety Information
WARNING: Failure to follow these safety instructions may result in serious injury or death.
- Ensure all electrical connections are performed by a qualified electrician and comply with local codes.
- Keep hands, feet, and clothing clear of the gate and opener mechanism during operation.
- Do not allow children to play near the gate or operate the controls.
- Regularly inspect the gate and opener for signs of wear, damage, or misalignment.
- In case of power failure, use the emergency release key to manually operate the gate.
- Ensure obstruction detection sensors are properly installed and functioning to prevent accidents.
- Do not attempt to repair or modify the gate opener yourself. Contact qualified service personnel.
3. Package Contents
Verify that all components listed below are present in your package:

Image: Complete kit contents for the iMeshbean Model 09554 Automatic Sliding Gate Opener, including the motor unit, chains, remotes, wireless keypad, and various installation hardware.
- 1 x Sliding Gate Opener Motor Unit
- 4 x Remote Controls
- 1 x Wireless Keypad
- 2 x Emergency Release Keys
- 2 x Drive Chains (length as specified for 40ft gate)
- Mounting Brackets and Hardware
- Infrared Obstruction Sensors (Photocells)
- Instruction Manual (this document)
- Additional accessories as pictured
4. Specifications
| Feature | Specification |
|---|---|
| Model Number | 09554 |
| Max Gate Weight | 4400 lbs |
| Max Gate Length | 40 ft |
| Motor Power | 750W |
| Gate Speed | 40 ft per minute |
| Control Methods | APP, Remote Control, Wireless Keypad, Manual Key |
| Operating Temperature | -4°F to +122°F |
| Noise Level | <56 dB |
| Product Dimensions | 19 x 13 x 10 inches |
| Item Weight | 47.6 pounds |

Image: Detailed view of the 750W motor and internal components, highlighting its power and protective features.
5. Setup and Installation
The iMeshbean Model 09554 gate opener is designed for straightforward installation. However, professional installation is recommended for electrical wiring. Refer to the detailed diagrams in the separate installation guide for specific steps.
5.1 Site Preparation
- Ensure the gate slides smoothly and is properly aligned before installing the opener.
- Clear any obstructions along the gate's path.
- Prepare a stable, level concrete pad for mounting the motor unit.
5.2 Mounting the Motor Unit
- Securely fasten the motor unit to the prepared concrete pad using the provided mounting hardware.
- Ensure the motor unit is positioned correctly relative to the gate and chain path.
5.3 Chain Installation
- Attach the drive chains to the gate, ensuring proper tension.
- Connect the chains to the motor's sprocket.
5.4 Electrical Connections
- Connect the power supply to the motor unit according to the wiring diagram in the installation guide.
- Install and connect the infrared obstruction sensors (photocells) at appropriate heights and distances to detect objects in the gate's path.

Image: The iMeshbean gate opener installed, demonstrating the chain mechanism for smooth gate operation.
6. Operating Instructions
Your iMeshbean gate opener offers multiple ways to control your gate.
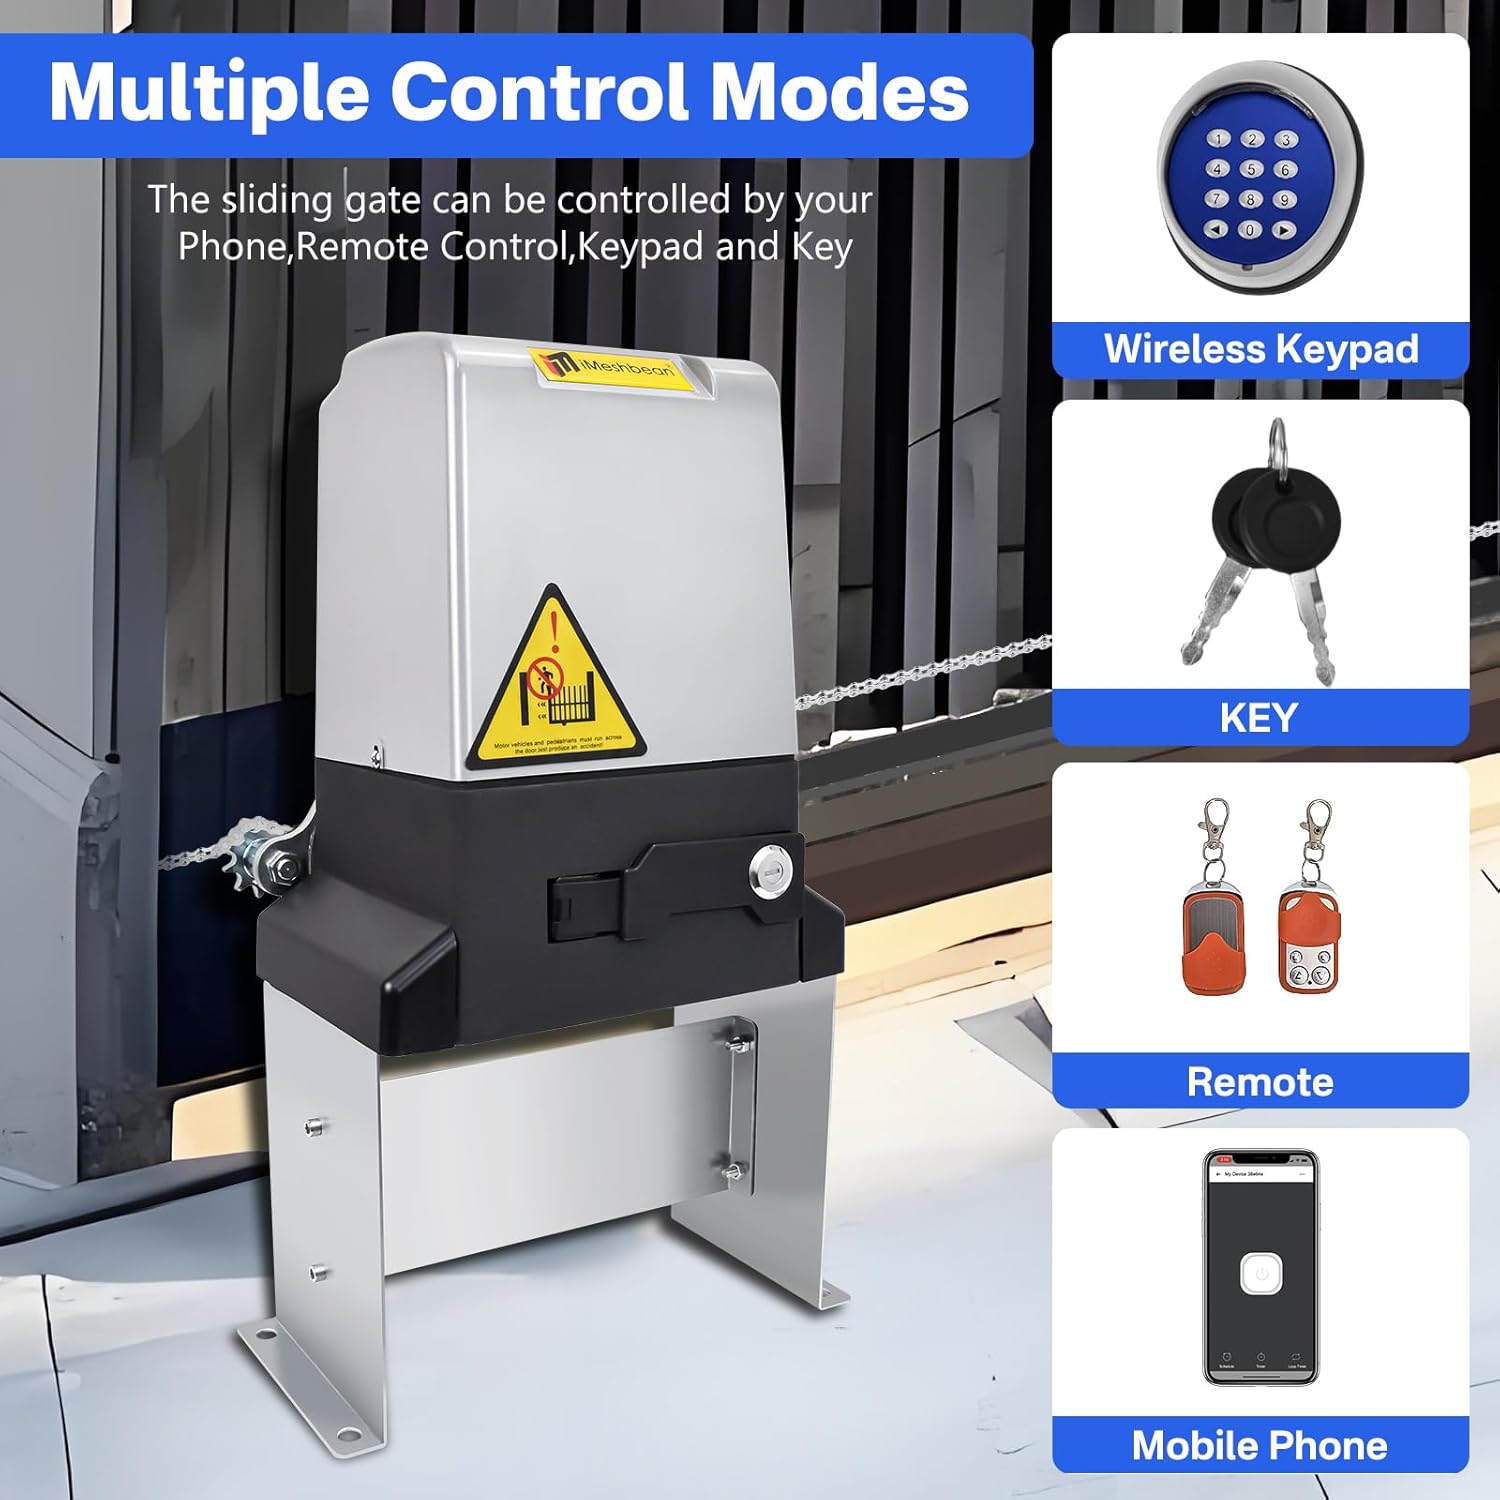
Image: Overview of the various control methods available for the gate opener, including wireless keypad, physical keys, remote controls, and a mobile application.
6.1 APP Control
The gate opener can be controlled via a mobile application. Ensure your device has internet access (Wi-Fi, 3G, or 4G) for initial setup and remote operation.
- Download the designated APP from your device's app store.
- Follow the in-app instructions to pair your gate opener with your device.
- Once paired, you can open, close, and monitor your gate from anywhere with internet connectivity.
- The APP also allows for setting scheduled timers for gate operation.

Image: A mobile phone screen showing the application interface used to control the sliding gate opener, with the gate in the background.
6.2 Remote Controls
The kit includes four 4-button remote controls for convenient operation from up to 100 feet away.
- Press the designated button on the remote to open or close the gate.
- Ensure the remote has working batteries.

Image: A person using one of the four included remote controls to operate the sliding gate, with the gate opener visible in the background.
6.3 Wireless Keypad
Use the wireless keypad for secure entry without a remote or phone.
- Enter your programmed access code on the keypad.
- Press the confirmation button to open or close the gate.
6.4 Manual Clutch Function (Power Failure)
In the event of a power outage or if you lose your remote, the gate can be operated manually.
- Locate the manual release mechanism on the motor unit.
- Insert and turn the emergency release key to disengage the motor.
- The gate can now be moved manually.
- To re-engage, reverse the key operation.

Image: A close-up view of the manual release key slot on the gate opener, demonstrating how to use the emergency release key.
6.5 Automatic Closing Function
The gate opener can be programmed to close automatically after a set period.
- The automatic closing time can be set to 5, 10, or 20 seconds.
- Refer to the detailed programming instructions in the separate installation guide or APP for adjustment.

Image: Illustration of the auto-closing function, showing a car passing through the gate and the gate closing automatically afterward.
6.6 Obstruction Detection
The infrared sensors detect obstructions in the gate's path and will stop or reverse the gate to prevent damage or injury.
- Ensure the sensors are clean and unobstructed.
- Test the obstruction detection regularly by placing an object in the gate's path.

Image: Infrared sensors installed on gate posts, detecting a vehicle and preventing the gate from closing, illustrating the smart obstruction detection feature.
7. Maintenance
Regular maintenance ensures the longevity and reliable operation of your gate opener.
- Monthly: Inspect the gate and opener for any loose hardware, signs of wear, or damage. Lubricate moving parts as recommended by the manufacturer.
- Quarterly: Clean the infrared sensors to ensure proper function. Check the gate's balance and alignment.
- Annually: Have a qualified technician inspect the entire system, including electrical connections and safety features.
- Keep the area around the gate and opener clear of debris, vegetation, and snow.
8. Troubleshooting
This section provides solutions to common issues. For problems not listed here, contact customer support.

Image: A detailed troubleshooting chart outlining various issues and their corresponding solutions for the gate opener.
Common Issues and Solutions:
- Power indicator off:
- Check 110V power input.
- Check the output line for short circuit.
- Verify the fuse is intact and the connector is properly placed. Replace fuse with same specification if broken.
- Power indicator light is on, press open/close key, door body cannot be switched open and off:
- Re-close the clutch if it's not closed.
- Check for circuit board damage due to short circuit or severe overload. Repair if necessary.
- Gate stops automatically or without machine response when pressing "Open" or "Close" button:
- Limit sensor cable short circuit or break, or sensor away from magnet. Check circuit and sensor, bring sensor to point magnet.
- Adjust sensitivity to single limit according to instructions.
- Infrared sensor light turns green, press "off" button to stop and return to the gate:
- Check for short circuit of infrared probe line.
- Troubleshoot the probe line.
- Check for damaged infrared probe.
- Replace the infrared probe if damaged.
- Remote control distance is shorter than usual:
- Check battery level.
- Reduce interference from fences, walls, etc.
- Adjust antenna for better reception.
- Replace remote control battery (23A or 27A 12V).
- Ensure antenna is straightened up as much as possible.
- Motor does not stop at end of run:
- Adjust sensitivity to single limit.
- Check if the height of the magnet is adjusted properly. Adjust magnet height according to instructions.
- Motor does not work:
- Check power to control board. If fuse is blown, replace it.
- Check for bad motor. Measure resistance of motor coils.
- Check capacitor value.
- Resistance does not stop:
- Ensure proper setup.
- Turn the knob counter-clockwise to minimize the test.
- Remote control does not work:
- Check if battery is installed upside down or not in good contact.
- Ensure proper setup.
- Check if receiver is not receiving signal.
- Re-test.
- Check if antenna and receiver module are damaged.
- Cannot connect to WiFi:
- Check for poor 4G line number.
- Connect motor to WiFi according to step-by-step instructions.
- Base shaking:
- Tighten floor and lock bolts if uneven floor.
9. Warranty and Support
For warranty information and technical support, please refer to the documentation included with your purchase or visit the official iMeshbean website. Keep your purchase receipt as proof of purchase.
If you encounter any issues not covered in this manual, please contact iMeshbean customer service for assistance.


