1. Introduction
This manual provides essential information for the proper installation, operation, and maintenance of your Siterwell Carbon Monoxide (CO) Detector, Model GS828A. This device is designed to detect carbon monoxide gas and alert you to potentially dangerous levels, ensuring the safety of your home or office. Please read these instructions thoroughly before use and retain them for future reference.
2. Key Features
- High Accuracy & Reliability: Conforms to ETL standards with a built-in advanced electrochemical sensor for accurate and rapid CO detection. Emits an alarm of no less than 85dB at 3 meters.
- Intuitive LCD Display: Shows real-time CO levels.
- 3-Colored LED Indicator: Flashes red for alarm, green for power, and yellow for fault.
- 10-Year Product Life: Equipped with 2 AA alkaline batteries (included) providing continuous power for the detector's lifespan, assuming normal battery replacement.
- Flexible Installation: Can be wall-mounted or used freestanding, suitable for various locations including homes, schools, hotels, and garages.
- Test/Silence Button: Allows for easy testing of the alarm and silencing during an alarm event.
3. Setup and Installation
3.1 Unpacking and Battery Installation
Upon opening the package, remove the detector and its components. The device comes with 2 AA alkaline batteries pre-installed. To activate the detector, gently pull the yellow tab from the battery compartment. The device will power on and begin its initial self-test.

Figure 3.1: Battery compartment with pre-installed AA batteries. Pull the yellow tab to activate the device.

Figure 3.2: Internal components of the Siterwell CO Detector, highlighting the sensor and alarm.
3.2 Choosing an Installation Location
For optimal performance and safety, select a location where the alarm can be heard from all sleeping areas. If installing only one CO alarm, place it near bedrooms. For multi-level homes, install at least one CO alarm on each level. Avoid placing the detector:
- Directly above or next to fuel-burning appliances.
- In areas with high humidity (e.g., bathrooms).
- In direct sunlight or near heat sources.
- In areas with strong air currents (e.g., near windows, doors, or vents).
- Where it can be easily painted or obstructed.

Figure 3.3: Home safety product placement guide for CO alarms.
3.3 Mounting the Detector
The Siterwell CO Detector can be wall-mounted or placed freestanding on a flat surface.
- Wall Mounting:
- Use the provided mounting plate as a template to mark the position of two screw holes on the wall.
- Drill two holes of 5mm diameter at the marked positions.
- Insert the two expansion capsules (wall anchors) into the drilled holes.
- Fix the mounting plate to the wall using the provided 3mm diameter screws.
- Align the detector with the mounting plate and slide it down to secure it.
- Freestanding Placement:
Simply place the detector on a stable, flat surface at eye level, ensuring it is not obstructed and is in a location where the alarm can be easily heard.
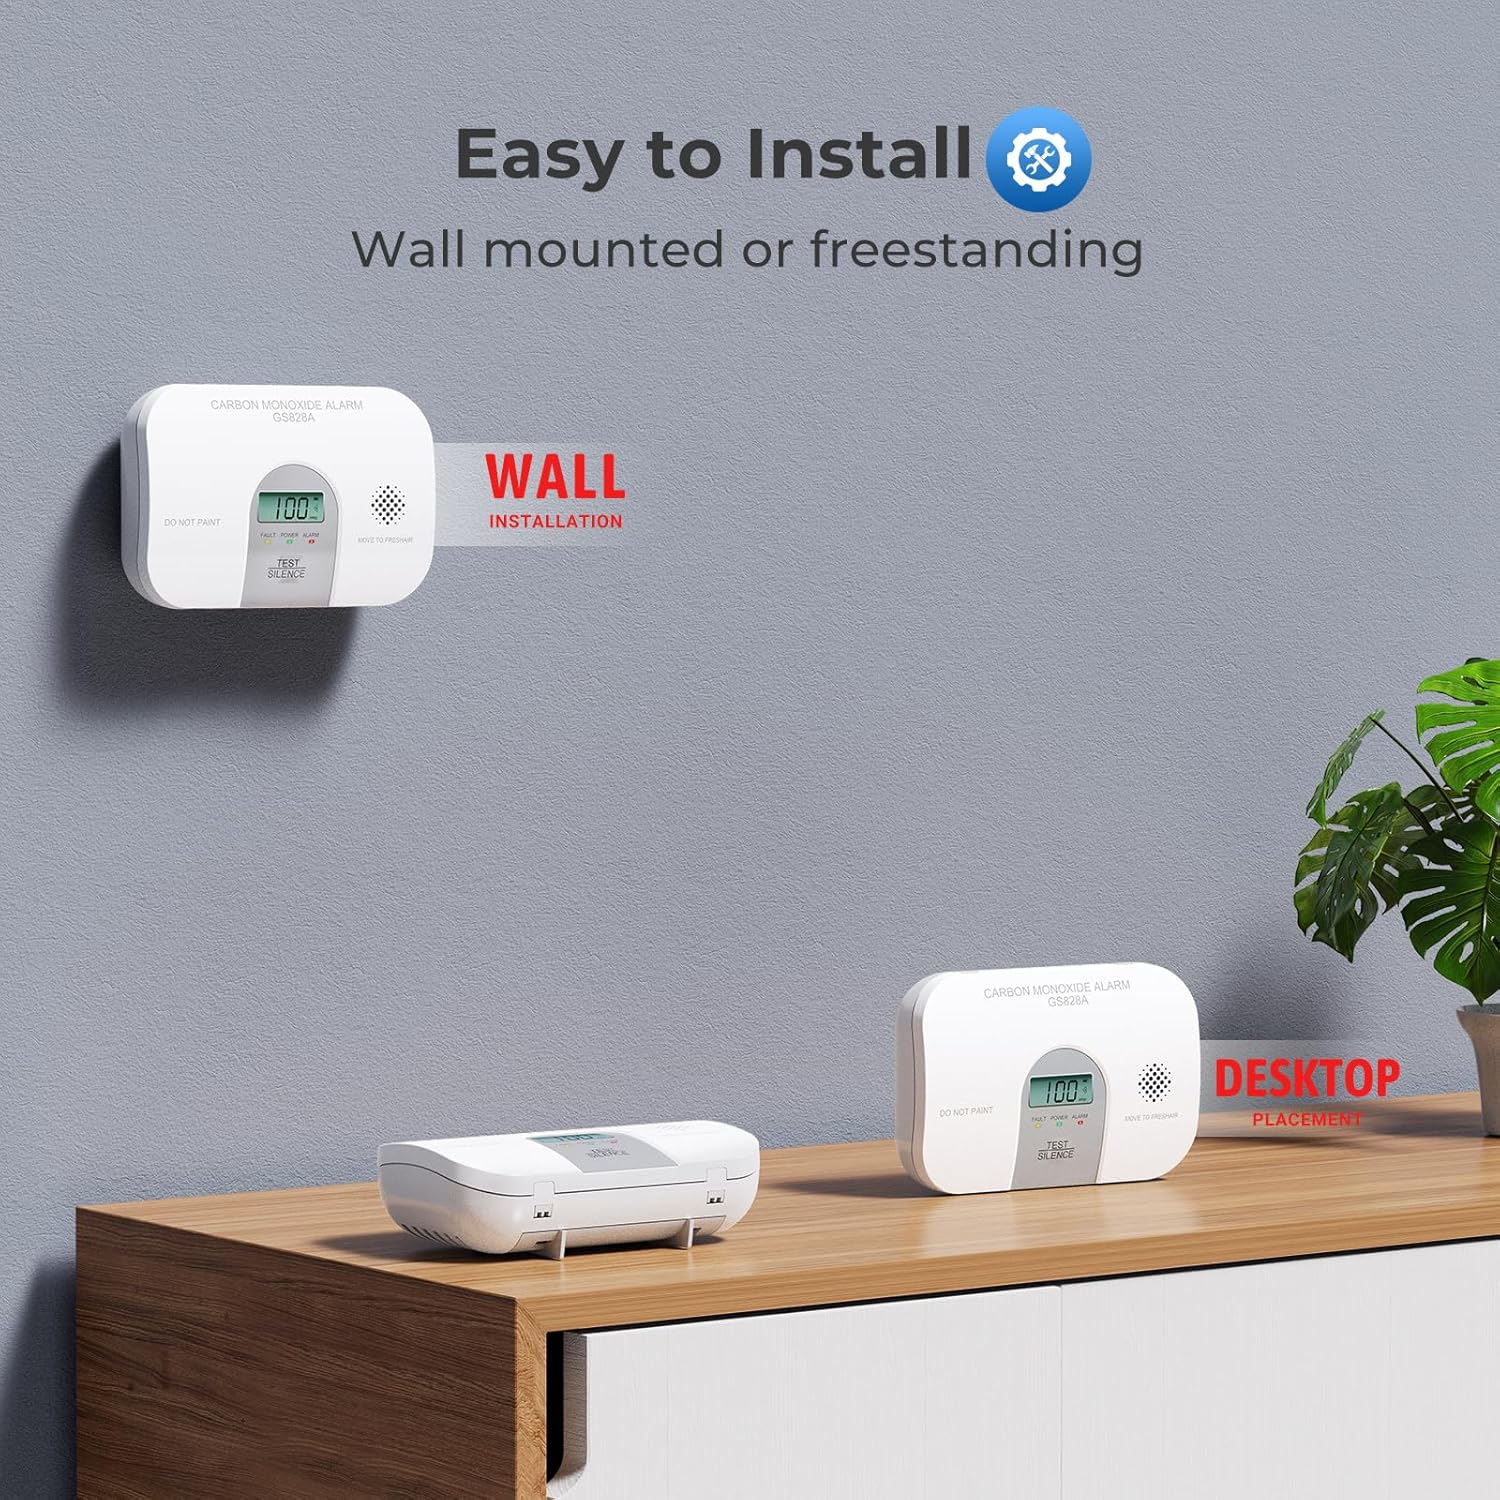
Figure 3.4: Wall-mounted and freestanding installation options.
Video 3.1: Official Siterwell video demonstrating battery installation and wall mounting steps for the GS828A Carbon Monoxide Alarm.
4. Operating Instructions
4.1 Power-On and Self-Test
After battery activation, the detector will perform a self-test. The LCD display will show "888" and then count down, indicating it is initializing. Once complete, it will display "0 PPM" (parts per million) and the green POWER LED will flash every 40 seconds, indicating normal operation.
4.2 LED Indicators and LCD Display
The detector features a clear LCD screen and three LED indicators to provide status information:
- Green POWER LED: Flashes every 40 seconds to indicate the device is powered on and functioning correctly.
- Yellow FAULT LED: Illuminates to indicate a fault or warning status with the CO alarm.
- Red ALARM LED: Flashes simultaneously with the audible alarm to indicate a dangerous level of CO.
- LCD Display: Shows real-time CO concentration in PPM. In normal standby, it cycles between CO concentration and temperature. It also displays "LB" for low battery, "ERR" for error, or "EOL" for end of life.
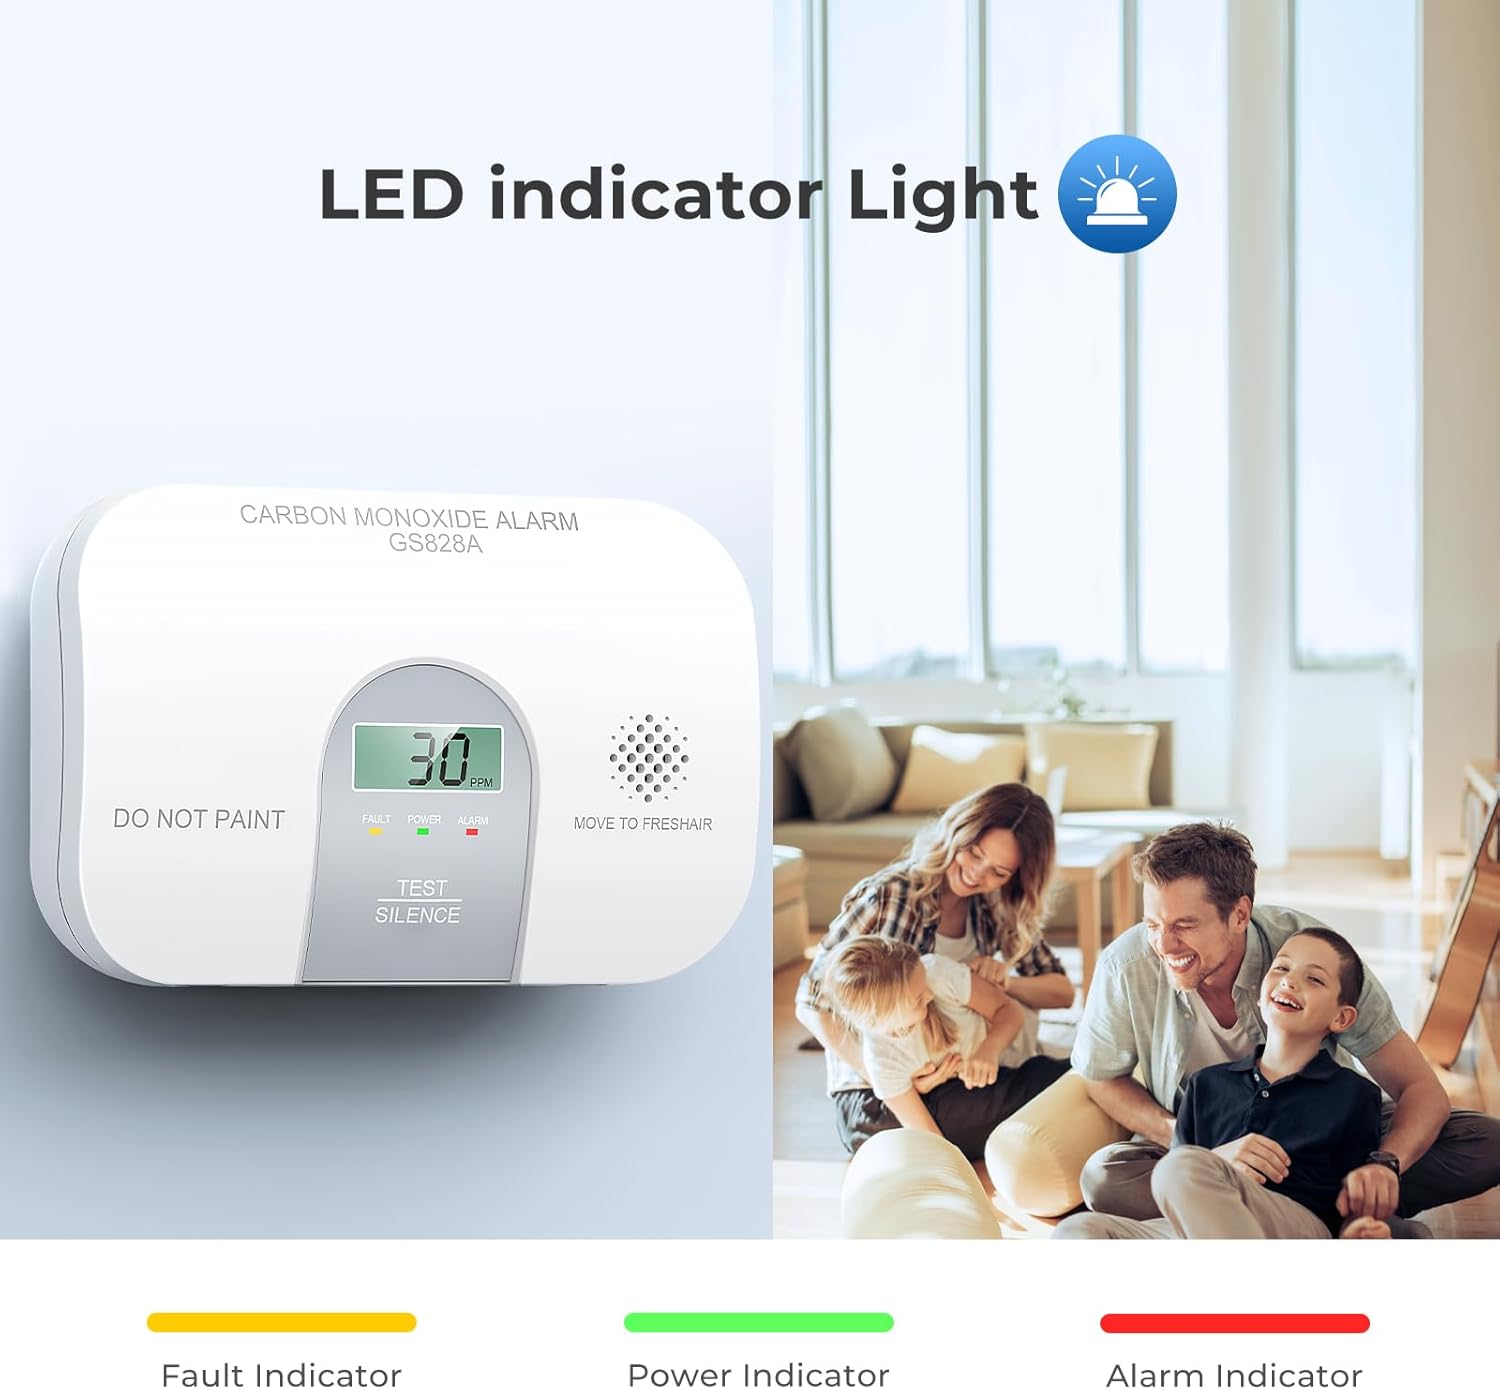
Figure 4.1: LCD display and LED indicators.
4.3 CO Alarm Warning
When the detector senses a dangerous level of CO, it will emit a loud alarm pattern: 4 quick beeps followed by 5 seconds of silence. This cycle repeats as long as a dangerous CO condition exists. The red ALARM LED will flash simultaneously. The LCD will display the CO concentration.
Sensitivity Settings (Conforms to UL2034 standard):
- 30 PPM: No alarm before 30 days.
- 70 PPM: Between 60 to 240 minutes.
- 150 PPM: Between 10 to 50 minutes.
- 400 PPM: Between 4 to 15 minutes.
4.4 Test/Silence Button
Press and hold the TEST/SILENCE button to test the unit. The alarm will sound, and the LEDs will flash. To silence a nuisance alarm, press the button briefly.
5. Maintenance
5.1 Regular Testing
Test your CO detector weekly by pressing and holding the TEST/SILENCE button until the alarm sounds. This confirms the unit's electronics, battery, and horn are working.
5.2 Cleaning
Clean your CO detector at least once a month. Use a soft, damp cloth to wipe the exterior. Do not use cleaning solvents or spray cleaners directly on the unit. Avoid painting the detector, as this can interfere with the sensor's operation.
5.3 Battery Replacement
The detector is designed for a 10-year product life with its included AA alkaline batteries. When the batteries are low, the LCD will display "LB" and the unit will chirp. Replace both AA alkaline batteries promptly to ensure continuous protection.
6. Troubleshooting
| Problem | Indication | Solution |
|---|---|---|
| CO Alarm Sounds | 4 quick beeps, 5 seconds silence; Red ALARM LED flashes; LCD shows CO level. | Immediately move to fresh air. Call 911 or your emergency services. Do not re-enter the premises until it has been aired out and the CO source has been identified and corrected. Press the TEST/SILENCE button to temporarily silence the alarm (if safe to do so). |
| Low Battery Warning | LCD displays "LB"; Unit chirps periodically. | Replace both AA alkaline batteries immediately. |
| Fault/Error Indication | Yellow FAULT LED illuminates; LCD displays "ERR". | The unit may be malfunctioning. Try replacing the batteries. If the error persists, contact customer support for assistance. |
| End of Life Warning | LCD displays "EOL"; Unit chirps periodically. | The detector has reached the end of its operational life (approximately 10 years). Replace the unit with a new Siterwell CO detector. |
7. Specifications
| Brand | SITERWELL |
| Model Number | GS828A |
| Power Source | Battery Powered (2 AA batteries, included) |
| Sensor Type | Electrochemical |
| Alarm Sound Level | 85dB at 3 meters |
| Product Dimensions | 1.4"D x 4.7"W x 3.14"H (3.56 cm D x 11.94 cm W x 7.98 cm H) |
| Item Weight | 7.06 ounces (200 grams) |
| Product Life | 10 Years |
| Certifications | ETL Listed |
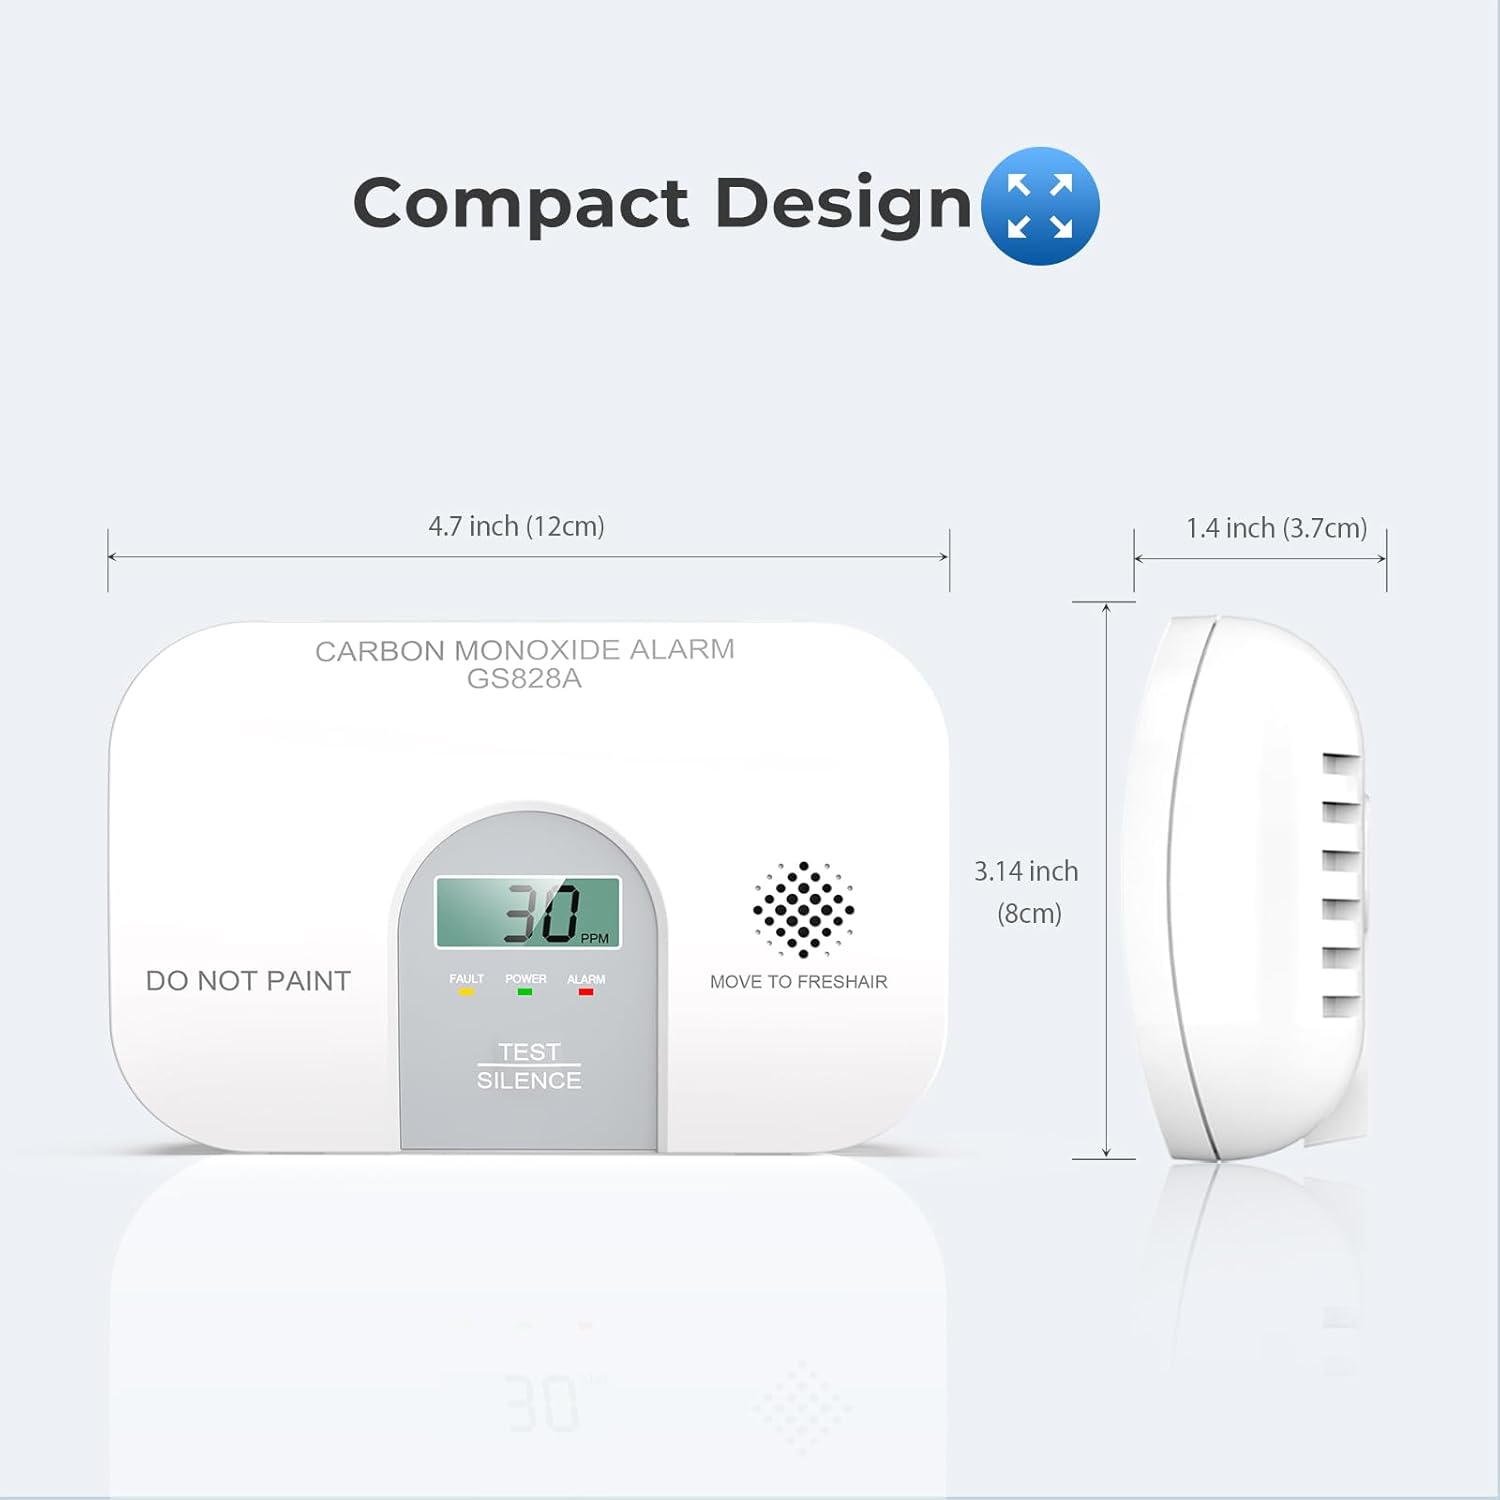
Figure 7.1: Dimensions of the Siterwell Carbon Monoxide Detector.
8. Warranty and Support
The Siterwell Carbon Monoxide Detector comes with a Three Years Limited Warranty. The warranty period begins on the day of purchase. Siterwell products undergo strict quality controls. If this device unexpectedly does not function perfectly, please contact Siterwell customer support for assistance.
For further support or inquiries, please refer to the contact information provided in your product packaging or visit the official Siterwell website.