
Important Safety Information
Please read and understand all instructions before installation and use. Failure to follow these instructions may result in property damage or personal injury.
- Ensure all components are securely fastened before driving. Regularly check the tightness of all bolts and clamps, especially during long trips or after driving on rough terrain.
- Do not exceed the maximum weight capacity of your vehicle's roof or the crossbars. Refer to your vehicle's owner's manual for specific roof load limits.
- Distribute cargo evenly across the crossbars. Secure all cargo with appropriate tie-downs to prevent shifting during transit.
- Avoid sudden maneuvers, hard braking, or sharp turns when carrying cargo on the roof.
- Be aware of increased vehicle height and width when driving with crossbars and cargo, especially when entering garages, car washes, or low-clearance areas.
- This product is designed for vehicles without any existing side rails. Do not attempt to install on vehicles with factory-installed side rails.

Figure 1: Compatibility illustration. The crossbars are designed for vehicles without existing side rails. Do not install on vehicles with factory-installed side rails.
Package Contents
Verify that all parts are present before beginning installation:
- 2 x Aluminum Crossbars (50 inches long)
- 4 x Mounting Feet/Towers
- Various sizes of mounting clamps (Large, Medium, Small)
- Rubber pads for protection
- Mounting hardware (bolts, knobs)
- Hex key (Allen wrench)
- 2 x Keys for locking mechanism

Figure 2: Complete package contents. Ensure all items are accounted for before proceeding with installation.
Setup and Installation
Follow these steps to properly install the crossbars on your vehicle. It is recommended to have a second person assist with placement on the roof.
1. Prepare the Crossbars
- Remove the end caps from the aluminum crossbars.
- Slide the mounting feet onto the crossbar. Ensure the feet are oriented correctly.
- Insert the locking mechanism into the end of the crossbar and secure it.
- Attach the metal bracket to the mounting foot using the provided bolts.

Figure 3: Detail of the mounting foot and bracket assembly.
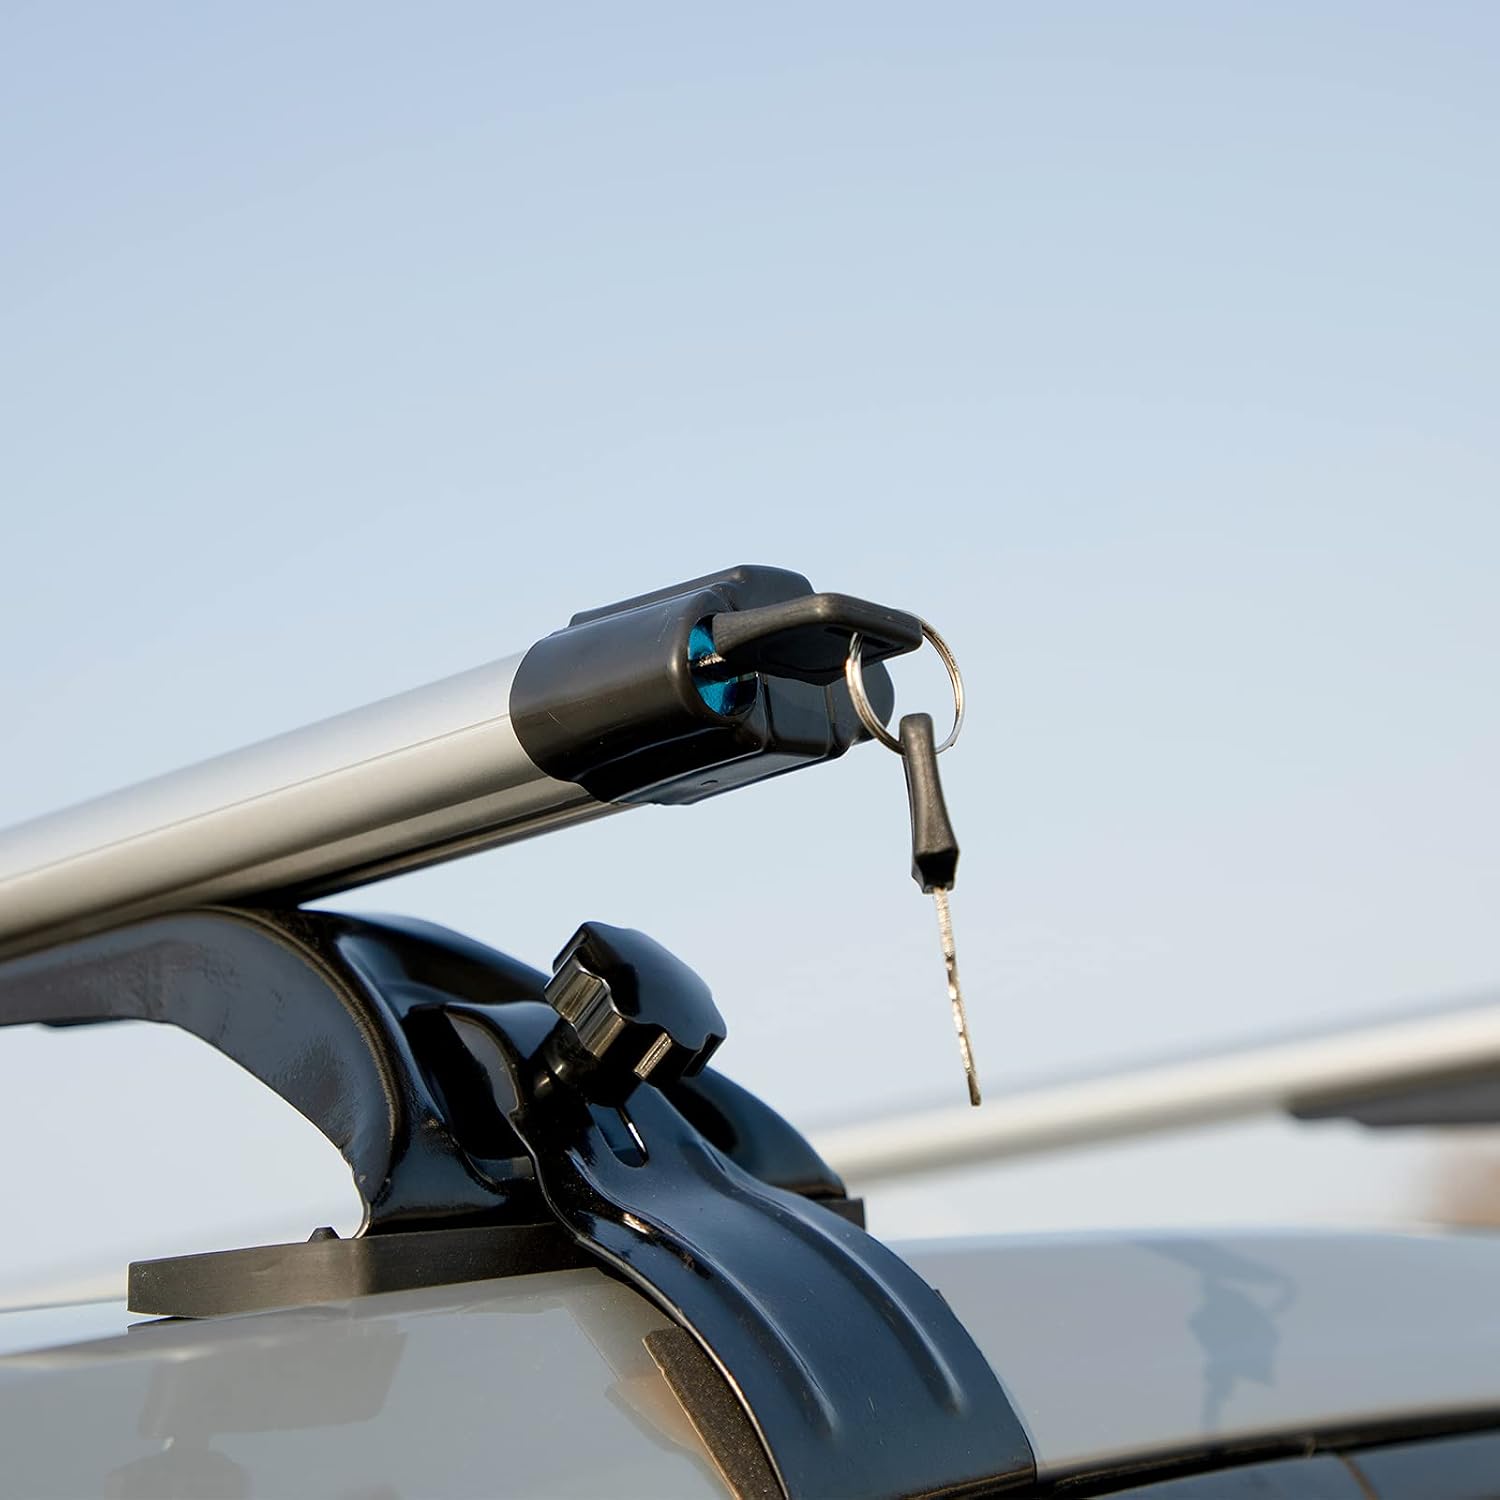
Figure 4: The locking mechanism at the end of the crossbar.
2. Select Appropriate Clamps
The crossbars come with three different sizes of mounting clamps (Large, Medium, Small) to accommodate various vehicle door frame designs. Select the size that best fits your vehicle's door frame for a secure attachment.

Figure 5: Different clamp sizes for universal fitment.
3. Position and Secure Crossbars
- Carefully place the assembled crossbars onto your vehicle's roof. Ensure they are parallel and evenly spaced.
- Open your vehicle's doors and position the mounting feet so that the clamps can grip the door frame securely.
- Attach the selected clamps to the mounting feet and hook them under the door frame.
- Tighten the knobs on the mounting feet to secure the clamps. Ensure the rubber pads are in place to protect your vehicle's paint.
- Use the provided hex key to further tighten any bolts as needed.
- Lock the crossbars using the keys provided to prevent theft and ensure stability.
Installation Video Guide
For a visual guide on the installation process, please watch the video below:
Video 1: This video demonstrates the assembly and installation of the YHAAVALE Universal Rooftop Crossbars on a vehicle. It shows how to attach the mounting feet and clamps, and secure the crossbars to the car roof.
Operating Instructions
Once installed, the crossbars provide a secure platform for transporting various items.
- Loading Cargo: Place cargo such as luggage bags, camping equipment, kayaks, or skis evenly across both crossbars.
- Securing Cargo: Always use appropriate tie-down straps, nets, or cargo boxes to firmly secure all items to the crossbars. Ensure there is no movement or shifting of cargo before driving.
- Weight Distribution: Distribute the weight of your cargo as evenly as possible between the two crossbars and across the width of the vehicle.
- Driving with Cargo: Drive cautiously, especially at higher speeds, in strong winds, or when making turns. The vehicle's handling characteristics will change with a loaded roof rack.

Figure 6: Examples of cargo that can be transported using the crossbars.
Maintenance
Regular maintenance ensures the longevity and safe operation of your crossbars.
- Regular Inspection: Periodically inspect all components for signs of wear, damage, or corrosion. Check the crossbars, mounting feet, clamps, and hardware.
- Tightness Check: Before each use and periodically during long trips, check that all bolts and knobs are securely tightened. Loose components can lead to instability and potential damage.
- Cleaning: Clean the crossbars with mild soap and water. Avoid abrasive cleaners or solvents that could damage the finish.
- Storage: If not in use for extended periods, consider removing the crossbars and storing them in a dry, protected area to prolong their lifespan.
Troubleshooting
| Problem | Possible Cause | Solution |
|---|---|---|
| Crossbars feel loose or unstable after installation. | Improper tightening of clamps or bolts; incorrect clamp size used. | Ensure all knobs and bolts are fully tightened. Verify that the correct clamp size is used for your vehicle's door frame. Re-adjust and re-tighten. |
| Excessive wind noise during driving. | Airflow over the crossbars; improper positioning. | Ensure crossbars are installed as far apart as possible for optimal aerodynamics. Check for any gaps or loose components that might cause whistling. |
| Crossbars do not fit my vehicle. | Vehicle has existing side rails; incompatible roof design. | This product is designed for vehicles without any type of side rails. If your vehicle has side rails, this product is not compatible. Confirm your vehicle's roof type before purchase. |
| Keys do not operate the locks smoothly. | Dust or debris in the lock mechanism; lack of lubrication. | Apply a small amount of graphite lubricant or a silicone-based spray to the lock mechanism. Avoid oil-based lubricants. |
Specifications
- Model: 007S-125
- Length: 50 inches (Adjustable range up to 47 inches between mounting points)
- Material: High-strength Aluminum
- Color: Silver
- Item Weight: Approximately 10.63 pounds
- Mounting Type: Clamp Mount (for vehicles without side rails)
- Automotive Fit Type: Universal Fit (for vehicles without side rails)
Figure 7: Crossbar dimensions and adjustable range.
Warranty and Support
For warranty information or technical support, please contact YHAAVALE customer service. Refer to your purchase documentation for specific warranty terms and contact details.
You can also visit the official YHAAVALE store on Amazon for more information: YHAAVALE Amazon Store