346233
Silvercrest STKK 17 A1 Wireless Battery-Free Doorbell Instruction Manual
Model: STKK 17 A1 (Internal Model Number: 346233)
Brand: Generic (Silvercrest)
1. Introduction
Thank you for choosing the Silvercrest STKK 17 A1 Wireless Battery-Free Doorbell. This manual provides detailed instructions for the setup, operation, and maintenance of your new doorbell system. Please read this manual thoroughly before use to ensure proper functionality and to maximize the lifespan of your device. Keep this manual for future reference.
2. Product Overview
The Silvercrest STKK 17 A1 is an innovative wireless doorbell system designed for convenience and reliability. It features a kinetic energy-powered transmitter, eliminating the need for batteries, and a plug-in receiver. The system offers multiple signal options and a wide operating range, making it suitable for various home environments.
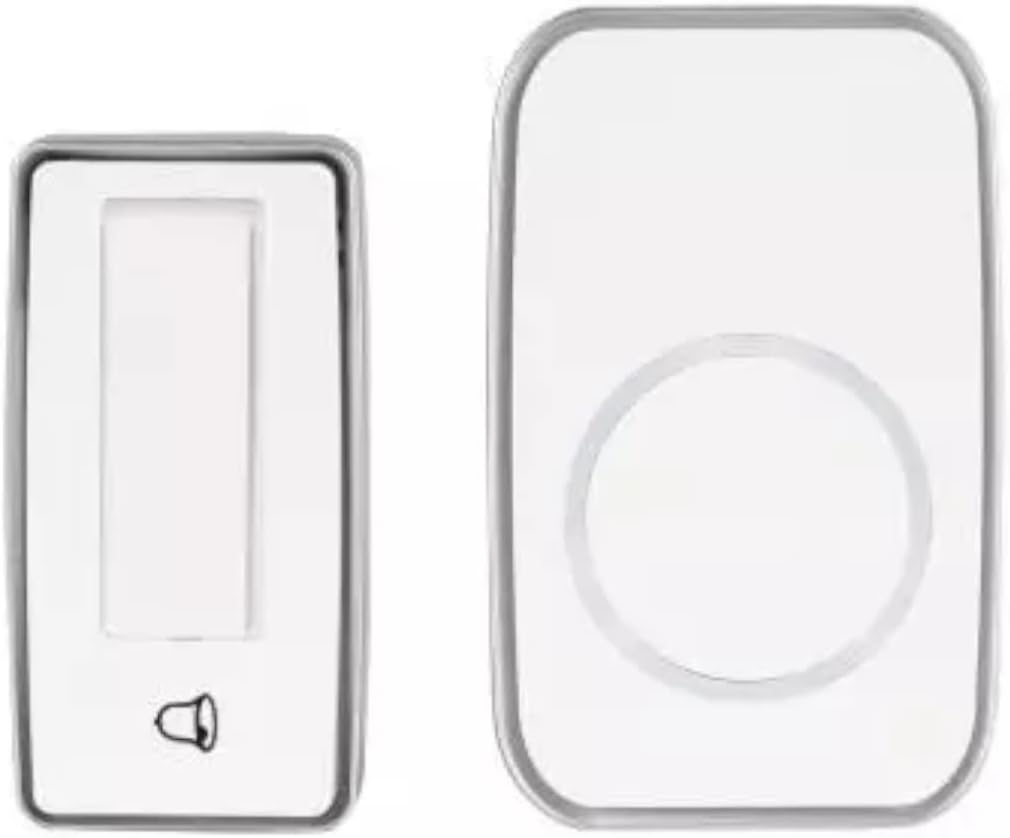
Figure 2.1: Silvercrest STKK 17 A1 Wireless Doorbell System. The image displays two main components: a smaller, rectangular unit on the left, which is the kinetic transmitter (chime button), and a larger, rectangular unit on the right with a circular design, which is the plug-in receiver (doorbell unit).
3. Features
- Battery-Free Operation: The transmitter utilizes kinetic energy, eliminating the need for batteries.
- Multiple Signal Options: Choose from acoustic (sound), optical (light), or a combination of acoustic and optical signals.
- Extensive Ringtones: Features 17 distinct ringtones to personalize your doorbell sound.
- Adjustable Volume: Four levels of volume control for the receiver.
- Plug-in Receiver: The receiver conveniently plugs directly into a standard electrical outlet.
- Splash-Proof Transmitter: IPX4 rated transmitter ensures protection against splashing water.
- LED Indicators: Transmitter includes 3 LEDs for signal mode indication and synchronization status.
- Long Range: Up to 100 meters (approximately 328 feet) outdoor operating range.
- Operating Frequency: 433 MHz.
- Easy Installation: Includes mounting materials and interchangeable nameplates.
4. Package Contents
Please check the package for the following items:
- 1 x Wireless Doorbell Receiver (Plug-in unit)
- 1 x Kinetic Chime Transmitter (Push button unit)
- 2 x Wall Plugs
- 2 x Screws
- 1 x Instruction Manual
- 1 x Quick Start Guide
- Interchangeable Nameplates
5. Setup
5.1 Transmitter Installation
- Choose Location: Select a suitable location for the transmitter (chime button) near your door. Ensure it is easily accessible and within the 100m range of the receiver. While splash-proof (IPX4), avoid direct exposure to heavy rain or prolonged submersion.
- Mounting:
- Screw Mounting: Use the provided screws and wall plugs to securely attach the transmitter to a wall or door frame. Drill pilot holes if necessary.
- Adhesive Mounting (Optional, not included): If preferred, you may use strong double-sided adhesive tape (not supplied) for mounting on smooth surfaces. Ensure the surface is clean and dry before application.
- Nameplate: Insert your desired nameplate into the designated slot on the transmitter, if applicable.
5.2 Receiver Installation
- Plug In: Plug the receiver unit directly into a standard electrical outlet in your desired location. Ensure the outlet is easily accessible and not obstructed.
- Proximity: For optimal performance, place the receiver in a central location within your home, away from large metal objects or other electronic devices that might cause interference.
5.3 Synchronization (Pairing)
The units are typically pre-paired from the factory. If they do not connect automatically or if you wish to pair additional transmitters/receivers (if compatible models are purchased separately), follow these steps:
- Plug in the receiver.
- Within a few seconds of plugging in, press and hold the pairing button on the receiver (refer to the Quick Start Guide for exact button location, usually a small button on the side or back). The receiver's LED indicator should start flashing.
- While the receiver's LED is flashing, press the transmitter (chime button) once.
- The receiver should chime, and its LED will stop flashing, indicating successful pairing.
- Test the doorbell by pressing the transmitter button.
6. Operating Instructions
6.1 Changing Ringtones
To cycle through the 17 available ringtones:
- Locate the ringtone selection button on the receiver (refer to the Quick Start Guide).
- Press the button repeatedly to preview each ringtone. The receiver will play the current selection.
- Stop pressing when you hear your desired ringtone. The receiver will save this selection automatically.
6.2 Adjusting Volume
To adjust the volume level (4 levels available):
- Locate the volume control button on the receiver.
- Press the button to cycle through the volume levels (e.g., High, Medium, Low, Mute).
- The receiver will play a sound at the current volume level to indicate the setting.
6.3 Signal Options
The receiver offers three signal modes:
- Acoustic: Only sound is produced when the doorbell is pressed.
- Optical: Only the LED light on the receiver flashes when the doorbell is pressed (useful for hearing-impaired users or quiet environments).
- Acoustic + Optical: Both sound and light signals are produced.
To change the signal mode, locate the mode selection button on the receiver and press it to cycle through the options. The transmitter's 3 LEDs also indicate the signal mode.
6.4 Kinetic Energy Operation
The transmitter (chime button) generates its own power through kinetic energy when pressed. This means it does not require any batteries. Ensure a firm, full press for reliable activation.
7. Maintenance
- Cleaning: Wipe the doorbell units with a soft, dry cloth. For stubborn dirt, a slightly damp cloth can be used, but ensure no water enters the units, especially the receiver. Do not use abrasive cleaners or solvents.
- Transmitter Care: Although the transmitter is IPX4 splash-proof, avoid prolonged exposure to extreme weather conditions, direct water jets, or submersion. Regularly check for any debris that might obstruct the button mechanism.
- Receiver Placement: Ensure the receiver is plugged into a well-ventilated area and not covered, to prevent overheating.
- Connection Check: Periodically check that the receiver is securely plugged into the outlet and that the transmitter is firmly mounted.
8. Troubleshooting
| Problem | Possible Cause | Solution |
|---|---|---|
| Doorbell does not chime. |
|
|
| Short operating range. |
|
|
| Ringtone or volume cannot be changed. |
|
|
| Transmitter LEDs not lighting up. |
|
|
9. Specifications
| Model | STKK 17 A1 |
| Internal Model Number | 346233 |
| Brand | Generic (Silvercrest) |
| Operating Frequency | 433 MHz |
| Outdoor Range | Up to 100 meters (328 feet) |
| Signal Options | Acoustic, Optical, Acoustic + Optical |
| Ringtones | 17 |
| Volume Levels | 4 |
| Transmitter Protection Rating | IPX4 (Splash-proof) |
| Receiver Dimensions (L x W x D) | 10 cm x 6 cm x 2.5 cm (7.2 cm depth with plug) |
| Transmitter Dimensions (L x W x D) | 8 cm x 4 cm x 2.5 cm |
10. Warranty and Support
This product is designed for reliability and durability. For information regarding warranty coverage, please refer to the warranty card included in your product packaging or contact the retailer where you purchased the product. For technical support, troubleshooting assistance beyond this manual, or inquiries about replacement parts, please contact the manufacturer's customer service or the retailer.
Please retain your proof of purchase for any warranty claims.