1. Introduction
The MiiElAOD 1-Bay NAS Dock is an expansion board designed to connect an external 2.5-inch SATA hard disk to a FriendlyElec NanoPi NEO or NanoPi NEO2. This combination allows users to quickly assemble a compact network-attached storage (NAS) server. The dock utilizes a JM20329 USB2SATA IC for communication with the NanoPi NEO via a USB interface. It features a power switch for convenient operation and a dual-color LED to indicate device status.
Package Contents:
- 1 x MiiElAOD 1-Bay NAS Dock
2. Setup Guide
Follow these steps to assemble and prepare your 1-Bay NAS Dock for operation:
2.1 Component Identification
Familiarize yourself with the various components and connectors on the NAS Dock board.

Figure 1: Labeled diagram of the NAS Dock board components.
2.2 Hardware Assembly
- Connect NanoPi NEO: Carefully align and connect your NanoPi NEO or NanoPi NEO2 board to the designated GPIO pins on the NAS Dock.
- Install 2.5-inch SATA Hard Disk: Connect a 2.5-inch SATA hard disk to the SATA data and power connectors on the NAS Dock. Ensure a secure connection.
- Power Connection: Connect a 12V DC power adapter (not included) to the 12V DC In port on the NAS Dock. The dock uses a TI DC-DC chipset to convert the 12V input to 5V for the components.
- Optional: RTC Battery: If Real-Time Clock (RTC) functionality is desired, install a CR2032 battery into the RTC battery holder on the underside of the board.
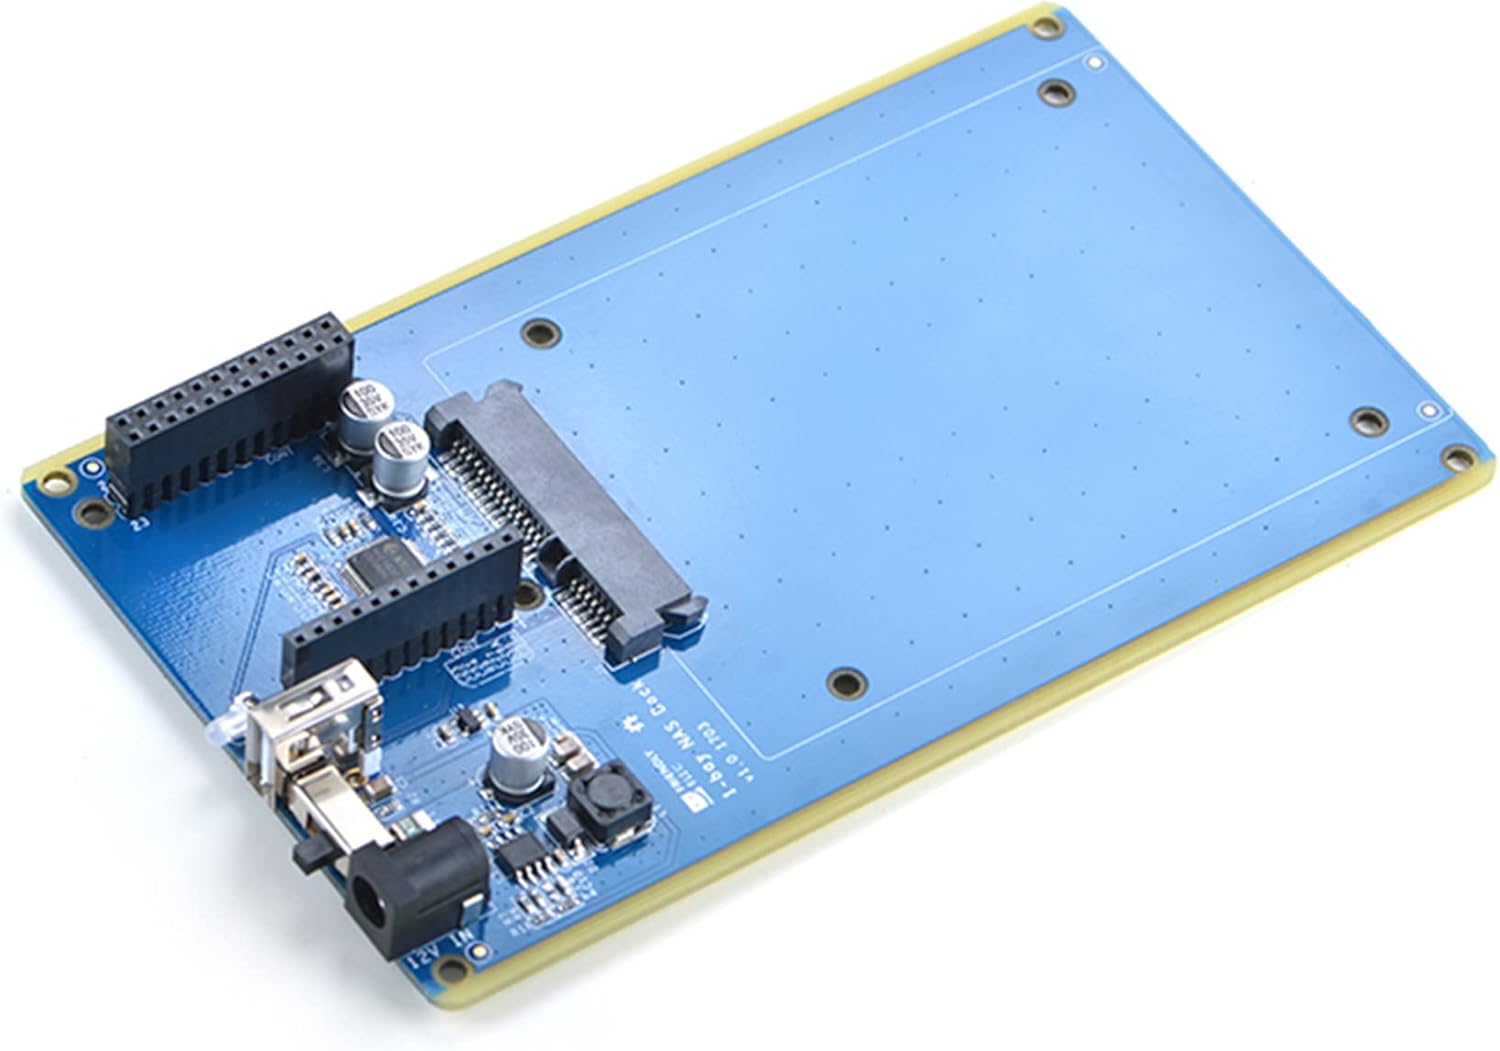
Figure 2: Assembled NAS Dock board.
2.3 Software Configuration
The NAS Dock is designed to work with a ready-to-go software system, typically a Linux-based distribution optimized for NAS functionality on NanoPi NEO boards. Refer to the FriendlyElec documentation for your specific NanoPi NEO model for detailed software installation and configuration instructions.
3. Operating Instructions
Once assembled and powered, operate the NAS Dock as follows:
- Power On: Use the onboard power switch to turn on the device.
- Status LED: Observe the dual-color status LED:
- Green: Indicates that the power is on.
- Red-blinking: Indicates that the connected hard disk is actively reading or writing data.
- Important Warning: When the status LED is red-blinking, DO NOT shut down the power or plug/unplug the power adapter. Doing so may result in data corruption or damage to the hard disk.
- Accessing Storage: Access the network storage server via your network using the appropriate protocols and software configured on your NanoPi NEO.
4. Maintenance
To ensure optimal performance and longevity of your MiiElAOD 1-Bay NAS Dock, consider the following maintenance guidelines:
- Keep Dry: Protect the device from moisture and humidity.
- Clean Gently: If cleaning is necessary, use a soft, dry cloth. Avoid using liquid cleaners or solvents.
- Ventilation: Ensure adequate airflow around the device, especially if enclosed in a case, to prevent overheating.
- Firmware Updates: Regularly check for and apply any available firmware or software updates for your NanoPi NEO and its NAS operating system to enhance stability and security.
5. Troubleshooting
If you encounter issues with your NAS Dock, try the following troubleshooting steps:
- No Power/LED Off:
- Check if the 12V DC power adapter is securely connected and functioning.
- Ensure the onboard power switch is in the 'On' position.
- Hard Disk Not Detected:
- Verify that the 2.5-inch SATA hard disk is correctly seated in its connectors.
- Ensure the NanoPi NEO is properly connected to the NAS Dock.
- Check the hard disk's functionality by testing it with another device if possible.
- Slow Performance:
- Ensure your NanoPi NEO's software is optimized for NAS operations.
- Check network connectivity and cable quality.
- Unexpected Shutdowns:
- Ensure the power supply is stable and provides sufficient current.
- Check for overheating; ensure proper ventilation.
For further assistance, refer to the NanoPi NEO documentation or contact MiiElAOD support.
6. Specifications
| Feature | Description |
|---|---|
| Model Name | NAS Dock |
| Compatible Boards | FriendlyElec NanoPi NEO, NanoPi NEO2 |
| Hard Disk Compatibility | 2.5-inch SATA Hard Disk |
| USB2SATA IC | JM20329 |
| Connectivity | USB Interface (for NanoPi NEO communication) |
| Supply Voltage | 12V DC (via external adapter) |
| Power Conversion | TI DC-DC chipset (12V to 5V) |
| Indicators | Dual-color status LED (Green for power, Red-blinking for R/W activity) |
| Onboard Features | Power switch, USB Host, RTC (requires CR2032 battery) |
| PCB Dimensions | 151 x 89.7 mm |
| Operating System Support | Linux (via NanoPi NEO) |
| Item Weight | 1.1 pounds |
| Package Dimensions | 3.94 x 1.97 x 1.97 inches |

Figure 3: Dimensional diagram of the NAS Dock.
7. Warranty and Support
For warranty information, please refer to the purchase documentation or contact your retailer. For technical support and further inquiries, please visit the official MiiElAOD brand store or contact their customer service. You can find more information about MiiElAOD products and support resources at the MiiElAOD Store on Amazon.