Introduction
This manual provides detailed instructions for the safe installation, operation, and maintenance of your Generation Lighting Cosmo 4-Light Chandelier. Please read all instructions carefully before beginning installation and retain this manual for future reference. This fixture features a Mid-Century Modern style with a Midnight Black and Burnished Brass finish, incorporating milk glass globes and metal cone shades.

Figure 1: Generation Lighting Cosmo 4-Light Chandelier (Model AEC1114MBKBBS)
Setup and Installation
Important Safety Information: Before beginning installation, ensure the electrical power to the circuit is turned off at the circuit breaker or fuse box. Consult a qualified electrician if you are unsure about wiring procedures. All wiring must be in accordance with national and local electrical codes.
- Unpack Contents: Carefully remove all components from the packaging. Inspect for any damage. Keep all packaging materials until you are satisfied with the product.
- Prepare for Installation: Turn off power at the main electrical panel. Ensure the mounting surface is structurally sound to support the fixture's weight (approximately 9.9 lbs).
- Mounting Hardware: This chandelier is sloped ceiling compatible and includes all necessary mounting hardware. It comes with one 6-inch and four 12-inch stems, allowing for customizable hanging length. Select the appropriate stem combination for your desired height.
- Assemble Fixture: Attach the selected stems to the fixture body and canopy. Secure all connections firmly.
- Wiring: Connect the fixture's wires to the corresponding household electrical wires (black to black, white to white, ground to ground) using appropriate wire connectors. Ensure all connections are secure and insulated.
- Secure Canopy: Carefully push the wired fixture up to the ceiling junction box and secure the canopy to the mounting bracket using the provided screws.
- Install Bulbs: Install four (4) 60-watt maximum, Torpedo Candelabra (E12 base) incandescent light bulbs (sold separately) into the sockets. Do not exceed the maximum wattage.
- Install Glass Shades: Carefully attach the milk glass globes and metal cone shades to the fixture as per the design.
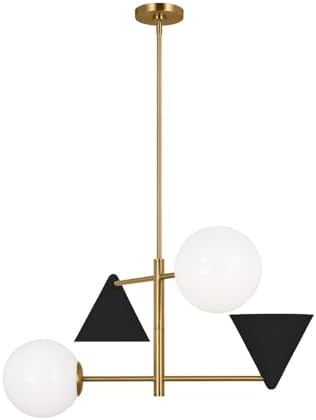
Figure 2: Chandelier Ceiling Mount Detail
Operating Instructions
Once installed, restore power to the circuit at the main electrical panel. The chandelier is designed for indoor use and operates with incandescent light sources. The control method for this fixture is typically via a wall switch or a remote control system if integrated into your home's smart lighting setup. Ensure bulbs are correctly seated for proper operation.
Maintenance
Regular maintenance will help preserve the appearance and functionality of your chandelier.
- Cleaning: To clean the fixture, turn off the power and allow it to cool. Wipe the metal surfaces with a soft, dry cloth. For glass shades, use a mild glass cleaner on a soft cloth, avoiding direct spray onto electrical components. Do not use abrasive cleaners or polishes as they may damage the finish.
- Bulb Replacement: Always turn off the power before replacing bulbs. Allow old bulbs to cool completely before removal. Replace with new 60-watt maximum, E12 Candelabra base incandescent bulbs.
- Inspection: Periodically check all connections and mounting hardware to ensure they remain secure.
Troubleshooting
If you experience issues with your chandelier, refer to the following common problems and solutions:
| Problem | Possible Cause | Solution |
|---|---|---|
| Light does not turn on. | No power to the fixture. Loose wire connection. Defective bulb. | Check circuit breaker or fuse. Ensure all wire connections are secure. Replace bulb with a known good one. |
| Light flickers. | Loose bulb. Loose wire connection. Incompatible dimmer switch. | Tighten bulb securely. Check and secure wire connections. Ensure dimmer switch is compatible with incandescent lighting. |
| Fixture hums. | Incompatible dimmer switch. | Replace dimmer switch with a high-quality, compatible model. |
If the problem persists after attempting these solutions, please contact customer support.
Product Specifications
| Model Number | AEC1114MBKBBS |
| Brand | Generation Lighting |
| Collection | Cosmo |
| Finish Color | Midnight Black/Burnished Brass |
| Material | Steel, Brass, Glass |
| Style | Mid-Century Modern |
| Dimensions (W x H) | 28 inches x 16.13 inches |
| Item Weight | 9.9 pounds |
| Number of Lights | 4 |
| Bulb Type | Incandescent |
| Bulb Base | E12 Candelabra |
| Max Wattage per Bulb | 60 Watts |
| Total Light Output | Up to 3200 Lumens (depending on bulbs) |
| Moisture Rating | Damp Rated (Indoor Use) |
| Power Source | Corded Electric |
| Installation Type | Semi Flush Mount |
| Control Method | Remote (if integrated with compatible system) / Wall Switch |
| UPC | 014817625981 |
Warranty Information
Generation Lighting products are manufactured to high-quality standards. For specific warranty details regarding your Cosmo 4-Light Chandelier, please refer to the warranty documentation provided at the time of purchase or visit the official Generation Lighting website. Warranty coverage typically includes defects in materials and workmanship under normal use.
Customer Support
If you have any questions about the installation, operation, or maintenance of your Generation Lighting Cosmo 4-Light Chandelier, or if you require technical assistance, please contact Generation Lighting customer service. Contact information can typically be found on the manufacturer's website or on your purchase receipt.
Online Resources: For additional support, product information, or to view other Generation Lighting products, please visit the official Generation Lighting website.