1. Introduction
This manual provides comprehensive instructions for the installation, operation, and maintenance of your GEEANN Electronic Deadbolt Smart Lock. Please read this manual thoroughly before installation and use to ensure proper function and security. Keep this manual for future reference.

Image: Front and back view of the GEEANN Keyless Entry Door Lock, showcasing its sleek design and components.
2. Product Overview
The GEEANN GA001 Electronic Deadbolt Smart Lock offers advanced security and convenience features for your home. Key features include:
- Touchscreen Keyless Entry: Highly responsive touchscreen with backlit display and sound for easy operation.
- Automatic Locking: Configurable auto-lock feature (5-60 seconds) or manual lock by holding the keypad for 2 seconds.
- Multiple User Codes: Supports up to 200 individual codes, including one-time codes and user codes.
- Anti-Peeking Passcode: Allows entry of random digits before or after the actual code to prevent code exposure.
- Certified Security: All-metal construction with a sturdy zinc-alloy frame, certified ANSI/BHMA A156.40 Grade 3.
- Weatherproof Design: IP54 rated for resistance against dust and water splashes.
- Backup Physical Keys: Two traditional keys are included for manual override.

Image: Illustration highlighting the ultra-responsive touchscreen, backlit display, and button sound features of the lock.

Image: Depiction of the auto-lock smart locking feature, showing how the lock can automatically secure the door after a set time.

Image: Visual explanation of the privacy password protect feature, demonstrating how random digits can be added to obscure the actual code.

Image: The lock installed on a door in varying weather conditions, illustrating its weatherproof capabilities from -4°F to 131°F.
3. Setup and Installation
The GEEANN GA001 lock is designed for easy installation without the need for drilling. It automatically identifies right-handed or left-handed doors.
3.1 Pre-Installation Checks
- Ensure your door thickness is between 1-3/8" to 2-1/6" (35-55mm).
- Verify the backset is 2-3/8" or 2-3/4" (60 or 70mm).
- Confirm the cross bore hole diameter is 2-1/8" (54mm).

Image: Detailed diagram showing the dimensions of the lock components and required door measurements for installation.
3.2 Installation Steps
For detailed step-by-step installation instructions, please refer to the dedicated 'Installation Instructions' document included with your product. A general overview includes:
- Install the latch into the door edge.
- Mount the exterior assembly.
- Install the interior mounting plate.
- Connect the cable and install the interior assembly.
- Install batteries (4 AA alkaline batteries, not included).
- Perform the door handing identification process. The lock will automatically learn and identify the door direction.
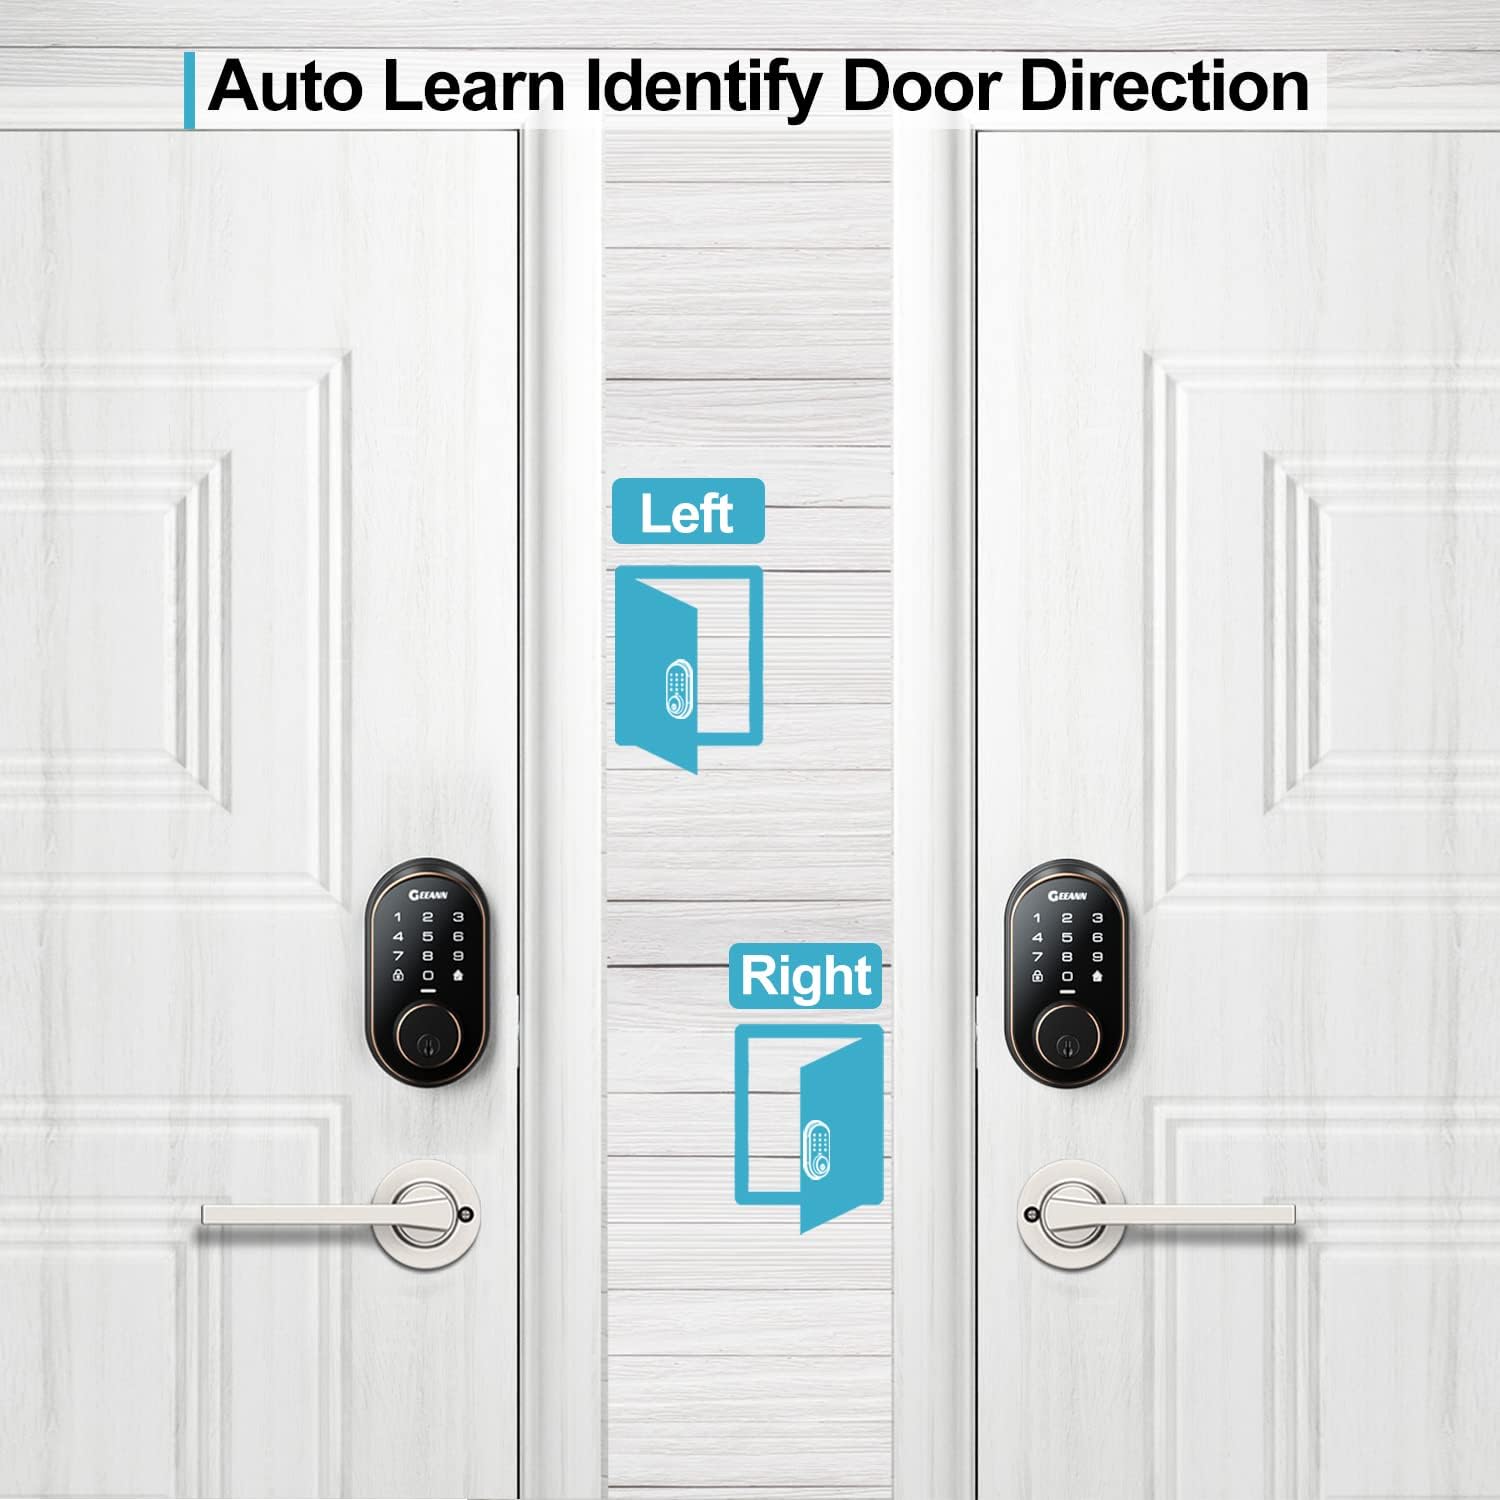
Image: Illustration demonstrating the lock's ability to automatically learn and identify the door's opening direction (left or right).
4. Operation
4.1 Programming Codes
The lock supports up to 200 unique codes, including master codes, user codes, and one-time codes. Refer to the 'Programming Instructions' document for detailed steps on how to add, delete, and modify codes.

Image: Visual representation of the lock's capacity to store up to 200 different access codes for various users, including master, new user, and one-time codes.
4.2 Unlocking the Door
- Using a Code: Enter your valid user code on the touchscreen keypad, followed by the '#' key.
- Using a Physical Key: Insert the backup physical key into the keyhole and turn to unlock.
4.3 Locking the Door
- Automatic Locking: If enabled, the lock will automatically engage after a set period (5-60 seconds) once the door is closed.
- Manual Locking: Press and hold any key on the keypad for 2 seconds to manually lock the door.
5. Maintenance
5.1 Battery Replacement
The lock is powered by 4 AA alkaline batteries. When the battery level is low, the lock will provide an audible and visual indicator. To replace batteries:
- Remove the battery cover on the interior assembly.
- Remove the old batteries.
- Insert four new AA alkaline batteries, ensuring correct polarity (+/-).
- Replace the battery cover.

Image: Depiction of the battery compartment and an illustration of a clock, symbolizing the long-term working time provided by the batteries.
5.2 General Care
- Avoid using abrasive cleaners or chemicals on the lock's surface.
- Wipe the lock with a soft, damp cloth to clean.
- Ensure the door frame and strike plate are aligned properly to prevent undue stress on the deadbolt.
6. Troubleshooting
If you encounter issues with your GEEANN Smart Lock, please refer to the 'Troubleshooting Guide' PDF provided with your product for detailed solutions. Below are some common issues and general advice:
- Lock not responding: Check battery levels and replace if necessary. Ensure the cable connection between the exterior and interior assemblies is secure.
- Keypad not lighting up: This usually indicates low batteries. Replace them.
- Lock not locking/unlocking: Verify that the deadbolt is not obstructed. Check if the door handing identification process was completed correctly.
- Codes not working: Ensure the codes are entered correctly and are still active. Try reprogramming the codes.
If problems persist, contact GEEANN customer support for assistance.
7. Specifications
| Feature | Detail |
|---|---|
| Brand | GEEANN |
| Model Number | GA001 |
| Lock Type | Keypad Deadbolt |
| Material | Metal, Zinc |
| Color | Silver-Black |
| Dimensions (L x W x H) | 5 x 3 x 2 inches |
| Item Weight | 2.2 Pounds |
| Power Source | 4 AA Alkaline Batteries (not included) |
| Special Features | Anti-Spy, IP54 weatherproof, Auto Identify Door Direction, Vacation Mode, Keyless Entry, Touchscreen, 200 Codes, Auto-Locking |
| Security Certification | ANSI/BHMA A156.40 Grade 3 |
| UPC | 765157165155 |
8. Warranty and Support
GEEANN offers at least a 1-year product warranty from the date of purchase. Lifetime customer support is also provided to assist with any questions or issues you may encounter.
For further assistance, please visit the official GEEANN website or contact their customer service department using the contact information provided in your product packaging.
9. Video Resources
No official product videos from the seller were available for embedding in this manual. Please refer to the product page or manufacturer's website for any available video demonstrations or guides.


