Introduction
The HTC 830L is a handheld 3½ digit digital multimeter designed for precise measurement of DC and AC voltage, DC current, Resistance, Diode, Transistor, and Continuity. It features a clear LCD display and is battery-operated for portability. This manual provides essential information for safe and effective use of your multimeter.
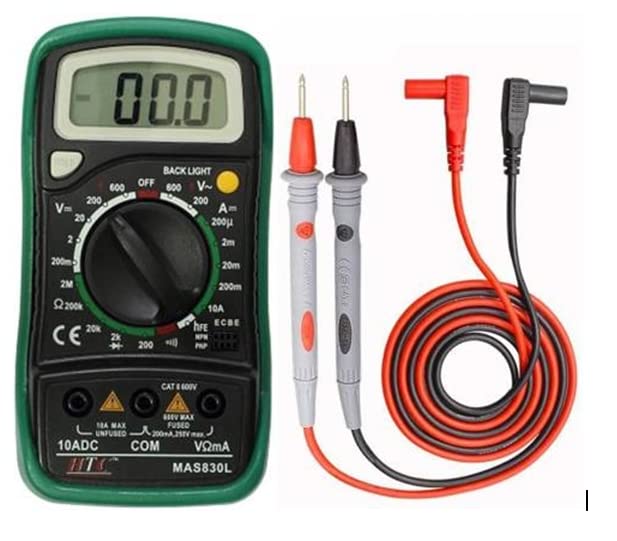
Image: The HTC 830L Digital Multimeter shown with its red and black test leads, coiled and ready for use. The multimeter itself is green and black, displaying "00.0" on its LCD screen.
Safety Information
WARNING: To prevent electrical shock or personal injury, please read and understand all safety information before using the multimeter.
- Before attempting to open the case, always ensure that test leads have been disconnected from measurement circuits.
- Close the case and tighten screws completely before using the meter to avoid electrical shock hazard.
- Do not use the meter if it is damaged or if the case is not fully closed.
- Always use the correct function and range for measurements.
- Observe all safety precautions when working with electrical circuits.
Product Overview and Components
Familiarize yourself with the main components of your HTC 830L Digital Multimeter.
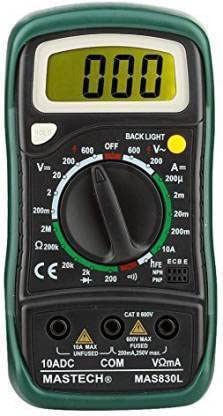
Image: A clear front view of the HTC 830L Digital Multimeter, highlighting the LCD display, rotary switch, function labels, and input jacks.
Front Panel Description:
- Display: A 3½ digit, 7 segment, 15mm high LCD for showing measurement readings.
- Backlight (for MAS830L): The backlight automatically turns off after approximately 5 seconds. Press the backlight button once to reactivate it.
- Rotary Switch: Used to select functions and desired measurement ranges, and to turn the meter ON/OFF.
- "VΩmA" Jack: This is the positive (+) input connector for the red test lead when measuring voltage, resistance, and current (except 10A).
- "COM" Jack: This is the common input connector for the black (-) test lead.
- "10A" Jack: This is the positive (+) input connector for the red test lead specifically for 10A current measurements.
- Hold Button: When pressed, the display will retain the last reading, and a "H" symbol will appear on the LCD until the button is pressed again.
Setup
Battery Installation:
The HTC 830L Digital Multimeter requires 2 AAA batteries (included). To install or replace batteries:
- Ensure the multimeter is turned OFF and disconnect all test leads from the input jacks.
- Locate the battery compartment cover on the back of the unit.
- Unscrew the retaining screw(s) and carefully remove the cover.
- Insert the 2 AAA batteries, observing the correct polarity (+/-) as indicated inside the compartment.
- Replace the battery compartment cover and secure it with the screw(s).
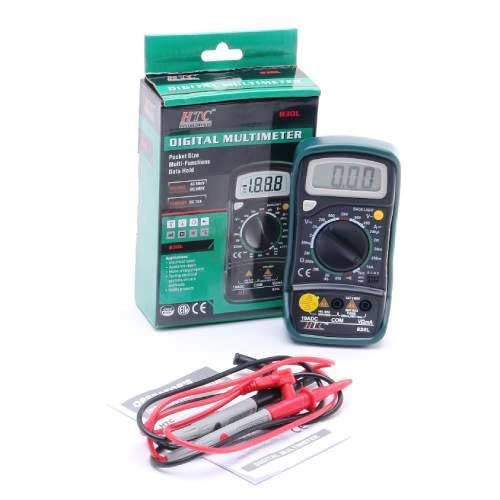
Image: The HTC 830L Digital Multimeter displayed alongside its retail box, test leads, and instruction manual, illustrating the complete package contents.
Operating Instructions
This section details how to perform various measurements using your digital multimeter.
General Operation:
- Turn the rotary switch to the desired function and range.
- Connect the black test lead to the "COM" jack.
- Connect the red test lead to the "VΩmA" jack for most measurements, or to the "10A" jack for high current measurements.
- Connect the test leads to the circuit or component under test.
- Read the measurement value on the LCD display.
Measuring DC Voltage:
- Set the rotary switch to the desired DC Voltage (V=) range (e.g., 200mV, 2V, 20V, 200V, 600V). Select a range higher than the expected voltage.
- Connect the red test lead to the positive (+) side of the circuit and the black test lead to the negative (-) side.
- Read the DC voltage value on the display.
Measuring AC Voltage:
- Set the rotary switch to the desired AC Voltage (V~) range (e.g., 200V, 600V). Select a range higher than the expected voltage.
- Connect the test leads across the AC voltage source.
- Read the AC voltage value on the display.
Measuring DC Current:
- IMPORTANT: To measure current, the multimeter must be connected in series with the circuit. Ensure the circuit is de-energized before connecting.
- Set the rotary switch to the desired DC Current (A=) range (e.g., 200µA, 2mA, 20mA, 200mA, 10A).
- For currents up to 200mA, connect the red test lead to the "VΩmA" jack. For currents up to 10A, connect the red test lead to the "10A" jack.
- Break the circuit and connect the multimeter in series.
- Re-energize the circuit and read the DC current value.
Measuring Resistance:
- Ensure the circuit or component is de-energized before measuring resistance.
- Set the rotary switch to the desired Resistance (Ω) range (e.g., 200Ω, 2kΩ, 20kΩ, 200kΩ, 2MΩ).
- Connect the test leads across the component whose resistance you want to measure.
- Read the resistance value on the display.
Diode and Continuity Test:
- Set the rotary switch to the Diode/Continuity ( ) position.
- For Diode Test: Connect the red test lead to the anode and the black test lead to the cathode of the diode. The display will show the approximate forward voltage drop. Reverse the leads to check for open circuit.
- For Continuity Test: Connect the test leads across the circuit or component. If continuity exists (resistance less than approximately 1.5kΩ), the built-in buzzer will sound.
Maintenance
- Cleaning: Wipe the meter with a damp cloth and mild detergent. Do not use abrasives or solvents.
- Battery Replacement: Replace batteries when the low battery indicator appears on the display to ensure accurate readings. Refer to the "Setup" section for instructions.
- Storage: If the meter is not to be used for a long period, remove the batteries to prevent leakage. Store in a cool, dry place.
- Calibration: Accuracy is specified for a period of one year after calibration at 18 to 28℃ (64°F to 82°F) with relative humidity up to 80%. Regular calibration by qualified personnel is recommended for professional use.
Troubleshooting
If you encounter issues with your multimeter, refer to the following common problems and solutions:
- No Display/Meter Does Not Turn On:
- Check if the rotary switch is set to an ON position.
- Verify battery installation and ensure batteries are not depleted. Replace if necessary.
- Incorrect Readings:
- Ensure test leads are properly connected to the correct input jacks and the circuit.
- Verify the rotary switch is set to the correct function and range for the measurement.
- Check if the batteries are low; replace them if the low battery indicator is on.
- Ensure the component or circuit is properly isolated for resistance or continuity tests.
- "OL" or "1" on Display:
- This indicates an overload or out-of-range condition. Select a higher range or ensure the measurement is within the meter's capabilities.
- For resistance, it may indicate an open circuit.
Specifications
Detailed technical specifications for the HTC 830L Digital Multimeter.

Image: A comprehensive table detailing the specifications of the DM-830L multimeter, including ranges, resolutions, and accuracies for DC Voltage, AC Voltage, DC Current, Resistance, and Transistor hFE test.
| Feature | Specification |
|---|---|
| Display | 3½ digit, 7 segment, 15mm high LCD |
| DC Voltage Ranges | 200mV, 2V, 20V, 200V, 600V |
| AC Voltage Ranges | 200V, 600V |
| DC Current Ranges | 200µA, 2mA, 20mA, 200mA, 10A |
| Resistance Ranges | 200Ω, 2kΩ, 20kΩ, 200kΩ, 2MΩ |
| Diode Test | Yes (shows approx. forward voltage drop) |
| Continuity Test | Yes (buzzer sounds for < 1.5kΩ) |
| Transistor Test | Yes (hFE test) |
| Data Hold | Yes |
| Backlight | Yes (auto-off after 5 seconds) |
| Power Supply | 2 x AAA batteries (included) |
| Dimensions (LxWxH) | 13.8 x 3.1 x 6.9 cm |
| Item Weight | 160 g |
| Operating Temperature | 18 to 28℃ (64°F to 82°F) |
| Relative Humidity | Up to 80% |
Warranty and Support
The HTC 830L Digital Multimeter comes with a 1-year warranty from the date of purchase, covering manufacturing defects. For warranty claims or technical support, please contact your retailer or the manufacturer, Hatco Industries.
Manufacturer: Hatco Industries, Hazari House, 197-201 Dr. C.W.J. Road, Kalbadevi, Mumbai-400002
Please retain your purchase receipt as proof of purchase for warranty purposes.


