
Introduction
This manual provides instructions for the installation, operation, and maintenance of your MICMXMO 3.5mm external microphone. Designed for car vehicle head units, GPS, and DVD enabled stereo audio radio systems, this microphone enhances hands-free communication quality. Please read this manual thoroughly before use to ensure proper functionality and longevity of your device.
Package Contents
- Car Microphone with 3.5mm connector and 3m cable
- Visor Clip
- Dash Mount
- Foam Filter (windscreen)
- 3.5mm Female to 2.5mm Male Plug Adapter (if included with specific model variant)

Image: The microphone, its 3-meter cable, a clip, and a 3.5mm to 2.5mm adapter are shown, illustrating the complete package contents.
Product Features
- Omnidirectional Design: Captures sound from all directions for clear voice transmission.
- Plug and Play: Simple connection with a standard 3.5mm plug.
- Extended Cable Length: 3-meter (9.84ft) cable for flexible placement.
- High Sensitivity: Electret condenser cartridge ensures clear audio.
- Low Impedance & Anti-Noise: Designed for stable and clear voice quality in various driving conditions.
- Versatile Mounting Options: Includes a fixing clip for visors and an adhesive dash mount.
- Wide Compatibility: Works with most car radios featuring a 3.5mm microphone input.
Specifications
| Polar Pattern | Omnidirectional |
| Connector Type | 3.5mm Jack (includes 3.5mm Female to 2.5mm Male Adapter) |
| Cable Length | 3 meters (9.84 feet) |
| Audio Sensitivity | -30dB +/- 2dB |
| Frequency Range | 50Hz-20KHz |
| Output Impedance | ≤2.2 kΩ |
| Signal-to-Noise Ratio (SNR) | >58dB |
| Standard Operation Voltage | 4.5V |
| Operation Voltage | 1.0V-10V.DC |
| Material | Plastic |
| Dimensions (L x W x H) | 0.79 x 0.39 x 2.76 inches (microphone unit) |
| Item Weight | 26 Grams (0.917 ounces) |
Compatibility
This microphone is compatible with most car radios and head units that feature a 3.5mm microphone input. It is known to work with various models from brands such as:
- Kenwood
- JVC
- Panasonic
- Jensen
- Boss
- Alpine
- Sony (MEX, XNV, XAV, WX series)
- And other brands with a compatible 3.5mm microphone input.
Important Note: Always plug the microphone into the dedicated microphone (MIC) port on the back of your head unit. Do NOT plug it into the AUX port on the front of the unit, as this is for audio input, not microphone input.
Setup and Installation
- Identify the Microphone Port: Locate the 3.5mm microphone input port on the rear of your car's head unit. If your head unit requires a 2.5mm input, use the provided 3.5mm Female to 2.5mm Male Plug Adapter.
- Connect the Microphone: Carefully plug the 3.5mm connector of the microphone cable into the designated microphone input port. Ensure a secure connection.
- Choose Mounting Location: Select a suitable location for the microphone. Optimal placement is typically near the driver's head, such as on the sun visor, dashboard, or A-pillar, to ensure clear voice pickup.
- Mount the Microphone:
- Using the Visor Clip: Attach the microphone to the visor clip. The clip can then be secured to your car's sun visor.
- Using the Dash Mount: If mounting on the dashboard or another flat surface, attach the microphone to the dash mount. Peel off the adhesive backing from the dash mount and firmly press it onto a clean, dry surface.
- Route the Cable: Carefully route the 3-meter cable to conceal it and prevent interference with driving controls. Use cable clips or tuck it under trim panels for a neat installation.
- Apply Foam Filter: Place the foam filter over the microphone head to reduce wind noise and plosives for clearer audio.

Image: Various installation methods are depicted, including clipping the microphone to a sun visor and using an adhesive mount on the dashboard.

Image: Detailed view of the microphone unit, the 3.5mm audio jack, and the included clip and adhesive dash mount.
Operating Instructions
Once installed, the microphone operates automatically with your car's head unit for hands-free calls or voice commands.
- Initiate Calls: Use your car head unit's interface or voice command features to make or receive calls.
- Speak Clearly: Speak in a normal tone towards the microphone. For optimal clarity, ensure the microphone is positioned within a reasonable distance (e.g., 1-2 feet) from your mouth.
- Adjust Volume: Adjust the call volume through your car's head unit controls.
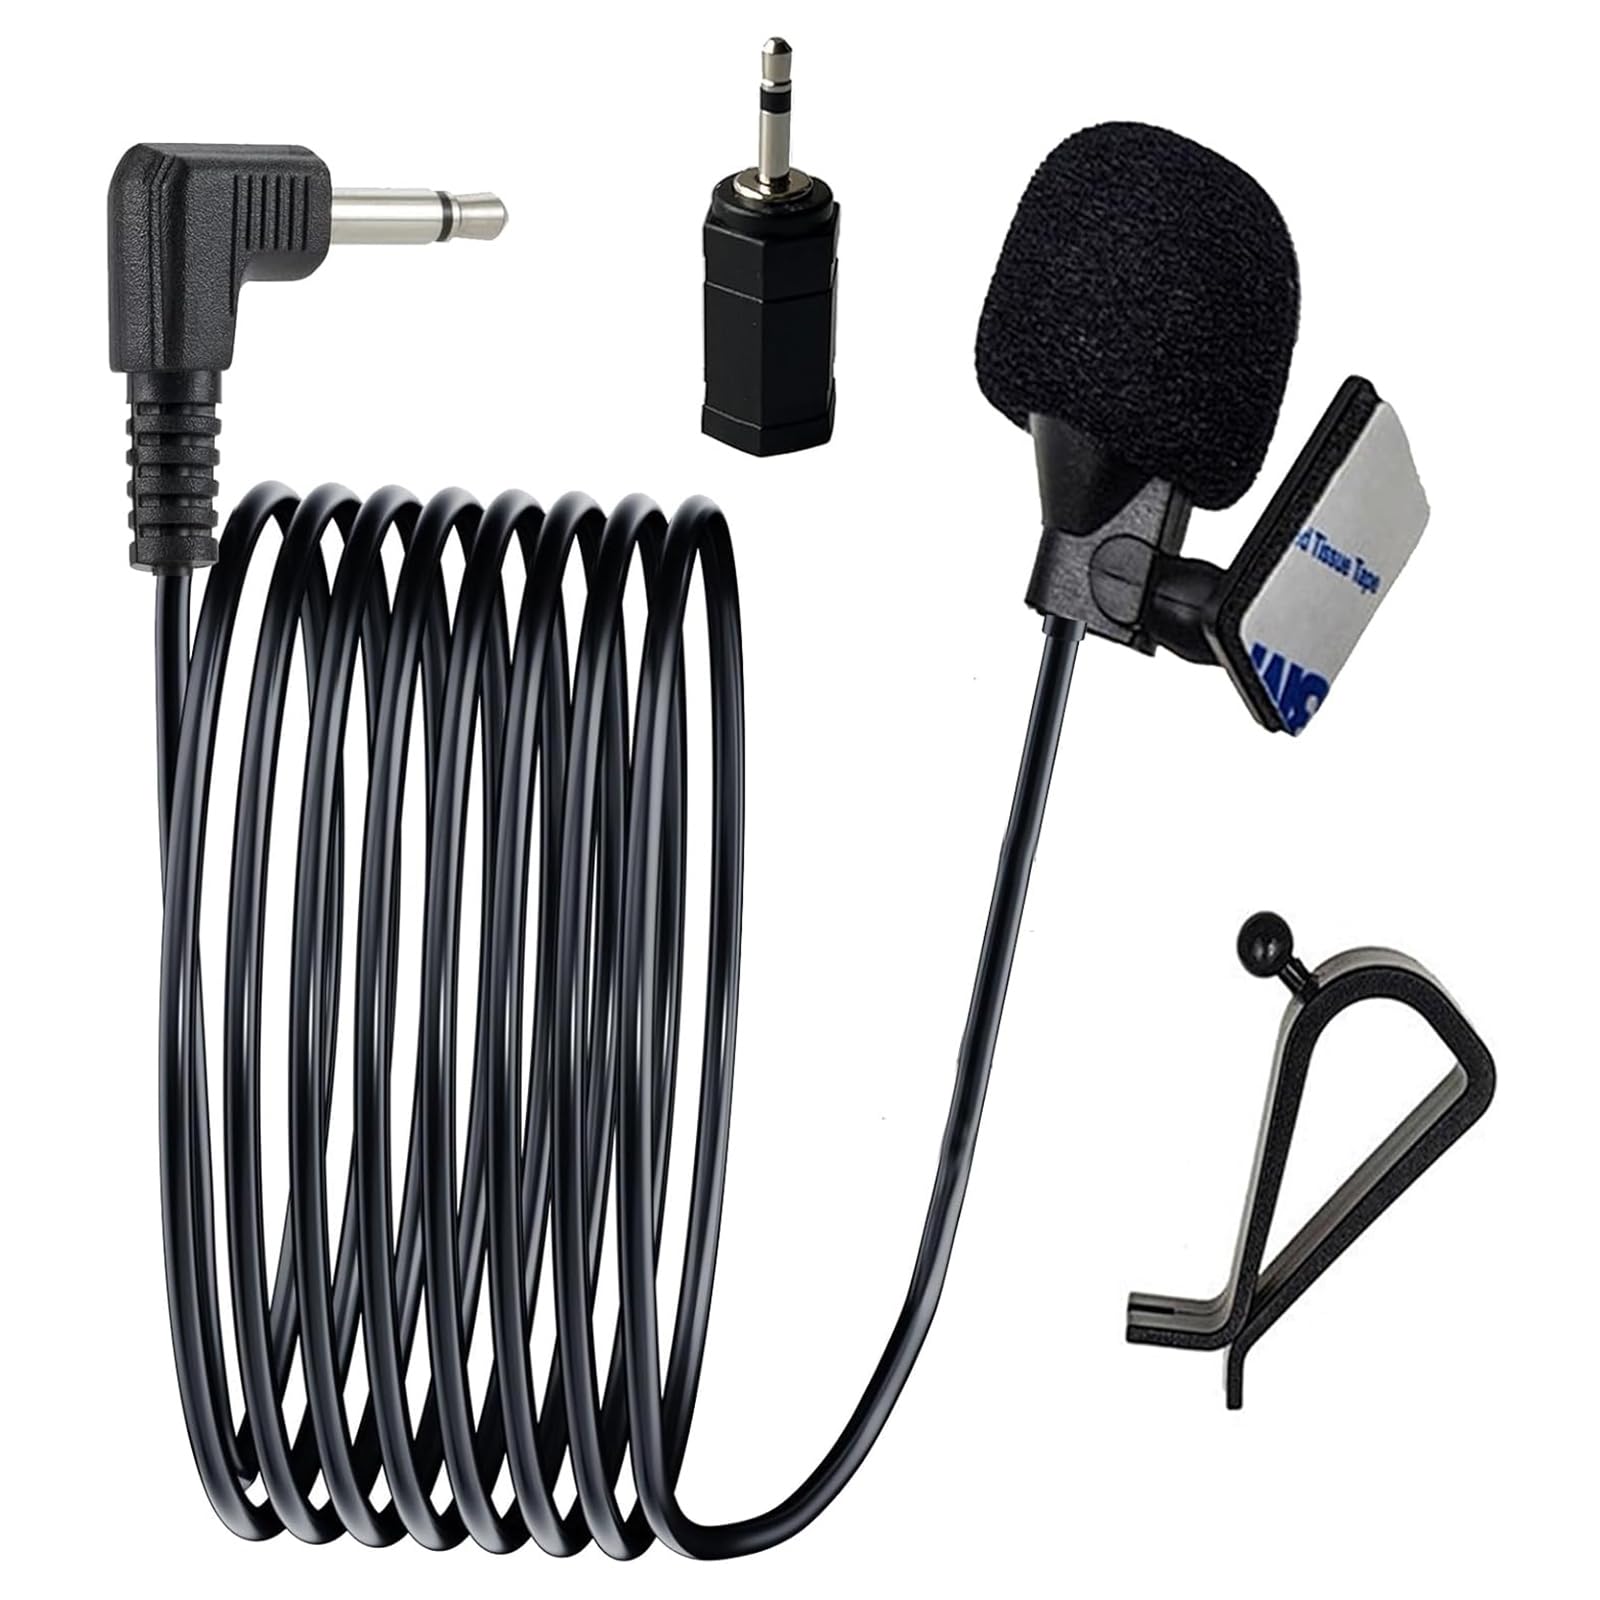
Image: A driver is shown in a car, with the microphone positioned to capture their voice for hands-free communication, indicating clear sound quality.
Maintenance
- Cleaning: Gently wipe the microphone and cable with a soft, dry cloth. Avoid using harsh chemicals or abrasive cleaners.
- Foam Filter: Periodically check the foam filter for dust or debris. Replace if it becomes damaged or excessively dirty to maintain optimal sound quality.
- Cable Care: Avoid sharp bends or kinks in the cable to prevent internal damage.
- Storage: If removing the microphone for extended periods, store it in a clean, dry place away from extreme temperatures.
Troubleshooting
- No Sound or Poor Sound Quality:
- Check Connection: Ensure the microphone's 3.5mm plug is fully inserted into the correct microphone input port on your head unit. Verify it is not plugged into an AUX input.
- Adapter Use: If using the 2.5mm adapter, ensure both connections (microphone to adapter, adapter to head unit) are secure.
- Head Unit Settings: Check your car head unit's audio settings. Some units may require enabling an external microphone or adjusting microphone gain levels.
- Microphone Placement: Ensure the microphone is positioned close enough to the speaker (typically within 1-2 feet) and not obstructed.
- Foam Filter: Verify the foam filter is properly seated and not damaged.
- Test with Another Device: If possible, test the microphone with another compatible device to rule out an issue with the head unit.
- Microphone Not Recognized:
- Correct Port: Double-check that the microphone is plugged into the dedicated MIC input, not an AUX or other audio input.
- Head Unit Reboot: Try restarting your car's head unit (turn off the car, wait a minute, then restart).
- Compatibility: Confirm your head unit model is compatible with external 3.5mm microphones.
Warranty and Support
For warranty information or technical support, please refer to the documentation provided with your original purchase or contact the retailer. Keep your purchase receipt as proof of purchase.