1. Introduction
Thank you for choosing the Canglan Technology GK9-2 Portable Electric Bag Sealing Machine. This manual provides essential information for the safe and efficient operation, setup, and maintenance of your machine. Please read these instructions carefully before use and retain them for future reference.
2. Safety Instructions
To ensure safe operation and prevent damage to the machine or injury, please observe the following safety precautions:
- Always connect the machine to a grounded 220V/50Hz power outlet.
- Do not operate the machine with wet hands or in damp conditions.
- Keep fingers and loose clothing away from moving parts during operation.
- Unplug the machine from the power source before performing any maintenance, cleaning, or when changing needles.
- Ensure the work area is well-lit and free from obstructions.
- Do not attempt to modify or repair the machine yourself. Contact qualified service personnel for assistance.
- Keep the machine out of reach of children.
3. Product Overview
3.1 Features
- Portable and Compact: Lightweight design for easy transport and on-site use.
- Easy to Operate: Simple stitching adjustments suitable for various users.
- Versatile Use: Ideal for sealing woven bags, sacks, and similar materials.
- High Speed: Achieves a stitching rate of up to 9.0mm/second for efficient sealing.
- Reliable Performance: Constructed with quality materials for consistent operation.
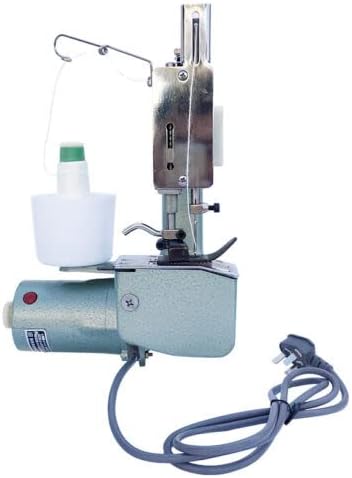
3.2 Components
The GK9-2 machine consists of a main body, motor, needle bar assembly, presser foot, thread stand, and power cord. Refer to the images below for visual identification of key parts.

4. Setup
4.1 Power Connection
- Ensure the machine's power switch is in the 'OFF' position.
- Connect the power cord securely to the machine's power input.
- Plug the power cord into a standard 220V/50Hz grounded electrical outlet.
4.2 Thread Installation
Correct thread installation is crucial for proper stitching. Follow the thread path as illustrated:
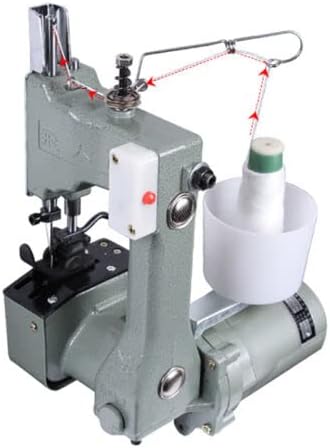

- Place the thread spool onto the thread stand.
- Guide the thread through the upper thread guide.
- Pass the thread through the tension disc assembly.
- Thread the needle from front to back. Ensure the thread is seated correctly in all guides.
4.3 Pressure Adjustment
The machine features adjustable pressure to accommodate different material thicknesses. To adjust the pressure, locate the pressure adjustment mechanism (typically a screw or knob near the presser foot) and turn it clockwise to increase pressure or counter-clockwise to decrease pressure. Test on a scrap piece of material to find the optimal setting.
5. Operating Instructions
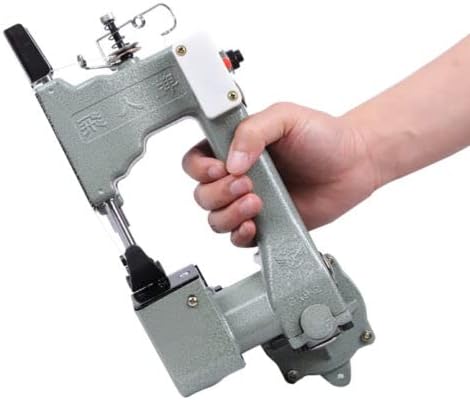
5.1 Starting the Machine
- Ensure the machine is properly threaded and connected to power.
- Hold the machine firmly by the handle.
- Press the power switch to turn the machine ON. The motor will start.
5.2 Sewing Process
With the machine running, guide the edge of the bag or material to be sealed under the presser foot. The machine will automatically feed the material and create a single-line chain stitch. Maintain a steady pace and guide the material evenly for a consistent seam.
5.3 Stopping the Machine
Once the desired seam length is achieved, release the power switch to turn the machine OFF. Carefully lift the presser foot and remove the sealed material. Cut the thread, leaving a sufficient tail.
6. Maintenance
Regular maintenance ensures the longevity and optimal performance of your GK9-2 machine.
6.1 Cleaning
- Always unplug the machine before cleaning.
- Use a soft brush or compressed air to remove lint and dust from the needle area, feed dogs, and other accessible parts.
- Wipe the exterior with a dry, soft cloth. Avoid using harsh chemicals or abrasive cleaners.
6.2 Lubrication
Periodically apply a few drops of sewing machine oil to moving parts, such as the needle bar, loopers, and other friction points as indicated in the machine's internal diagrams (if available). Over-lubrication should be avoided.
6.3 Needle Replacement
If the needle becomes bent, dull, or breaks, replace it immediately. Use only needles specified for this type of industrial bag sealing machine. To replace:
- Turn off and unplug the machine.
- Loosen the needle clamp screw.
- Remove the old needle.
- Insert the new needle with the flat side facing the back, pushing it up as far as it will go.
- Tighten the needle clamp screw securely.
7. Troubleshooting
This section addresses common issues you might encounter. For problems not listed here, please contact customer support.
| Problem | Possible Cause | Solution |
|---|---|---|
| Machine does not start | No power, loose connection, faulty switch | Check power cord, outlet, and switch. Ensure it's plugged in. |
| Skipped stitches | Incorrect threading, bent needle, wrong needle type, improper tension | Re-thread the machine, replace needle, adjust tension. |
| Thread breaks frequently | High tension, poor quality thread, burr on thread path, damaged needle | Reduce tension, use quality thread, inspect thread path for rough spots, replace needle. |
| Uneven stitching | Inconsistent material feeding, incorrect pressure, tension issues | Guide material steadily, adjust presser foot pressure, check thread tension. |
8. Specifications
The following are the technical specifications for the GK9-2 Portable Electric Bag Sealing Machine:
| Specification | Value |
|---|---|
| Model | GK9-2 |
| Input Voltage | AC 220V/50Hz |
| Current | 0.75A |
| Speed | 12000 RPM |
| Power | 130W |
| Stitch Type | Single-line chain |
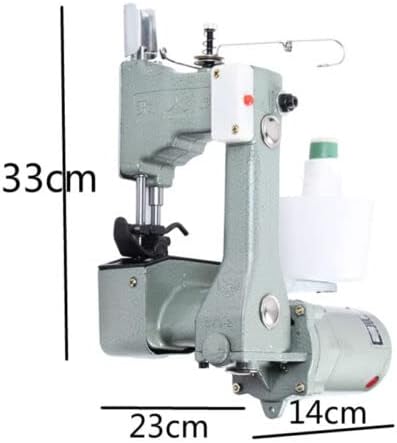
| Dimensions (L x W x H) | 23 x 14 x 33 CM |
| Weight | 4 KG |
| Material | Alloy Steel |
| UPC | 783464231288 |
9. Warranty and Support
For warranty information, technical support, or service inquiries regarding your Canglan Technology GK9-2 machine, please refer to your purchase documentation or contact the seller directly. Keep your proof of purchase for any warranty claims.