Product Overview
This instruction manual provides detailed information for the installation, function, and troubleshooting of the AZ4U Washer Water Inlet Valve. This component is designed as a direct replacement for various Maytag, Whirlpool, and Kenmore top-load washer models, ensuring proper water flow and resolving common washer issues.
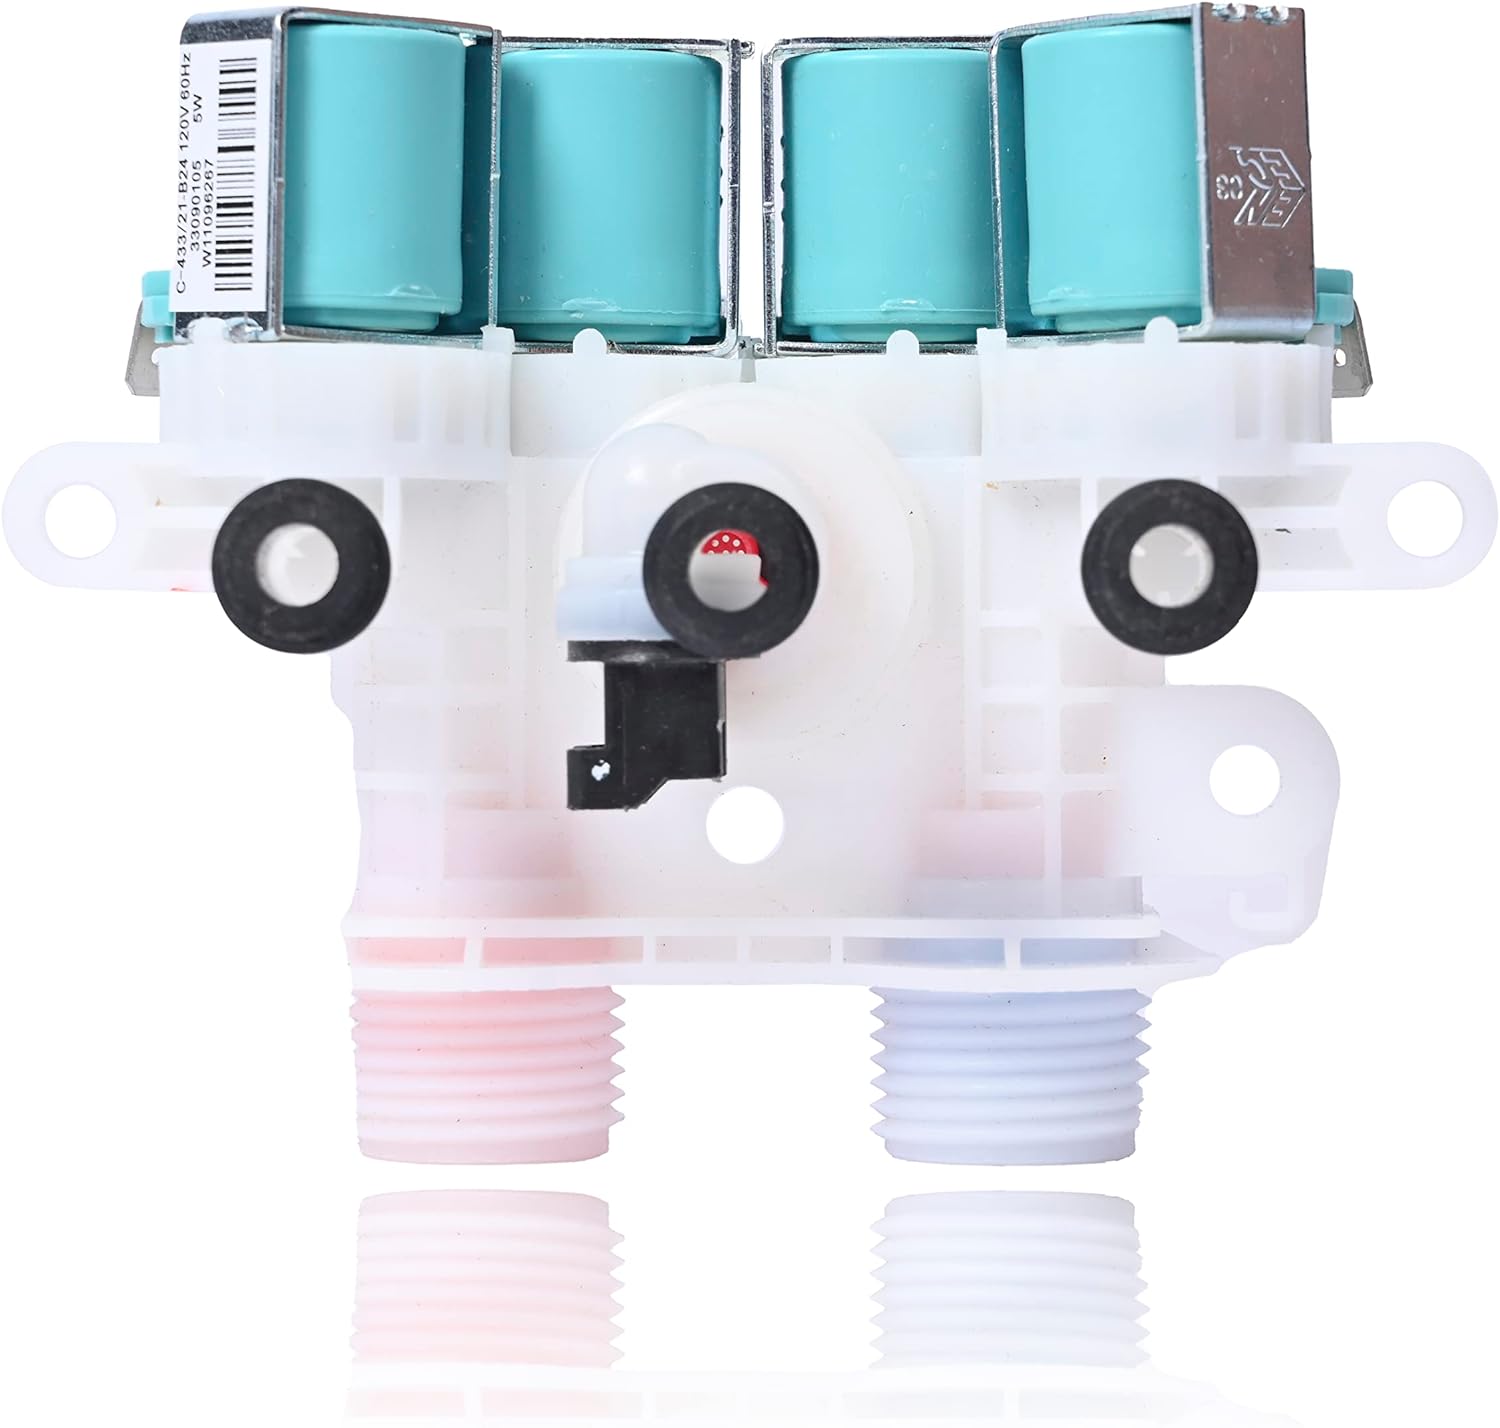
Image: The AZ4U Washer Water Inlet Valve, showing its main components and design.
Specifications
| Feature | Detail |
|---|---|
| Voltage | 120 V, 60 Hz |
| Valve Type | Electrically controlled solenoid mechanism |
| Ports | 2 threaded ports (hot and cold water) with blue and red mesh inserts |
| Valves/Solenoids | 3 push-on valves, 4 solenoids |
| Dimensions | Approximately 5.5 x 4.2 x 3 inches |
| Weight | Approximately 11.8 ounces |
| Material | Durable, high-quality material, OEM standards |

Image: Visual representation of the valve's specifications, including its components and dimensions.
Compatibility
This water inlet valve is compatible with a wide range of Maytag, Whirlpool, and Kenmore top-load washer models. Key compatible models include:
- Maytag Bravos XL series: MVWB765FW0, MVWB835DW2, MVWB855DC2, MVWB835DW3, MVWB835DW1, MVWB835DW4, MVWB766FW0, MVWB765FW1, MVWB765FW2, MVWB765FW3, MVWB855DC3, MVWB766FW1, MVWB865GC0, MVWB755DW0, MVWB755DW1, MVWB765FC1, MVWB765FC2, MVWB765FC3, MVWB835DC0, MVWB835DC2, MVWB835DC3, MVWB835DC4, MVWB855DC0, MVWB855DC1, MVWB855DW0, MVWB855DW1, MVWB855DW2, MVWB855DW3, MVWB865GW0, MVW7230HC0, MVW7230HW0, MVW7232HC0, MVW7232HW0, MVW8230HC0, MVWB757JW0, MVWB765FC4, MVWB765FW4, MVWB835DC5, MVWB835DW5, MVWB855DC4, MVWB865GC1, MVWB865GW1, 7MMVWB855EC2, 7MMVWB855EC3, 7MMVWB835EW0, 7MMVWB835EW1, 7MMVWB855EC0, 7MMVWB855EC1.
- Whirlpool/Kenmore models: 7MWTW8500EC2, 7MWTW8500EC0, 7MWTW8500EC1, WTW7500GC0, WTW7500GW0, WTW8500DC0, WTW8500DC1, WTW8500DC2, WTW8500DC3, WTW8500DR0, WTW8500DR1, WTW8500DR2, WTW8500DR3, WTW8500DW0, WTW8500DW1, WTW8500DW2, WTW8500DW3, WTW8700EC0, WTW8700EC1, WTW5100HC0, WTW5100HW0, WTW5105HC0, WTW5105HC1, WTW5105HW0, WTW5105HW1, WTW7500GC2, WTW7500GC3, WTW7500GW2, WTW7500GW3, WTW8500DC4, WTW8500DC5, WTW8500DC6, WTW8500DR4, WTW8500DR5, WTW8500DW4, WTW8500DW5, WTW8500DW6.
Replaces part numbers: W10599423, W10758828, W11096267, W11165546VP, and others.

Image: A visual guide illustrating the wide range of Maytag models compatible with this water inlet valve.
Installation Instructions
Safety First: Always disconnect the power source and water supply to your washing machine before beginning any repair or installation. Wear work gloves for protection.
Tools Required:
- 1/4 inch nut driver
- Flathead screwdriver
- Thin putty knife
- Channel locks (optional, for hoses)
- Work gloves
Step-by-Step Installation:
- Prepare the Washer: Ensure the hot water supply is working. Disconnect the washing machine's power cord from the electrical outlet and turn off the hot and cold water supply valves.
- Drain Water: Disconnect the water hoses from the existing inlet valve at the back of the washer and allow any residual water to drain into a bucket.
- Access the Control Panel: Gently insert a thin putty knife between the console and the washer lid at the front, near the clips. Apply gentle pressure until you hear a pop, indicating the body clip has released. Repeat on both the right and left sides.
- Lift and Position Console: Carefully slide the console forward to unmount it, then turn it upside down. Be cautious of any connected wires.
- Disconnect Wiring: Locate the small wire connected to the control panel. Gently unclip this wire from the control board on the machine and set it aside. This provides better access to the water inlet valve.
- Remove Metal Plates (if present): Use a 1/4 inch nut driver to remove any screws holding metal plates over the inlet valve. Set these plates aside.
- Disconnect Electrical Plugs: Use a small flat-head screwdriver to gently pry between each of the four electrical plugs connected to the water inlet valve. Be patient, as they may be snug. Disconnect all four plugs.
- Remove Old Valve: Use your 1/4 inch nut driver to remove the two screws on each side holding the water inlet valve in place. Gently pull up on the old inlet valve to release it from its mounting position. There may be one small plug remaining on the bottom; disconnect it.
- Install New Valve: Position the new AZ4U water inlet valve in the same location. Secure it with the two screws using the 1/4 inch nut driver.
- Reconnect Wiring: Reconnect all electrical plugs to the new valve, ensuring they are securely seated. Reconnect the small wire to the control board.
- Reassemble Console: Carefully slide the console back into place, ensuring the clips engage properly.
- Reconnect Water Hoses: Reattach the hot and cold water hoses to the threaded ports on the new valve. Ensure connections are tight to prevent leaks.
- Restore Power and Water: Turn on the hot and cold water supply valves, then reconnect the washing machine's power cord. Check for any leaks before operating the washer.
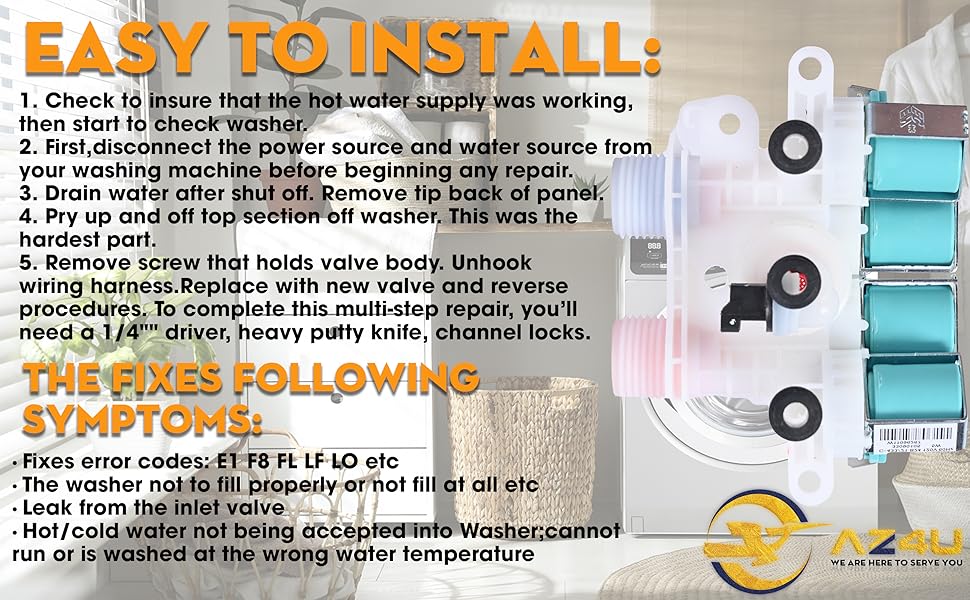
Image: Visual guide for the installation process, highlighting key steps and components.
Operating Principle
The water inlet valve is a crucial component that controls the flow of water into your washing machine. It operates via a solenoid mechanism. When the washer initiates a fill cycle, based on the selected wash temperature and water level settings, the control board sends signals to the corresponding solenoids within the valve. These solenoids then open or close, allowing the precise amount of hot and/or cold water to enter the wash tub.
The valve features two threaded ports for hot and cold water connections, each controlled by its own solenoid. The integrated mesh inserts help filter incoming water, preventing debris from entering the washer system.
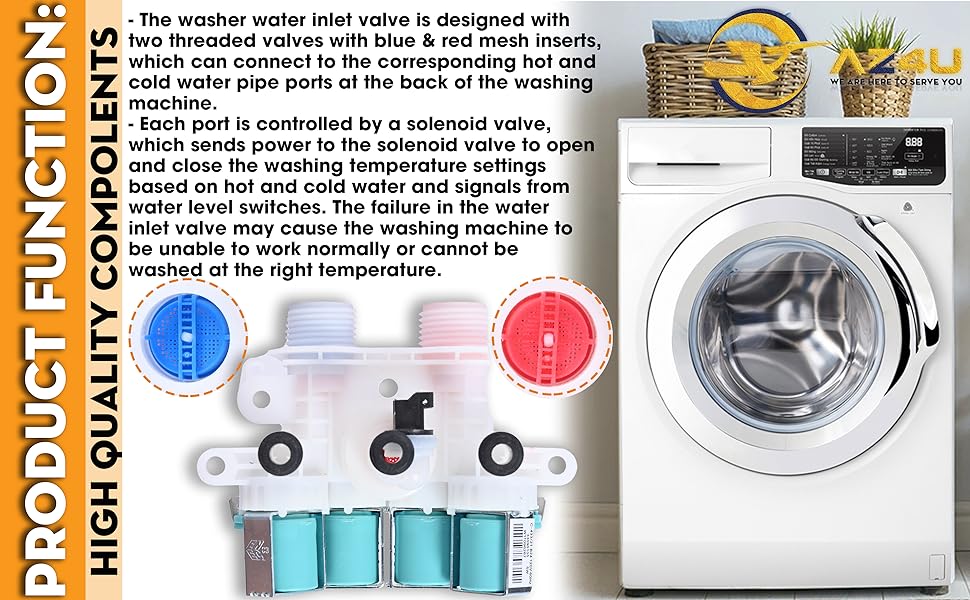
Image: A detailed view of the water inlet valve, showing the hot and cold water ports and the internal solenoid components responsible for water flow control.
Maintenance
To ensure optimal performance and longevity of your water inlet valve and washing machine, consider the following maintenance tips:
- Inspect Hoses: Periodically check the hot and cold water inlet hoses for any signs of wear, cracks, or leaks. Replace them if necessary.
- Clean Inlet Screens: The valve includes mesh inserts in the threaded ports. Over time, these can accumulate sediment or debris from your water supply. If you notice reduced water flow or filling issues, disconnect the water hoses and carefully clean these screens.
- Check for Leaks: After installation and periodically thereafter, visually inspect the area around the water inlet valve and hose connections for any signs of water leakage. Address any leaks promptly.

Image: The water inlet valve, highlighting its durable construction and integrated anti-scale filter for improved performance and reduced maintenance.
Troubleshooting
The AZ4U Washer Water Inlet Valve is designed to resolve several common washing machine issues. If your washer is experiencing any of the following symptoms, replacing the water inlet valve may be the solution:
- Error Codes: Displays error codes such as LF, F8, E1, LO, or FL.
- Water Leakage: Leakage observed at or around the water valve.
- No Water/Insufficient Water: The washer does not feed water, or there is no hot or cold water entering the tub.
- Incorrect Water Filling: The washer fills incorrectly, either overfilling or underfilling.
- Continuous Water Intake: The washer cannot stop water intake, leading to potential overfilling.
If you encounter these issues, refer to the "Installation Instructions" section to replace the valve. If problems persist after replacement, consult a qualified appliance technician.

Image: A visual summary of common washer symptoms that can be resolved by replacing the water inlet valve.
Warranty and Support
Your AZ4U Washer Water Inlet Valve comes with a one-year warranty from the date of purchase, covering manufacturing defects.
Additionally, we offer a 30-day money-back guarantee if you are not satisfied with the product.
For any concerns, questions, or assistance, please contact our customer support team. We aim to resolve your problem within 24 hours.
Contact Information: Please refer to your purchase documentation or the AZ4U brand store on Amazon for direct contact methods.
Official Product Videos
No official product videos from the seller were found for this product in the provided data. For installation guides, many users find helpful resources on video-sharing platforms by searching for their specific washer model and "water inlet valve replacement".