1. Getting Started
1.1. Package Contents
Verify that all items are present in your product package:
- UMIDIGI F3 5G Cell Phone
- USB Type-C Cable
- SIM Tray Ejector
- Power Adapter (may vary by region)
- Protective Case (optional, may vary)
- Screen Protector (pre-applied or included, may vary)
1.2. Device Layout
Familiarize yourself with the physical components of your UMIDIGI F3 5G phone.

Image: Front and back view of the UMIDIGI F3 5G smartphone, showcasing its design and camera setup.
- Front Camera: Located at the top center of the display.
- Display: 6.7-inch full screen.
- Volume Buttons: On the side, for adjusting audio levels.
- Power Button/Fingerprint Sensor: On the side, used for power control and biometric authentication.
- Independent Shortcut Key: Customizable button on the left side for quick access to functions.
- USB Type-C Port: At the bottom, for charging and data transfer.
- 3.5mm Audio Jack: For connecting headphones.
- Speaker: Located at the bottom.
- Microphone: Located at the bottom.
- SIM/MicroSD Card Tray: On the side, requires the SIM ejector tool to open.
- Rear Camera Module: Houses the triple camera system and LED flash.
1.3. SIM Card and MicroSD Installation
To install your SIM card(s) and/or MicroSD card:
- Ensure the phone is powered off.
- Locate the SIM card tray on the side of the device.
- Insert the SIM ejector tool into the small hole next to the tray and press gently until the tray pops out.
- Place your Nano-SIM card(s) and/or MicroSD card into the designated slots on the tray. The UMIDIGI F3 5G supports dual Nano-SIM cards or one Nano-SIM and one MicroSD card. Ensure the gold contacts face downwards.
- Carefully reinsert the tray into the phone until it clicks into place.
2. Basic Operation
2.1. Power On/Off
- To Power On: Press and hold the Power button until the UMIDIGI logo appears.
- To Power Off: Press and hold the Power button until the power options menu appears, then select "Power off".
- To Restart: Press and hold the Power button until the power options menu appears, then select "Restart".
2.2. Initial Setup
Upon first power-on or after a factory reset, the phone will guide you through the initial setup process. This includes selecting your language, connecting to a Wi-Fi network, setting up your Google account, and configuring security features.
2.3. Navigation
The UMIDIGI F3 5G uses a touchscreen interface. Common gestures include:
- Tap: To select an item or open an app.
- Swipe: To scroll through screens or lists.
- Pinch: To zoom in or out on images and web pages.
- Long Press: To access contextual menus or move app icons.
2.4. Network Connectivity (5G/4G/3G/2G)
The UMIDIGI F3 5G supports a wide range of cellular networks. Ensure your SIM card is active and has a data plan for internet access. You can manage network settings in the 'Settings' app under 'Network & internet'.
Supported frequency bands include:
- 5G NR: N1/2/3/5/7/8/20/25/28/38/40/41/66/77/78
- 4G FDD-LTE: B1/2/3/4/5/7/8/12/13/17/18/19/20/25/26/28A/28B/B66
- 4G TDD-LTE: B34/38/39/40/41
- 3G WCDMA: B1/2/4/5/6/8/19
- 3G CDMA: BC0/BC1
- 2G GSM: B2/B2/B3/B5/B8
Note: 5G connectivity and specific band support may vary based on your region and carrier.
2.5. Camera Usage
The UMIDIGI F3 5G features a versatile triple camera system on the rear and a high-resolution front camera.

Image: Detailed view of the UMIDIGI F3 5G's rear camera module, indicating the 48MP main, 5MP macro, and 8MP ultra-wide lenses.
- Rear Cameras:
- 48MP Ultra-Clear Main Camera (f/1.79)
- 8MP Ultra-Wide Angle Camera (120° FOV)
- 5MP Macro Camera
- Front Camera: 16MP
Open the 'Camera' app to access various modes such as Photo, Video, Portrait, Night, and Macro. Tap on the screen to focus, and use the shutter button to capture images or start/stop video recording.
2.6. Battery Management
The UMIDIGI F3 5G is equipped with a 5150mAh high-capacity battery and supports 18W fast charging.

Image: Visual representation of the 5150mAh battery, 18W fast charging, and estimated battery life for various activities.
- Charging: Use the provided USB Type-C cable and power adapter for optimal charging speed.
- Battery Optimization: The phone features an AI battery management system to optimize power usage. You can further manage battery settings in 'Settings' > 'Battery'.
2.7. Storage
The device comes with 8GB of RAM and 128GB of internal storage, expandable via MicroSD card.

Image: Illustration highlighting the 8GB RAM and 128GB internal storage, emphasizing its capacity for photos and videos.
- Internal Storage: 128GB for apps, photos, videos, and files.
- Expandable Storage: Supports MicroSD cards up to 256GB.
- RAM: 8GB LPDDR4X for smooth multitasking.
2.8. Security Features
The UMIDIGI F3 5G offers multiple security options to protect your device and data.

Image: Overview of additional features including Face Unlock, Global Bands support, headset-free FM Radio, and a 3.5mm headphone jack.
- Fingerprint Unlock: The side-mounted fingerprint sensor allows for quick and secure unlocking. Set it up in 'Settings' > 'Security' > 'Fingerprint'.
- Face Unlock: Use your face to unlock the device. Configure this in 'Settings' > 'Security' > 'Face Unlock'.
- Pattern, PIN, Password: Standard Android security options are also available.
2.9. Independent Shortcut Key
The customizable shortcut key on the left side of the phone provides quick access to frequently used applications or functions.

Image: Visual guide to the independent shortcut key, showing how single, double, and long presses can be assigned to different functions like opening an app or turning on the flashlight.
- Single Click: Assign to open a specific app or function.
- Double Click: Assign to open a different app or function.
- Long Press: Assign to yet another app or function, such as the flashlight.
Customize these actions in 'Settings' > 'Smart Key' or a similar menu option.
3. Device Maintenance
3.1. Cleaning Your Device
To keep your phone clean and functioning properly:
- Use a soft, lint-free cloth to wipe the screen and body.
- Avoid using harsh chemicals, abrasive cleaners, or compressed air.
- Keep ports free of dust and debris.
3.2. Software Updates
Your UMIDIGI F3 5G runs on Android 12, which includes privacy protection mechanisms and performance improvements.
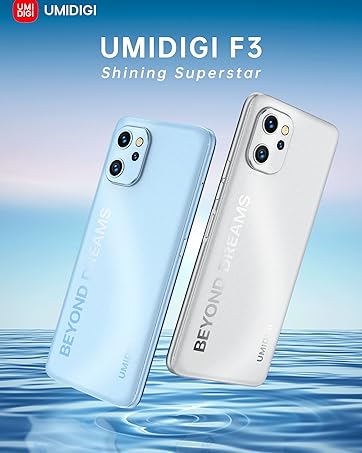
Image: A phone display showcasing the clean interface and features of Stock Android 12.
Regular software updates provide security patches, bug fixes, and new features. To check for updates, go to 'Settings' > 'System' > 'System update'. Ensure your device is connected to Wi-Fi and has sufficient battery before performing an update.
3.3. Battery Care
- Avoid extreme temperatures, as they can degrade battery life.
- Do not leave the phone charging for excessively long periods after it reaches 100%.
- If storing the device for an extended time, charge it to about 50% first.
4. Troubleshooting
4.1. Common Issues and Solutions
| Issue | Solution |
|---|---|
| Phone does not turn on | Ensure the battery is charged. Connect to a charger for at least 10 minutes, then try powering on. |
| Apps are crashing or freezing | Clear the app's cache and data in 'Settings' > 'Apps'. If the issue persists, uninstall and reinstall the app. |
| Poor network signal | Check SIM card insertion. Ensure you are in an area with network coverage. Try restarting the phone. Verify APN settings with your carrier. |
| Battery drains quickly | Reduce screen brightness, close unused apps, disable unnecessary background data. Check 'Settings' > 'Battery' for apps consuming the most power. |
| Cannot connect to Wi-Fi | Ensure Wi-Fi is enabled. Restart your router. Forget the network in phone settings and reconnect. |
4.2. Factory Reset
A factory reset will erase all data from your phone and restore it to its original factory settings. This can resolve persistent software issues but should be used as a last resort.
Warning: Back up all important data before performing a factory reset.
- Go to 'Settings' > 'System' > 'Reset options'.
- Select 'Erase all data (factory reset)'.
- Confirm your decision and enter your PIN/password if prompted.
- The phone will restart and begin the reset process.
5. Technical Specifications
| Feature | Specification |
|---|---|
| Model | UMIDIGI F3 5G |
| Processor | MediaTek Dimensity 700 5G (Octa-core, up to 2.2 GHz) |
| RAM | 8GB LPDDR4X |
| Internal Storage | 128GB eMMC 5.1 |
| Expandable Storage | MicroSD card up to 256GB |
| Display | 6.7-inch HD+ (1650 x 720) Full Screen |
| Rear Camera | 48MP Main + 8MP Ultra-Wide + 5MP Macro |
| Front Camera | 16MP |
| Battery | 5150mAh (typ) |
| Charging | 18W Fast Charging (USB Type-C) |
| Operating System | Android 12 |
| Network | 5G/4G/3G/2G Global Bands |
| SIM Card | Dual Nano-SIM or 1 Nano-SIM + 1 MicroSD |
| Connectivity | Wi-Fi, Bluetooth, GPS, NFC, 3.5mm Audio Jack |
| Dimensions | 6.61 x 2.99 x 0.31 inches (168 x 76 x 8.75 mm) |
| Weight | 6.9 ounces (195g) |

Image: The UMIDIGI F3 5G showcasing its 6.7-inch large full screen with a 20.6:9 aspect ratio, ideal for media consumption.

Image: A visual representation of the MediaTek Dimensity 700 5G processor, highlighting its advanced 7nm process and octa-core CPU.
6. Warranty and Support
6.1. Warranty Information
UMIDIGI products typically come with a limited manufacturer's warranty. The duration and terms of the warranty may vary by region and retailer. Please refer to the warranty card included in your package or the official UMIDIGI website for detailed information. Keep your proof of purchase for warranty claims.
6.2. Contact Support
If you encounter issues not covered in this manual or require further assistance, please contact UMIDIGI customer support through their official website or the retailer from whom you purchased the device. For Amazon purchases, you can contact Amazon Customer Service for support.