1. Introduction
This instruction manual provides detailed information for the Hobbypark Front & Rear Aluminum Suspension Arms Set. These components are designed as an upgrade for specific Traxxas Maxx V1 models, offering enhanced durability and performance over standard parts. Please read this manual thoroughly before installation and use to ensure proper fitment and function.
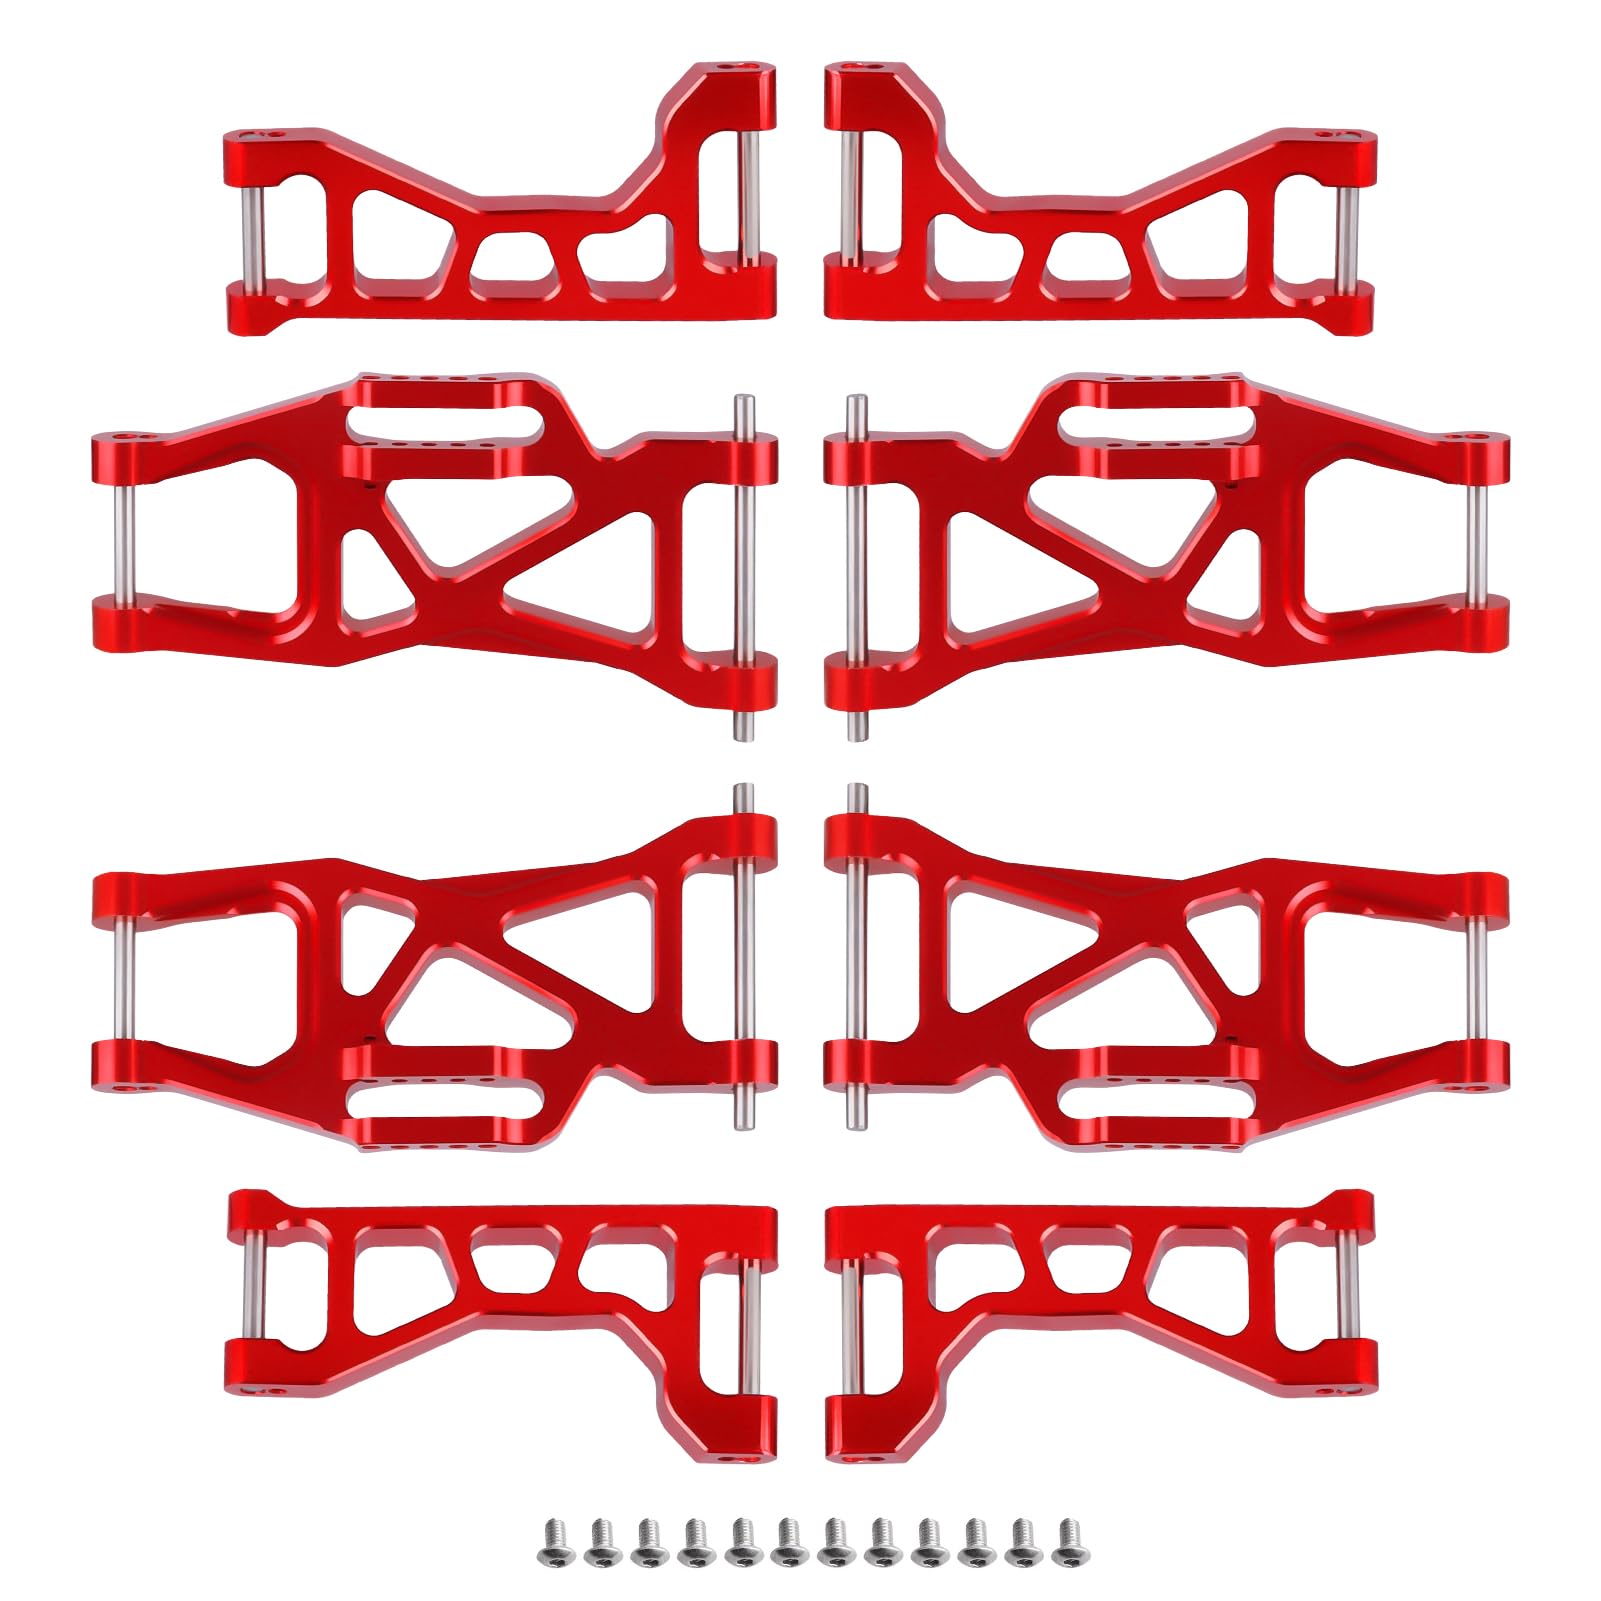
Image 1.1: The Hobbypark aluminum suspension arms installed on a Traxxas Maxx V1 monster truck. This image illustrates the product's appearance when mounted on a compatible vehicle.
2. Compatibility
This suspension arm set is specifically designed for the following model:
- Traxxas Maxx 1/10 Scale 89076-4 V1 Monster Truck
Important Note: This product is not compatible with the Traxxas Maxx 2.0 WideMaxx version. Always refer to your specific model's manual for part compatibility before attempting installation.
3. Package Contents
Verify that all components listed below are present in your package:
- Upper Suspension Arms (4 pieces) - 2 front, 2 rear
- Lower Suspension Arms (4 pieces) - 2 front, 2 rear
- Mounting Hardware (pins and screws, as shown in images)

Image 3.1: Included hardware components. This image displays the screws and metal pins necessary for installing the suspension arms.
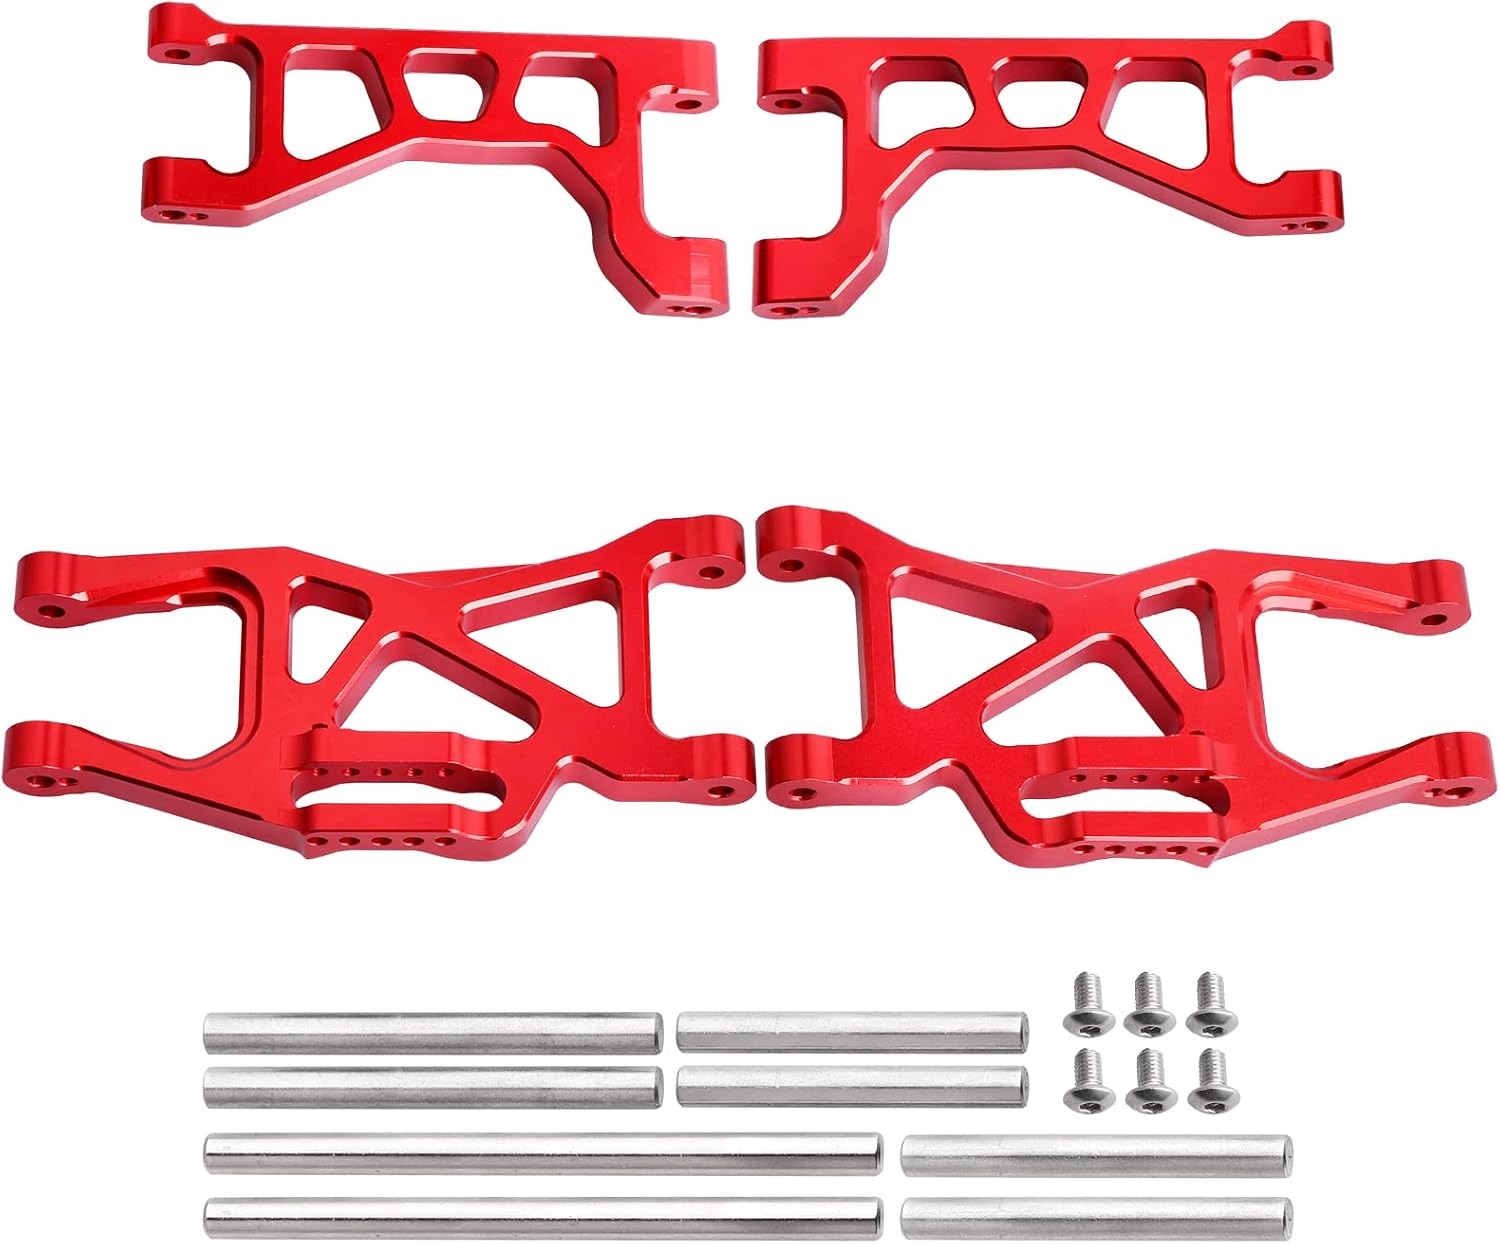
Image 3.2: Complete set of Hobbypark red aluminum suspension arms with pins and screws. This image shows all the main components included in the package.
4. Installation
Follow these steps to replace the stock suspension arms with your new Hobbypark aluminum set. It is recommended to consult your Traxxas Maxx V1 owner's manual for detailed disassembly instructions of the original suspension components.
4.1 Required Tools (Not Included)
- Hex wrenches (various sizes, typically 2.0mm, 2.5mm)
- Small pliers or tweezers (for pin handling)
4.2 Step-by-Step Replacement
- Prepare the Vehicle: Ensure your Traxxas Maxx V1 is powered off and the battery is disconnected. Place the vehicle on a stable, clean surface.
- Remove Wheels: Carefully remove the wheels from the vehicle to gain access to the suspension components.
- Remove Stock Suspension Arms:
- Identify the upper and lower suspension arms.
- Using appropriate hex wrenches, remove the screws and pins that secure the stock suspension arms to the chassis and the wheel hubs. Keep track of all hardware.
- Install New Hobbypark Suspension Arms:
- Select the correct Hobbypark aluminum arm (front upper, front lower, rear upper, rear lower) for the position you are working on. The arms are designed to replace stock parts #8929 and #8930.
- Align the new arm with the mounting points on the chassis and the wheel hub.
- Insert the provided metal pins through the designated holes in the suspension arms and into the chassis/hub. Ensure the pins slide smoothly.

Image 4.1: Pin insertion into the suspension arm. This image demonstrates the correct method for inserting the metal pins into the aluminum suspension arms.

Image 4.2: Pin fully inserted into the suspension arm. This image shows a metal pin correctly seated within the aluminum suspension arm.
- Secure the pins with the provided screws, tightening them gently but firmly. Do not overtighten, as this can strip threads or damage components.
- Repeat this process for all four suspension arms (front upper, front lower, rear upper, rear lower).
- Reattach Wheels: Once all suspension arms are securely installed, reattach the wheels.
- Final Check: Before operating the vehicle, manually check the movement of all suspension components to ensure they move freely and without binding. Verify all screws are tightened.
4.3 Installation Video Guide
For a visual guide on the installation process, please refer to the video below:
Video 4.1: Hobbypark Suspension Arms for Traxxas Maxx. This video provides a visual demonstration of the Hobbypark suspension arms, including their design and how they might be installed.
5. Usage and Performance Considerations
The Hobbypark aluminum suspension arms are designed to provide increased durability and rigidity compared to stock plastic components. This can lead to improved handling and resistance to damage during impacts.
- Enhanced Durability: Constructed from 6061-T6 aluminum, these arms are anodized for corrosion resistance and a durable finish.
- Precision Fit: CNC machined for precise dimensions, ensuring a direct replacement for original parts #8929 and #8930.
- Performance: The increased strength of aluminum can contribute to more consistent suspension geometry under stress, potentially improving vehicle stability and control.
6. Maintenance
Regular maintenance will help prolong the life and performance of your aluminum suspension arms:
- Inspection: Periodically inspect the arms for any signs of bending, cracking, or excessive wear. Check the mounting points for looseness.
- Cleaning: After use, especially in dirty or wet conditions, clean the arms and surrounding areas to remove dirt, mud, and debris. A soft brush and mild soap with water can be used. Ensure all components are dry before storage.
- Fastener Check: Regularly check all screws and pins securing the suspension arms to ensure they remain tight. Loose fasteners can lead to premature wear or component failure.
- Lubrication: While not typically required for the arms themselves, ensure that any associated pivot points or shock mounts are properly lubricated according to your vehicle's manual.
7. Troubleshooting
If you encounter issues after installing the Hobbypark aluminum suspension arms, consider the following:
- Binding or Stiff Movement:
- Ensure all pins are fully inserted and not bent.
- Check that screws are not overtightened, which can cause binding. Loosen slightly and re-test movement.
- Verify that no debris is lodged in the pivot points.
- Loose Arms:
- Re-check all mounting screws and pins for tightness.
- Inspect the mounting holes on the chassis and hubs for wear or damage.
- Incorrect Fitment:
- Double-check the compatibility section to ensure your vehicle model is supported.
- Confirm that the correct arm (front/rear, upper/lower) is installed in its designated position.
If problems persist, refer to your Traxxas Maxx V1 service manual or contact Hobbypark customer support.
8. Specifications
| Feature | Detail |
|---|---|
| Product Name | Front & Rear Aluminum Suspension Arms Set |
| Brand | Hobbypark |
| Model Number | 10516-10517 |
| Material | 6061-T6 Aluminum |
| Color | Red (as per product variant) |
| Compatibility | Traxxas Maxx 1/10 Scale 89076-4 V1 Monster Truck (Replaces stock parts #8929, #8930) |
| Product Dimensions | 5.9 x 3.93 x 1.18 inches |
| Item Weight | 1.12 pounds |
9. Warranty & Support
For information regarding product warranty, returns, or technical support, please refer to the official Hobbypark website or contact the retailer from whom the product was purchased. Keep your proof of purchase for any warranty claims.
Hobbypark Official Store: Visit Hobbypark Store on Amazon