X79M-S 3.0
JINGSHA X79M-S 3.0 ATX Motherboard User Manual
Model: X79M-S 3.0
1. Introduction
This manual provides detailed instructions for the installation, operation, and maintenance of your JINGSHA X79M-S 3.0 ATX Motherboard. Designed for LGA2011 processors, this motherboard supports dual-channel DDR3 memory, NVMe M.2 SSDs, and Xeon E5 CPUs, making it suitable for gaming and high-performance desktop applications. Please read this manual thoroughly before proceeding with installation.
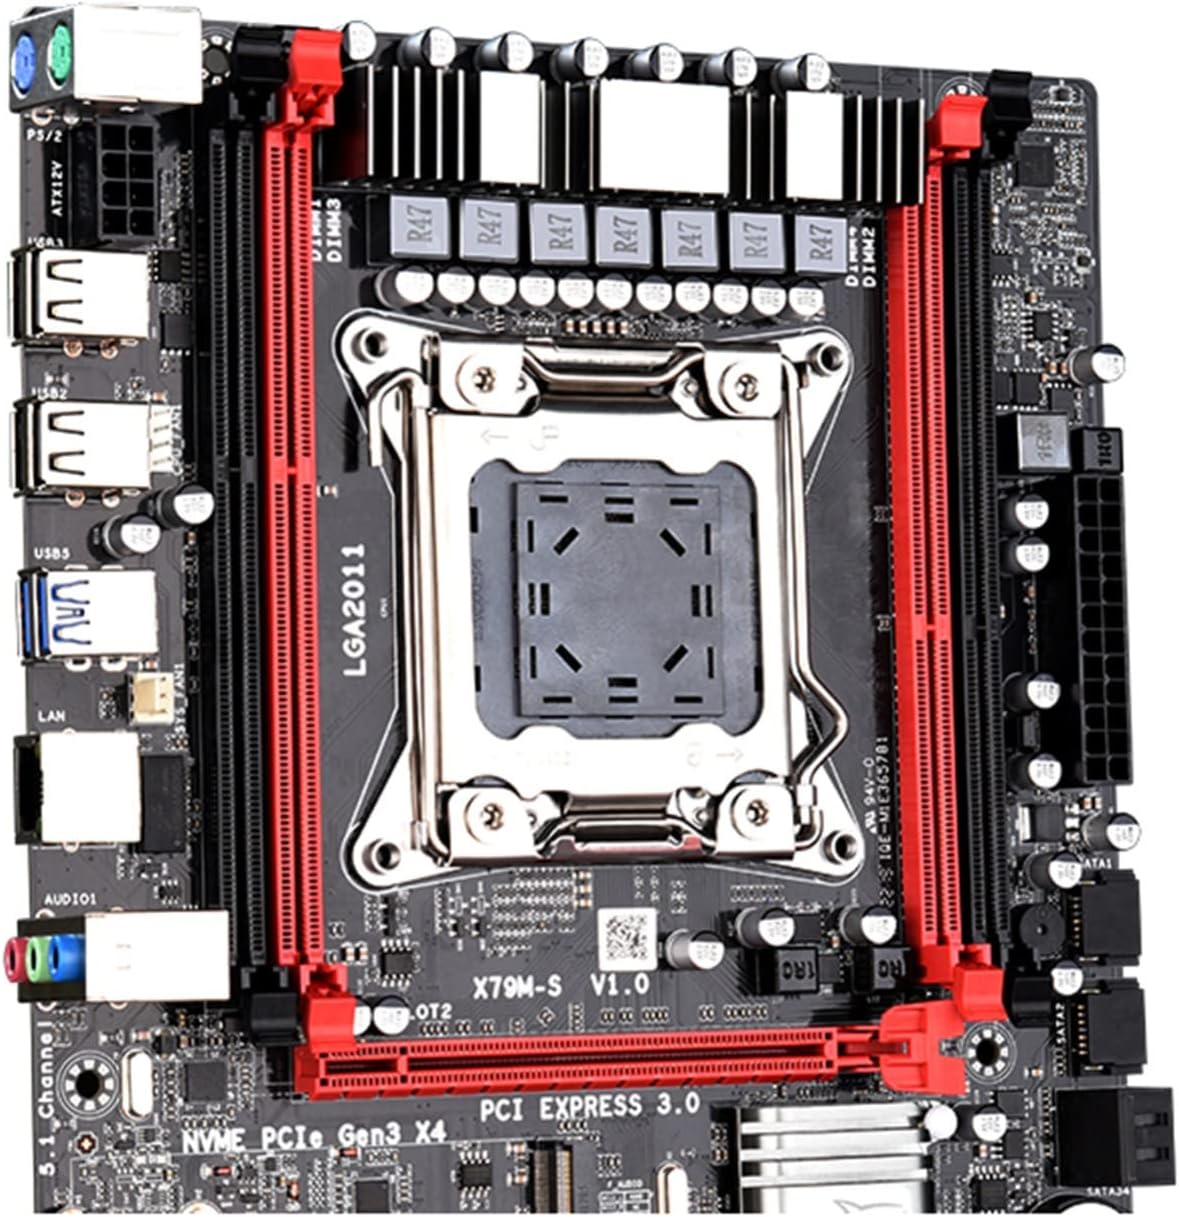
Figure 1.1: Front view of the JINGSHA X79M-S 3.0 ATX Motherboard, showcasing the LGA2011 CPU socket, DDR3 memory slots, and PCI Express slots.
2. Product Overview and Features
2.1 Motherboard Layout
Familiarize yourself with the various components and connectors on your motherboard using the diagram below.

Figure 2.1: Detailed layout of the X79M-S 3.0 motherboard, indicating key components such as the CPU socket, DDR3 memory slots, PCI-E slots, M.2 interface, SATA ports, and various power and fan headers.
2.2 Key Features
- CPU Support: LGA2011 socket, compatible with Intel Xeon E5 series processors.
- Memory: Dual-channel DDR3 memory slots, supporting up to 64GB RAM.
- Storage: Integrated NVMe M.2 SSD slot for high-speed storage, alongside SATA 2.0 and SATA 3.0 ports.
- Expansion Slots: Multiple PCI-E slots for graphics cards and other expansion cards.
- USB Connectivity: USB 3.0 and USB 2.0 ports for peripheral connections.
- Network: Gigabit Ethernet for stable network connectivity.
2.3 Rear I/O Panel
The rear input/output panel provides various ports for connecting external devices.

Figure 2.2: Rear I/O panel of the motherboard, showing PS/2 ports for mouse and keyboard, USB 2.0 and USB 3.0 ports, Gigabit Ethernet port, and audio jacks.
3. Setup and Installation
3.1 Before You Begin
- Ensure you have all necessary components: CPU, CPU cooler, RAM, power supply, storage devices, and a compatible PC case.
- Always handle the motherboard by its edges to avoid static discharge. Consider using an anti-static wrist strap.
- Unplug the power cord from the wall outlet before installing or removing any components.
3.2 Motherboard Installation
- Prepare the Case: Install the I/O shield into the rear opening of your PC case.
- Install Motherboard: Carefully align the motherboard with the standoffs in your PC case and secure it with screws.
- Install CPU: Open the CPU socket lever, align the CPU with the triangle marker on the socket, gently place the CPU, and close the lever to secure it.
- Install CPU Cooler: Apply thermal paste (if not pre-applied) and install the CPU cooler according to its instructions. Connect the CPU fan cable to the CPU_FAN header.
- Install RAM: Open the clips on the DDR3 memory slots. Align the RAM modules with the notch and press firmly until the clips snap into place. For dual-channel, install modules in matching colored slots.
- Install M.2 SSD: Insert the M.2 SSD into the M.2 slot at an angle, then push it down and secure it with the provided screw.
- Connect Power: Connect the 24-pin ATX power connector and the 8-pin CPU power connector from your power supply to the motherboard.
- Connect Storage: Connect SATA data cables from your storage drives (HDDs/SSDs) to the SATA ports on the motherboard. Connect SATA power cables from your power supply to the drives.
- Connect Front Panel: Connect the front panel cables (Power SW, Reset SW, HDD LED, Power LED, USB, Audio) from your case to the corresponding headers on the motherboard. Refer to the motherboard layout diagram for correct pin assignments.
- Install Graphics Card (Optional): If using a dedicated graphics card, insert it into the primary PCI-E x16 slot and secure it. Connect any necessary PCIe power cables from your power supply.
4. Operating Your Motherboard
4.1 First Boot-Up
After completing all connections, connect your monitor, keyboard, and mouse. Power on your system. The system should display the BIOS/UEFI screen or begin the operating system installation process.
4.2 BIOS/UEFI Setup
To enter the BIOS/UEFI setup utility, press the designated key (usually DEL or F2) repeatedly during the initial boot-up sequence. Within the BIOS, you can configure boot order, system time, fan speeds, and other advanced settings.
5. Maintenance
- Cleaning: Regularly clean dust from the motherboard and components using compressed air. Ensure the system is powered off and unplugged before cleaning.
- BIOS Updates: Check the manufacturer's website for the latest BIOS updates. Updating the BIOS can improve compatibility, stability, and performance. Follow the update instructions carefully to avoid system damage.
- Cable Management: Ensure cables are neatly routed to improve airflow and prevent interference.
6. Troubleshooting
- No Power: Ensure all power cables (24-pin ATX, 8-pin CPU) are securely connected. Check the power supply unit (PSU) and wall outlet.
- No Display: Verify that the monitor is connected to the correct graphics output (either integrated or dedicated GPU). Reseat the graphics card and RAM modules.
- System Instability/Crashes: Check RAM seating. Ensure CPU cooler is properly installed and making good contact. Monitor CPU and system temperatures.
- Boot Device Not Found: Check SATA/M.2 cable connections to storage drives. Verify boot order in BIOS/UEFI settings.
- Peripheral Issues: Try different USB ports. Ensure drivers for devices are installed correctly.
7. Technical Specifications
Below are the detailed specifications for the JINGSHA X79M-S 3.0 Motherboard.

Figure 7.1: Visual representation of the motherboard's key specifications, including model, form factor, dimensions, and port details.
| Feature | Specification |
|---|---|
| Model | X79M-S 3.0 Motherboard |
| Plate Type | ATX |
| Size | 251mm*190mm |
| PCI-E Slots | 1*PCI-E 16X, 1*PCI-E 4X |
| Network Card | Gigabit adaptive network card |
| CPU Socket | LGA2011 |
| RAM Slots | 4*DDR3 |
| Max RAM Capacity | 64GB |
| SATA Ports | SATA3.0*1, SATA2.0*3 (M.2 NVME port also available) |
| Power Ports | 8PIN*1 + 24PIN*1 |
| PS/2 Ports | PS/2 mouse, PS/2 keyboard |
| USB Ports | USB3.0*4, USB2.0*6 (Front USB3.0*2, USB2.0*2) |
8. Warranty and Support
For warranty information and technical support, please refer to the documentation provided with your purchase or contact the vendor directly. Keep your proof of purchase for warranty claims.