MEANHDAG 383EEL9001L
Universal Side Vent Kit for LG and Kenmore Dryers
Model: 383EEL9001L
Brand: MEANHDAG
Introduction
This instruction manual provides essential information for the installation, operation, and maintenance of the 383EEL9001L Universal Side Vent Kit. This high-quality kit is designed to allow LG and Kenmore/Sears dryers to vent exhaust from either the side or bottom, offering flexibility in laundry room configurations. It is manufactured to precise specifications using durable materials to ensure reliable performance.
Important Safety Information
Always observe the following safety precautions before attempting any installation or maintenance.
- Disconnect Power: Before beginning installation, ensure that the electricity supply to the dryer is completely shut off and disconnected.
- Disconnect Water (if applicable): If your dryer is a steam model or has a water connection, ensure the water supply is also shut off and disconnected.
- Gas Dryers: Gas dryers cannot be vented on the right side. Always refer to your dryer's specific manual for venting requirements and restrictions.
- Professional Assistance: If you are unsure about any step of the installation process, consult a qualified technician.
- Proper Sealing: Ensure all joints are properly sealed to prevent air and lint leakage, which can be a fire hazard.
Package Contents
Verify that all components listed below are present in your kit:

Image: Labeled components of the side vent kit, showing each part clearly.
- 2 x Straight Tubes
- 1 x 90 Degree Elbow
- 1 x Cover Plate
- 1 x Mounting Screw
- 1 x Instruction Sheet (refer to this for detailed steps)
- 1 x Adhesive Aluminum Foil Tape

Image: An overview of all components included in the 383EEL9001L side vent kit.
Compatibility
This universal side vent kit is compatible with a range of LG and Kenmore/Sears dryer models. It is crucial to confirm your dryer model matches the list below before installation.

Image: A visual representation of compatible LG and Kenmore dryer models.
Compatible LG Dryer Models:
- DLEX7700VE, DLEX7700WE, DLEX8000V, DLEX8000W, DLEX8100V, DLEX8100W
- DLEX8500V, DLEX9000V, DLEX9000W, DLEX9500K, DLGX7701VE, DLGX7701WE
- DLGX8001W, DLGX8101W, DLGX8501V, DLGX9001V, DLGX9001W, DLGX9501K
Compatible Kenmore / Sears Dryer Models:
- 796.8107231, 796.8107331, 796.8196271, 796.8196371, 796.8198241, 796.8198341
- 796.9107231, 796.9107331, 796.9196271, 796.9196371, 796.9198241, 796.9198341
If your model is not listed, please refer to your dryer's manual or contact customer support to ensure compatibility before purchase.
Setup and Installation
The installation of this dryer venting kit is designed to be straightforward. For detailed, step-by-step instructions, please refer to the included Instruction Sheet. The general process involves reconfiguring the dryer's internal venting to allow for side or bottom exhaust.
- Preparation: Ensure the dryer is unplugged and any water supply is disconnected. Move the dryer away from the wall to access the rear and sides.
- Access Internal Venting: Depending on your dryer model, you may need to remove the back panel or access internal components to reach the existing vent connection.
- Remove Existing Venting: Carefully detach any existing internal vent components that will be replaced by the kit.
- Install New Components:
- Connect the 90-degree elbow to the dryer's exhaust port.
- Attach the straight tubes as needed to extend the vent path to the desired side or bottom opening.
- Use the provided mounting screw to secure components where necessary.

Image: Illustrates the area where the vent modification takes place within the dryer.
- Seal Joints: Apply the adhesive aluminum foil tape to all joints and connections to ensure an airtight seal and prevent lint leakage.

Image: Demonstrates the proper application of aluminum foil tape for sealing vent connections.
- Install Cover Plate: Secure the cover plate over any unused vent openings.
- Reassemble Dryer: Reattach any panels removed during installation.
- Connect External Ducting: Connect your external dryer ducting to the newly configured side or bottom vent opening.
- Test: Plug in the dryer and run a short cycle to ensure proper operation and no air leaks.
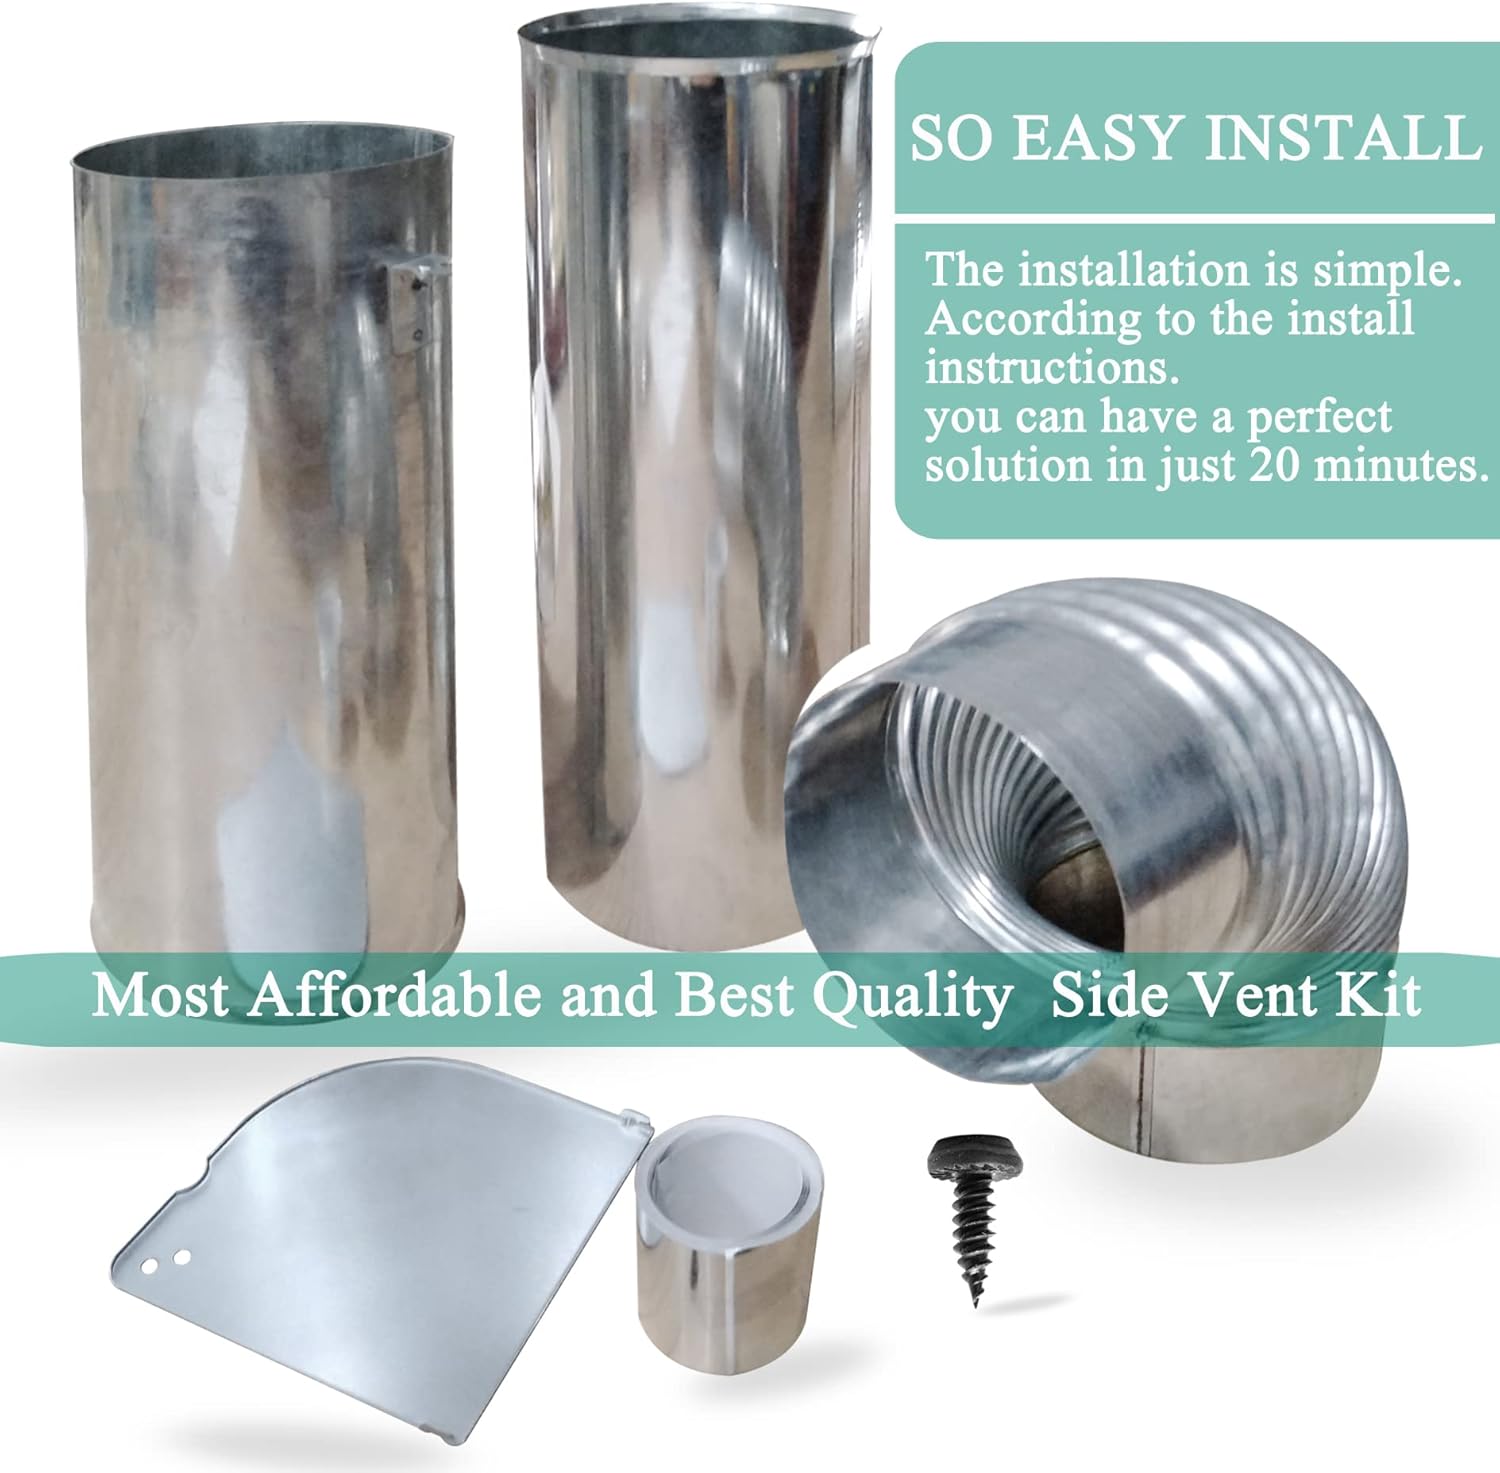
Image: Highlights the ease of installation for the vent kit.
Operating Considerations
Once installed, your dryer will now exhaust air through the newly configured side or bottom vent. This allows for greater flexibility in dryer placement, especially in confined spaces where rear venting is not ideal.
- Ensure the external vent path is clear and unobstructed for optimal dryer performance and safety.
- Regularly check the external vent hood for blockages from lint or debris.

Image: Depicts the kit components, emphasizing the benefit of proper dryer exhaust.
Maintenance
Proper maintenance of your dryer's venting system is crucial for efficiency and safety.
- Regular Cleaning: Periodically inspect and clean the entire dryer vent system, from the dryer connection to the exterior vent hood, to remove lint buildup. Lint accumulation is a fire hazard and reduces dryer efficiency.
- Check Seals: Annually inspect the tape and connections of the side vent kit to ensure they remain airtight. Reapply tape if any signs of wear or leakage are observed.
- Inspect for Damage: Check the metal components for any dents, corrosion, or damage that could impede airflow or compromise the seal.
Troubleshooting
If you encounter issues after installing the side vent kit, consider the following common problems and solutions:
| Problem | Possible Cause | Solution |
|---|---|---|
| Dryer taking too long to dry clothes | Obstructed vent path; Lint buildup; Leaky seals | Clean entire vent system; Check and re-seal all connections with aluminum tape. |
| Excessive lint around dryer | Leaky vent connections | Inspect all joints and apply adhesive aluminum foil tape to ensure a tight seal. |
| Dryer overheating or shutting off | Restricted airflow due to lint buildup or kinked external ducting | Clean all lint from the vent system; Ensure external ducting is not kinked or crushed. |
| Kit components do not fit properly | Incorrect dryer model; Manufacturing variation | Double-check dryer model compatibility; Contact customer support if issues persist. |
Specifications
Key specifications for the 383EEL9001L Side Vent Kit:
- Part Number: AP5672784, 383EEL9001L
- Replaces Parts: 2400642, PS7784989
- Compatible Brands: Kenmore, LG
- Material: Metal (Galvanized sheet)
- Item Weight: Approximately 11.2 ounces (0.7 lbs)
- Product Dimensions: Approximately 16 x 8 x 4 inches
- Included Components: 2 Straight Tubes, 1 90 Degree Elbow, 1 Cover Plate, 1 Mounting Screw, 1 Adhesive Aluminum Foil Tape, 1 Instruction Sheet
Image: Displays key specifications and illustrates the sealing process.
Warranty and Support
This product comes with a satisfaction guarantee.
- Warranty: There is a 100% refund or exchange policy within 30 days of purchase.
- Customer Support: For any questions, concerns, or assistance with installation or compatibility, please contact the manufacturer or seller directly. Refer to your purchase documentation for specific contact information.
no relevant documents
Ask a question about this manual
Ask about setup, troubleshooting, compatibility, parts, safety, or missing instructions. Manuals+ will review the question and use this page’s manual context to help answer it.