1. Introduction
This manual provides detailed instructions for the installation, operation, and maintenance of your Generic 6-inch Smart Hubspace Ultra Slim RGB+W LED Recessed Kit, model 50292. This recessed lighting kit is designed for both new construction and remodel applications, offering adjustable color (RGB+W) and smart control capabilities. Please read this manual thoroughly before installation and retain it for future reference.
2. Important Safety Information
WARNING: Risk of electric shock. Disconnect power at the fuse or circuit breaker before installation or servicing.
- Ensure all electrical connections comply with local codes and ordinances, as well as the National Electric Code (NEC).
- Consult a qualified electrician if you are unsure about the installation process.
- Do not install in wet locations unless specifically rated for such use. This product is intended for dry and damp locations.
- Do not modify the fixture or its components.
- Handle the product with care to avoid damage.
- Keep packaging materials away from children.
3. Package Contents
Verify that all components are present before beginning installation:
- 6-inch Ultra Slim RGB+W LED Recessed Light Fixture
- Remote Driver/Junction Box
- Instruction Manual (this document)
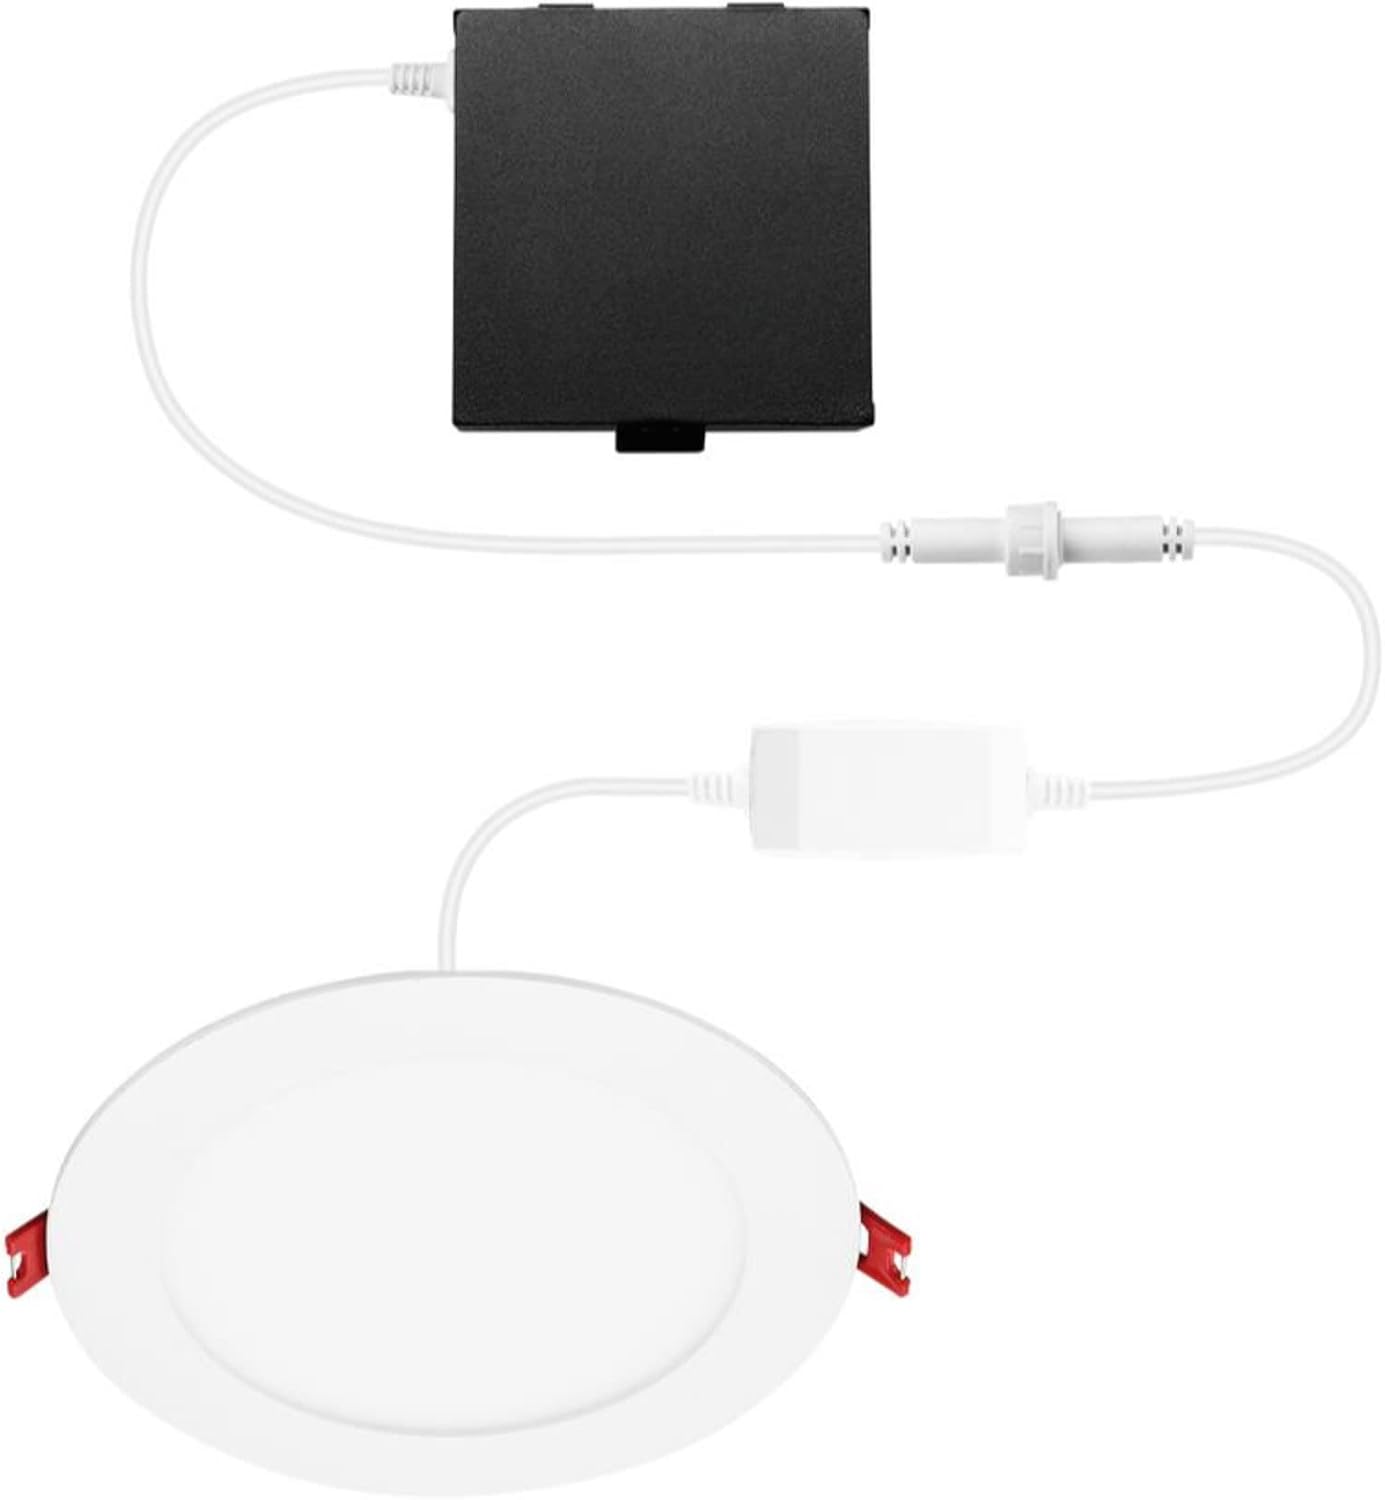
Figure 1: Components of the Recessed LED Kit. Shown are the round LED light fixture, the remote driver box, and the connecting cables with quick connectors.
4. Installation Instructions
4.1. Pre-Installation
- Turn off power at the circuit breaker or fuse box to avoid electrical shock.
- Determine the desired location for the recessed light fixture. Ensure there is sufficient clearance above the ceiling for the remote driver box.
- Cut a circular hole in the ceiling. For this 6-inch fixture, a hole saw or template should be used to create a 6.25-inch (approximately 159mm) diameter opening.
4.2. Wiring the Remote Driver Box
- Open the cover of the remote driver/junction box.
- Remove the appropriate knockout(s) for your electrical wiring.
- Connect the house wiring (live, neutral, ground) to the corresponding wires inside the junction box using wire nuts or push-in connectors (not included, typically supplied by installer).
- Connect the black (Live) wire from the house to the black wire of the driver box.
- Connect the white (Neutral) wire from the house to the white wire of the driver box.
- Connect the bare copper or green (Ground) wire from the house to the green wire of the driver box.
- Secure the house wiring to the junction box using appropriate cable clamps.
- Close the junction box cover securely.
4.3. Connecting and Mounting the Fixture
- Connect the cable from the LED light fixture to the cable extending from the remote driver box using the quick connector. Ensure a secure connection.
- Gently push the remote driver box through the ceiling opening and place it above the ceiling.
- Push the spring-loaded clips on the sides of the LED light fixture upwards.
- Insert the LED light fixture into the ceiling opening. The clips will spring back down, securing the fixture firmly against the ceiling.
- Ensure the fixture is flush with the ceiling surface.
4.4. Post-Installation
- Restore power at the circuit breaker or fuse box.
- Test the light fixture to ensure it functions correctly.
5. Operating Instructions
5.1. Basic On/Off Control
Once installed and powered, the light can be turned on and off using a standard wall switch connected to the circuit.
5.2. Smart Control (Hubspace App)
This Smart LED Recessed Kit is designed to be controlled via the Hubspace app, enabling advanced features such as:
- Color Adjustment: Change between various RGB colors and white light temperatures (warm to cool white).
- Dimming: Adjust the brightness level.
- Scheduling: Set timers for automatic on/off or color changes.
- Grouping: Control multiple Hubspace lights simultaneously.
- Voice Control: Integrate with compatible voice assistants (e.g., Google Assistant, Amazon Alexa) after setup in the Hubspace app.
Refer to the Hubspace app's in-app instructions for detailed pairing and control procedures. Typically, this involves downloading the app, creating an account, and following the prompts to add a new device.
6. Maintenance
The LED light source in this fixture is integrated and does not require replacement. Maintenance is minimal.
- Cleaning: Ensure power is off before cleaning. Wipe the fixture with a soft, dry, or slightly damp cloth. Do not use harsh chemicals, abrasive cleaners, or solvents, as these may damage the finish or electrical components.
- Inspection: Periodically check for any visible damage or loose connections. If any issues are found, disconnect power and consult a qualified electrician.
7. Troubleshooting
| Problem | Possible Cause | Solution |
|---|---|---|
| Light does not turn on. |
|
|
| Light flickers or dims unexpectedly. |
|
|
| Cannot connect to Hubspace app. |
|
|
8. Product Specifications
| Feature | Detail |
|---|---|
| Model Number | 50292 |
| Brand | Generic |
| Light Source Type | Light Emitting Diode (LED) |
| Wattage | 6 Watts |
| Color | Adjustable Color (RGB+W) |
| Material | Copper |
| Finish Type | Copper |
| Shape (Fixture) | Round |
| Mounting Type | Ceiling Mount |
| Item Weight | 1.41 pounds |
| Package Dimensions | 15.79 x 7.87 x 2.56 inches |
| UPC | 058219502921 |
9. Warranty and Support
Specific warranty information for this Generic product is not provided in the available data. Please refer to the product packaging or the retailer's website for details regarding warranty coverage and terms.
For technical support or inquiries, please contact the retailer or manufacturer directly using the contact information provided at the point of purchase or on the product packaging.


