USWELDWIRE US202926ML
USWELDWIRE 202926 Drive Roll Replacement User Manual
Model: US202926ML
1. Introduction
This manual provides essential information for the proper installation, operation, and maintenance of the USWELDWIRE 202926 Drive Roll Replacement. This drive roll is designed for use with various Miller Millermatic and Passport Plus welding machines, ensuring consistent wire feeding for optimal welding performance.
2. Safety Information
Always observe general safety precautions when working with welding equipment. Disconnect power to the welding machine before performing any maintenance or part replacement. Wear appropriate personal protective equipment (PPE) such as safety glasses and gloves. Refer to your welding machine's primary user manual for comprehensive safety guidelines.
3. Product Overview
The USWELDWIRE 202926 Drive Roll is a reversible VK-Groove drive roll engineered for feeding welding wire sizes .030-.035 inches (0.8-0.9 mm) and .045 inches (1.2 mm). It is a direct replacement part designed for compatibility with specific Miller Millermatic and Passport Plus models.

Figure 3.1: Front view of the USWELDWIRE 202926 Drive Roll, displaying the .030-.035 (0.8-0.9) wire size marking and the central keyway for installation.

Figure 3.2: Side profile of the drive roll, illustrating the two distinct V-grooves for different wire diameters. The knurled edges provide traction for wire feeding.
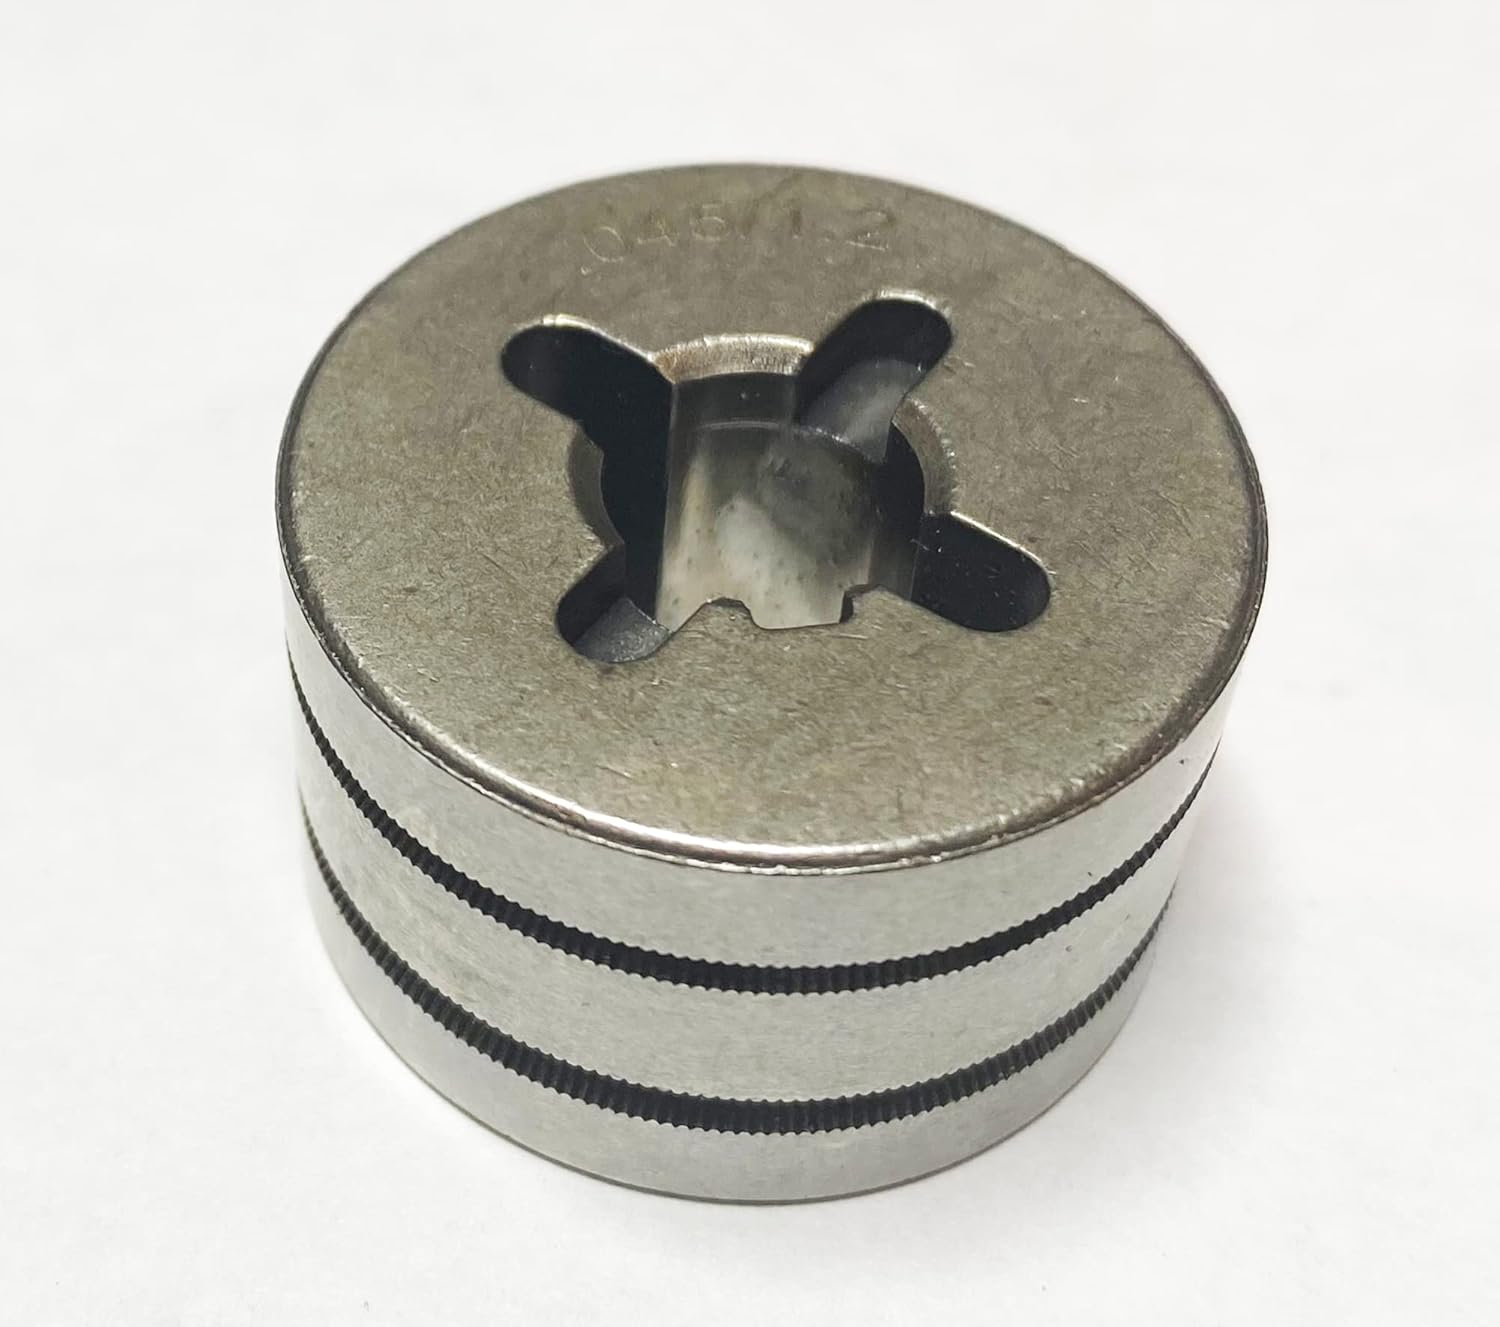
Figure 3.3: Rear view of the drive roll, showing the .045 (1.2) wire size marking. This side is used when feeding .045 inch wire.
Key Features:
- Reversible VK-Groove Design: Allows for use with two different wire sizes by simply flipping the drive roll.
- Wire Size Compatibility: Supports .030-.035 inches (0.8-0.9 mm) and .045 inches (1.2 mm) welding wire.
- Broad Machine Compatibility: Designed for Millermatic 135, 175, 180s, 140s, 211, Passport, and Passport Plus models.
- Durable Construction: Manufactured for reliable and consistent wire feeding.
4. Setup and Installation
- Power Disconnection: Ensure the welding machine is completely unplugged from its power source before beginning installation.
- Access Drive Mechanism: Open the wire feed compartment of your welding machine. Refer to your machine's manual for specific instructions on accessing the drive roll assembly.
- Remove Old Drive Roll: Carefully remove the existing drive roll. Note its orientation and any retaining clips or pins.
- Select Wire Size: Identify the desired wire size (.030-.035 or .045) you will be using. Orient the USWELDWIRE 202926 Drive Roll so that the marking for your chosen wire size is visible and facing outwards when installed.
- Install New Drive Roll: Place the new drive roll onto the drive shaft. Ensure it seats properly and aligns with any keyways or pins. Some installations may require a firm but gentle push. If the fit is excessively tight, verify the model compatibility.
- Secure Drive Roll: Reinstall any retaining clips, nuts, or covers that were removed. Ensure the drive roll is securely in place and rotates freely without excessive wobble.
- Close Compartment: Close the wire feed compartment.
Important: Always ensure the drive roll is correctly seated and aligned to prevent wire feeding issues and potential damage to the welding machine.
5. Operating Instructions
Once the drive roll is installed, ensure the correct groove is aligned with your welding wire. The drive roll is reversible, meaning one side is for .030-.035 inch wire and the other for .045 inch wire. The wire size is typically marked on the face of the drive roll. Adjust the tension on the wire feed mechanism according to your welding machine's manual and the type of wire being used. Proper tension is crucial for smooth wire feeding and preventing bird-nesting or slipping.
6. Maintenance
- Regular Inspection: Periodically inspect the drive roll for wear, debris, or corrosion. Worn grooves can lead to inconsistent wire feeding.
- Cleaning: Use a clean, dry brush or compressed air to remove any accumulated dust, metal shavings, or wire coating residue from the grooves and surrounding area. Do not use solvents that could damage the drive roll material or other components.
- Storage: If removing the drive roll for extended periods, store it in a clean, dry environment to prevent corrosion.
7. Troubleshooting
| Problem | Possible Cause | Solution |
|---|---|---|
| Drive roll does not fit or is too tight. | Incorrect model compatibility; manufacturing tolerance variations; existing machine components obstructing fit. | Verify the drive roll is compatible with your specific welder model. Ensure no obstructions are present on the drive shaft. If the issue persists, contact USWELDWIRE support. |
| Inconsistent wire feeding or slipping. | Incorrect wire size groove selected; insufficient drive roll tension; worn or dirty drive roll grooves; incorrect liner size. | Ensure the correct groove for your wire size is aligned. Adjust wire tension according to your machine's manual. Clean the drive roll grooves. Inspect the welding gun liner for blockages or incorrect size. |
| Drive roll appears corroded or rusty upon arrival. | Exposure to moisture during storage or transit. | Minor surface corrosion may not affect performance. Clean with a wire brush if necessary. If corrosion is significant or affects functionality, contact USWELDWIRE for assistance. |
8. Specifications
| Attribute | Detail |
|---|---|
| Part Number | US202926ML |
| Item Weight | 2.39 ounces |
| Package Dimensions | 3.66 x 1.85 x 0.87 inches |
| Wire Size Compatibility | .030-.035 inches (0.8-0.9 mm) and .045 inches (1.2 mm) |
| Compatible Welders | Miller Millermatic 135, 175, 180s, 140s, 211, Passport, Passport Plus |
| Manufacturer | XLIANE (Brand: USWELDWIRE) |
9. Warranty and Support
For warranty information or technical support regarding your USWELDWIRE 202926 Drive Roll Replacement, please contact USWELDWIRE directly through their official channels or the retailer from whom the product was purchased. Keep your proof of purchase for any warranty claims.
For general inquiries or to report issues, please visit the USWELDWIRE website or contact their customer service department.
Ask a question about this manual
Ask about setup, troubleshooting, compatibility, parts, safety, or missing instructions. Manuals+ will review the question and use this page’s manual context to help answer it.