Product Overview
The CAMECHO 4-inch Dash Cam is a comprehensive vehicle recording system designed to capture high-definition video of your journeys. It features a 1080P Full HD front camera and a rear camera, providing a wide field of view to reduce blind spots. Equipped with advanced functionalities such as Super Night Vision, Wide Dynamic Range (WDR) technology, G-Sensor for emergency recording, Parking Monitor, and seamless Loop Recording, this dash cam ensures reliable and continuous surveillance of your vehicle's surroundings.
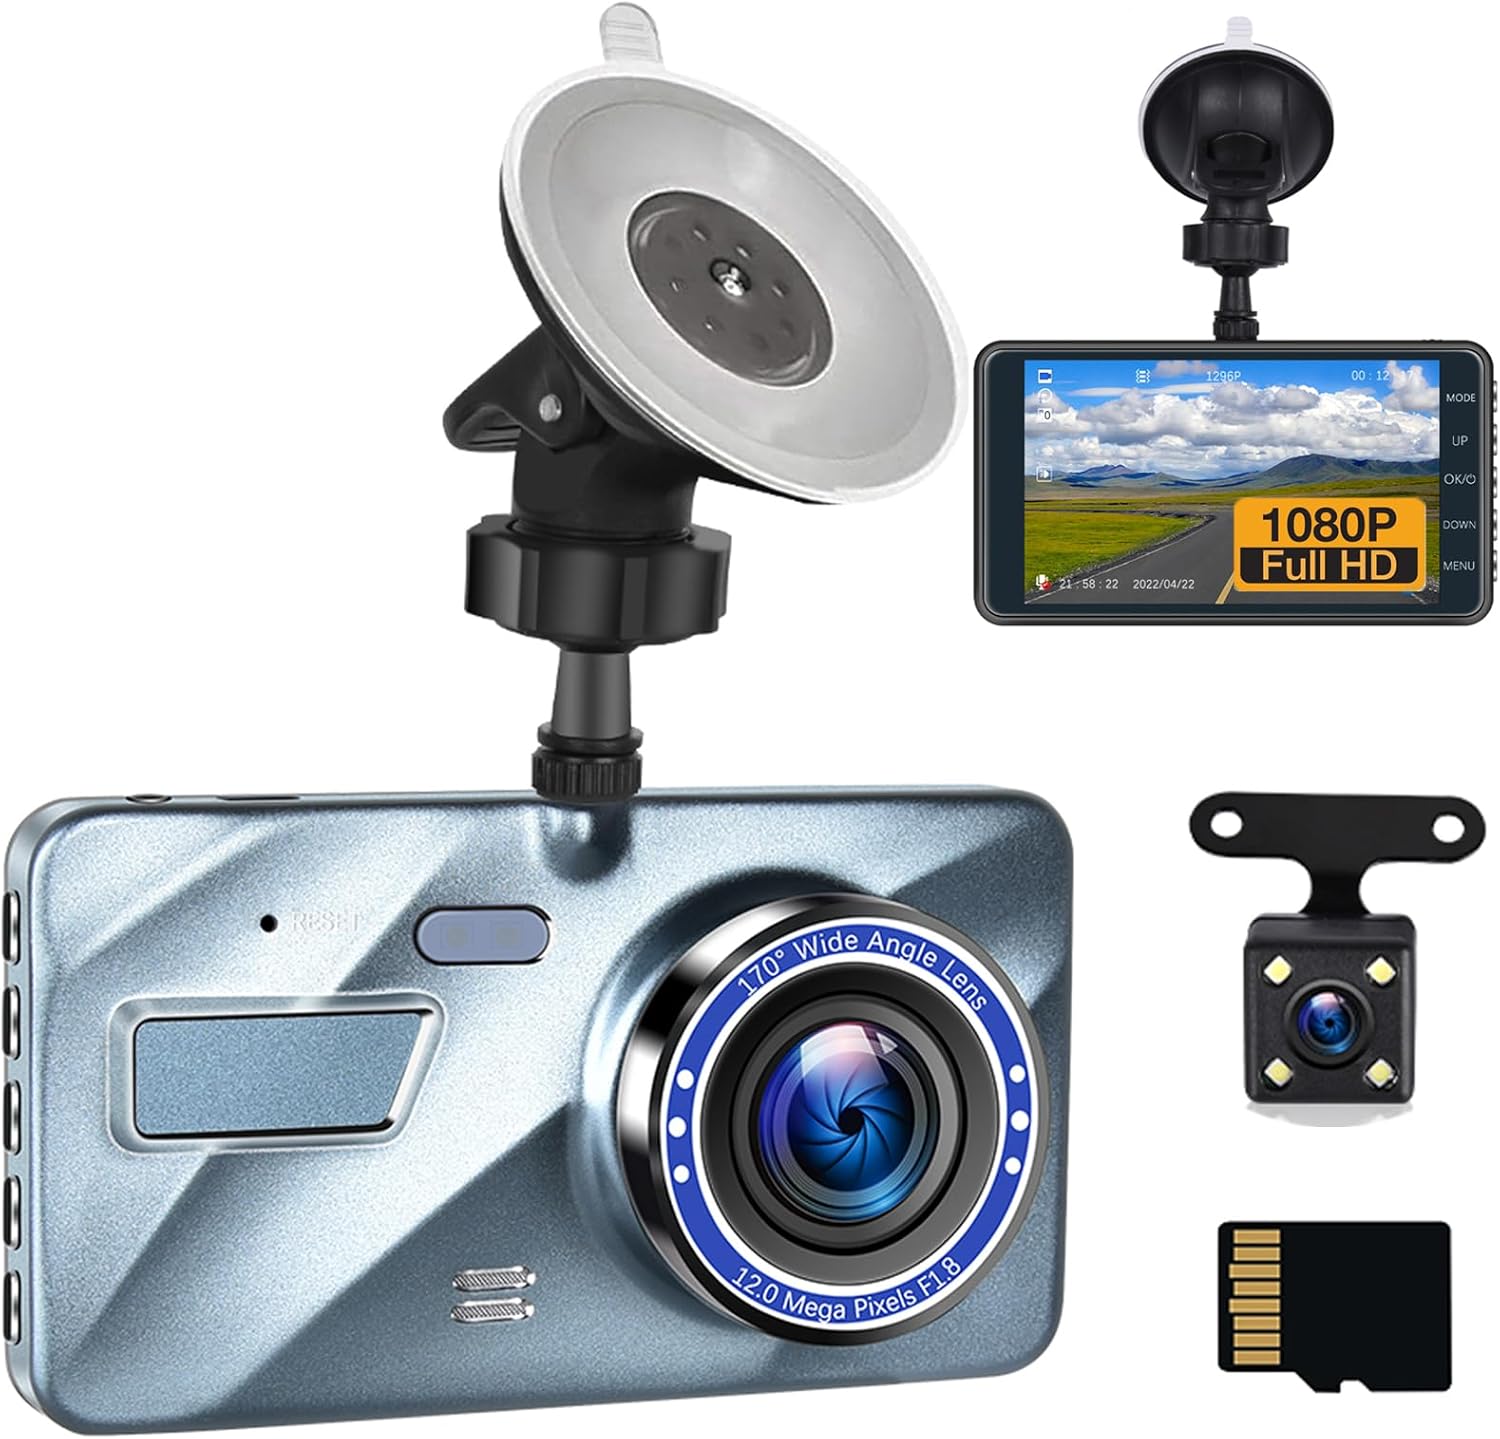
Image: The CAMECHO 4-inch Dash Cam system, including the main unit, rear camera, suction cup mount, and a 32GB TF card.
Package Contents
Please verify that all items listed below are included in your package:
- CAMECHO 4-inch Dash Cam Main Unit
- Rear Camera
- Suction Cup Mount
- 32GB TF Memory Card
- Car Charger with USB Port
- User Manual

Image: A visual representation of the dash cam's key features and all accessories included in the box.
Setup Guide
1. Mounting the Dash Cam
- Clean the windshield area where you intend to mount the dash cam.
- Attach the suction cup mount to the dash cam.
- Press the suction cup firmly against the cleaned windshield and engage the locking mechanism to secure it. Ensure the camera has a clear view of the road.

Image: Detailed view of the dash cam components, illustrating how the suction cup mount attaches to the main unit.
2. Inserting the Memory Card
- Locate the TF card slot on the side of the dash cam.
- Insert the provided 32GB TF card into the slot until it clicks into place. Ensure the card is inserted correctly to avoid damage.
3. Connecting the Rear Camera (Optional)
- Connect the rear camera cable to the designated port on the main dash cam unit.
- Route the cable neatly along the vehicle's interior trim to the rear of the car.
- Mount the rear camera on the rear windshield, ensuring a clear view. If reverse mode is desired, connect the red wire of the rear camera cable to the car's reverse light power supply.
4. Power Connection
- Plug the car charger into your vehicle's cigarette lighter socket.
- Connect the mini USB end of the charger cable to the dash cam's power input port.
- The dash cam will automatically power on and begin recording when the vehicle's ignition is turned on.
Operating Instructions
Basic Operation
- Power On/Off: The dash cam powers on automatically with vehicle ignition. To manually power on/off, press and hold the power button.
- Menu Navigation: Use the 'UP', 'DOWN', 'OK', and 'MENU' buttons on the side of the device to navigate through settings and options on the 4-inch IPS display.

Image: Close-up views of the dash cam, highlighting the control buttons and various ports for connectivity.
Recording Modes and Features
Loop Recording
The dash cam automatically records video in segments of 1, 3, or 5 minutes (user-selectable). When the memory card is full, the oldest unlocked video files are automatically overwritten by new recordings, ensuring continuous operation without manual intervention.

Image: A diagram depicting the circular recording process, where new video files replace the oldest ones on the memory card.
G-Sensor (Emergency Recording)
The built-in G-Sensor detects sudden impacts or collisions. In the event of a vehicle collision, the dash cam automatically locks the current video segment, preventing it from being overwritten by loop recording. This ensures critical incident footage is preserved as evidence.
Parking Monitor
When the vehicle is parked and the ignition is off, the dash cam can enter parking monitoring mode. If a vibration or impact is detected, the camera will automatically power on and record a short video, providing surveillance even when you're away from your vehicle.
Super Night Vision and WDR Technology
Equipped with an advanced sensor, f1.8 aperture, and Wide Dynamic Range (WDR) technology, the dash cam delivers clear and detailed video recordings even in low-light conditions or challenging lighting environments, such as tunnels or bright sunlight transitions.

Image: A simulated view from the dash cam at night, showcasing the clarity provided by the starlight night vision feature.
Reversing Rear View
When the rear camera is connected and properly wired to the vehicle's reverse light, the dash cam display will automatically switch to a full-screen rear view with parking guidelines when the vehicle is put into reverse, assisting with safe parking maneuvers.

Image: An illustration of the dash cam screen displaying the rear camera feed with dynamic parking assist lines.
Playback
To view recorded videos or photos directly on the dash cam, enter playback mode via the menu. Use the navigation buttons to select and play files. Alternatively, you can remove the TF card and view files on a computer using a compatible media player.
Maintenance and Care
- Cleaning: Use a soft, dry cloth to clean the camera lens and screen. Avoid using abrasive cleaners or solvents.
- Temperature: Do not expose the dash cam to extreme temperatures (hot or cold) for extended periods, as this can affect battery life and performance.
- Memory Card: Periodically format the TF card (at least once a month) within the dash cam's settings to ensure optimal performance and prevent data corruption. Back up any important files before formatting.
- Firmware Updates: Check the manufacturer's website for any available firmware updates to ensure your dash cam has the latest features and bug fixes.
Troubleshooting Guide
If you encounter issues with your CAMECHO Dash Cam, please refer to the following common problems and solutions:
| Problem | Possible Cause / Solution |
|---|---|
| Dash cam does not power on. | Check power connection to the car charger and vehicle's cigarette lighter. Ensure the vehicle's ignition is on. The car charger may be faulty; try another USB charger if available. |
| Recording stops or freezes. | The memory card may be full or corrupted. Format the TF card (back up data first). Ensure you are using a high-speed (Class 10 or higher) TF card. |
| Video quality is poor. | Clean the camera lens. Ensure the protective film has been removed from the lens. Adjust video resolution settings in the menu. |
| G-Sensor is too sensitive/not sensitive enough. | Adjust the G-Sensor sensitivity setting in the dash cam's menu. |
| Rear camera not displaying. | Check the connection of the rear camera cable to the main unit. Ensure the cable is not damaged. |
Factory Reset: If the dash cam freezes or experiences persistent issues, you can restore factory settings by inserting a pin into the small hole labeled "RES" (Reset) on the device. This can resolve many minor software-related problems.
Technical Specifications
| Feature | Specification |
|---|---|
| Display Size | 4.0 inch IPS screen |
| Front Camera Resolution | 1920*1080P / 30fps (FHD) |
| Rear Camera Resolution | 1280*720P / 30fps (HD) |
| Front Lens Angle | 150° wide angle |
| Rear Lens Angle | 120° wide angle |
| Video Format | AVI |
| Picture Format | JPEG |
| Power Interface | DC 5V/1A |
| USB Interface | Mini USB |
| Battery | 300mAh built-in |
| Operating Temperature | -20°C to +75°C |
| Included Memory Card | 32GB TF Card |
| Special Features | Loop Recording, G-Sensor, Parking Monitor, Super Night Vision, WDR |
Warranty Information
CAMECHO products are designed and manufactured to the highest quality standards. For specific warranty terms and conditions, please refer to the warranty card included in your product packaging or visit the official CAMECHO website. Please retain your proof of purchase for warranty claims.
Customer Support
If you require further assistance or have questions not covered in this manual, please contact CAMECHO customer support. You can often find support contact information on the product packaging, the official CAMECHO website, or through the retailer where you purchased the product.
You can also visit the official CAMECHO store on Amazon for more product information and support resources:
Important Note on Videos
No official product videos were found in the provided product data. Please refer to the text descriptions and images for product information.