1. Introduction
This manual provides detailed instructions for the safe and efficient operation, installation, and maintenance of the OUBO 16L Class B Autoclave Vacuum Sterilizer with an integrated printer. Please read this manual thoroughly before operating the device to ensure proper usage and to prevent damage or injury.
2. Safety Information
Always adhere to the following safety guidelines to ensure safe operation and to prevent personal injury or damage to the equipment.
- Ensure the autoclave is placed on a stable, level surface.
- Do not operate the autoclave if the door seal is damaged or improperly seated.
- Never attempt to open the door before the internal pressure reaches 0 bar. A warning label is present on the unit: "Don't open the door before the Pressure reaches 0Bar."
- Use only distilled water for operation to prevent mineral buildup and ensure proper function.
- Ensure proper ventilation around the unit.
- Regularly inspect the power cord for damage.
- Follow all local regulations and guidelines for sterilization equipment.
3. Product Overview and Components
The OUBO 16L Class B Autoclave is designed for efficient sterilization with a built-in printer for record-keeping. Key features include a digital display, automatic alarm system, and three-times pre-vacuum cycle.

Figure 3.1: Front view of the OUBO 16L Autoclave, showing the door handle, digital display, and control panel.
3.1 Main Features
- 16L Sterilization Capacity
- Safety Door Mechanism
- Integrated Printer for Cycle Records
- 2L Water Tank Capacity
- Class B Sterilization with Digital Display
- Automatic Alarm System
- Three Times Pre-vacuum Cycle
3.2 Included Components

Figure 3.2: The autoclave unit shown with its standard accessories, including power cable, plastic handle, water/steam pipe, measuring cup, and spare O-ring/sealing ring.
- OUBO 16L Autoclave Unit
- Power Line
- Plastic Handle
- Water and Steam Pipe
- Measuring Cup
- Spare O-ring and Sealing Ring
- Instrument Rack (as shown in Figure 3.3)
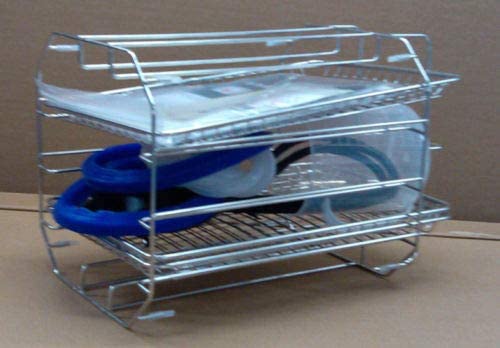
Figure 3.3: The metal instrument rack designed to hold items within the autoclave chamber.
4. Setup
- Unpacking: Carefully remove the autoclave from its packaging. Inspect for any visible damage.
- Placement: Place the unit on a sturdy, level surface capable of supporting its weight (approximately 103 pounds). Ensure adequate clearance around the unit for ventilation.
- Power Connection: Connect the power line to the power point at the rear of the unit. Ensure the power supply matches the unit's requirements (230V, 50Hz, 1800VA/2000VA).

Figure 4.1: Rear panel connections, including the power input and fuse installation points.
- Water Tank Filling: Open the water tank cap located on the top of the unit. Fill the 2L water tank with distilled water using the provided measuring cup. Do not overfill.

Figure 4.2: The green cap for accessing the water tank, located on the top surface of the autoclave.
- Printer Paper Installation: Open the printer cover and install the thermal paper roll. Ensure the paper feeds correctly through the mechanism.

Figure 4.3: The integrated printer compartment, showing the paper roll and a diagram for correct paper loading.
5. Operating Instructions
The autoclave features a user-friendly interface with a digital display and program settings for various materials.
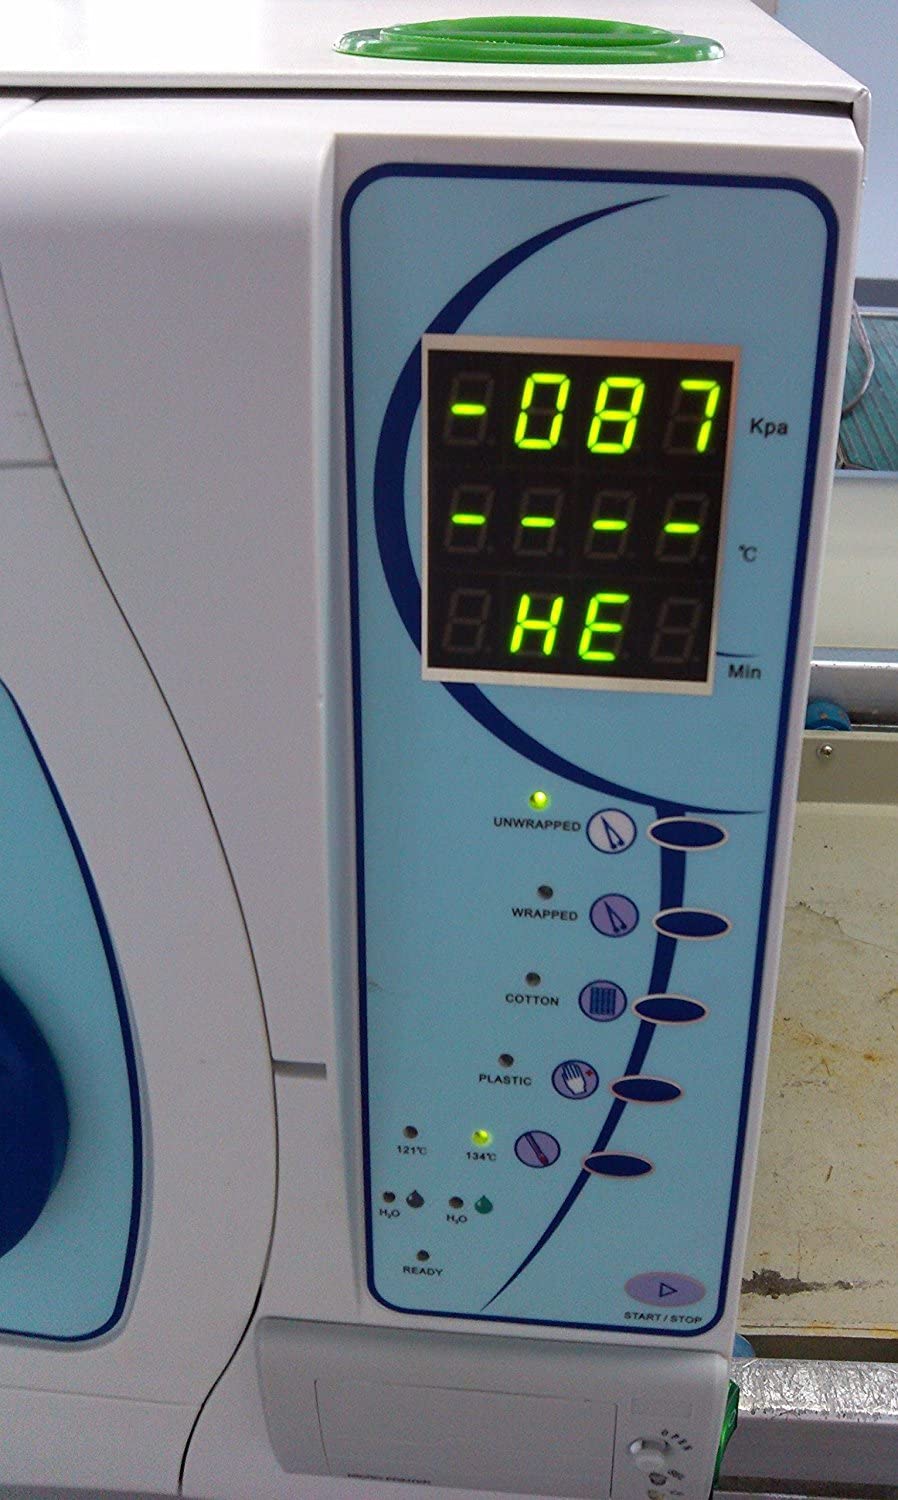
Figure 5.1: The control panel, displaying temperature, pressure, and time, along with program selection buttons.
- Loading Instruments: Place instruments to be sterilized onto the instrument rack. Ensure items are not overcrowded and allow for proper steam circulation.
- Closing the Door: Close the autoclave door firmly. Rotate the door handle to the "Close" position until it is securely locked. The indicator light for a locked door will illuminate.

Figure 5.2: The door handle mechanism, indicating the 'Close' and 'Open' positions for securing the chamber.
- Selecting a Program: Use the program selection buttons on the control panel to choose the appropriate sterilization cycle based on the material type (e.g., Unwrapped, Wrapped, Cotton, Plastic). The digital display will show the selected temperature and time. You may also customize program settings if needed.
- Starting the Cycle: Press the "Start/Stop" button to begin the sterilization cycle. The autoclave will initiate the pre-vacuum phase, followed by heating and sterilization.
- Monitoring the Cycle: The digital display will show the current pressure, temperature, and remaining time. The integrated printer will record cycle parameters.
- Cycle Completion: Once the cycle is complete, the autoclave will automatically release pressure. Wait until the pressure gauge reads 0 bar before attempting to open the door. An audible alarm may sound to indicate completion.
- Opening the Door: Rotate the door handle to the "Open" position and carefully open the door. Allow sterilized items to cool before handling.
- Draining Water: After the cycle, connect the drainage tube to the front drainage port to empty the used water tank.
6. Maintenance
Regular maintenance is essential for the longevity and proper functioning of your autoclave.
- Daily:
- Wipe down the exterior of the unit with a damp cloth.
- Check the water level in the distilled water tank and refill as needed.
- Empty the used water tank after each day of operation.
- Weekly:
- Clean the chamber and instrument rack with a non-abrasive cleaner.
- Inspect the door gasket for any signs of wear or damage. Replace if necessary (a spare gasket is provided).
- Clean the printer head to ensure clear printouts.
- Monthly:
- Perform a test cycle with a biological indicator to verify sterilization effectiveness.
- Check all connections and hoses for leaks or damage.
7. Troubleshooting
This section addresses common issues you might encounter with your autoclave. For problems not listed here, please contact customer support.
| Problem | Possible Cause | Solution |
|---|---|---|
| Autoclave does not reach max temperature/pressure. | Loose connection in internal tubing (e.g., missing nut), insufficient water, faulty heating element. | Check internal tubing connections (refer to service manual or contact support). Ensure water tank is filled. Contact support for heating element issues. |
| Error message displayed. | Specific error code indicates a problem (e.g., pressure sensor, temperature sensor, door not sealed). | Refer to the specific error code in the full user manual (if available) or contact customer support with the error code. |
| Printer not printing or printing illegibly. | No paper, paper installed incorrectly, dirty print head, faulty printer. | Check paper supply and installation. Clean the printer head. If problem persists, contact support. |
| Door difficult to close or seal. | Damaged or worn door gasket, debris on gasket or chamber rim. | Inspect and clean the door gasket and chamber rim. Replace the gasket if damaged. |
8. Specifications
| Feature | Detail |
|---|---|
| Model Number | eas59887 |
| Capacity | 16 Liters |
| Operating Temperature Range | 0-40°C |
| Water Tank Capacity | 2 Liters |
| Water Consumption per Cycle | 0.3 Liters (per recycling round) |
| Rated Power | 1800VA / 2000VA |
| Inside Dimensions | 240mm x 360mm |
| Outside Dimensions | 640mm x 530mm x 540mm |
| Item Weight | 103 pounds |
| Power Supply | 230V, 50Hz (as per rear label image) |
9. Warranty and Support
For warranty information, please refer to your purchase documentation. OUBO offers customer support for product inquiries and technical assistance.
- Customer Support: For assistance, please contact the seller, East Dental, or refer to the contact information provided with your purchase.
- Protection Plans: Extended protection plans may be available for purchase. Refer to your retailer for details.
- Returns: This product typically includes a 90-day free return policy for refunds or replacements.