Product Overview
The MiOYOOW 3D RGB Christmas Tree LED DIY Kit is an electronic assembly kit designed for users to build a functional 3D Christmas tree featuring RGB LED lights and music. This kit provides an engaging way to practice soldering skills and learn basic electronics, resulting in a decorative and interactive display suitable for various occasions.

Image: Fully assembled 3D RGB Christmas Tree LED Kit, showcasing its completed form with green circuit board branches and a central trunk.
Safety Information
Please read and understand all safety instructions before beginning assembly. This kit involves soldering, which requires caution.
- Always work in a well-ventilated area when soldering.
- Use appropriate personal protective equipment, such as safety glasses, to protect your eyes from solder splatter.
- Ensure your soldering iron is on a heat-resistant stand and unplugged when not in use.
- Avoid touching the hot tip of the soldering iron.
- Keep all flammable materials away from the soldering area.
- This product contains small parts and is recommended for ages 12 and up. Keep out of reach of small children.
- Ensure correct polarity when connecting power sources (battery box or USB).
Package Contents
Verify that all components listed below are present in your kit before starting assembly. Refer to the component listing table and image for identification.

Image: All individual components of the DIY kit, including circuit boards, resistors, LEDs, capacitors, transistors, and power accessories, laid out on a surface.

Image: A table detailing each component by number, name, PCB marker, parameter, and quantity, essential for assembly.
Note: Users can complete the installation according to the PCB silk screen and component list.
Setup and Assembly Instructions
This kit requires soldering. Familiarity with basic soldering techniques is recommended. Follow the steps carefully, referring to the PCB silk screen markings for component placement.

Image: A visual representation of the DIY installation process, showing the transition from individual components to the fully assembled Christmas tree.
- Identify Components: Use the provided component list and image to identify each part. Pay close attention to resistor values and capacitor polarities.
- Prepare PCB: Lay out the main circuit board (CHR-T12 Controller) and the tree branch PCBs (CHR-T1 to CHR-T11).
- Solder Resistors: Solder all resistors onto their designated spots on the main PCB and branch PCBs. Ensure correct values are placed in the correct locations as indicated by the PCB silk screen.
- Solder Diodes and Capacitors: Solder the diodes (1N4007) and electrolytic capacitors (47uF 16V), paying careful attention to their polarity markings.
- Solder Transistors: Solder the S9014 and S8050 transistors onto the main PCB.
- Solder RGB LEDs: Solder the 37 RGB LEDs onto the branch PCBs. LEDs are polarized; ensure the longer leg (anode) matches the positive marking on the PCB.
- Solder Other Components: Solder the self-locking switches, PX088A Music Chip (U1), and Passive Buzzer (LS1) onto the main PCB.
- Assemble Tree Structure: Once all components are soldered onto the PCBs, begin assembling the 3D tree structure by connecting the branch PCBs to the central PCB spindle (CHR-T10A, CHR-T10B, CHR-T11A, CHR-T11B) and then to the main controller board. Use screws and nuts to secure connections where indicated.
- Connect Power Components: Solder the DC Power Socket (J1) and connect the battery box (BAT) and USB power wire to the main PCB.
- Final Check: Before applying power, carefully inspect all solder joints for shorts or cold joints. Ensure all components are correctly oriented.


Images: Left: A detailed view of the main circuit board at the base of the tree, showing various soldered components. Right: The underside of the base, revealing the battery box for power input.
Operating Instructions
Once assembly is complete and verified, you can power on your 3D RGB Christmas Tree.
- Power Connection:
- Insert 3 AA batteries into the battery box, ensuring correct polarity.
- Alternatively, connect the provided USB power cable to a 5V USB power source (e.g., computer USB port, USB wall adapter) and plug the other end into the DC power socket on the tree's base.
- Activation: Once power is supplied, the Christmas tree will automatically begin flashing its RGB LEDs and playing simple music.
- Functionality: The kit is designed for automatic operation of light patterns and music. There are no user-adjustable settings for light modes or music playback.

Image: The assembled Christmas tree illuminated with colorful RGB LEDs in a dimly lit environment, demonstrating its visual effect.

Image: The assembled Christmas tree with colorful musical notes floating around it, symbolizing its integrated music playback feature.
Maintenance
The MiOYOOW 3D RGB Christmas Tree LED DIY Kit requires minimal maintenance.
- Cleaning: Use a soft, dry cloth to gently wipe dust from the circuit boards and LEDs. Do not use liquids or abrasive cleaners.
- Storage: When not in use, store the assembled tree in a dry, cool place away from direct sunlight and excessive humidity.
- Battery Replacement: If using batteries, replace them when the lights dim or music becomes distorted. Remove batteries if storing for extended periods to prevent leakage.
Troubleshooting
If you encounter issues with your MiOYOOW 3D RGB Christmas Tree, refer to the following common problems and solutions:
| Problem | Possible Cause | Solution |
|---|---|---|
| Lights do not turn on / No music |
|
|
| Some LEDs not lighting up |
|
|
| Music is distorted or absent |
|
|
If you continue to experience issues, please contact MiOYOOW customer support for further assistance.
Specifications
- Brand: MiOYOOW
- Model Number: 1
- ASIN: B0BC8VF66G
- Recommended Age: 12 years and up
- Package Dimensions: 7.13 x 3.27 x 1.26 inches
- Item Weight: 5.6 ounces
- LEDs: 37 RGB LEDs
- Power Input: 3.5mm power socket (USB cable included) or AA*3 battery box
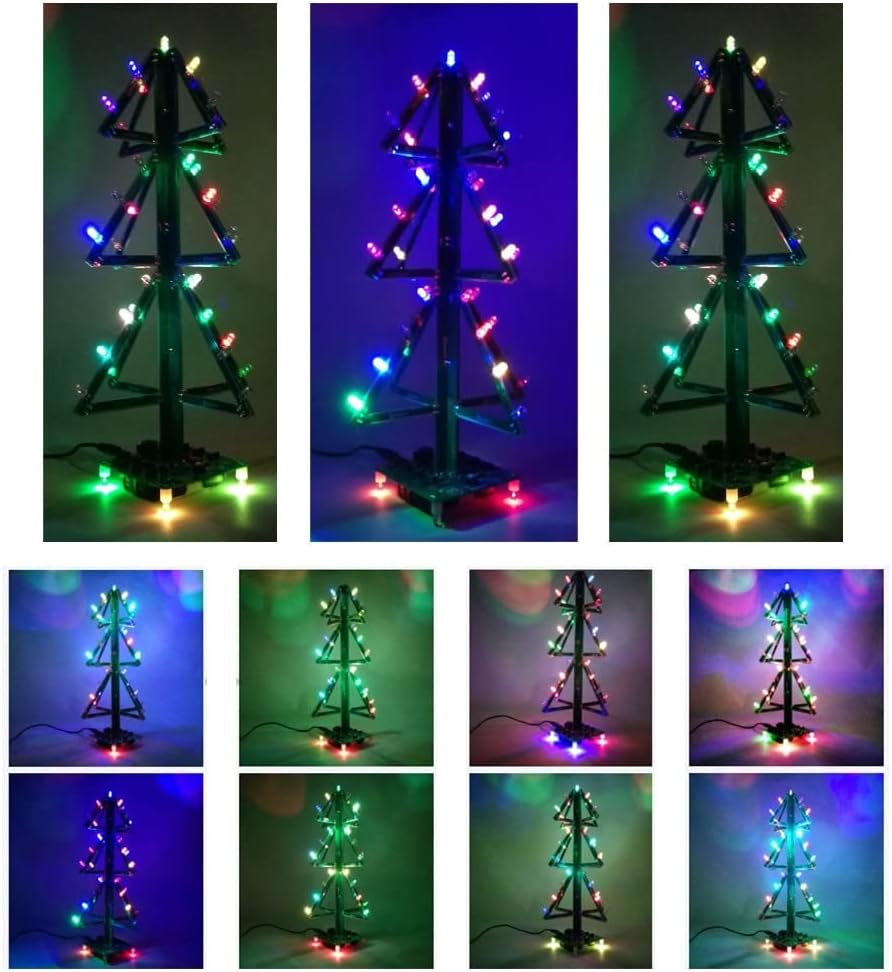
Image: A diagram showing the approximate dimensions of the assembled Christmas tree: 315mm height and 153mm base width.
Warranty and Support
MiOYOOW is committed to providing quality products and customer satisfaction. If you have any questions, concerns, or require assistance with your 3D RGB Christmas Tree LED DIY Kit, please do not hesitate to contact our customer support team.
For support, please refer to the contact information provided with your purchase or visit the official MiOYOOW store on Amazon: MiOYOOW Store.
We aim to provide satisfying solutions within 24 hours for any issues you may encounter.