1. Important Safety Information
Please read all instructions carefully before using the JIFAR H6 Projector. Keep this manual for future reference.
- Do not block ventilation openings. Ensure adequate airflow around the projector to prevent overheating.
- Do not look directly into the projector lens when the lamp is on. The bright light can cause eye damage.
- Use only the power adapter supplied with the projector.
- Avoid placing the projector in unstable locations or on uneven surfaces.
- Keep the projector away from water or other liquids. Do not expose it to rain or moisture.
- Unplug the projector during lightning storms or when unused for long periods.
- Do not attempt to repair the projector yourself. Refer all servicing to qualified service personnel.
2. Product Overview
The JIFAR H6 Projector is a native 1080P projector designed for a superior viewing experience with a large screen display capability.
2.1 Package Contents
Verify that all items are included in your package:
- JIFAR H6 Projector
- Carrying Bag
- Remote Control (batteries not included)
- Power Cable
- HDMI Cable
- AV Cable
- User Manual (this document)
2.2 Projector Components
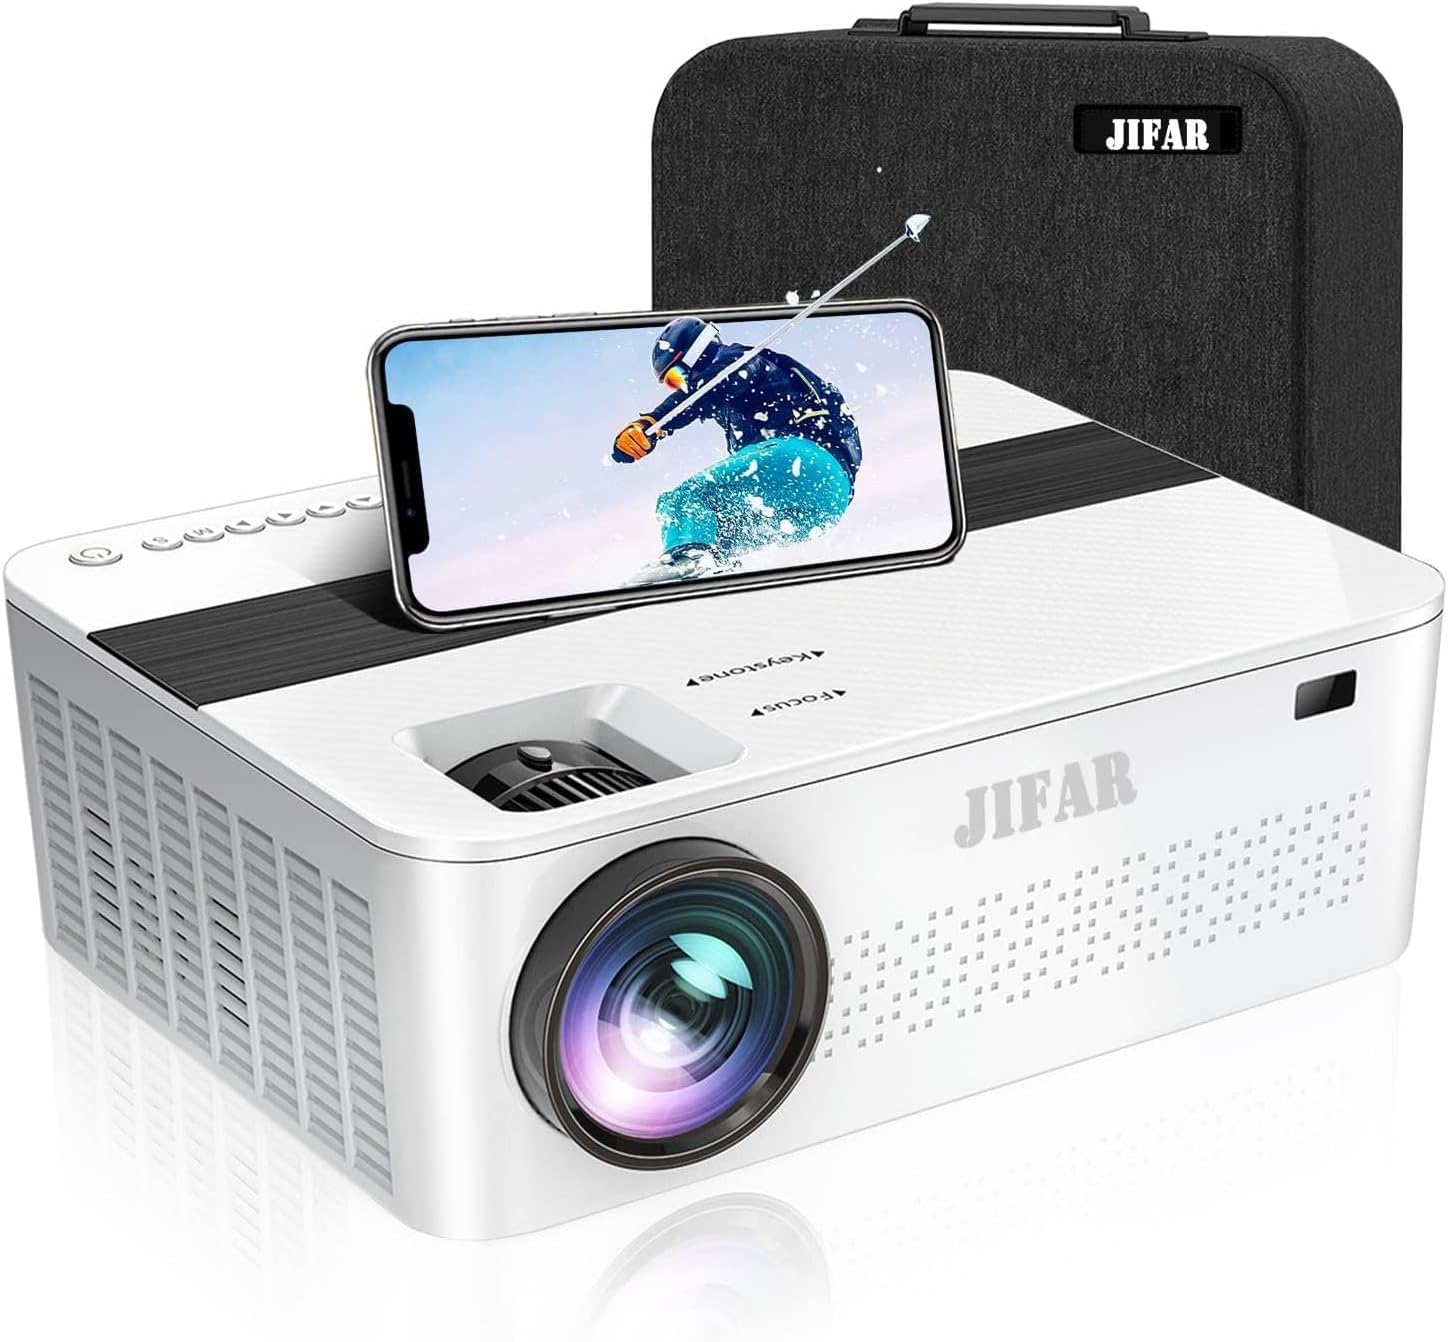
Figure 2.1: Front view of the JIFAR H6 Projector, showing the lens, control panel, and a smartphone placed on top, alongside its carrying bag.

Figure 2.2: Various features of the JIFAR H6 Projector, including options for ceiling mounting (M4*10mm), efficient fan cooling, zoom capability (-50%), and integrated Hi-Fi stereo speakers.
The JIFAR H6 Projector features a robust design with multiple connectivity options and user-friendly controls. Key components include the projection lens, focus ring, keystone correction, various input ports (HDMI, USB, VGA, AV), and integrated speakers.
2.3 Key Features
- Native 1080P Resolution: Provides sharp and detailed images with a native resolution of 1920x1080.
- High Brightness & Contrast: Features 10000Lux brightness and a 10000:1 high contrast ratio for vivid projections.
- Large Screen Display: Supports projection sizes from 60 to 450 inches.
- Extensive Connectivity: Includes HDMI, VGA, USB, SD, AV, and TV inputs, along with audio out.
- Long LED Lamp Life: The LED lamp has an impressive lifespan of up to 100,000 hours.
- Dolby Digital & 4K Video Support: Enhances audio and video experience.
- Built-in HiFi Stereo Speakers: Dual 6W speakers provide clear audio without external speakers.
- Keystone Correction: Adjustable keystone for optimal image alignment.

Figure 2.3: Visual comparison illustrating the superior brightness of the JIFAR projector (10000Lux) compared to other projectors (6000Lux).
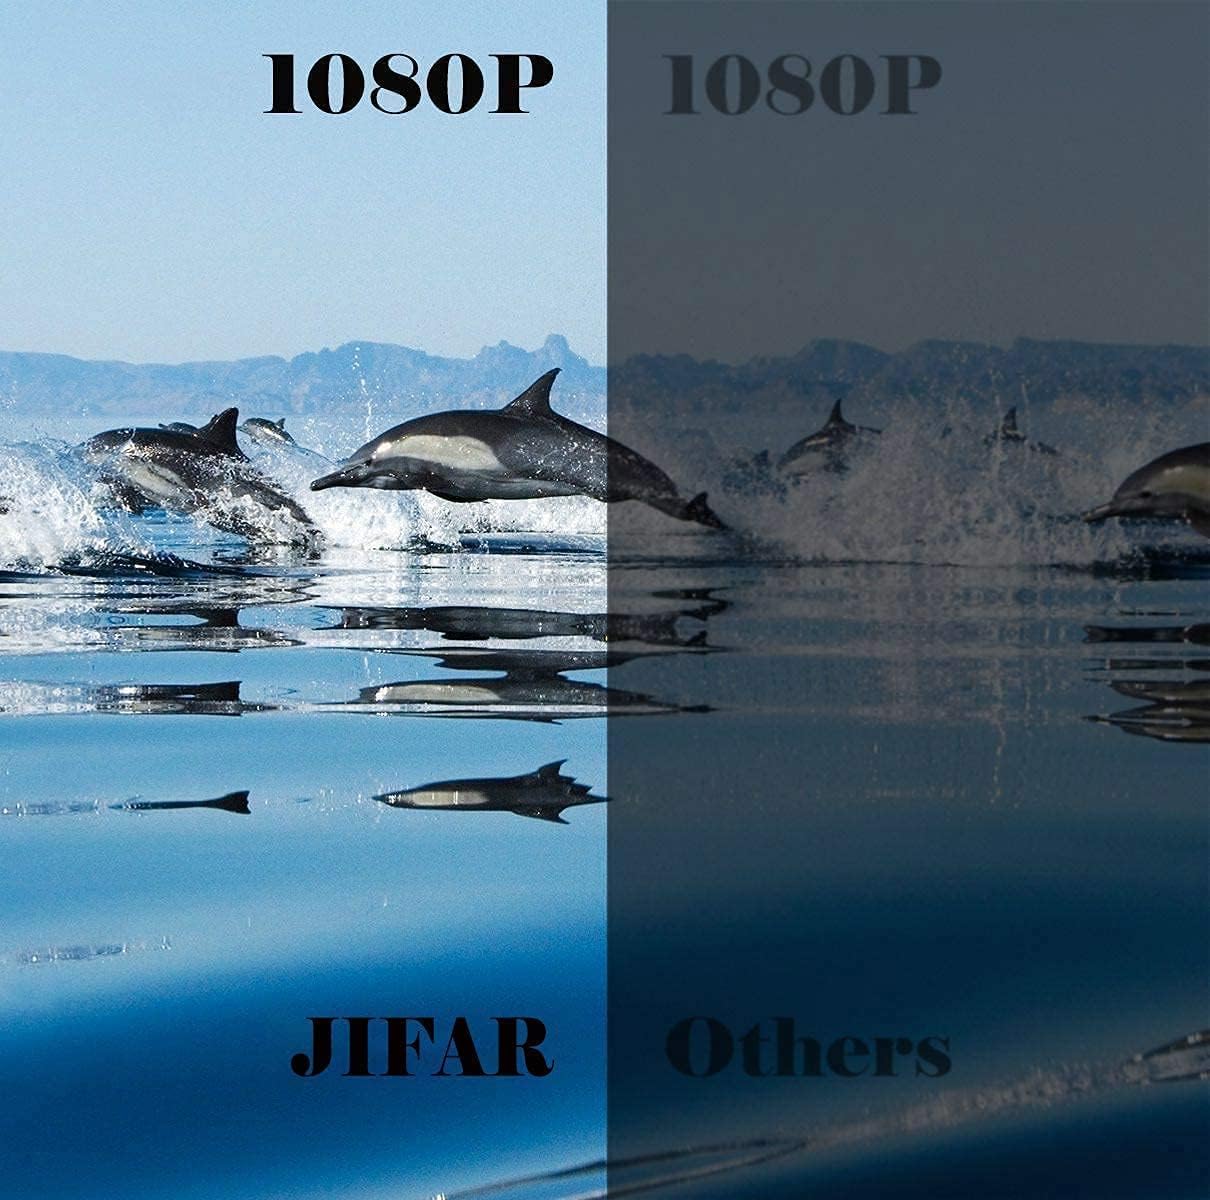
Figure 2.4: Side-by-side comparison demonstrating the enhanced clarity and detail of the JIFAR projector's native 1080P resolution.

Figure 2.5: Comparison highlighting the JIFAR projector's superior contrast ratio (15000:1) and extended LED lamp life (100,000 hours) compared to typical projectors.
3. Setup
3.1 Placement
Position the projector on a stable, flat surface or mount it to the ceiling. Ensure the projector is centered with the screen for optimal image alignment. Maintain a clear path for ventilation around the projector.
- For front projection, place the projector in front of the screen.
- For rear projection, place the projector behind a translucent screen.
- For ceiling mount, use appropriate mounting hardware (M4*10mm screws) and ensure the image can be inverted in the settings.
3.2 Power Connection
- Connect the power cable to the projector's power input port.
- Plug the other end of the power cable into a power outlet.
- The power indicator light on the projector will illuminate.
3.3 Connecting Input Devices
The JIFAR H6 Projector supports various input sources:
- HDMI: Connect a computer, laptop, game console (PS3/PS4, Xbox), or streaming device (Fire Stick) using an HDMI cable.
- USB: Insert a USB flash drive to play media files directly.
- VGA: Connect older computers or laptops using a VGA cable.
- AV: Connect devices like DVD players using the AV cable.
- Smartphone Connection: Use an HDMI adapter (not included) to connect your smartphone.
After connecting a device, ensure you select the correct input source in the projector's menu.
3.4 Focus and Keystone Adjustment
Adjust the image clarity and shape using the rings on the projector lens:
- Focus Ring: Rotate the focus ring until the projected image appears sharp and clear.
- Keystone Correction: Use the keystone adjustment to correct trapezoidal distortion, ensuring the image is rectangular. This is particularly useful if the projector is not perfectly perpendicular to the screen.
4. Operating Instructions
4.1 Power On/Off
- Power On: Press the power button on the projector or the remote control. The projector will start up and display the main interface.
- Power Off: Press the power button again. Confirm shutdown if prompted. Allow the projector to cool down before unplugging.
4.2 Menu Navigation and Input Source Selection
Use the navigation buttons on the projector or remote control to navigate the on-screen menu.
- From the main menu, select "Input Source".
- Choose the desired input (e.g., HDMI1, USB, VGA, AV) corresponding to your connected device.
- Press "OK" or "Enter" to confirm your selection.
4.3 Audio Settings
The projector has built-in HiFi stereo speakers. You can adjust the volume using the remote control.
- Volume Control: Use the Volume Up/Down buttons on the remote.
- External Audio: For enhanced audio, connect external speakers or a sound system to the projector's audio out port.
- Dolby Digital: Ensure your audio source is compatible with Dolby Digital for optimal sound quality.
4.4 Screen Size Adjustment (Zoom)
The projector supports a screen size range of 60 to 450 inches. You can digitally adjust the screen size (zoom) via the menu.

Figure 4.1: The JIFAR H6 Projector is capable of producing a large 450-inch screen, providing an immersive viewing experience.
Navigate to the "Picture" or "Display" settings in the menu to find the zoom or screen size adjustment option. This allows you to reduce the image size without moving the projector.
5. Maintenance
Proper maintenance ensures the longevity and optimal performance of your JIFAR H6 Projector.
5.1 Cleaning the Lens
Use a soft, lint-free cloth specifically designed for optical lenses. Gently wipe the lens to remove dust or smudges. Do not use abrasive cleaners or excessive force, as this can scratch the lens.
5.2 Cleaning the Projector Body
Wipe the exterior of the projector with a soft, dry cloth. For stubborn dirt, a slightly damp cloth can be used, but ensure no moisture enters the ventilation openings or ports.
5.3 Storage
When not in use for extended periods, store the projector in its carrying bag in a cool, dry, and dust-free environment. Avoid extreme temperatures or high humidity.
6. Troubleshooting
If you encounter issues with your JIFAR H6 Projector, refer to the following common problems and solutions:
| Problem | Possible Cause | Solution |
|---|---|---|
| No image projected | Power cable loose; Incorrect input source; Device not connected properly. | Check power connection; Select correct input source; Reconnect input device. |
| Image blurry | Focus not adjusted; Projector too close/far from screen. | Adjust the focus ring; Adjust projection distance. |
| Image is trapezoidal | Projector not perpendicular to screen. | Adjust keystone correction. |
| No sound | Volume too low; Muted; External audio device not connected/configured. | Increase volume; Unmute; Check external audio connections. |
| Remote control not working | Batteries dead/incorrectly inserted; Obstruction between remote and projector. | Replace batteries; Ensure clear line of sight to IR receiver. |
If the problem persists, please contact JIFAR customer support.
7. Specifications
Detailed technical specifications for the JIFAR H6 Projector:
| Brand | JIFAR |
| Model Number | H6 |
| Display Resolution | 1920 x 1080 (Native 1080P) |
| Brightness | 10000 Lux |
| Contrast Ratio | 10000:1 |
| Aspect Ratio | 16:9 / 4:3 |
| Projection Size | 60-450 inches |
| LED Lamp Life | Up to 100,000 hours |
| Connectivity Technology | HDMI, VGA, USB, SD, AV, TV |
| Speaker Type | Built-in HiFi Stereo (6W dual) |
| Product Dimensions | 12 x 9.4 x 4 inches |
| Item Weight | 8 pounds |
8. Warranty and Support
JIFAR provides comprehensive support for your H6 Projector.
- Lifetime Professional Technical Support: JIFAR offers 7x24 hours and lifetime professional technical support for the H6 Projector.
- For any problems or inquiries, please feel free to contact JIFAR customer service at any time.
- Visit the official JIFAR Store on Amazon for more information and product updates.


