
1. Introduction
This manual provides comprehensive instructions for the installation, operation, and maintenance of the Speedway Motors Hurst GM Muncie/T-10 Street Super Shifter and its accompanying installation kit. This product is designed to enhance the shifting performance of compatible manual transmissions.
The Hurst Street Super Shifter is based on the racing version of the Super Shifter 3, offering robust construction and precise gear engagement. The installation kit provides all necessary components for a secure and functional setup.
2. Safety Information
WARNING: Improper installation or use of this product can lead to serious injury or vehicle damage. Always follow safety guidelines and consult a qualified professional if you are unsure about any step.
- Always wear appropriate personal protective equipment (PPE), including safety glasses and gloves, during installation.
- Ensure the vehicle is securely supported on jack stands or a lift before working underneath it. Never rely solely on a jack.
- Disconnect the vehicle's battery before beginning any electrical work.
- Keep all tools and components clean and organized to prevent accidents.
- Refer to your vehicle's service manual for specific procedures related to transmission removal or modification.
- This product is not vehicle-specific and may require modifications to the vehicle's floor pan for proper clearance. Plan and execute these modifications carefully.
3. Package Contents
Verify that all components listed below are present and undamaged before beginning installation. If any parts are missing or damaged, contact Speedway Motors customer support.
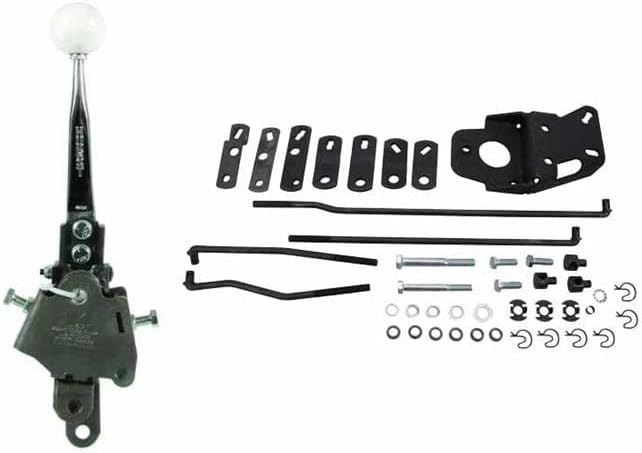
Figure 3.1: Complete Speedway Motors Hurst Street Super Shifter and Installation Kit. This image displays the shifter assembly on the left and all the individual components of the installation kit, including rods, arms, mounting plate, bolts, nuts, washers, and clips, laid out on the right.
3.1. Shifter Assembly
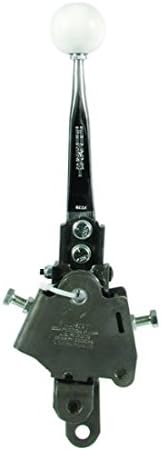
Figure 3.2: Hurst Street Super Shifter assembly. This image shows the shifter unit with its chrome-plated stick and white shift knob.
- Hurst Street Super Shifter (7-1/2" tall chrome plated short throw stick, 3/8"-16 thread for shift knob)
3.2. Installation Kit Components

Figure 3.3: Installation kit components. This image displays the mounting plate, two sets of shift arms, hardened steel shift rods, rod adjusting buttons, nylon bushings, spring clips, and various bolts, nuts, and washers.
- Mounting Plate
- Shift Arms (2 sets)
- Hardened Steel Shift Rods
- Rod Adjusting Buttons
- Nylon Bushings
- Spring Clips
- Necessary Hardware (bolts, nuts, washers)
4. Setup & Installation
This section outlines the general steps for installing the Speedway Motors Hurst Street Super Shifter and its kit. Due to the universal nature of this product, specific vehicle modifications may be required. Consult a professional if you are not comfortable performing these steps.
4.1. Transmission Compatibility
The shifter and kit are compatible with the following transmissions:
- Muncie 4-speeds (Trans Code 451, 452, 453) (1963-1974)
- Borg Warner T-10 (Trans Code 410)
- Richmond/Borg Warner Super T-10 (Trans Code 454)
- Saginaw (Trans Code 441)
- New Process (Trans Code 421)
- Ford T & C (Trans Code 432-433)
Note: For Ford applications, use kit 3738615.

Figure 4.1: 4-Speed Transmission Identification Chart. This diagram illustrates various 4-speed transmissions (Muncie M-20/M-21 Early, Muncie M-20/M-21 Later, Muncie M-22, Borg-Warner T-10, and Richmond/Borg-Warner Super T-10) with their respective transmission codes and distinguishing features like bolt patterns and side cover details.
4.2. Pre-Installation Steps
- Safely lift and support the vehicle.
- Remove any existing shifter assembly and linkage.
- Clean the transmission mounting surface.
4.3. Shifter Mounting
- Attach the mounting plate to the transmission according to the specific transmission type.
- Mount the Hurst Street Super Shifter to the mounting plate using the provided hardware. Ensure it is securely fastened.
- Important: The Street Super Shifter mounts high on the transmission. This often requires modification to the vehicle's floor pan for proper clearance. Carefully mark and cut the floor pan as needed.
4.4. Linkage Installation
- Identify the correct shift arms for your transmission. The kit includes two sets.
- Attach the shift arms to the transmission shift levers.
- Connect the hardened steel shift rods between the shifter and the transmission shift arms.
- Install the nylon bushings and spring clips to secure the rods.
- Adjust the rod adjusting buttons to ensure smooth and precise engagement of all gears. Refer to the transmission's service manual for proper linkage adjustment procedures.
5. Operation
The Speedway Motors Hurst Street Super Shifter provides a short-throw, positive shifting experience. Proper operation ensures longevity and performance.
- Engage the clutch fully before attempting to shift gears.
- Apply firm, deliberate pressure to the shift knob to engage the desired gear.
- Avoid forcing the shifter into gear, as this can damage the transmission or shifter components.
- Ensure the vehicle is stationary and the clutch is engaged when shifting into reverse.
6. Maintenance
Regular inspection and minor maintenance will help ensure the optimal performance and lifespan of your shifter.
- Periodic Inspection: Annually inspect all bolts, nuts, and fasteners for tightness. Check for any signs of wear on the shift rods, bushings, and clips.
- Lubrication: Apply a small amount of high-quality grease to the pivot points of the shifter mechanism and the ends of the shift rods where they connect to the transmission levers.
- Cleaning: Keep the shifter mechanism free from dirt, debris, and excessive grease buildup. Use a clean cloth to wipe down the chrome stick.
- Bushing Replacement: If the nylon bushings show signs of excessive wear or play, replace them promptly to maintain shifting precision.
7. Troubleshooting
This section addresses common issues that may arise during or after installation.
| Problem | Possible Cause | Solution |
|---|---|---|
| Difficulty engaging gears | Improper linkage adjustment, worn bushings, bent shift rod, clutch issues | Verify linkage adjustment. Inspect and replace worn bushings. Check for bent rods. Ensure clutch is fully disengaging. |
| Shifter feels loose or excessive play | Loose mounting bolts, worn bushings, loose rod connections | Tighten all mounting bolts. Inspect and replace worn bushings. Secure rod connections with spring clips. |
| Grinding noise when shifting | Clutch not fully disengaging, transmission synchronizer issues, improper linkage adjustment | Ensure clutch is properly adjusted. Re-check linkage adjustment. If problem persists, consult a transmission specialist. |
| Shifter hits floor pan | Insufficient floor pan clearance | Further modification of the vehicle's floor pan is required for adequate clearance. |
If you encounter issues not listed here or if the suggested solutions do not resolve the problem, contact Speedway Motors customer support.
8. Specifications
- Brand: Speedway Motors
- Model: Hurst Street Super Shifter & Installation Kit
- Part Number: 9101448
- Shifter Stick Height: 7-1/2 inches (chrome plated)
- Shift Knob Thread: 3/8"-16
- Material: Alloy Steel, Nylon
- Exterior Finish: Chrome (shifter), Natural (kit components)
- Item Weight: Approximately 12 pounds
- Product Dimensions: 1"L x 1"W (refer to actual product for detailed measurements)
- Compatible Transmissions: Muncie (451, 452, 453), BW T-10 (410), Richmond/BW Super T-10 (454), Saginaw (441), New Process (421), Ford T & C (432-433)
9. Warranty Information
Speedway Motors products are designed for quality and performance. For specific warranty details, please refer to the official Speedway Motors return policy or contact their customer service directly. The product information states "See Return Policy" for warranty description.
For the most current warranty information, please visit the Speedway Motors Brand Store or their official website.
10. Customer Support
If you have any questions, require assistance with installation, or need to report a missing/damaged part, please contact Speedway Motors customer support.
- Online Support: Visit the official Speedway Motors website for FAQs, technical articles, and contact forms.
- Phone Support: Refer to the Speedway Motors website for current contact numbers and operating hours.
- Brand Store: You can also find more information and contact options through the Speedway Motors Brand Store on Amazon.