GPJYYDS YYDS-TS-500
Benchtop Edge Bander Instruction Manual
Brand: GPJYYDS
Model: YYDS-TS-500
1. Introduction
This manual provides comprehensive instructions for the safe and efficient operation, maintenance, and troubleshooting of your GPJYYDS Benchtop Edge Bander, Model YYDS-TS-500. This machine is designed for applying edge banding to straight and arc-shaped woodworking panels, featuring double-sided gluing technology for a firm and even bond. Please read this manual thoroughly before initial use to ensure proper setup and to maximize the lifespan of your equipment.
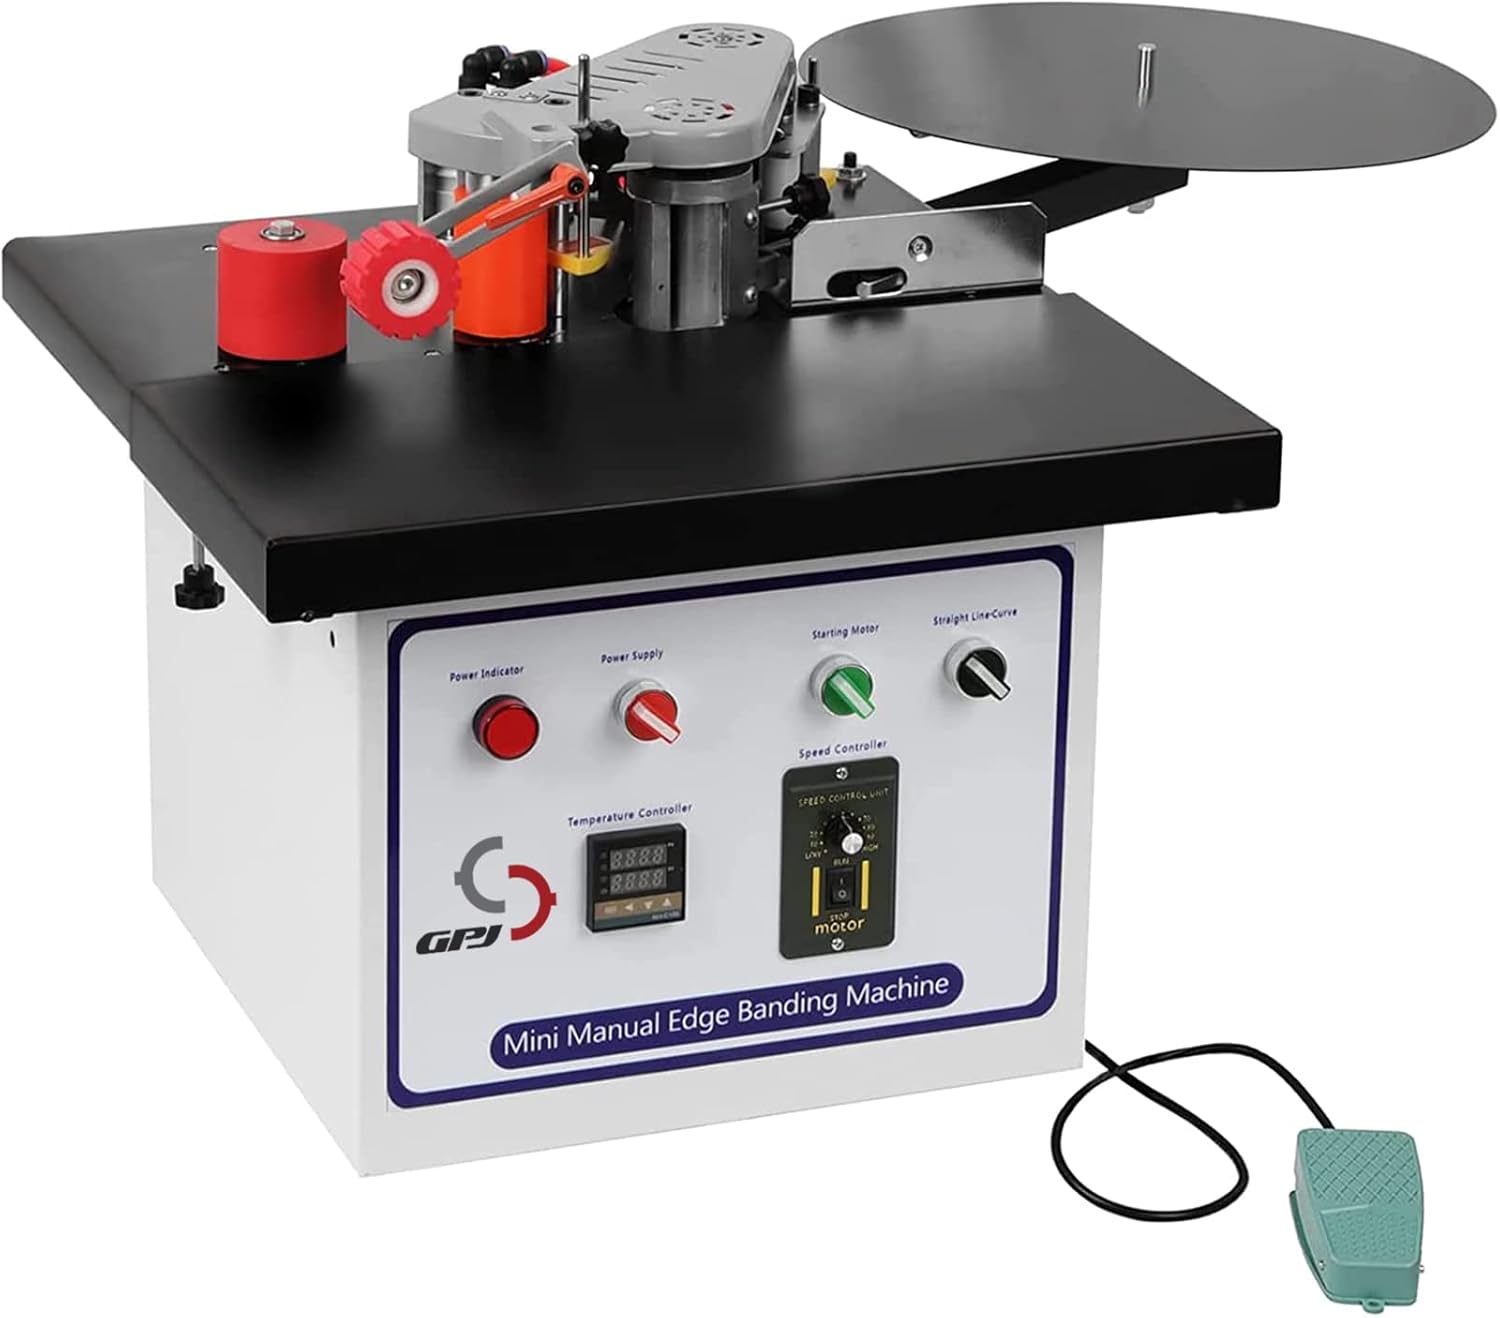
Figure 1: Overview of the GPJYYDS Benchtop Edge Bander.
2. Safety Instructions
Always adhere to the following safety precautions to prevent injury and damage to the machine:
- Wear appropriate personal protective equipment (PPE), including safety glasses, hearing protection, and gloves, during operation.
- Ensure the work area is clean, well-lit, and free from obstructions.
- Operate the machine on a stable, level surface to prevent tipping.
- Keep hands and fingers clear of moving parts, especially the gluing and cutting mechanisms.
- Disconnect power before performing any maintenance, adjustments, or when the machine is not in use.
- Do not operate the machine in damp or wet conditions.
- Ensure proper ventilation when working with hot melt glue.
- Never leave the machine unattended while it is operating or heating.
- Use only recommended edge banding materials and glue.
- In case of malfunction, immediately turn off the machine and disconnect power. Do not attempt repairs unless qualified.
3. Product Components
Familiarize yourself with the main components of your edge bander:
- Control Panel: Features power indicator, power supply switch, starting motor switch, temperature controller, and speed controller.
- Glue Pot: 800ml capacity for hot melt glue.
- Edge Banding Feed Mechanism: Guides the edge banding material.
- Pressurized Device: Ensures firm adhesion of the edge banding to the workpiece.
- Cutting Mechanism: Trims excess edge banding.
- Self-locking Foot Switch: Activates the cutting mechanism.
- Work Table: Provides a stable surface for the workpiece.

Figure 2: Control Panel and Key Components. Note the power switch, large governor for speed regulation, and special temperature controller for stable heating.

Figure 3: Pressurized Device, Microswitch, and Foot Switch. The foot switch is used to activate the cutting mechanism.

Figure 4: Internal Mechanisms. Features include a high-quality knife for strong cutting, an enlarged cylinder for powerful operation, five heating pipes for even glue heating, and an 800ml glue pot.
4. Setup
- Unpacking: Carefully remove the edge bander from its packaging. The machine is typically shipped in a sturdy wooden crate (see Figure 5). Inspect for any shipping damage.
- Placement: Place the machine on a robust, level workbench or stand capable of supporting its weight (approximately 51.9 pounds). Ensure there is sufficient space around the machine for safe operation and material handling.
- Power Connection: Connect the machine to a standard 110 Volt AC power outlet. Ensure the power switch on the control panel is in the "OFF" position before plugging in.
- Air Compressor Connection (if applicable): For certain functions, an external air compressor may be required. Connect the air hose to the designated air intake port on the machine. Note: Specific PSI requirements are not provided in the product data. Please consult the manufacturer or product labeling for the appropriate air pressure setting.
- Foot Switch Connection: Plug the self-locking foot switch into its designated port on the machine. This foot switch is primarily used to activate the cutting mechanism, particularly when working with round-over or arc edges.

Figure 5: Product Packaging.
5. Operating Instructions
Follow these steps for effective edge banding:
- Power On and Preheating:
- Ensure the glue pot is clean and free of debris.
- Turn on the main power switch. The power indicator light will illuminate.
- Set the desired temperature using the temperature controller. The machine typically requires 5-8 minutes to reach optimal operating temperature for the glue.
- Once the temperature is reached, the machine is ready for glue loading.
- Glue Loading:
- Carefully add hot melt glue pellets or sticks into the 800ml capacity glue pot. Avoid overfilling.
- The machine features double-sided gluing technology, ensuring stable and even glue application for a strong bond.
- Edge Banding Material Preparation:
- Select the appropriate edge banding material for your workpiece. The machine is suitable for various materials and panel types, including solid wood particle board, particle board, multi-layer solid wood board, and Malacca board (see Figure 6).
- Load the edge banding roll onto the designated holder.
- Edge Banding Process:
- Turn on the "Starting Motor" switch.
- Adjust the edge banding speed using the speed controller (0-6m/min).
- Carefully feed the workpiece into the machine, ensuring it is aligned with the edge banding material. The professional design of the material pressing device helps prevent sagging of the suspended part of large panels.
- Guide the workpiece smoothly through the machine, allowing the glue to apply and the banding to adhere.
- Cutting and Trimming:
- Once the desired length of edge banding is applied, use the self-locking foot switch to activate the cutting mechanism. This will cleanly trim the edge banding.
- The machine features an automatic break of the motor belt if the glue temperature is too low, protecting the motor.

Figure 6: Applicable Materials and Common Applications.
6. Maintenance
Regular maintenance ensures optimal performance and longevity of your edge bander:
- Glue Pot Cleaning: Regularly clean the glue pot to prevent hardened glue buildup, which can affect heating efficiency and glue flow. Follow manufacturer guidelines for glue pot cleaning solutions.
- Cutter Blade Inspection: Periodically inspect the high-quality cutter blade for sharpness and damage. A dull blade can lead to poor cuts. Replace if necessary.
- General Cleaning: Keep the machine free of dust, wood chips, and glue residue. Use a soft cloth and appropriate cleaning agents.
- Lubrication: Refer to the detailed product diagram or manufacturer's specific instructions for any lubrication points.
- Storage: When not in use, store the machine in a dry, clean environment, protected from extreme temperatures.
7. Troubleshooting
Refer to the following table for common issues and their solutions:
| Problem | Possible Cause | Solution |
|---|---|---|
| Machine does not power on. | No power supply; loose connection; faulty switch. | Check power cord and outlet; ensure all switches are in the ON position; inspect connections. |
| Glue not melting or heating slowly. | Incorrect temperature setting; insufficient preheating time; faulty heating element. | Verify temperature setting; allow full 5-8 minutes for preheating; contact support if issue persists. |
| Edge banding not adhering properly. | Insufficient glue; incorrect temperature; improper pressure from pressurized device. | Add more glue; check temperature; adjust pressure device. |
| Motor stops unexpectedly. | Overload protection activated; low glue temperature. | Allow machine to cool; ensure glue is at proper temperature before operation. The automatic protection system will break the motor belt if glue temperature is too low. |
| Poor cutting performance. | Dull cutter blade; incorrect foot switch activation. | Inspect and replace cutter blade if dull; ensure foot switch is fully depressed for cutting. |
If you encounter issues not listed here or if the suggested solutions do not resolve the problem, please contact GPJYYDS customer support.
8. Specifications
| Feature | Detail |
|---|---|
| Manufacturer | GPJYYDS |
| Model Number | YYDS-TS-500 |
| Item Weight | 51.9 pounds |
| Package Dimensions | 23.5 x 23.5 x 23.25 inches |
| Power Source | AC |
| Voltage | 110 Volts |
| Wattage | 850 watts |
| Edge Banding Speed | 0-6 meters/minute (stepless electronic speed regulation) |
| Glue Pot Capacity | 800ml |
| Heating Time | 5-8 minutes |
| Gluing Method | Double-sided gluing |
| Edge Plate Shape | Curve, Straight Line |
| Tape Breaking Mode | Automatic tape breaking |
| Included Components | 1 * Edge Banding Machine |
| Date First Available | August 26, 2022 |

Figure 7: Product Dimensions.
9. Warranty and Support
For warranty information, technical support, or replacement parts, please contact GPJYYDS customer service directly. Keep your purchase receipt and model number (YYDS-TS-500) handy for faster service.
For further assistance, you may visit the official GPJYYDS store on Amazon: GPJYYDS Store
Ask a question about this manual
Ask about setup, troubleshooting, compatibility, parts, safety, or missing instructions. Manuals+ will review the question and use this page’s manual context to help answer it.