1. Introduction
This instruction manual provides detailed guidance for assembling and enjoying your Flever Dollhouse Miniature DIY House Kit, Model LV-002, known as 'Time Impression'. This kit offers a rewarding crafting experience, culminating in a charming miniature house featuring intricate details, LED lighting, and a music movement.
The assembly process is designed for individuals aged 14 years and older, requiring patience and attention to detail. Upon completion, the miniature dollhouse serves as a unique decorative piece, adding a cozy ambiance to any room.
2. Safety Information
Warning: This kit contains small components. Keep all small objects out of reach of young children to prevent choking hazards.
Exercise caution when using cutting tools and adhesives during assembly. Always work in a well-ventilated area.
3. Package Contents
Your Flever Dollhouse Miniature DIY House Kit includes the following:
- Pre-cut MDF wooden pieces for the house structure and furniture.
- Fabric and printed paper for decorations and accessories.
- Plexiglass pieces for the dust cover.
- LED light wires.
- Music movement mechanism.
- English Instruction Manual.
Items Not Included (Required for Assembly):
- 2-AAA Batteries for LED lights.
- Adhesive/Glue suitable for wood, paper, and fabric.
- Scissors or precision cutting tools (e.g., X-Acto knife).
- Tweezers for handling small parts.
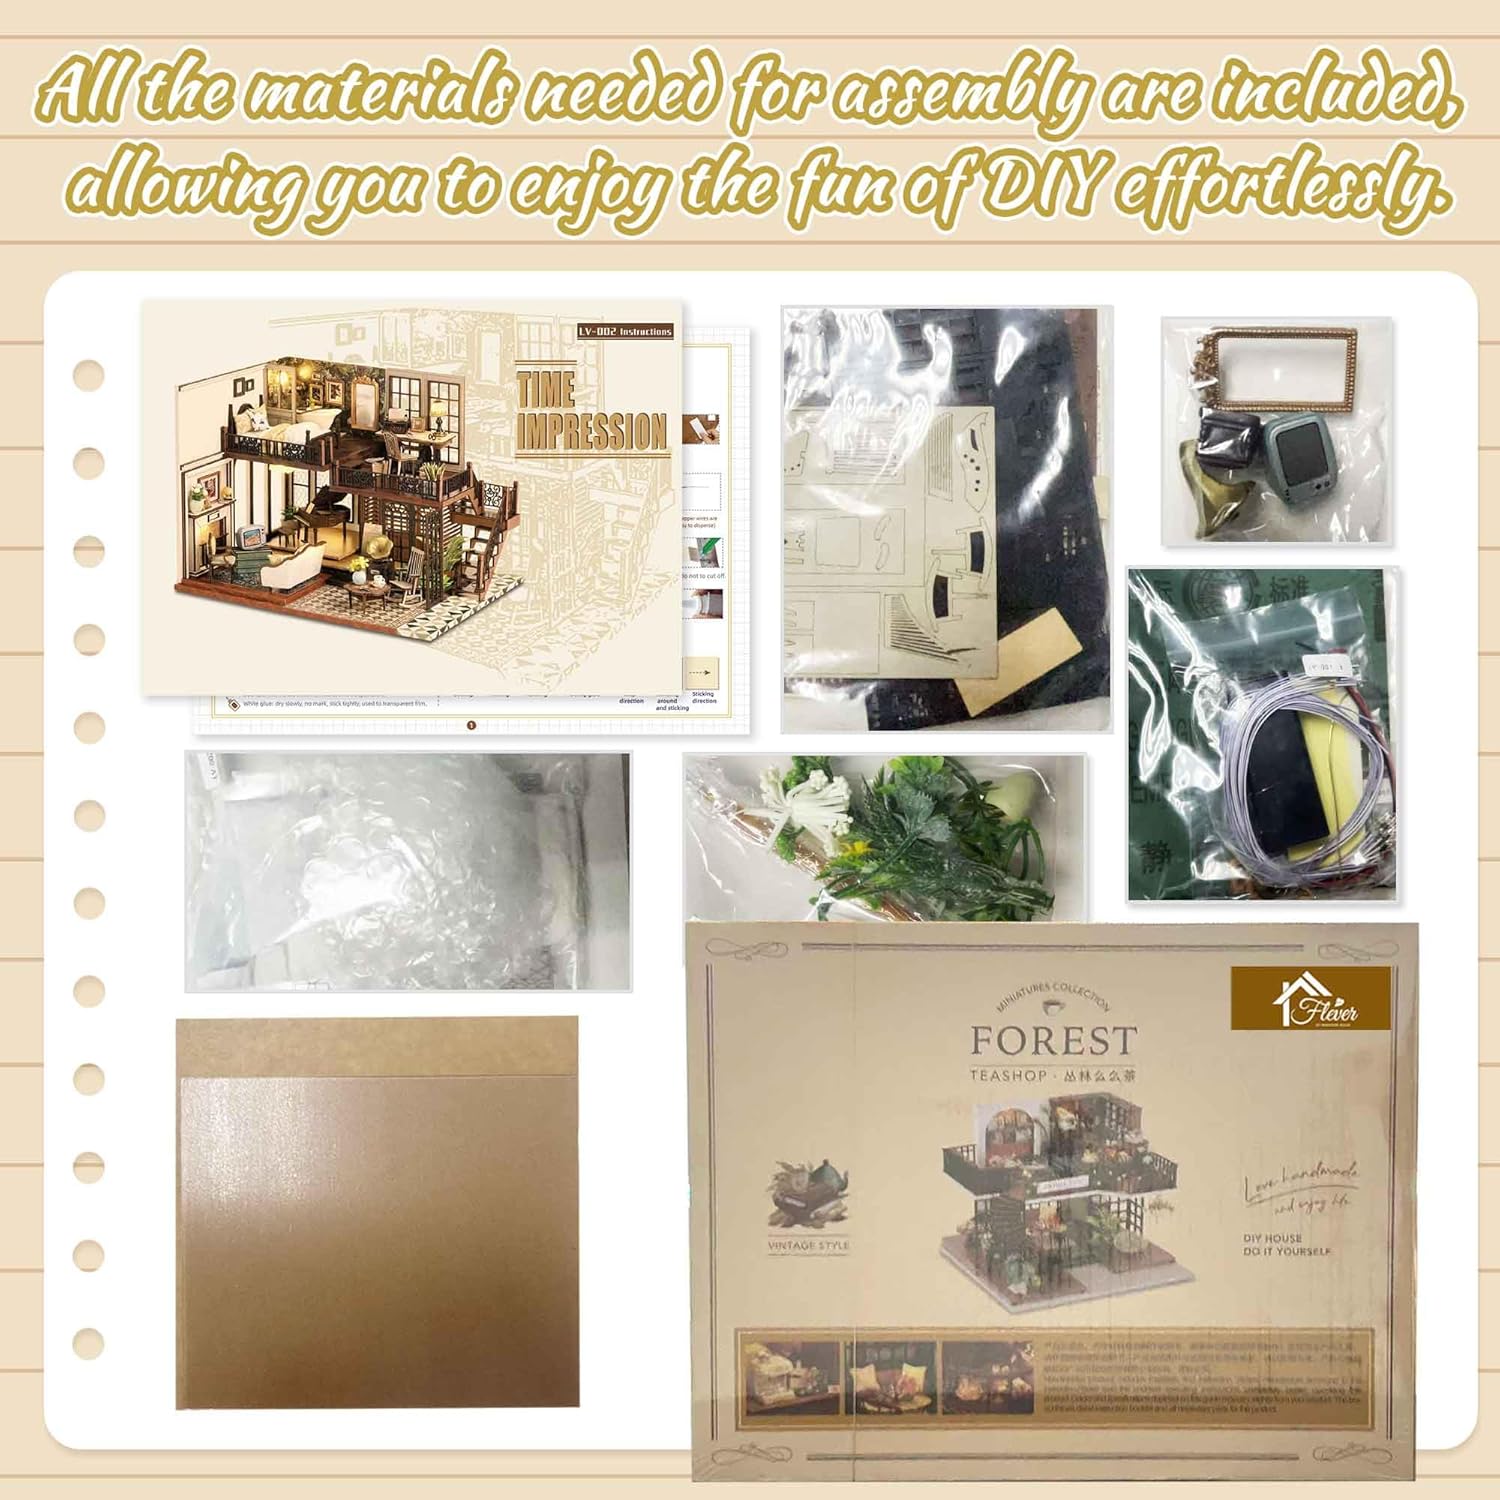
Image 3.1: Overview of the kit's contents, including pre-cut pieces, fabric, paper, and the instruction manual.
4. Assembly Instructions (Setup)
The assembly of the 'Time Impression' dollhouse is a step-by-step process detailed in the included English Instruction Manual. It is recommended to follow the instructions carefully for the best results.
- Preparation: Organize all components. The pieces are often labeled or grouped, which aids in identification. Refer to the detailed sheets with pictures of each piece to ensure you have all necessary components.
- Cutting and Shaping: Use precision cutting tools (scissors, X-Acto knife) to carefully cut out paper and fabric elements. Tweezers are highly recommended for handling small parts and applying glue accurately.
- Gluing: Apply adhesive sparingly to join wooden pieces, fabric, and paper. Allow sufficient drying time for each step before proceeding.
- Structure Assembly: Begin by assembling the main structural components of the house, as guided by the manual.
- Furniture and Accessories: Construct the miniature furniture and decorative accessories. Pay close attention to the small details to bring the scene to life.
- Electrical Wiring (LED Lights): Follow the wiring diagrams in the manual to install the LED lights. Ensure all connections are secure. The LED lights require 2-AAA batteries (not included).
- Music Movement: Integrate the music movement mechanism into the designated area.
- Dust Cover: Assemble the plexiglass pieces to create the dust cover, if included in your kit.
The assembly process is estimated to take approximately 24-32 hours, depending on individual pace and experience. Patience is key to achieving an 'ultra-detailed experience'.

Image 4.1: Illustrates the precision required for assembling the miniature details.
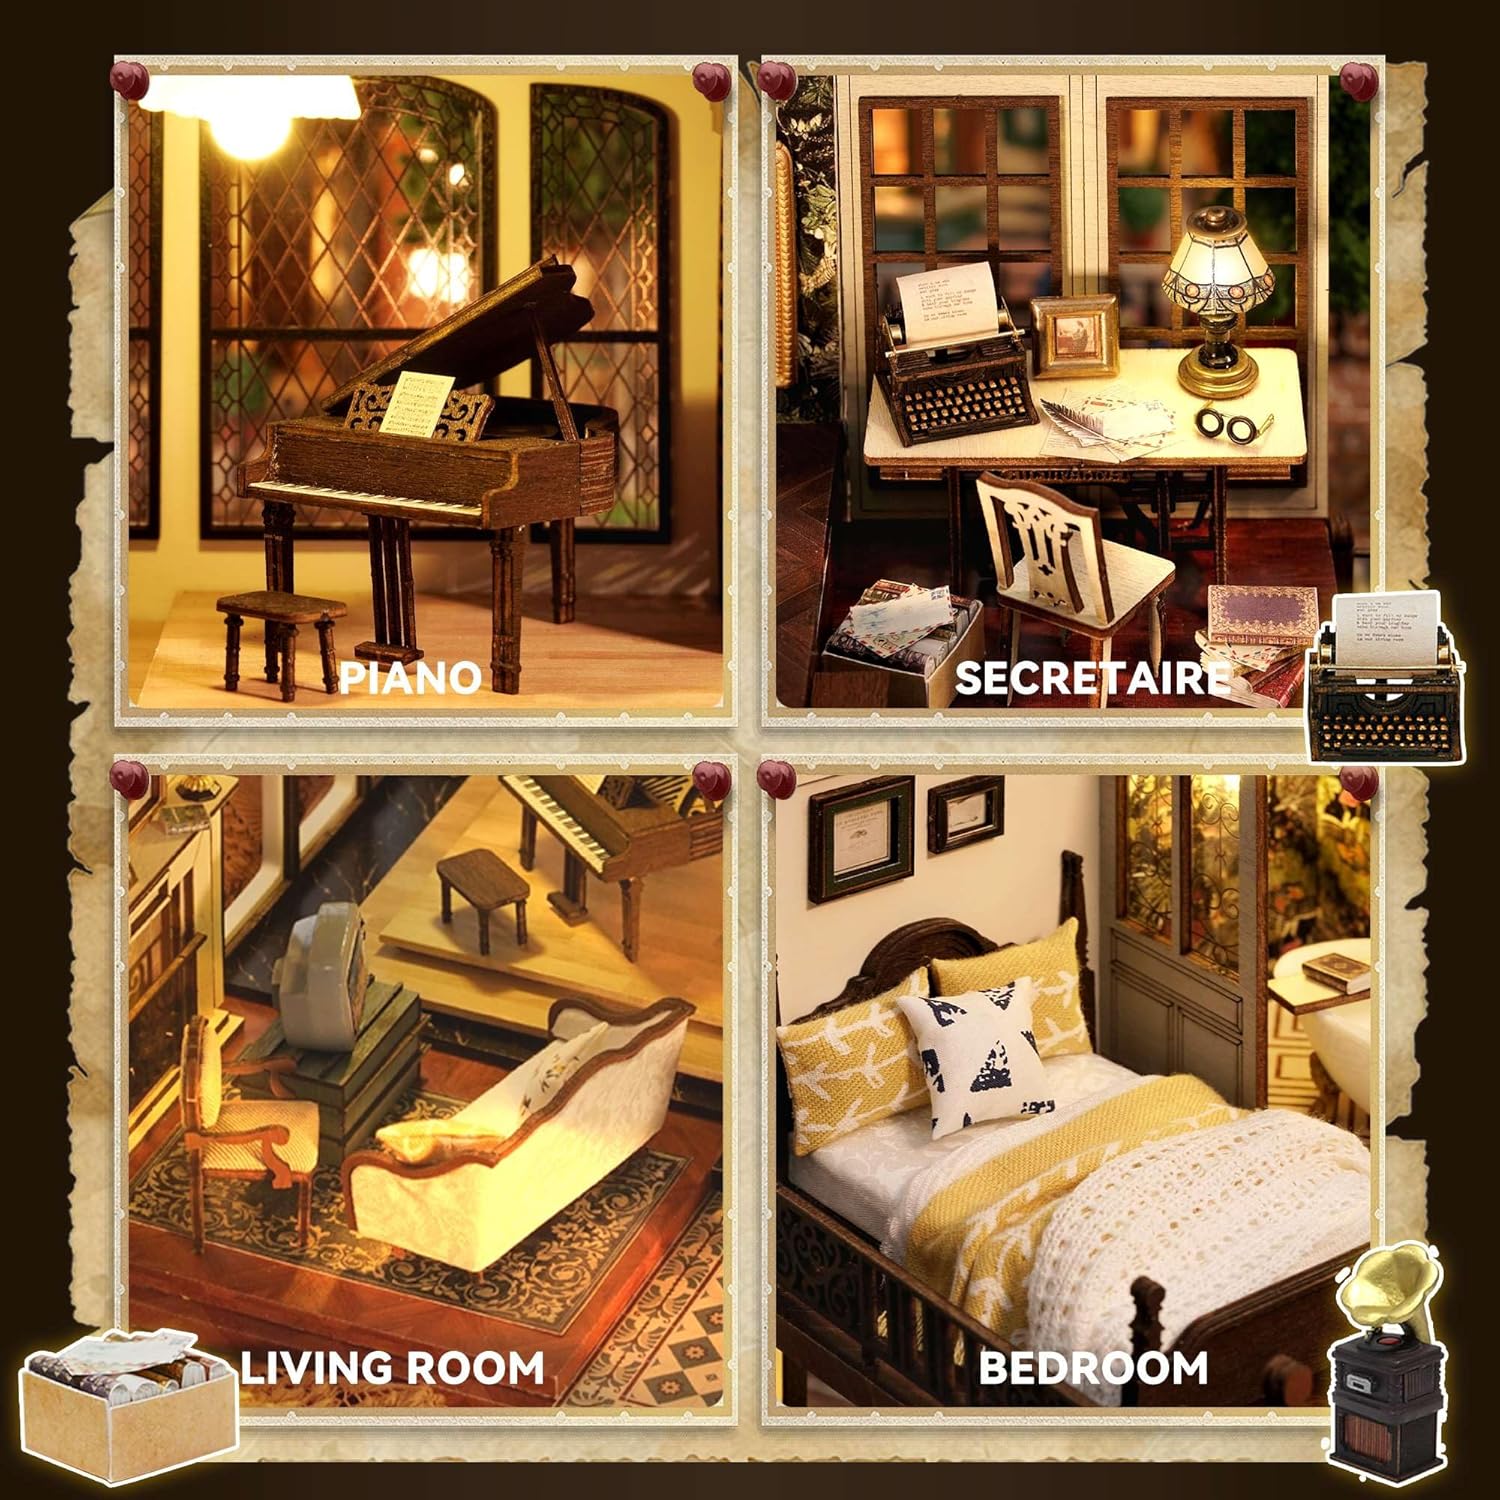
Image 4.2: Detailed views of various rooms and furniture within the assembled dollhouse.
5. Operating Instructions
5.1 LED Lighting
To activate the LED lights, ensure that 2-AAA batteries (not included) are correctly installed in the battery compartment, following the polarity markings. Once installed, the lights can typically be switched on/off via a small switch integrated into the wiring system.
5.2 Music Movement
The music movement is a mechanical wind-up mechanism. Gently turn the winding key (usually located on the side or back of the dollhouse) clockwise until you feel slight resistance. Release the key to play the melody. Do not over-wind the mechanism.
Video 5.1: Demonstration of the assembled 'Time Impression' dollhouse, showcasing its intricate details and the music box functionality.
Video 5.2: Close-up views of the 'Time Impression' dollhouse, highlighting the immersive crafting experience and finished details.
6. Maintenance
To maintain the appearance and longevity of your miniature dollhouse:
- Dust Protection: Utilize the included plexiglass dust cover to protect the delicate components from dust accumulation.
- Cleaning: Gently dust the dollhouse with a soft, dry brush or cloth. Avoid using liquid cleaners, which may damage the materials.
- Handling: Handle the assembled dollhouse with care to prevent damage to the intricate parts.
7. Troubleshooting
- Missing Pieces: If you find any pieces missing from your kit, please contact Flever customer support for assistance.
- Unclear Instructions: While the manual is designed to be detailed, some steps may require careful interpretation. Refer to the visual aids in the manual and online resources if available. If issues persist, contact customer support.
- LED Lights Not Working: Check that the 2-AAA batteries are correctly inserted and fully charged. Ensure all wiring connections are secure.
- Music Box Not Playing: Verify that the winding mechanism has been properly wound.
8. Specifications
| Product Dimensions | 8 x 4 x 9 inches |
| Item Weight | 1.9 pounds |
| Model Number | LV-002 |
| Manufacturer Recommended Age | 14 years and up |
| Manufacturer | Flever |

Image 8.1: Product dimensions for the 'Time Impression' miniature dollhouse.
9. Customer Support
Flever is committed to ensuring a smooth assembly experience. If you encounter any issues, require assistance with assembly, or have questions regarding your kit, please contact Flever customer service. Our dedicated support team is ready to help.