
1. Introduction
Thank you for choosing the IRNEHARUITI M107 Professional Wireless Lapel Microphone. This device is designed to provide high-quality audio recording for various applications, including video production, live broadcasting, online teaching, and interviews. Its plug-and-play functionality, intelligent noise reduction, and wide compatibility make it a versatile tool for content creators. Please read this manual carefully to ensure proper use and optimal performance.
2. Package Contents
Upon unpacking, please verify that all the following items are included:
- 1 x Wireless Microphone Transmitter (TX)
- 1 x Wireless Microphone Receiver (RX)
- 1 x USB Charging Cable
- 1 x Wind Muff
- Various adapter cables (e.g., Lightning, USB-C, 3.5mm jack) for broad compatibility.

Image 2.1: The IRNEHARUITI M107 Wireless Lapel Microphone system, including the transmitter (TX), receiver (RX), charging cables, and a wind muff.
3. Product Overview
The IRNEHARUITI M107 system consists of two main units:
- Transmitter (TX): This unit contains the microphone and is clipped onto the user's clothing. It captures audio and wirelessly transmits it to the receiver.
- Receiver (RX): This unit connects to your recording device (e.g., smartphone, camera, computer) and receives audio from the transmitter.
Both units feature indicator lights for connection status, battery level, and charging.
4. Setup Guide
4.1 Charging the Device
Before first use, fully charge both the transmitter (TX) and receiver (RX) units using the provided USB charging cable. A full charge typically takes approximately two hours. The charging indicator light will change to indicate a full charge.
4.2 Connecting and Pairing
The M107 microphone system is designed for plug-and-play operation with automatic pairing.
- Plug In: Connect the receiver (RX) unit to your recording device (e.g., iPhone, iPad, camera, computer) using the appropriate adapter cable.
- Power On: Turn on the transmitter (TX) unit.
- Connected: The transmitter and receiver will automatically pair within a few seconds. A stable indicator light on both units will confirm a successful connection. No additional app or Bluetooth connection is required for basic operation.

Image 4.1: Visual guide demonstrating the simple three-step auto-pairing process for the wireless microphone system.
5. Operating Instructions
5.1 Wearing the Microphone
Clip the transmitter (TX) unit onto your clothing, ideally near your mouth, to ensure optimal sound capture. Ensure the microphone is not obstructed.

Image 5.1: Proper placement of the wireless lapel microphone for recording.
5.2 Recording Audio
Once the transmitter and receiver are paired, simply start your recording application on your connected device. The microphone will automatically be used as the audio input source.

Image 5.2: Examples of the wireless microphone in use for different applications.
5.3 Flexible Ducking Function
The microphone features a flexible ducking function. When enabled, this feature automatically adjusts the level of background music or ambient sound, reducing it when a human voice is detected, and raising it when speech pauses. This ensures the speaker's voice remains clear and prominent.
5.4 Intelligent Noise Reduction
The M107 incorporates an intelligent noise reduction function with a built-in DSP sound processing chip. This technology actively filters out ambient interference, providing professional, clean, and clear audio quality (20~20kHz stereo CD quality).
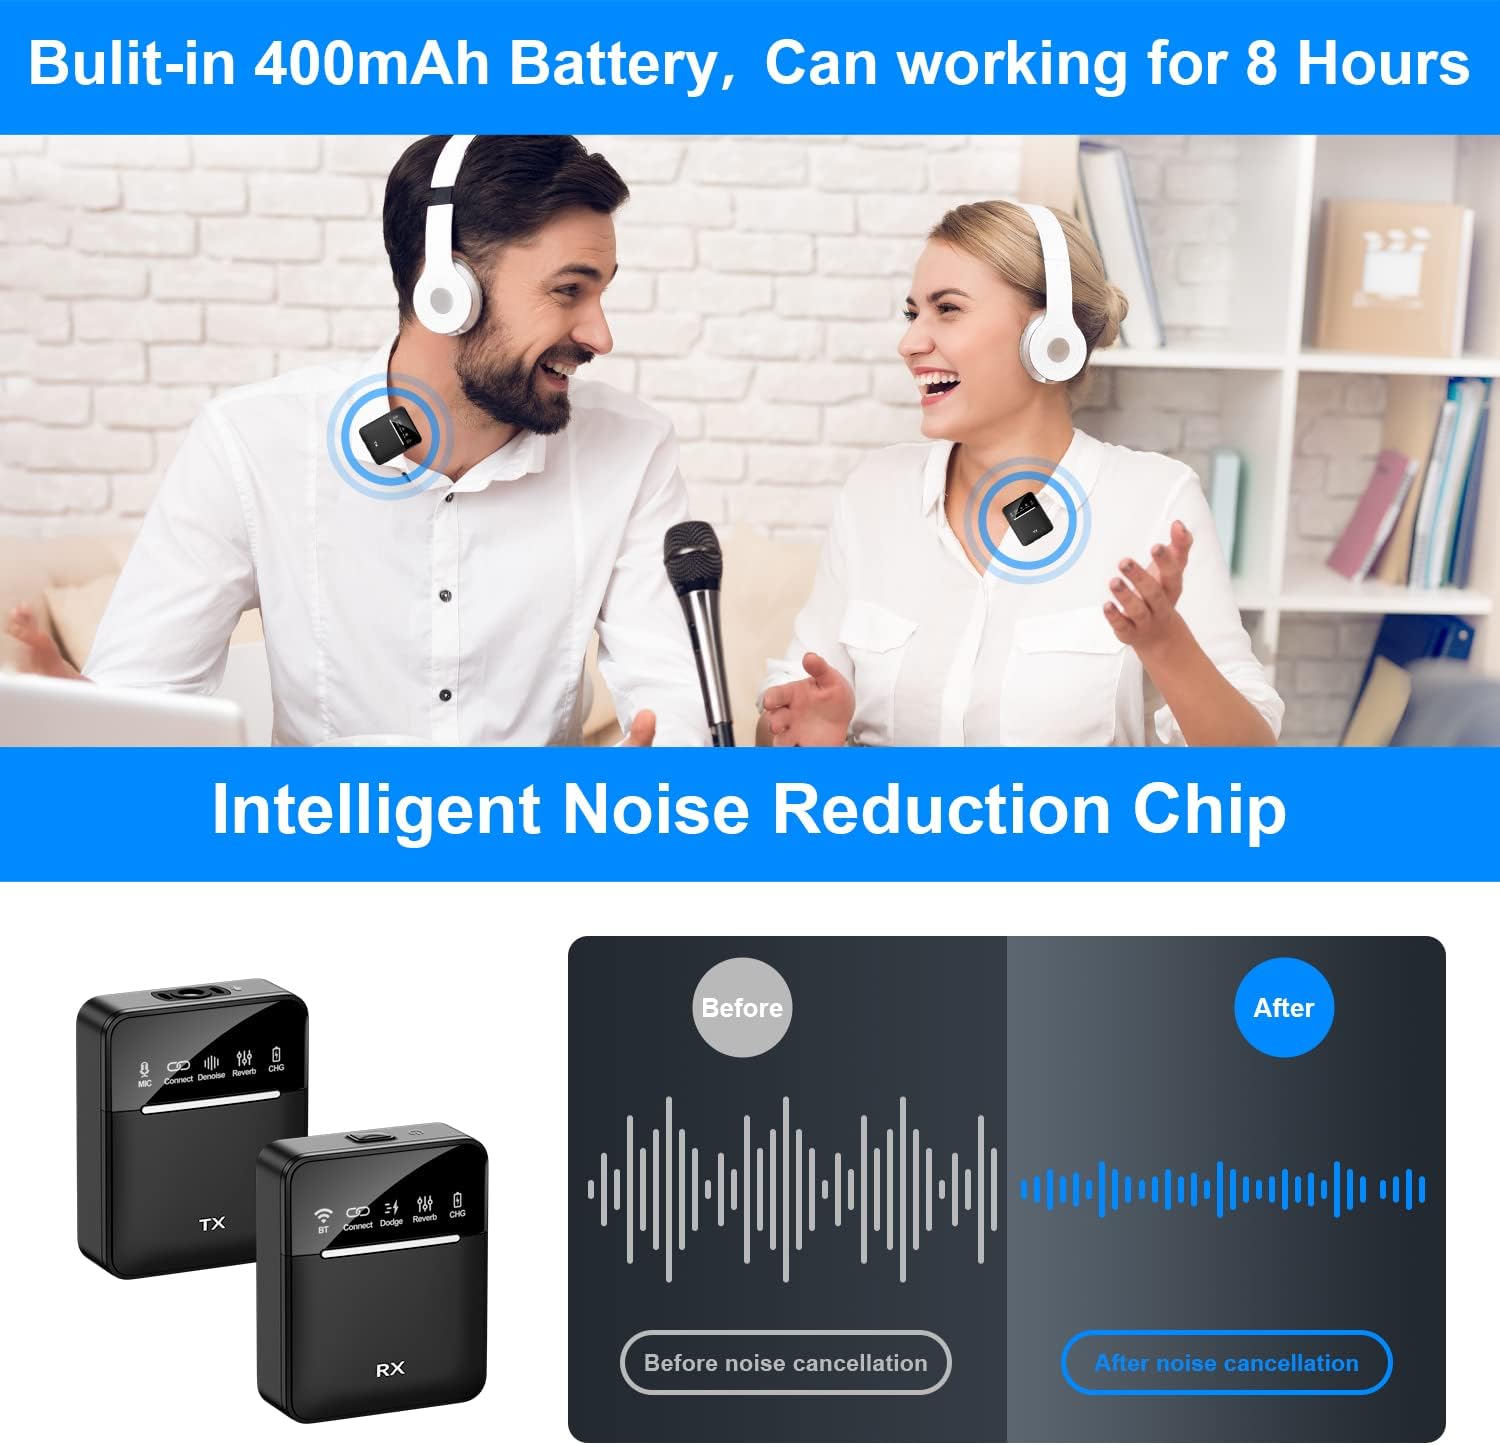
Image 5.3: Demonstration of the intelligent noise reduction feature, comparing audio waveforms before and after processing.
6. Key Features
- Long Battery Life: Equipped with a built-in 400mAh rechargeable battery, providing up to 8 hours of continuous use on a single charge. Supports charging while operating for extended use.
- Small and Portable: Weighing only 0.05 pounds, the compact design allows for easy transport and discreet wear.

Image 6.1: The compact size of the microphone, easily fitting into a pocket.
- Omnidirectional Pickup: Captures sound from all directions, offering 360-degree sound reception up to a distance of 50 feet.
- Great Compatibility: Plug-and-play design compatible with a wide range of devices including mobile phones, cameras, video recorders, computers, and sound cards. No app required.

Image 6.2: The microphone's broad compatibility with devices and social media platforms.
7. Care and Maintenance
- Cleaning: Use a soft, dry cloth to clean the microphone units. Avoid using liquid cleaners or solvents.
- Storage: Store the device in a cool, dry place away from direct sunlight and extreme temperatures.
- Handling: Handle the units with care to prevent damage from drops or impacts.
- Charging: Use only the provided charging cable or a certified equivalent.
8. Troubleshooting
| Problem | Possible Cause | Solution |
|---|---|---|
| No sound recorded |
|
|
| Poor audio quality / Excessive noise |
|
|
| Short battery life |
|
|
9. Specifications
| Model Number | M107 |
| Brand | IRNEHARUITI |
| Connectivity Technology | Wireless (Bluetooth) |
| Connector Type | Lightning (with various adapters) |
| Polar Pattern | Omnidirectional |
| Frequency Response | 20 Hz - 20 kHz |
| Signal-to-Noise Ratio | 78 dB |
| Power Source | Battery Powered (400mAh built-in) |
| Item Weight | 0.05 pounds (per unit, approx.) / 7.8 ounces (package) |
| Color | Black |
| UPC | 735133928067 |
10. Warranty and Support
Specific warranty information for the IRNEHARUITI M107 Professional Wireless Lapel Microphone is not provided in this manual. For details regarding warranty coverage, technical support, or customer service, please refer to the product packaging, the seller's website, or contact IRNEHARUITI customer support directly.