
NewPal NP002
Hands-Free Dial Photo Memory Corded Phone User Manual
Brand: NewPal | Model: NP002
Introduction
This manual provides comprehensive instructions for the NewPal Hands-Free Dial Photo Memory Corded Phone, Model NP002. This corded telephone is designed for ease of use, featuring large buttons, photo memory dialing, and a speakerphone function. It operates without the need for batteries, drawing power directly from the telephone line, ensuring functionality even during power outages.

Figure 1: Front view of the NewPal Corded Phone, showing the large keypad, display, and photo memory buttons.
Key features include:
- Hands-Free Dial Photo Memory Corded Phone with large buttons and speakerphone.
- LCD Display for caller number visibility.
- SOS button for emergency calls.
- Operates without external power, using the telephone line for power.
- Adjustable handset, ringer, and speaker volume.
- Flashing red LED for incoming calls, beneficial for hearing-impaired users.
Package Contents
Verify that all components are present in the package:
- 1 x NewPal Corded Telephone Unit
- 1 x Handset
- 1 x Coiled Handset Cord
- 1 x Telephone Line Cord (for wall jack connection)
- 1 x Connecting Line Cord (for telephone unit connection)
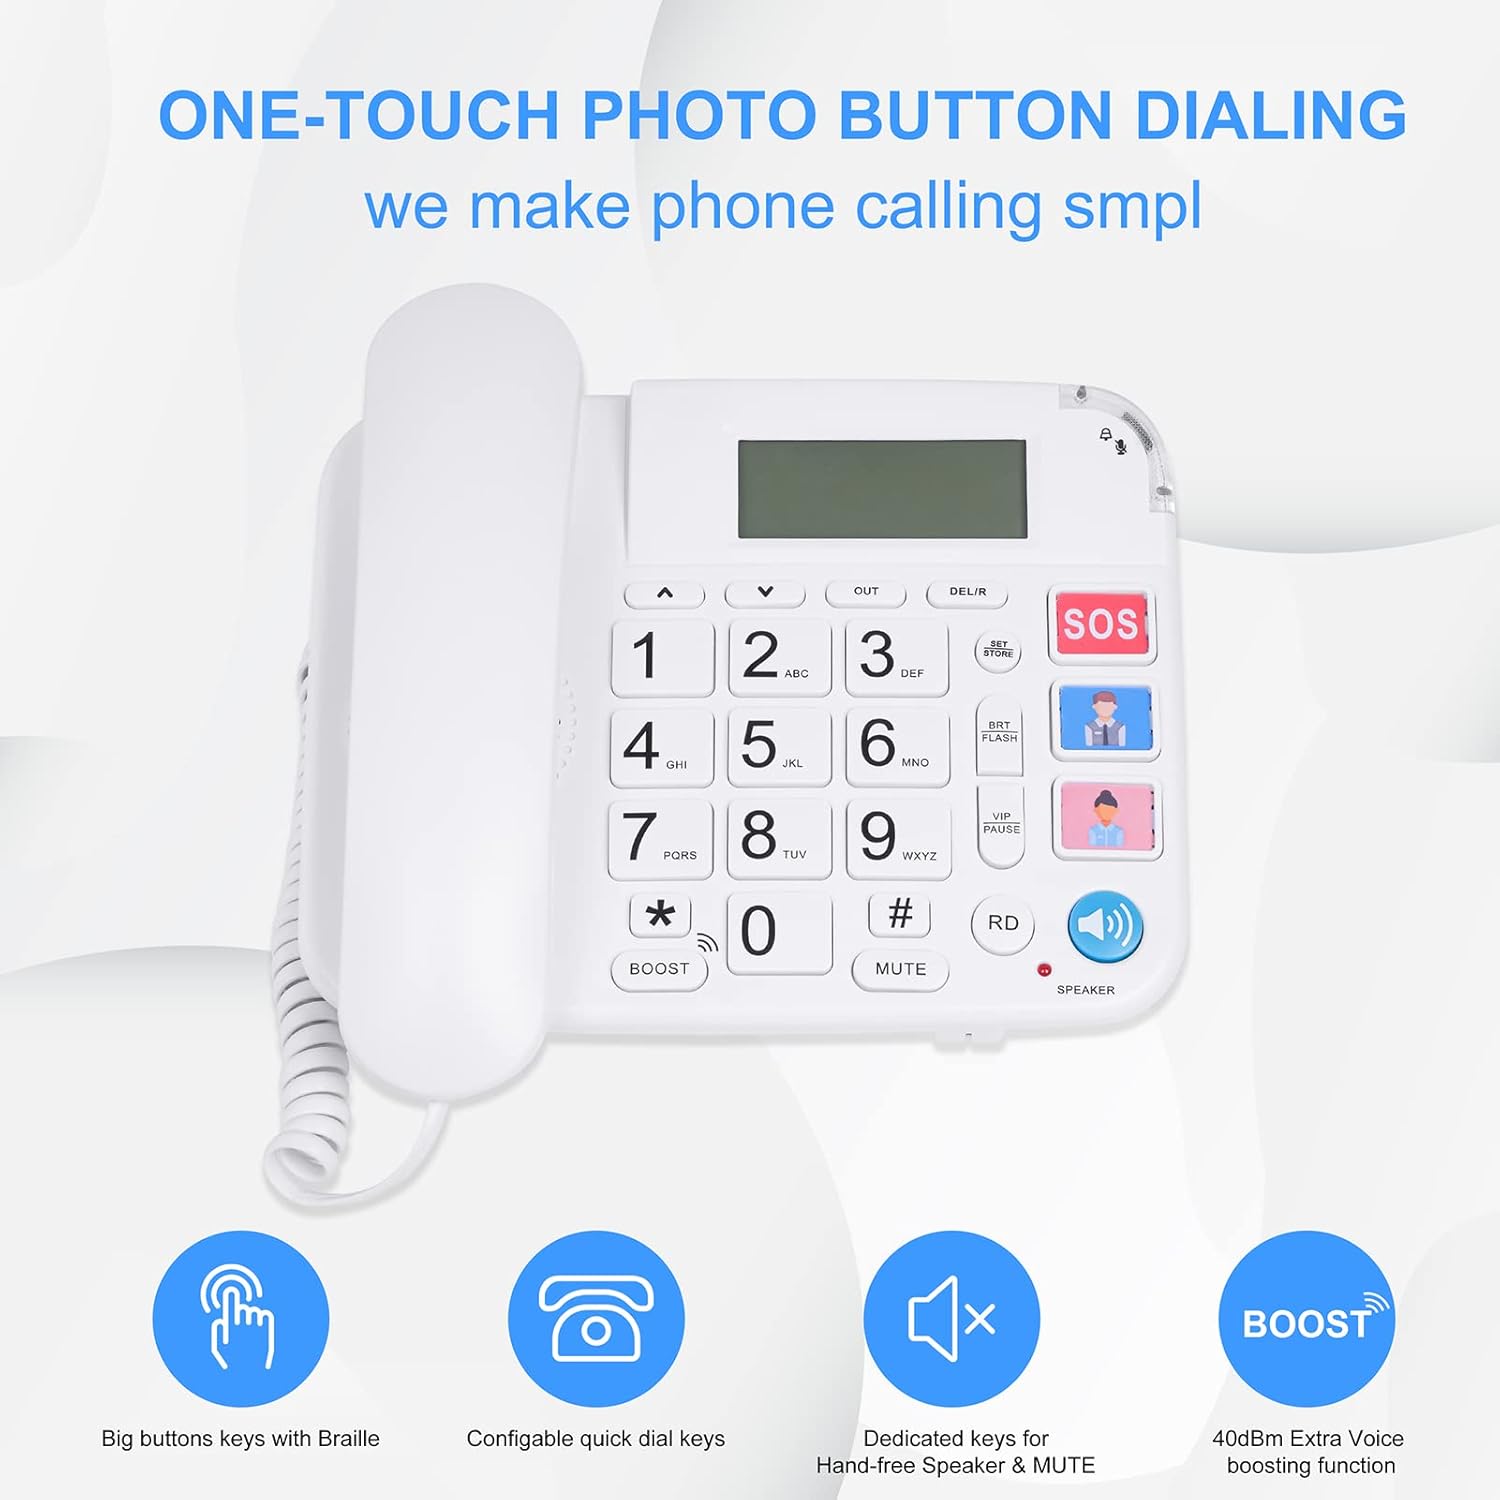
Figure 2: All components included in the NewPal Corded Phone package: telephone unit, handset, coiled cord, telephone line cord, and connecting line cord.
Setup Instructions
- Connect the Handset: Plug one end of the coiled handset cord into the handset and the other end into the port labeled "Handset" on the side of the telephone unit.
- Connect the Telephone Line:
- Locate the two telephone line ports on the back of the phone. One is typically labeled "LINE" or has a phone icon, and the other "EXT" or "EXTENSION".
- Plug one end of the telephone line cord into the "LINE" port on the phone.
- Plug the other end of the telephone line cord into your wall telephone jack.

Figure 3: Rear view of the phone, illustrating the dual port design for main line and extension connections.
- Place the Phone: Position the phone on a flat, stable surface or mount it on a wall using the integrated wall-mount holes (screws not included).
- Adjust Ringer Volume: On the back of the phone, locate the RINGER switch. Slide it to HI (High), LO (Low), or OFF (Off) as desired.
- Test Connection: Lift the handset. You should hear a dial tone. If not, refer to the Troubleshooting section.
Setting Photo Memory Buttons (M1-M6)
The phone features six photo memory buttons (M1-M6) that allow for one-touch dialing of frequently called numbers. You can insert small photos of contacts into these slots for easy identification.

Figure 4: The six photo memory buttons, designed for quick dialing of pre-programmed numbers.
- Lift the handset.
- Press the SET/STORE button.
- Dial the phone number you wish to store (up to 16 digits).
- Press the SET/STORE button again.
- Press the desired photo memory button (M1-M6) where you want to save the number.
- Replace the handset. The number is now stored.
Repeat this process for each photo memory button you wish to program.
Operating Instructions
Making a Call
- Standard Dialing: Lift the handset, wait for a dial tone, then dial the desired phone number using the large numeric keypad.
- Using Photo Memory Buttons: Lift the handset, then press the desired photo memory button (M1-M6). The stored number will be dialed automatically.
- Using Speakerphone: Press the SPEAKER button (blue button with speaker icon). The speakerphone will activate. Dial the number. To end the call, press the SPEAKER button again or replace the handset.

Figure 5: The phone's large buttons and dedicated photo memory keys simplify dialing.
Receiving a Call
- When the phone rings, lift the handset to answer.
- Alternatively, press the SPEAKER button to answer in speakerphone mode.
- The red LED indicator will flash during an incoming call, providing a visual alert.

Figure 6: The amplified ringer and flashing red LED provide clear indications of incoming calls, especially useful for hearing-impaired users.
Using the SOS Button
The large red SOS button is designed for emergency situations. When pressed, it will automatically dial a pre-programmed emergency number.
- To Program SOS Number:
- Lift the handset.
- Press the SET/STORE button.
- Dial the emergency number (e.g., 911 or a family member's number).
- Press the SET/STORE button again.
- Press the SOS button.
- Replace the handset.
- To Use SOS: In an emergency, simply press the large red SOS button. The phone will automatically dial the stored emergency number.
Adjusting Volume
- Handset Volume: During a call, use the BOOST button (below the * key) to amplify the handset volume.
- Speakerphone Volume: During a speakerphone call, use the UP (▲) and DOWN (▼) arrow buttons to adjust the speaker volume.
- Ringer Volume: As mentioned in Setup, use the RINGER switch on the back of the phone.

Figure 7: The ergonomic handset design is intended to enhance hearing clarity during calls.
Maintenance and Care
- Cleaning: Wipe the phone's surface with a soft, damp cloth. Do not use abrasive cleaners or solvents.
- Avoid Liquids: Keep the phone away from water and other liquids.
- Temperature: Do not expose the phone to extreme temperatures or direct sunlight.
- Storage: If storing the phone for an extended period, disconnect it from the telephone line and store it in a cool, dry place.
Troubleshooting
| Problem | Possible Cause | Solution |
|---|---|---|
| No dial tone. | Telephone line not connected properly or line issue. |
|
| Phone does not ring. | Ringer volume set to OFF. |
|
| Cannot hear caller / Caller cannot hear me. | Volume too low or faulty connection. |
|
| Photo memory buttons not working. | Number not stored correctly. |
|
Specifications
| Feature | Detail |
|---|---|
| Model Number | NP002 |
| Dimensions (L x W x H) | 7.8 x 7.8 x 2.6 inches |
| Item Weight | 1.4 pounds |
| Color | White |
| Material | Acrylonitrile Butadiene Styrene (ABS) |
| Telephone Type | Corded |
| Power Source | Corded Electric (Line Powered) |
| Dialer Type | Single Keypad |
| Display | LCD (for caller number) |
| Memory Buttons | 6 Photo Memory Buttons, 1 SOS Button |
Warranty and Support
For warranty information or technical support, please contact NewPal customer service. Details can typically be found on the product packaging or the official NewPal website.
Manufacturer: agosmart
Brand: NewPal
For further assistance, you may visit the NewPal Store on Amazon.
Related documentsNP002

Ask a question about this manual
Ask about setup, troubleshooting, compatibility, parts, safety, or missing instructions. Manuals+ will review the question and use this page’s manual context to help answer it.