Introduction
This manual provides essential information for the safe and efficient operation, maintenance, and care of your TUDALLK 10-inch 340W Electric Meat Slicer. Please read all instructions thoroughly before initial use and retain this manual for future reference. Proper use and maintenance will ensure optimal performance and extend the lifespan of your appliance.
Important Safety Instructions
WARNING: Failure to follow these safety instructions may result in electric shock, fire, serious injury, or property damage.
- General Safety:
- Always operate the slicer on a stable, level, and dry surface.
- Keep hands, hair, clothing, and utensils away from the blade during operation.
- Never leave the slicer unattended while it is running.
- This appliance is not intended for use by persons with reduced physical, sensory, or mental capabilities, or lack of experience and knowledge, unless they have been given supervision or instruction concerning use of the appliance by a person responsible for their safety.
- Children should be supervised to ensure that they do not play with the appliance.
- Always wear cut-resistant gloves when handling or cleaning the blade.
- Electrical Safety:
- Ensure the power supply voltage matches the rating indicated on the appliance.
- Do not immerse the motor unit, cord, or plug in water or other liquids.
- Unplug the slicer from the outlet when not in use, before cleaning, or before attaching/removing parts.
- Do not operate any appliance with a damaged cord or plug, or after the appliance malfunctions or has been damaged in any manner.
- Blade Safety:
- The blade is extremely sharp. Exercise extreme caution.
- Ensure the fixed ring guard is always in place during operation.
- Never attempt to slice food by hand without using the food carriage and pusher.
- When removing or cleaning the blade, always wear protective gloves.
- Cleaning Safety:
- Always unplug the slicer before cleaning.
- Use only mild detergents and a damp cloth for cleaning. Avoid abrasive cleaners or scouring pads.
- Ensure all parts are completely dry before reassembly or storage.
Product Overview
Familiarize yourself with the components of your TUDALLK Electric Meat Slicer before operation.
Components
- 10-inch Chromium-plated Steel Blade: The primary cutting component.
- Food Carriage: Holds the food item to be sliced.
- Food Pusher: Secures food on the carriage and protects hands.
- Thickness Adjustment Knob: Controls the slice thickness from 0-12mm.
- Power Switch (On/Off): Activates and deactivates the motor.
- Built-in Sharpening Stone: For maintaining blade sharpness.
- Fixed Ring Guard: A safety feature to prevent accidental contact with the blade.
- Non-slip Feet: Provides stability during operation.
- Motor Unit: Houses the 340W motor.

Image: Key features of the TUDALLK Electric Meat Slicer, including the built-in sharpener, fixed safety ring, and on/off switch.
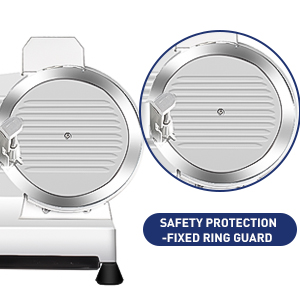
Image: Detail of the fixed ring guard, a safety component designed to prevent unintentional contact with the blade.

Image: The integrated sharpening stone, used for maintaining the sharpness of the slicer blade.
Setup
Unpacking
- Carefully remove the slicer and all accessories from the packaging.
- Inspect the appliance for any signs of damage. Do not use if damaged.
- Remove all packing materials, including protective films or tapes.
- Clean all removable parts (food carriage, food pusher, blade) with warm soapy water before first use. Rinse thoroughly and dry completely.
Initial Assembly
- Place the slicer on a clean, stable, and dry countertop. Ensure the non-slip feet are firmly gripping the surface.
- Attach the food carriage to its designated track on the slicer.
- Place the food pusher onto the food carriage.
- Ensure the blade is securely fastened. Refer to the "Blade Removal and Cleaning" section for details on securing the blade if it was removed for cleaning.

Image: The TUDALLK Electric Meat Slicer, ready for setup. Protective gloves are shown as a safety reminder.
Operating Instructions
Preparing Food
- For best results, chill meats and cheeses before slicing. This helps maintain their shape and allows for more uniform slices.
- Trim any bones or excessively hard rinds from the food item.
- Ensure the food item fits securely on the food carriage and under the food pusher.
Adjusting Slice Thickness
- Locate the thickness adjustment knob on the side of the slicer.
- Rotate the knob to select your desired slice thickness, from 0mm (paper-thin) to 12mm (thick). The dial is marked for reference.
- Ensure the thickness setting is locked in place if your model features a locking mechanism.

Image: The thickness adjustment knob, illustrating how to select slice thickness from 0mm to 12mm, with visual examples of meat slices at different thicknesses.
Slicing Procedure
- Plug the slicer into a grounded electrical outlet.
- Place the food item onto the food carriage, pressing it firmly against the guide plate and securing it with the food pusher.
- Turn on the slicer using the power switch.
- Using the handle on the food carriage, gently push the food item back and forth across the rotating blade. Apply even pressure with the food pusher.
- Collect sliced food from the receiving tray or directly onto a plate.
- Once slicing is complete, turn off the slicer and unplug it from the outlet.
- Allow the blade to come to a complete stop before attempting to remove any remaining food or clean the unit.

Image: The TUDALLK Electric Meat Slicer in operation, showing its capability to slice various food items such as meats, cheeses, bread, and vegetables.
Maintenance and Cleaning
Regular cleaning and maintenance are crucial for hygiene, performance, and longevity of your slicer. Always wear cut-resistant gloves when handling the blade.
General Cleaning
- Unplug the slicer from the power outlet.
- Remove the food carriage and food pusher. Wash them in warm, soapy water, rinse, and dry thoroughly.
- Wipe down the exterior of the slicer body with a damp cloth and mild detergent. Avoid getting water into the motor housing.
- Clean the area behind the blade and the guide plate using a damp cloth or brush.
- Ensure all food particles are removed from crevices.
Blade Removal and Cleaning
- Ensure the slicer is unplugged.
- Wear cut-resistant gloves.
- Locate the screws or locking mechanism holding the blade cover in place. Carefully remove the blade cover.
- Unscrew the blade retaining screws (usually three) using the appropriate tool.
- Carefully lift the blade off the slicer. Handle it by the center hub, avoiding the sharp edge.
- Wash the blade with warm, soapy water. Use a brush to clean any food residue. Rinse thoroughly and dry immediately to prevent rust.
- Clean the blade housing area on the slicer body.
- To reattach, align the blade with the motor shaft and screw holes. Secure the retaining screws firmly. Replace the blade cover.
Sharpening the Blade
The slicer features a built-in sharpening stone to maintain blade sharpness. Sharpen the blade only when necessary, typically after extended use or when slicing performance decreases.
- Ensure the slicer is unplugged.
- Clean the blade thoroughly before sharpening.
- Locate the sharpening stone assembly. It typically has two grinding wheels.
- Turn on the slicer.
- Gently press the sharpening stone assembly against the rotating blade for a few seconds (e.g., 5-10 seconds). Do not apply excessive pressure.
- Release the sharpening stone assembly and turn off the slicer.
- Wipe the blade clean to remove any metal filings.
- Note: Some users find external sharpeners more effective for optimal blade maintenance.
Troubleshooting
Refer to this section for common issues and their solutions.
| Problem | Possible Cause / Solution |
|---|---|
| Slicer does not turn on. |
|
| Blade is not rotating. |
|
| Slices are uneven or ragged. |
|
| Slicer vibrates excessively or makes unusual noise. |
|
Specifications
| Feature | Detail |
|---|---|
| Brand | TUDALLK |
| Model | B0BBG6MM4M |
| Product Dimensions | 17"L x 11"W x 16"H |
| Material | Aluminum |
| Color | Silver |
| Blade Material | Chromium-plated Steel |
| Blade Length | 10 Inches |
| Item Weight | 35 Pounds |
| Motor Power | 340W |
| Operation Mode | Semi Automatic |
| Adjustable Thickness | 0-12mm |
| Product Care Instructions | Hand Wash Only |
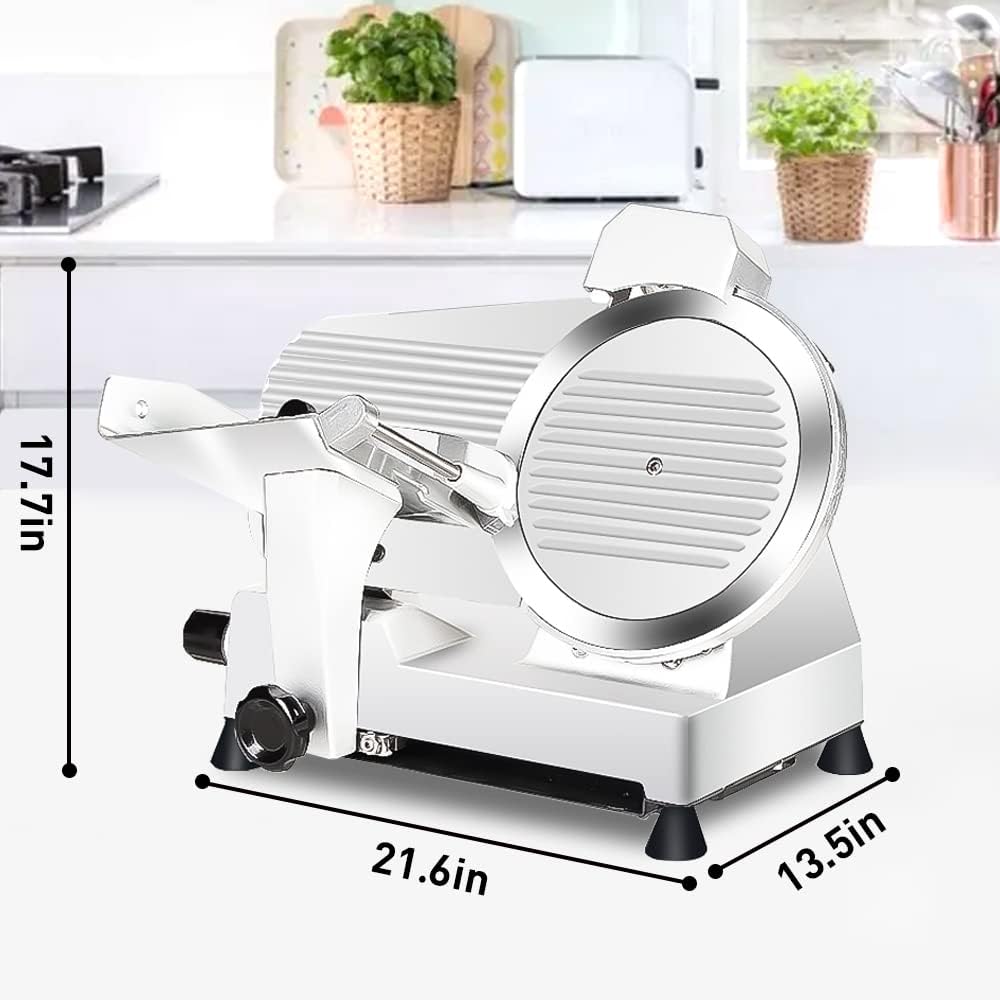
Image: Diagram showing the dimensions of the TUDALLK Electric Meat Slicer: 21.6 inches length, 13.5 inches width, and 17.7 inches height.

Image: A close-up view of the 10-inch diameter chromium-plated steel blade.
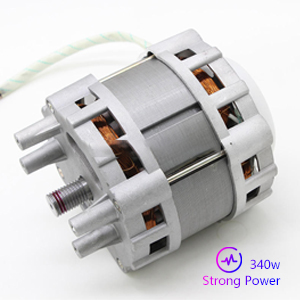
Image: An internal view of the 340W motor, indicating its strong power for slicing.
Warranty and Support
For information regarding warranty coverage, technical support, or replacement parts, please contact TUDALLK customer service through the retailer where the product was purchased or refer to the official TUDALLK website for contact details. Please have your model number (B0BBG6MM4M) and purchase date available when contacting support.