1. Introduction
The VIRONE DT-4 programmable socket is an electronic timer designed to automate the switching ON and OFF of electrical appliances. It features a clear LCD display, 16 programmable settings, and a presence simulator function for enhanced home security. This manual provides detailed instructions for setting up, operating, and maintaining your device.
2. Important Safety Information
- Read all instructions carefully before use.
- Do not exceed the maximum load of 3680W (16A). Overloading can cause damage to the device and connected appliances, and poses a fire risk.
- This device is for indoor use only. Do not expose to moisture, water, or extreme temperatures.
- Ensure the device is properly plugged into a grounded outlet (Type E).
- Do not disassemble or attempt to repair the device. Refer all servicing to qualified personnel.
- Keep out of reach of children.
- Unplug the device from the wall socket before cleaning.
3. Package Contents
- 1 x VIRONE DT-4 Programmable Socket
- 1 x User Manual (this document)
4. Product Overview
Familiarize yourself with the components of your VIRONE DT-4 programmable socket.
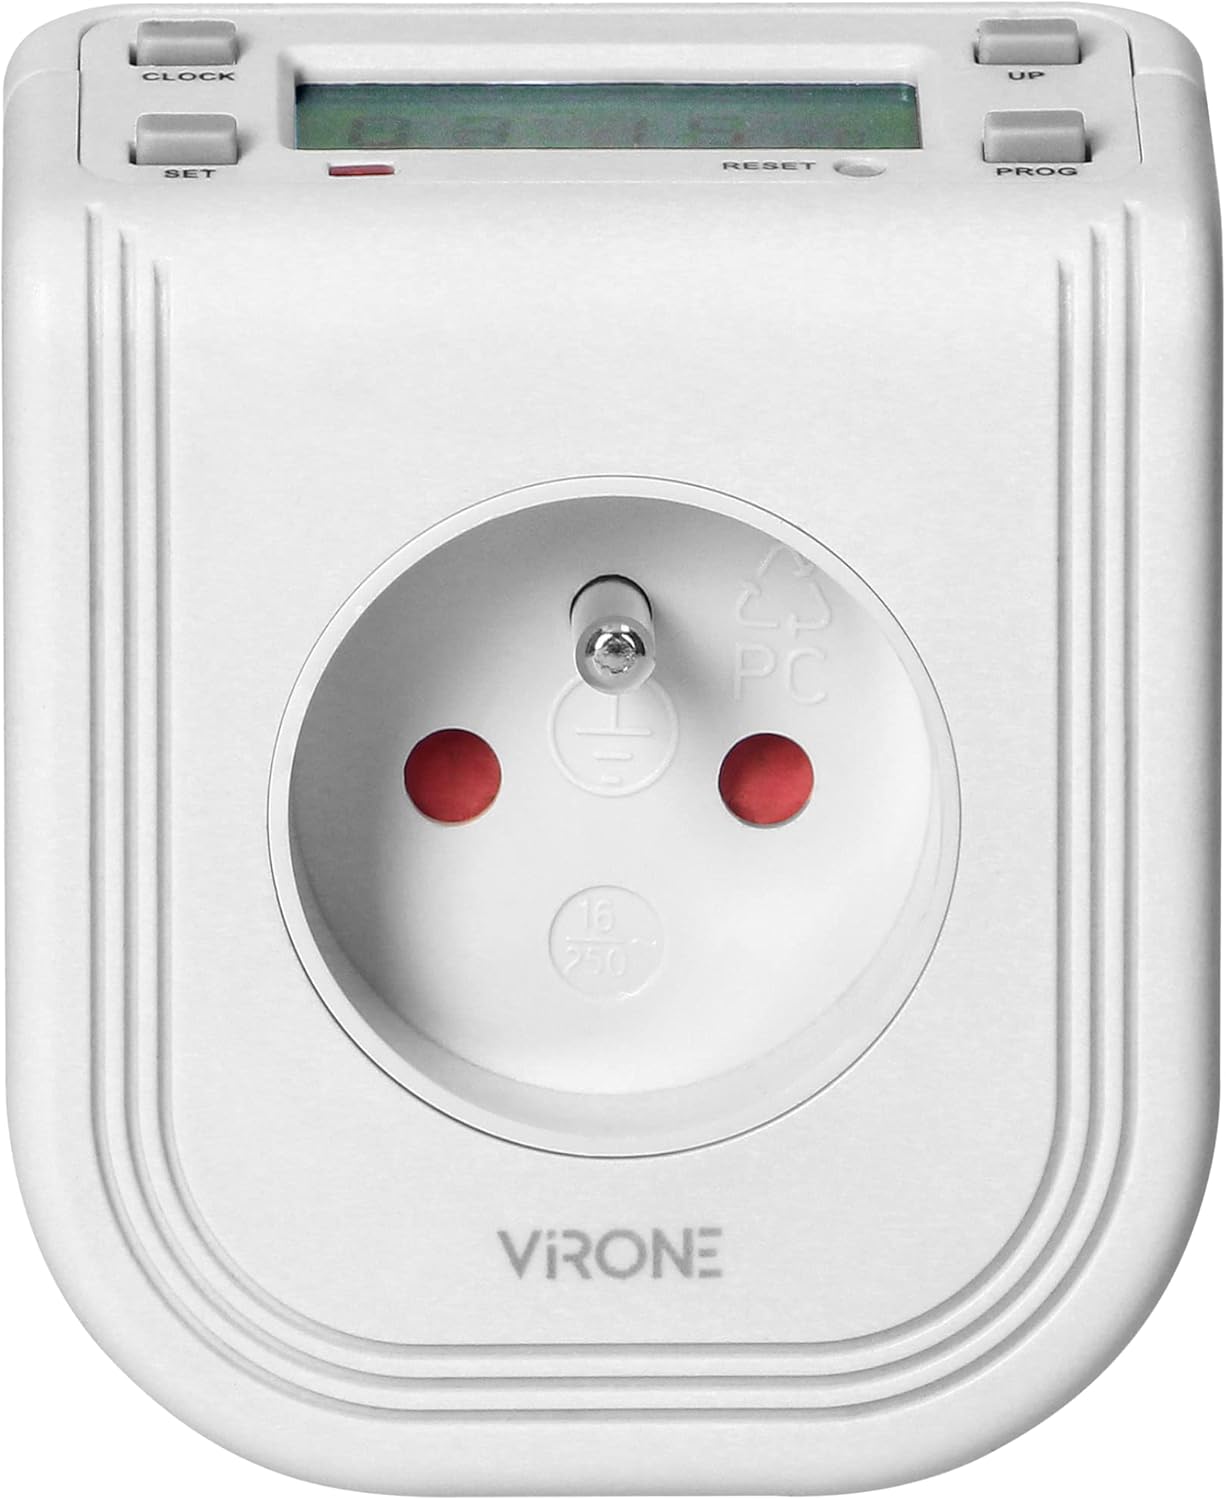
Image 1: Front view of the VIRONE DT-4 programmable socket, showing the French Type E outlet and the LCD display at the top.
4.1. Controls and Display

Image 2: Angled view of the VIRONE DT-4, highlighting the LCD display and control buttons.
- LCD Display: Shows current time, day, program status, and settings.
- CLOCK Button: Used to set the current time and day.
- SET Button: Used to confirm selections or enter setting modes.
- UP Button: Used to increase values or navigate through options.
- PROG Button: Used to enter program setting mode.
- RESET Button: Small button (requires a pointed object) to clear all settings and restore factory defaults.
5. Initial Setup
5.1. First Use and Charging
The device contains a built-in rechargeable battery to retain settings during power outages. Before first use, plug the timer into a live wall socket for at least 30 minutes to charge the internal battery. If the display is blank or dim, charge it longer.
5.2. Resetting the Device
If the display shows unusual characters or if you wish to clear all previous settings, press the RESET button using a small, pointed object (e.g., a pen tip). This will clear all programs and reset the clock to default.
5.3. Setting Current Time and Day
- Press and hold the CLOCK button for approximately 3 seconds until the display starts flashing.
- Use the UP button to adjust the current hour.
- Press SET to confirm the hour and move to minute setting. Use UP to adjust minutes.
- Press SET to confirm minutes and move to day setting. Use UP to select the current day (MO, TU, WE, TH, FR, SA, SU).
- Press CLOCK to exit the time setting mode and save the changes.
6. Operating Instructions
6.1. Setting Programs (ON/OFF Times)
The DT-4 allows you to set up to 16 ON/OFF programs. Each program can be set for specific days or groups of days.
- Press the PROG button once to enter program setting mode. The display will show '1 ON'.
- Use the UP button to select the desired day(s) for this program. Options include individual days, weekdays, weekends, or all days.
- Press SET to confirm the day selection and move to hour setting. Use UP to adjust the ON hour.
- Press SET to confirm the hour and move to minute setting. Use UP to adjust the ON minute.
- Press PROG again. The display will show '1 OFF'.
- Repeat steps 2-4 to set the OFF time for the same program.
- To set additional programs, press PROG again to move to '2 ON', and repeat the process.
- After setting all desired programs, press CLOCK to exit program setting mode and return to normal operation.
6.2. Activating/Deactivating Programs
In normal operating mode, press the SET button repeatedly to cycle through the operating modes:
- AUTO ON: The device will follow the programmed ON times.
- AUTO OFF: The device will follow the programmed OFF times.
- ON: The device output is continuously ON, overriding all programs.
- OFF: The device output is continuously OFF, overriding all programs.
For the programs to function, ensure the mode is set to AUTO ON or AUTO OFF.
6.3. Presence Simulator Function
The presence simulator randomly switches the connected appliance ON and OFF for short periods, creating the illusion of someone being home. This can deter potential intruders.
- To activate the presence simulator, press and hold the UP button for 3 seconds. The display will show 'RANDOM'.
- To deactivate, press and hold the UP button again for 3 seconds.
6.4. Countdown Function
The DT-4 includes a countdown timer function, allowing you to set a specific duration for the connected appliance to be ON or OFF.
- Press the CLOCK button once to enter countdown mode. The display will show 'COUNT DOWN'.
- Use the UP button to set the desired countdown duration (from 1 minute to 168 hours).
- Press SET to start the countdown. The display will show the remaining time.
- To cancel the countdown, press CLOCK again.
7. Troubleshooting
| Problem | Possible Cause | Solution |
|---|---|---|
| Display is blank or dim. | Internal battery is low or uncharged. | Plug the timer into a live wall socket for at least 30 minutes to charge. |
| Programs are not running. | Device is not in AUTO ON/OFF mode. | Press the SET button until 'AUTO ON' or 'AUTO OFF' is displayed. |
| Connected appliance does not turn ON/OFF. | Appliance is faulty; Timer is faulty; Incorrect program settings. | Check the appliance; Test the timer with another appliance; Review and correct program settings. |
| Display shows erratic characters. | Internal error or interference. | Press the RESET button to clear all settings and restart. |
8. Specifications

Image 3: Back view of the VIRONE DT-4, showing the technical specifications label.
- Power Supply Voltage: 230V~, 50Hz
- Type: Electronic Timer
- Current: 16A
- Max Load: 3680 W
- Socket Type: 2P + E (French Type E)
- Built-in Battery: Yes
- Installation: Plug-in
- Number of Programs: 16
- Protection Rating (IP): 20
- Dimensions (Depth x Height x Width): 85 mm x 85 mm x 80 mm (approximate)
- Minimum Operating Time Setting: 1 minute
- Maximum Operating Time Setting: 168 hours (7 days)
- Other Features: Top-mounted LCD display, Countdown Function, Presence Simulator
9. Maintenance
To ensure the longevity and proper functioning of your VIRONE DT-4 programmable socket, follow these maintenance guidelines:
- Cleaning: Disconnect the device from the power outlet before cleaning. Wipe the exterior with a soft, dry cloth. Do not use abrasive cleaners, solvents, or immerse the device in water.
- Storage: If storing the device for an extended period, ensure it is kept in a dry, cool place away from direct sunlight.
- Inspection: Periodically inspect the device for any signs of damage, such as cracks in the casing or frayed wires. If damage is found, discontinue use and contact customer support.
10. Warranty and Support
Specific warranty information is typically provided with the product packaging or on the manufacturer's official website. Please refer to these sources for details regarding warranty coverage, terms, and conditions.
For technical support or inquiries, please contact your retailer or the VIRONE customer service department. Contact information can usually be found on the product packaging or the manufacturer's website.


