VEVOR QCKTZKB5JLZKTDM01V0210527
VEVOR 5 Gallon Stainless Steel Vacuum Chamber Instruction Manual
Model: QCKTZKB5JLZKTDM01V0210527
1. Introduction
This manual provides detailed instructions for the safe and effective use of your VEVOR 5 Gallon Stainless Steel Vacuum Chamber. This equipment is designed for degassing various materials such as urethane, silicones, epoxy resins, and for extracting essential oils. Please read this manual thoroughly before operation to ensure proper setup, usage, and maintenance.

Figure 1: VEVOR 5 Gallon Stainless Steel Vacuum Chamber with accessories.
2. Safety Information
Always observe the following safety precautions to prevent injury or damage to the equipment:
- Ensure the vacuum chamber is placed on a stable, level surface.
- Do not exceed the maximum operating temperature of 160°F (71°C) for the acrylic lid.
- Always wear appropriate personal protective equipment (PPE), such as safety glasses and gloves, when operating the vacuum chamber.
- Never operate the vacuum pump without sufficient vacuum pump oil. Refer to the vacuum pump's manual for specific oil requirements and levels.
- Do not attempt to open the chamber while it is under vacuum. Slowly release the vacuum before opening.
- Keep the equipment away from flammable materials and open flames.
- Regularly inspect the lid, gasket, and hoses for any signs of wear, cracks, or damage. Replace damaged components immediately.
- Ensure all connections are tight before initiating vacuum.
3. Product Components
The VEVOR 5 Gallon Vacuum Chamber kit includes the following main components:
- Stainless Steel Chamber: A durable 5-gallon capacity chamber resistant to corrosion and chemical damage.
- Acrylic Lid: A transparent lid allowing observation of the degassing process, with a maximum temperature rating of 160°F.
- Silicone Gasket/Seal Ring: Provides a high-sealability, non-stick surface for the lid.
- Vacuum Gauge: A pressure gauge for accurate measurement of vacuum levels.
- Valve Assembly: Includes a precision valve, tight cast valve, and an oil filling port for the gauge.
- Hose: A wear-proof steel wire reinforced hose for connecting to a vacuum pump.
- Silencers: Two silencers to reduce noise during pump operation.
- Silicone Mat: A reversible rubber mat for placement inside the chamber.

Figure 2: Illustration of the durable stainless steel chamber construction.

Figure 3: Transparent lid and sealing components, suitable for various materials.

Figure 4: The vacuum gauge and valve assembly with silencers.
4. Setup Instructions
Follow these steps to set up your vacuum chamber for first use:
- Unpack Components: Carefully remove all items from the packaging and inspect for any damage.
- Place Chamber: Position the stainless steel chamber on a stable, flat, and clean surface.
- Install Gasket: Ensure the silicone gasket is properly seated around the rim of the chamber.
- Connect Vacuum Pump: Attach the provided hose to the valve assembly on the lid and to your vacuum pump. Ensure all connections are secure and airtight.
- Prepare Vacuum Pump: If using a new vacuum pump or after maintenance, ensure the vacuum pump is filled with the appropriate vacuum pump oil to the correct level. Refer to your vacuum pump's instruction manual for details. Note: Vacuum pump oil is typically not included and must be purchased separately.
- Initial Check: Before placing any materials inside, perform a dry run to check for leaks. Close all valves on the lid, place the lid securely on the chamber, and start the vacuum pump. Observe the vacuum gauge for a steady decrease in pressure. If the pressure holds, the seals are good. If not, check all connections and the gasket.
5. Operating Instructions
This section outlines the general procedure for degassing materials using the VEVOR vacuum chamber.
- Prepare Material: Place the material to be degassed (e.g., resin, silicone) into a container that is smaller than the chamber and can withstand vacuum. Ensure the container is not filled to the brim, as materials may expand significantly under vacuum.
- Place Material in Chamber: Carefully place the container with the material inside the vacuum chamber. You may use the provided silicone mat at the bottom of the chamber.
- Secure Lid: Place the acrylic lid firmly onto the chamber, ensuring the silicone gasket creates a tight seal.
- Close Valves: Ensure all valves on the lid's manifold are in the closed position.
- Start Vacuum Pump: Turn on your vacuum pump.
- Open Vacuum Valve: Slowly open the valve connecting the chamber to the vacuum pump. Observe the vacuum gauge.
- Monitor Degassing: As vacuum is applied, the material will begin to bubble and expand. Monitor this process through the transparent lid. If the material expands too much and threatens to overflow, partially close the vacuum valve to reduce the vacuum slightly, then reopen it slowly. Repeat this process as necessary until bubbling subsides.
- Maintain Vacuum: Once bubbling has stopped or significantly reduced, maintain the desired vacuum level for the recommended duration for your specific material.
- Release Vacuum: After the degassing process is complete, first close the valve connecting the chamber to the vacuum pump. Then, slowly open the air release valve on the manifold to gradually allow air back into the chamber. Do not open the chamber until the vacuum gauge reads zero.
- Remove Material: Once the pressure is equalized, carefully remove the lid and retrieve your degassed material.
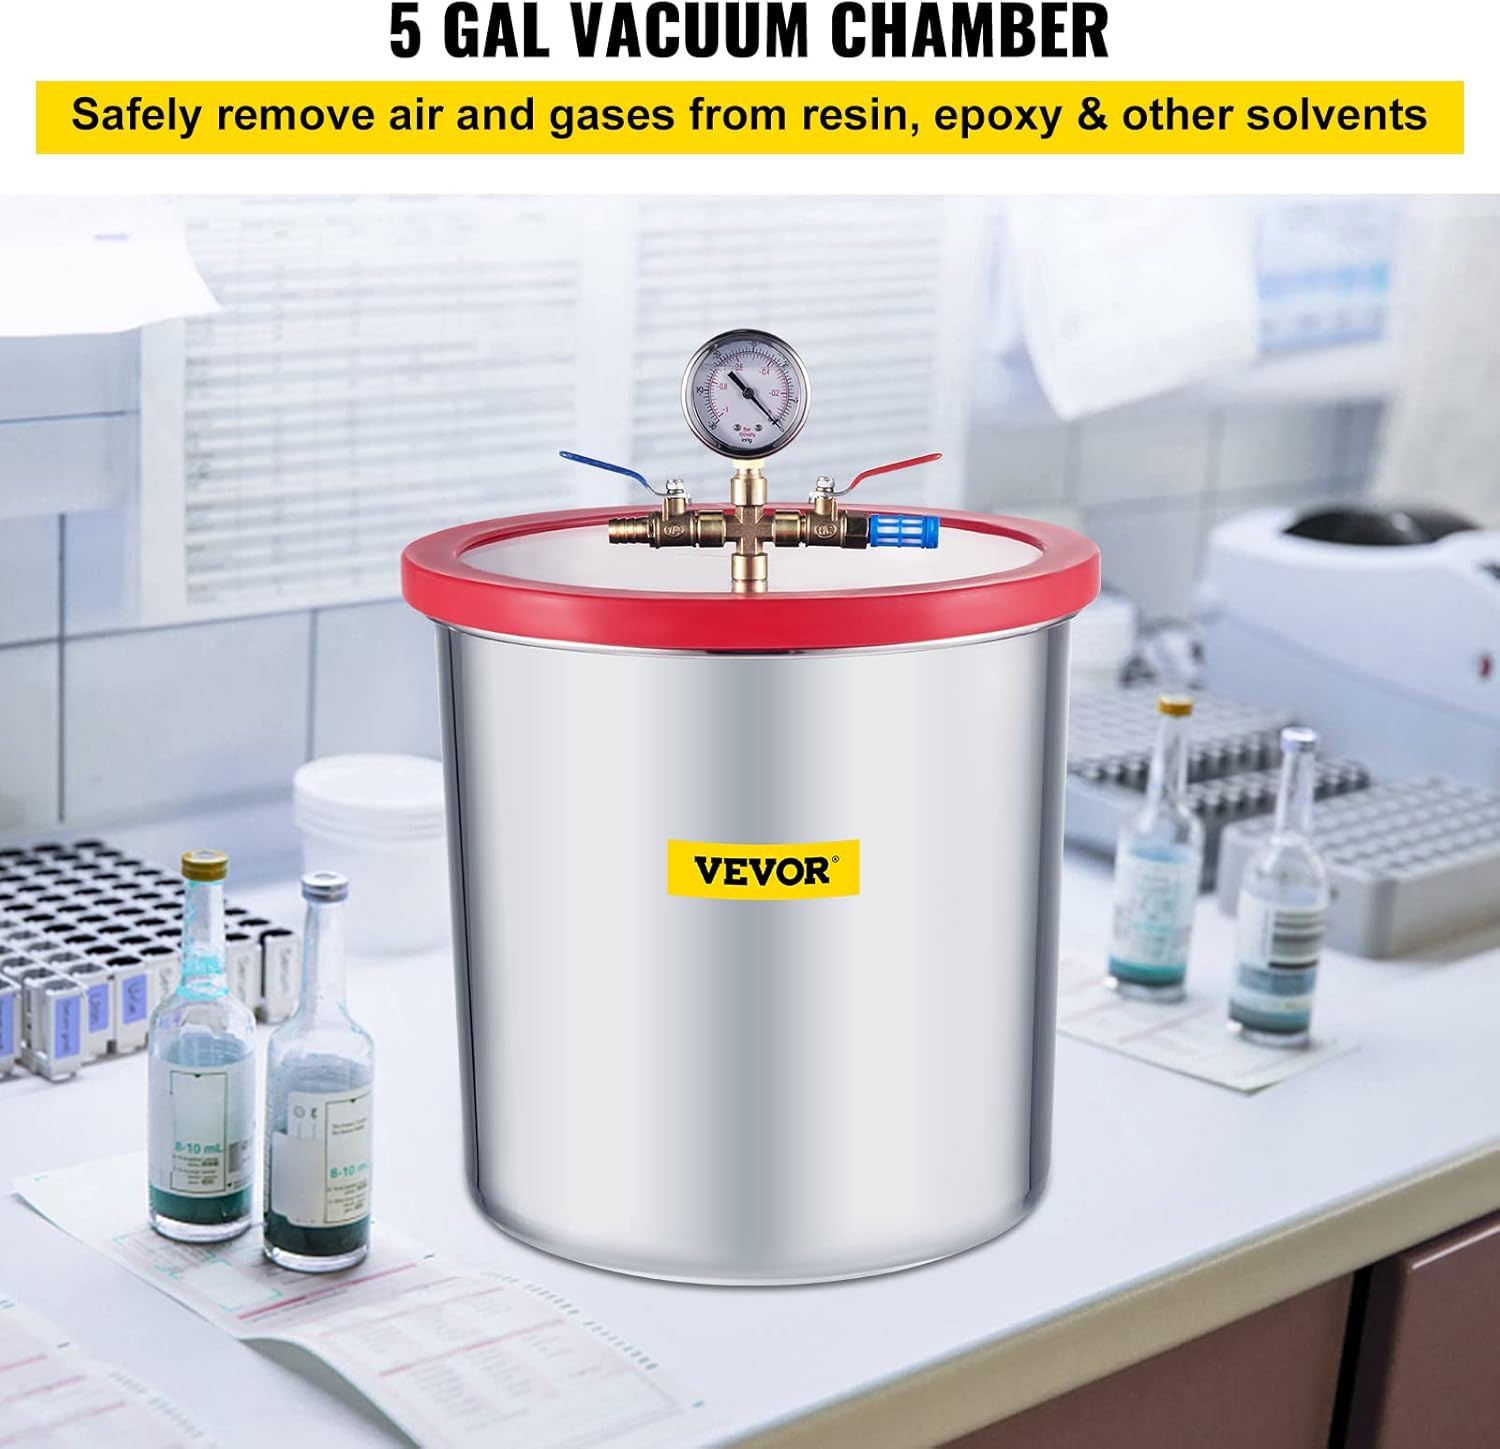
Figure 5: The vacuum chamber in an operational environment.

Figure 6: Examples of materials suitable for degassing.
6. Maintenance
Regular maintenance ensures the longevity and optimal performance of your vacuum chamber.
- Clean Chamber: After each use, clean the interior of the stainless steel chamber and the acrylic lid with a soft cloth and mild detergent. Avoid abrasive cleaners that could scratch the acrylic.
- Inspect Gasket: Regularly check the silicone gasket for cracks, tears, or deformation. A damaged gasket can lead to vacuum leaks. Replace if necessary.
- Check Hoses: Inspect the vacuum hose for kinks, cracks, or loose connections. Ensure it is free from obstructions.
- Vacuum Pump Maintenance: Refer to your vacuum pump's manual for its specific maintenance schedule, including oil changes and filter cleaning. Maintaining your vacuum pump is crucial for the overall system's performance.
- Gauge Protection: The vacuum gauge has an oil filling port to help maintain pressure and prevent cracking. Ensure this is properly sealed and protected.
7. Troubleshooting
If you encounter issues during operation, refer to the following common problems and solutions:
| Problem | Possible Cause | Solution |
|---|---|---|
| Chamber does not hold vacuum or pulls weak vacuum. |
|
|
| Material overflows during degassing. |
|
|
| Lid appears to be cracking. |
|
|
8. Specifications
Key specifications for the VEVOR 5 Gallon Vacuum Chamber:
- Brand: VEVOR
- Model Number: QCKTZKB5JLZKTDM01V0210527
- Capacity: 5 Gallon
- Chamber Material: Stainless Steel
- Lid Material: Acrylic
- Maximum Lid Temperature: 160°F (71°C)
- Product Dimensions: Approximately 13 x 13 x 13 inches (33 x 33 x 33 cm)
- Item Weight: Approximately 12.4 pounds (5.6 kg)

Figure 7: Product dimensions.
9. Warranty and Support
For warranty information, technical support, or to purchase replacement parts, please refer to the official VEVOR website or contact their customer service directly.
You can visit the VEVOR store for more products and support: VEVOR Official Store
Protection plans may also be available for purchase separately. Please check with your retailer for details.
Related Documents - QCKTZKB5JLZKTDM01V0210527
 |
VEVOR Vacuum Pump and Chamber Kit KQ-1K Operating Manual Official operating manual for the VEVOR Vacuum Pump and Chamber Kit, Model KQ-1K. Learn about setup, operation, maintenance, and safety for degassing and impregnation applications. |
 |
VEVOR Vacuum Pump and Chamber Kit Operating Manual - Guide to Degassing and Impregnation This operating manual for the VEVOR Vacuum Pump and Chamber Kit (Model KQ-1K) provides essential information on setup, operation, and maintenance for degassing casting materials like silicone and resin, and for impregnating porous materials. Learn how to achieve optimal results with this versatile kit. |
 |
VEVOR Vacuum Chamber Instructions and Technical Guide (Models Y2, T3, T5, T1.5) Comprehensive instructions and technical specifications for VEVOR Vacuum Chambers, models Y2, T3, T5, and T1.5. Learn about assembly, operation, safety precautions, and product components. |
 |
VEVOR KQ-1K Vacuum Pump and Chamber Kit Operating Manual Operating manual for the VEVOR KQ-1K Vacuum Pump and Chamber Kit, detailing setup, operation, maintenance, and troubleshooting for degassing and impregnation applications. |
 |
VEVOR 30/35 Gallon Caddy Owner's Manual Owner's manual for the VEVOR 30/35 Gallon Caddy, providing essential safety instructions, detailed parts identification, and a step-by-step assembly guide for proper operation and maintenance. |
 |
VEVOR KQ-1K Vacuum Pump and Chamber Kit Operating Manual Comprehensive operating manual for the VEVOR KQ-1K Vacuum Pump and Chamber Kit. Includes introduction, safety precautions, installation, operation, maintenance, and troubleshooting guides. |
Ask a question about this manual
Ask about setup, troubleshooting, compatibility, parts, safety, or missing instructions. Manuals+ will review the question and use this page’s manual context to help answer it.